nix-bookhttps://saylesss88.github.io/atom.xml2026-08-01T00:00:00+00:00saylesss88DescriptionUnderstanding Nix Functionshttps://saylesss88.github.io/Understanding_Nix_Functions_2.html2026-08-01T00:00:00+00:00saylesss87@proton.me (saylesss88)<h1>Chapter 2</h1>
<details>
<summary> ✔️ Table of Contents</summary>
<!-- toc -->
</details>
<!-- <img src="https://saylesss88.github.io/images/nixLogo.png" width="400" height="300"> -->
<p><img src="https://saylesss88.github.io/images/trees2.cleaned.png" alt="trees2" /></p>
<h2>Understanding Nix Functions</h2>
<p><strong>Functions</strong> are the building blocks of Nix, appearing everywhere in Nix
expressions and configurations. Mastering them is essential for writing
effective Nix code and understanding tools like NixOS and Home Manager. This
chapter explores how Nix functions work, focusing on their <strong>single-argument
nature</strong>, <strong>currying</strong>, <strong>partial application</strong>, and their role in <strong>modules</strong>.</p>
<h2>What are Nix Functions?</h2>
<p>A <strong>Nix Function</strong> is a rule that takes an input (called an <strong>argument</strong>) and
produces an <strong>output</strong> based on that input. Unlike many programming languages,
Nix functions are designed to take exactly one argument at a time. This unique
approach, combined with a technique called currying, allows Nix to simulate
multi-argument functions in a flexible and reusable way.</p>
<h2>Builtins</h2>
<details>
<summary> ✔️ Nix Builtin Functions (Click to Expand)</summary>
<p>The Nix expression evaluator has a bunch of functions and constants built in:</p>
<ul>
<li>
<p><code>toString e</code>: (Convert the expression <code>e</code> to a string)</p>
</li>
<li>
<p><code>import path</code>: (Load, parse and return the Nix expression in the file <code>path</code>)</p>
</li>
<li>
<p><code>throw x</code>: (Throw an error message <code>x</code>. Usually stops evaluation)</p>
</li>
<li>
<p><code>map f list</code>: (Apply the function <code>f</code> to each element in the <code>list</code>)</p>
</li>
<li>
<p><a href="https://nix.dev/manual/nix/2.18/language/builtins">Built-in Functions</a></p>
</li>
<li>
<p><a href="https://nix.dev/manual/nix/2.26/language/operators">Nix Operators</a></p>
</li>
</ul>
</details>
<h2>Lambdas</h2>
<p>Nix functions are anonymous (lambdas) (e.g., <code>x: x + 2</code>), and technically take a
single parameter. However, that single parameter is very often an attribute set,
allowing you to effectively pass multiple named inputs by destructuring (e.g.,
<code>{ arg1, arg2 }: arg1 + arg2</code>).</p>
<p>Type the parameter name, followed by a colon, and finally the body of the
function.</p>
<pre><code class="language-nix">nix-repl> param: param * 2
<<lambda @ <<string>>:1:1>>
nix-repl> (param: param * 2) 2
4
</code></pre>
<p>The above example shows that everything in Nix returns a value. When you call a
function directly (without first assigning the function itself to a variable),
the result of that call is immediately evaluated and displayed/used.</p>
<p>In order to make our function reusable and be able to pass different values at
different times we have to assign our function to a variable:</p>
<pre><code class="language-nix">nix-repl> twoTimes = param: param * 2
</code></pre>
<p>Now, we can reference our function by it’s name and pass our required parameter:</p>
<pre><code class="language-nix">nix-repl> twoTimes
«lambda @ «string»:1:2»
nix-repl> twoTimes 2
4
nix-repl> twoTimes 4
8
</code></pre>
<p>We defined a function <code>param: param * 2</code> takes one parameter <code>param</code>, and
returns <code>param * 2</code>. We then assigned this function to the variable <code>twoTimes</code>.
Lastly, we called the function with a few different arguments showing it’s
reusability.</p>
<h2>Understanding Function Structure: The Role of the Colon</h2>
<p>The colon (<code>:</code>) acts as a clear separator within a function definition:</p>
<ul>
<li>
<p><strong>Left of the Colon:</strong> This is the function’s <strong>argument</strong>. It’s a placeholder
name for a value that will be provided when the function is called.</p>
</li>
<li>
<p><strong>Right of the Colon:</strong> This is the <strong>function body</strong>. It’s the expression
that will be evaluated when the function is invoked.</p>
</li>
</ul>
<p><strong>Think of function arguments as naming values that aren’t known in advance.</strong>
These names are placeholders that get filled with specific values when the
function is used.</p>
<p><strong>Example:</strong></p>
<pre><code class="language-nix">greet = personName: "Hello, ${personName}!";
</code></pre>
<ul>
<li>
<p>Here, <code>personName</code> is the <strong>argument</strong> (the placeholder).</p>
</li>
<li>
<p><code>"Hello, ${personName}!"</code>, is the <strong>function body</strong> (which uses the
placeholder to create the greeting).</p>
</li>
</ul>
<p>When you call the function, (click to see Output):</p>
<pre><code class="language-nix">greet "Anonymous"
~ "Hello, Anonymous!"
</code></pre>
<ul>
<li>
<p>The value <code>"Anonymous"</code> is substituted for the <code>personName</code> placeholder within
the function body.</p>
</li>
<li>
<p>This structure is the foundation of all Nix functions, whether simple or
complex.</p>
</li>
</ul>
<h3>Single-Argument Functions: The Basics</h3>
<p>The simplest form of a Nix function takes a single argument. In Nix, function
definitions like <code>x: x + 1</code> or <code>personName: "Hello, ${personName}!";</code> are
<strong>anonymous lambda functions</strong>. They exist as values until they are assigned to
a variable.</p>
<ul>
<li>Click to see Output:</li>
</ul>
<pre><code class="language-nix"># This is an anonymous lambda function value:
# x: x + 1
inc = x: x + 1; # here we assigned our lambda to a variable `inc`
inc 5
~ 6
</code></pre>
<ul>
<li>
<p><code>x</code> is the argument.</p>
</li>
<li>
<p><code>x + 1</code> is the function body.</p>
</li>
</ul>
<p>This straightforward design makes single-argument functions easy to understand
and use. But what if you need a function that seems to take multiple arguments?
That’s where <strong>currying</strong> comes in.</p>
<h3>Simulating Multiple Arguments: Currying</h3>
<p>To create functions that appear to take multiple arguments, Nix uses currying.
This involves nesting single-argument functions, where each function takes one
argument and returns another function that takes the next argument, and so on.</p>
<pre><code class="language-nix">nix-repl> multiply = x: (y: x*y)
nix-repl> multiply
«lambda»
nix-repl> multiply 4
«lambda»
nix-repl> (mul 4) 5
20
</code></pre>
<p>We defined a function that takes the parameter <code>x</code>, the body returns another
function. This other function takes a parameter <code>y</code> and returns <code>x*y</code>.
Therefore, calling <code>multiply 4</code> returns a function like: <code>x: 4*y</code>. In turn, we
call the returned function with <code>5</code>, and get the expected result.</p>
<h4>Currying example 2</h4>
<pre><code class="language-nix"># concat is equivalent to:
# concat = x: (y: x + y);
concat = x: y: x + y;
concat 6 6 # Evaluates to 12
12
</code></pre>
<p>Here, <code>concat</code> is actually <strong>two nested functions</strong></p>
<ol>
<li>
<p>The <strong>first function</strong> takes <code>x</code> and returns another function.</p>
</li>
<li>
<p>The <strong>second function</strong> takes <code>y</code> and performs <code>x + y</code></p>
</li>
</ol>
<p>Nix interprets the colons (<code>:</code>) as separators for this chain of single-argument
functions.</p>
<p>Here’s how it works step by step:</p>
<ul>
<li>
<p>When you call <code>concat 6</code>, the outer function binds <code>x</code> to <code>6</code> and returns a
new function: <code>y: 6 + y</code>.</p>
</li>
<li>
<p>When you call that function with <code>6</code> (i.e., <code>concat 6 6</code>), it computes
<code>6 + 6</code>, resulting in <code>12</code>.</p>
</li>
</ul>
<p>This chaining is why Nix functions are so powerful—it allows you to build
flexible, reusable functions.</p>
<p>Currying is a powerful feature in Nix that enables you to partially apply
arguments to functions, leading to increased reusability. This behavior is a
direct consequence of Nix functions being “first-class citizens” (a concept
we’ll delve into later), and it proves invaluable for decomposing intricate
logic into a series of smaller, more focused functions.</p>
<p><strong>Key Insight</strong>: Every colon in a function definition separates a <strong>single
argument</strong> from its <strong>function body</strong>, even if that body is another function
definition.</p>
<h4>Greeting Example</h4>
<p>Let’s explore currying with a more relatable example in the <code>nix repl</code>:</p>
<pre><code class="language-nix">nix repl
nix-repl> greeting = prefix: name: "${prefix}, ${name}!";
nix-repl> greeting "Hello"
<<lambda @ <<string>>:1:10>> # partial application returns a lambda
nix-repl> greeting "Hello" "Alice"
"Hello, Alice!" # providing both arguments returns the expected result
</code></pre>
<p>This function is a chain of two single-argument functions:</p>
<ol>
<li>
<p>The outer function takes <code>prefix</code> (e.g. <code>"Hello"</code>) and returns a function
that expects <code>name</code>.</p>
</li>
<li>
<p>The inner function takes <code>name</code> (e.g. <code>"Alice"</code>) and combines it with
<code>prefix</code> to produce the final string.</p>
</li>
</ol>
<p>Thanks to <strong>lexical scope</strong> (where inner functions can access variables from
outer functions), the inner function “remembers” the <code>prefix</code> value.</p>
<h4>Partial Application: Using Functions Incrementally</h4>
<p>Because of <strong>currying</strong>, you can apply arguments to a Nix function one at a
time. This is called <em>partial application</em>. When you provide only some of the
expected arguments, you get a new function that “remembers” the provided
arguments and waits for the rest.</p>
<blockquote>
<p>[!EXAMPLE]</p>
<p>Using our <code>greeting</code> function again:</p>
<pre><code class="language-nix">nix repl
nix-repl> greeting = prefix: name: "${prefix}, ${name}!";
nix-repl> helloGreeting = greeting "Hello";
nix-repl> helloGreeting "Alice"
"Hello, Alice"
</code></pre>
<ul>
<li><code>helloGreeting</code> is now a new function. It has already received the <code>prefix</code>
argument (<code>"Hello"</code>), when we provide the second argument we get
<code>"Hello, Alice!"</code></li>
</ul>
</blockquote>
<p><strong>Benefits of Partial Application:</strong></p>
<p>Partial application provides significant benefits by enabling you to derive
specialized functions from more general ones through the process of fixing
certain parameters. Additionally, it serves as a powerful tool for adapting
existing functions to fit the precise argument requirements of higher-order
functions like <code>map</code> and <code>filter</code>.</p>
<h4>Nix Functions being “first class citizens”</h4>
<p>In the context of Nix, the phrase “Nix treats functions as first-class citizens”
means that functions in Nix are treated as values, just like numbers, strings,
or lists. They can be manipulated, passed around, and used in the same flexible
ways as other data types. This concept comes from functional programming and has
specific implications in Nix.</p>
<p><strong>What It Means in Nix</strong></p>
<ol>
<li>Functions Can Be <strong>Assigned to Variables</strong>:</li>
</ol>
<ul>
<li>You can store a function in a variable, just like you would store a number or
string.</li>
</ul>
<blockquote>
<p>[!EXAMPLE]</p>
<pre><code class="language-nix">greet = name: "Hello, ${name}!";
</code></pre>
<ul>
<li>Here, greet is a variable that holds a function.</li>
</ul>
</blockquote>
<ol start="2">
<li>Functions Can Be <strong>Passed as Arguments</strong>:</li>
</ol>
<ul>
<li>You can pass a function to another function as an argument, allowing for
higher-order functions (functions that operate on other functions).</li>
</ul>
<blockquote>
<p>[!EXAMPLE]</p>
<pre><code class="language-nix">applyTwice = f: x: f (f x);
inc = x: x + 1;
applyTwice inc 5 # Output: 7 (increments 5 twice: 5 → 6 → 7)
~ 7
</code></pre>
<ul>
<li>Here, applyTwice takes a function <code>f</code> (in this case, <code>inc</code>) and applies it to
<code>x</code> twice.</li>
</ul>
</blockquote>
<ol start="3">
<li>Functions Can Be <strong>Returned from Functions</strong>:</li>
</ol>
<ul>
<li>Functions can produce other functions as their output, which is key to
currying in Nix.</li>
</ul>
<blockquote>
<p>[!EXAMPLE]</p>
<pre><code class="language-nix">greeting = prefix: name: "${prefix}, ${name}!";
helloGreeting = greeting "Hello"; # Returns a function
helloGreeting "Alice" # Output: "Hello, Alice!"
~ "Hello, Alice!"
</code></pre>
<ul>
<li>The greeting function returns another function when partially applied with
prefix.</li>
</ul>
</blockquote>
<ol start="4">
<li>Functions <strong>Are Values in Expressions</strong>:</li>
</ol>
<ul>
<li>Functions can be used anywhere a value is expected, such as in attribute sets
or lists.</li>
</ul>
<blockquote>
<p>[!EXAMPLE]</p>
<pre><code class="language-nix">myFuncs = {
add = x: y: x + y;
multiply = x: y: x * y;
};
myFuncs.add 3 4 # Output: 7
~ 7
</code></pre>
<ul>
<li>
<p>Here, functions are stored as values in an attribute set.</p>
</li>
<li>
<p>To try this in the <code>repl</code> just remove the semi-colon (<code>;</code>)</p>
</li>
</ul>
</blockquote>
<p><strong>Why This Matters in Nix</strong>:</p>
<p>This functional approach is fundamental to Nix’s unique build system. In Nix,
<strong>package builds (called derivations)</strong> are essentially functions. They take
specific <strong>inputs</strong> (source code, dependencies, build scripts) and
deterministically produce <strong>outputs</strong> (a built package).</p>
<p>This design ensures <strong>atomicity</strong>: if a build does not succeed completely and
perfectly, it produces no output at all. This prevents situations common in
other package managers where partial updates or corrupted builds can leave your
system in an inconsistent or broken state.</p>
<p>Many NixOS and Home Manager modules are functions, and their first-class status
means they can be combined, reused, or passed to other parts of the
configuration system.</p>
<p>Now that we understand the “first-class” nature of Nix Functions let’s see how
they fit into NixOS and Home Manager modules.</p>
<h4>The Function Nature of NixOS and Home Manager Modules</h4>
<p>It’s crucial to understand that most NixOS and Home Manager modules are
fundamentally <strong>functions</strong>.</p>
<p>These module functions typically accept a single argument: <strong>an attribute set</strong>
(remember this, it’s important to understand).</p>
<p><strong>Example</strong>:</p>
<p>A practical NixOS module example for Thunar with plugins:</p>
<pre><code class="language-nix"># thunar.nix
{pkgs, ...}: {
programs = {
thunar = {
enable = true;
plugins = with pkgs.xfce; [
thunar-archive-plugin
thunar-volman
];
};
};
}
</code></pre>
<ul>
<li>To use this module I would need to import it into my <code>configuration.nix</code> or
equivalent, shown here for completeness.</li>
</ul>
<pre><code class="language-nix"># configuration.nix
# ... snip ...
imports = [ ../nixos/thunar.nix ];
# ... snip ...
</code></pre>
<ul>
<li>
<p>This is actually a pretty good example of <code>with</code> making it a bit harder to
reason where the plugins are from. You might instinctively try to trace a path
like <code>programs.thunar.plugins.pkgs.xfce</code> because you saw <code>pkgs.xfce</code> in the
<code>with</code> statement. But that’s now how <code>with</code> works. The <code>pkgs.xfce</code> path exists
<em>outside</em> the <code>plugins</code> list, defining the source of the items, not their
nested structure within the list.</p>
</li>
<li>
<p>To follow best practices you could write the above plugins section as:</p>
</li>
</ul>
<pre><code class="language-nix">plugins = [
pkgs.xfce.thunar-archive-plugin
pkgs.xfce.thunar-volman
];
</code></pre>
<ul>
<li>Now it’s clear that each plugin comes directly from <code>pkgs</code> and each will
resolve to a derivation.
<ul>
<li>To be clear either way is fine, especially in such a small self contained
module. If it were in a single file <code>configuration.nix</code> it would be a bit
more confusing to trace. Explicitness is your friend with Nix and
maintaining reproducability. <code>with</code> isn’t always bad but should be avoided
at the top of a file for example to bring <code>nixpkgs</code> into scope, use <code>let</code>
instead.</li>
</ul>
</li>
</ul>
<p>The entire module definition is a function that takes one argument (an attribute
set):<code>{ pkgs, ... }</code>. When this module is included in your configuration, the
NixOS module system calls this function with a specific attribute set. This
attribute set contains the available packages (<code>pkgs</code>), and other relevant
information. The module then uses these values to define parts of your system.</p>
<h3>Understanding passing and getting back arguments</h3>
<p>For this example we will build the Hello derivation from the Nix Pills series.</p>
<p>Create an <code>autotools.nix</code> with the following contents:</p>
<pre><code class="language-nix">pkgs: attrs: let
defaultAttrs = {
builder = "${pkgs.bash}/bin/bash";
args = [./builder.sh];
baseInputs = with pkgs; [
gnutar
gzip
gnumake
gcc
coreutils
gawk
gnused
gnugrep
binutils.bintools
];
buildInputs = [];
system = builtins.currentSystem;
};
in
derivation (defaultAttrs // attrs)
</code></pre>
<p>Let’s create the hello derivation:</p>
<pre><code class="language-nix">let
pkgs = import <nixpkgs> {};
mkDerivation = import ./autotools.nix pkgs;
in
mkDerivation {
name = "hello";
src = ./hello-2.12.1.tar.gz;
}
</code></pre>
<ul>
<li>You can get the tarball
<a href="https://ftp.gnu.org/gnu/hello/hello-2.12.1.tar.gz">here</a>, place it in the
same directory as <code>autotools.nix</code></li>
</ul>
<p>And finally the <code>builder.sh</code> that <code>autotools.nix</code> declares for the <code>args</code>
attribute:</p>
<pre><code class="language-bash">#!/bin/bash
set -e
unset PATH
for p in $buildInputs $baseInputs; do
export PATH=$p/bin${PATH:+:}$PATH
done
tar -xf $src
for d in *; do
if [ -d "$d" ]; then
cd "$d"
break
fi
done
./configure --prefix=$out
make
make install
</code></pre>
<p>When you write:</p>
<pre><code class="language-nix">mkDerivation = import ./autotools.nix pkgs;
</code></pre>
<ul>
<li>
<p><code>import ./autotools.nix</code>: This evaluates the <code>autotools.nix</code> file. Because it
starts with <code>pkgs: attrs: ...</code>, it means that <code>autotools.nix</code> evaluates to a
function that expects one argument named <code>pkgs</code>.</p>
</li>
<li>
<p><code>... pkgs</code>: We are immediately calling that function (the one returned by
<code>import ./autotools.nix</code>) and passing it our <code>pkgs</code> variable (which is the
result of <code>import <nixpkgs> {}</code>).</p>
</li>
</ul>
<p><strong>This illustrates the concept of Currying in Nix</strong>:</p>
<p>The function defined in <code>autotools.nix</code> (<code>pkgs: attrs: ...</code>) is a curried
function. It’s a function that, when given its first argument (<code>pkgs</code>), returns
another function (which then expects <code>attrs</code>).</p>
<p>The result of import <code>./autotools.nix pkgs</code> is that second, inner function:
<code>attrs: derivation (defaultAttrs // attrs)</code>. This inner function is then bound
to the <code>mkDerivation</code> variable, making it ready to be called with just the
specific attributes for your package (like <code>name</code> and <code>src</code>).</p>
<p><strong>Understanding the <code>attrs</code> Argument</strong></p>
<p>Now let’s focus on the second argument of our <code>autotools.nix</code> function: <code>attrs</code>.</p>
<p>Recall the full function signature in <code>autotools.nix</code>:</p>
<pre><code class="language-nix">pkgs: attrs: let
# ... defaultAttrs definition ...
in
derivation (defaultAttrs // attrs)
</code></pre>
<ol>
<li>What <code>attrs</code> Represents:</li>
</ol>
<ul>
<li>
<p>Once <code>autotools.nix</code> has received its <code>pkgs</code> argument (and returned the inner
function), this inner function is waiting for its final argument, which we
call <code>attrs</code>.</p>
</li>
<li>
<p><code>attrs</code> is simply an attribute set (a key-value map in Nix). It’s designed to
receive all the specific properties of the individual package you want to
build using this helper.</p>
</li>
</ul>
<ol start="2">
<li>How <code>attrs</code> is Used:</li>
</ol>
<ul>
<li>
<p>Look at the final line of <code>autotools.nix</code>:
<code>derivation (defaultAttrs // attrs)</code>.</p>
</li>
<li>
<p>The <code>//</code> operator in Nix performs an attribute set merge. It takes all
attributes from <code>defaultAttrs</code> and combines them with all attributes from
<code>attrs</code>.</p>
</li>
<li>
<p>Crucially, if an attribute exists in both <code>defaultAttrs</code> and <code>attrs</code>, the
value from <code>attrs</code> (the second operand) takes precedence and overrides the
default value.</p>
</li>
</ul>
<ol start="3">
<li>Applying attrs in the hello Derivation:</li>
</ol>
<ul>
<li>In the <code>hello</code> derivation, we call <code>mkDerivation</code> like this:</li>
</ul>
<pre><code class="language-nix"> mkDerivation {
name = "hello";
src = ./hello-2.12.1.tar.gz;
}
</code></pre>
<ul>
<li>
<p>The attribute set <code>{ name = "hello"; src = ./hello-2.12.1.tar.gz; }</code> is what
gets passed as the <code>attrs</code> argument to the <code>mkDerivation</code> function (which,
remember, is the inner function returned by <code>autotools.nix</code>).</p>
</li>
<li>
<p>When derivation <code>(defaultAttrs // attrs)</code> is evaluated for “hello”, the <code>name</code>
and <code>src</code> provided in the <code>attrs</code> set will be merged with all the
<code>defaultAttrs</code> (like <code>builder</code>, <code>args</code>, <code>baseInputs</code>, etc.).</p>
</li>
</ul>
<p>In summary:</p>
<ul>
<li>
<p>The <code>pkgs</code> argument configures the general environment and available tools for
the builder.</p>
</li>
<li>
<p>The <code>attrs</code> argument is where you provide the unique details for each specific
package you intend to build using this <code>autotools.nix</code> helper. It allows you
to specify things like the package’s name, source code, version, and any
custom build flags, while still benefiting from all the sensible defaults
provided by <code>autotools.nix</code>. This separation makes <code>autotools.nix</code> a reusable
and flexible “template” for creating derivations.</p>
</li>
</ul>
<h4>Conclusion</h4>
<p>Having explored the fundamental nature of functions in Nix, we can now see this
concept applies to more complex areas like NixOS configuration and derivations.
In the next chapter,
<a href="https://saylesss88.github.io/NixOS_Modules_Explained_3.html">NixOS Modules Explained</a>.
We will learn about NixOS Modules which are themselves functions most of the
time.</p>
<h4>Resources</h4>
<details>
<summary> ✔️ Resources (Click to Expand) </summary>
<ul>
<li>
<p><a href="https://nix.dev/tutorials/nix-language.html">nix.dev Nix Lang Basics</a></p>
</li>
<li>
<p><a href="https://nixos.org/guides/nix-pills/05-functions-and-imports.html">nix pills Functions and Imports</a></p>
</li>
<li>
<p><a href="https://zero-to-nix.com/concepts/nix-language/">zero-to-nix Nix Lang</a></p>
</li>
<li>
<p><a href="https://nixcloud.io/tour/?id=functions%2Fintroduction">A tour of Nix “Functions”</a></p>
</li>
<li>
<p><a href="https://learnxinyminutes.com/nix/">learn Nix in y minutes</a></p>
</li>
<li>
<p><a href="https://noogle.dev/">noogle function library</a></p>
</li>
</ul>
</details>
Hardening NixOShttps://saylesss88.github.io/nix/hardening_NixOS.html2026-06-17T00:00:00+00:00saylesss87@proton.me (saylesss88)<h1>Hardening NixOS</h1>
<details>
<summary> ✔️ Table of Contents</summary>
<!-- toc -->
</details>
<p><img src="https://saylesss88.github.io/../images/guy_fawks.png" alt="guy fawks hacker" /></p>
<p>Securing your NixOS system begins with a philosophy of minimalism, explicit
configuration, and proactive control. As desktop Linux attracts more novice
users, it has become an increasingly valuable target for attackers. This makes
it crucial to adopt security best practices early to protect your desktop from
common attack vectors and to avoid configuration mistakes that could expose
vulnerabilities.</p>
<blockquote class="markdown-alert-warning">
<p>I am not a security expert. This guide presents various options for hardening
NixOS, but it is your responsibility to evaluate whether each
adjustment suits your specific needs and environment. Security hardening and
process isolation can introduce stability challenges, compatibility issues, or
unexpected behavior. Additionally, these protections often come with
performance tradeoffs. Always conduct thorough research, there are no plug and
play one size fits all security solutions.</p>
</blockquote>
<blockquote>
<p>That said, I typically write about what I’m implementing myself to deepen
understanding and share what works for me. <code>--Source</code> means the proceeding
paragraph came from <code>--Source</code>, you can often click to check for yourself. If
you use some common sense with a bit of caution you could end up with a more
secure NixOS system that fits your needs.</p>
</blockquote>
<blockquote>
<p>Much of this guide draws inspiration or recommendations from the well-known
<a href="https://madaidans-insecurities.github.io/guides/linux-hardening.html">Linux Hardening Guide</a>
by Madaidan’s Insecurities. Madaidan’s work is widely regarded in technical
and security circles as one of the most comprehensive and rigorously
researched sources on practical Linux security, frequently cited for its depth
and actionable advice. For example, much of the original basis for hardening
for <a href="https://github.com/cynicsketch/nix-mineral">nix-mineral</a> came from this
guide as well. This can be a starting point but shouldn’t be blindly followed
either, always do your own research, things change frequently. Madaidan is
also a contributor to both
<a href="https://www.kicksecure.com/wiki/Contributors">Kicksecure</a> and
<a href="https://www.whonix.org/wiki/Contributors">Whonix</a>.</p>
</blockquote>
<p>For an article with apposing perspectives, see
<a href="https://chyrp.cgps.ch/en/debunking-madaidans-insecurities/">debunking-madaidans-insecurities</a>.
We can learn from both and hopefully find something in between that is closer to
the truth.</p>
<blockquote>
<p>❗ <strong>Note on SELinux and AppArmor</strong>: While NixOS can provide a high degree of
security through its immutable and declarative nature, it’s important to
understand the limitations regarding Mandatory Access Control (MAC)
frameworks. Neither SELinux nor AppArmor are fully supported or widely used in
the NixOS ecosystem. You can do a lot to secure NixOS but if anonymity and
isolation are paramount, I recommend booting into a
<a href="https://tails.net/">Tails USB stick</a>. Or using
<a href="https://www.whonix.org/">Whonix</a>.</p>
</blockquote>
<p>☝️ The unique file structure of NixOS, particularly the immutable <code>/nix/store</code>,
makes it difficult to implement and manage the file-labeling mechanisms that
these frameworks rely on. There are ongoing community efforts to improve
support, but as of now, they are considered experimental and not a standard part
of a typical NixOS configuration. For an immutable distro that implements
SELinux by default at a system level as well as many other hardening techniques,
see <a href="https://secureblue.dev/">Fedora secureblue</a>.</p>
<p>Containers and VMs are beyond the scope of this chapter but can also enhance
security and sandboxing if configured correctly. See
<a href="https://saylesss88.github.io/nix/kvm.html">Running NixOS in a VM</a> for more
details on running NixOS in a Secureblue VM for additional security.</p>
<p>It’s crucial to <strong>document every change</strong> you make. By creating smaller,
feature-complete commits, each with a descriptive message, you’re building a
clear history. This approach makes it far simpler to revert a breaking change
and quickly identify what went wrong. Over time, this discipline allows you to
create security-focused checklists and ensure all angles are covered, building a
more robust and secure system.</p>
<p>Don’t rely on single solutions or products, develop processes and defense in
depth. Think ahead and fail securely so that a single failure doesn’t mean total
insecurity.</p>
<p>Attackers often monitor the latest Linux CVEs (Common Vulnerabilities and
Exposures) and check if and when specific distributions like NixOS have
implemented fixes. The unstable branch will receive the security patches and
fixes faster than stable which is another thing to keep in mind.</p>
<p>Check out the
<a href="https://saylesss88.github.io/nix/index.html">Hardening NixOS Baseline Hardening README</a>
for baseline hardening recommendations and best practices.</p>
<p>There is something to be said about the window manager you use. GNOME, KDE
Plasma, and Sway secure privileged Wayland protocols like screencopy. This means
that on environments outside of GNOME, KDE, and Sway, applications can access
screen content of the entire desktop. This implicitly includes the content of
other applications. It’s primarily for this reason that Silverblue, Kinoite,
Sericea, and COSMIC images are recommended. <del>COSMIC has plans to fix this.</del>
–<a href="https://secureblue.dev/images">secureblue Images</a></p>
<blockquote class="markdown-alert-important">
<p>This is a little misleading, hyprland takes a different approach that also
works. Disabling wlroots portal does not block screencopy for all apps, but
only with sandboxed clients. Unsandboxed apps (like <code>grim</code>) can still access
ext-image-copy-capture directly on Sway without going through the portal.</p>
</blockquote>
<ul>
<li><a href="https://wiki.hypr.land/0.50.0/Configuring/Permissions/">Hyprland Permissions</a></li>
</ul>
<p>For example, to disable Xwayland for sway on home-manager you would add:</p>
<pre><code class="language-nix">wayland.windowManager.sway = {
enable = true;
extraConfig = ''
xwayland disable
'';
}
</code></pre>
<ul>
<li>You may get an error saying you’re only able to disable xwayland at boot,
restart your system and you’ll be all set.</li>
</ul>
<p>You can explicitly disable <code>xdg-desktop-portal-wlr</code> with systemd in your
<code>configuration.nix</code> like this:</p>
<pre><code class="language-nix"># configuration.nix
systemd.user.services."xdg-desktop-portal-wlr" = {
enable = false; # Masks/stops the wlr service
};
xdg.portal.wlr.enable = false;
</code></pre>
<h2>Common Attack Vectors for Linux</h2>
<details>
<summary> ✔️ Common Attack Vectors in Linux </summary>
<p><strong>Privilege escalation</strong>: The unauthorized act of gaining elevated permissions
rather than legitimate, controlled privilege use. It’s a very common tactic that
threat actors use to take over a system, steal data, delete files, and more.</p>
<p><strong>Processes to protect against Privilege escalation</strong></p>
<ul>
<li>
<p>Adopt the principle of least privilege, only giving users the permissions that
they require to perform their duties.</p>
</li>
<li>
<p>Harden your system: Minimize the attack surface, use strong passwords, and
follow best practices.</p>
</li>
<li>
<p>Monitor relevant sources such as the
<a href="https://www.strongdm.com/nist-compliance">NIST National Vulnerability Database</a>,
<a href="https://github.com/NixOS/nix/security/advisories">NixOS Security Advisories</a>,
and
<a href="https://discourse.nixos.org/c/announcements/security/56">NixOS Discourse Security</a>
So you’ll know the latest CVEs and vulnerabilities in Linux and NixOS.</p>
</li>
<li>
<p>While not made for NixOS the
<a href="https://github.com/peass-ng/PEASS-ng/tree/master/linPEAS">linPEAS Privilege Escalation Awesome Script</a>
gives you some useful info such as active capabilities and potential risks.</p>
</li>
<li>
<p>Remove unnecessary SUID binaries to reduce the attack surface.</p>
</li>
</ul>
<hr />
<p><strong>Use after Free/Double free</strong>:</p>
<p><strong>Use-After-Free (UAF)</strong> is a type of software vulnerability that occurs in
memory unsafe languages (C C++) when a program continues to use a memory
location after it has been freed or deallocated.</p>
<p><strong>Double free</strong>: is a flaw where a program frees the same memory block twice
using <code>free()</code> or <code>delete</code>, leading to undefined behavior and potential
exploitation.</p>
<p>Mitigation techniques include the use of hardened allocators such as
<code>hardened_malloc</code>, which improve memory management to detect and prevent UAF and
double-free bugs. Recent versions of <code>glibc</code> also incorporate built-in checks to
catch double frees.</p>
<hr />
<p><strong>Unauthorized Access</strong>:</p>
<p>Unauthorized access is the entry or use of your system, networks, or data by
individuals without permission. It’s a common way for adversaries to exfiltrate
data, execute malicious code, and cause damage.</p>
<p><strong>Protections against Unauthorized Access</strong></p>
<ul>
<li>
<p>Strong Passwords, MFA, and robust Secrets management. In 2025, 22% of breaches
involved stolen credentials overall; in basic web app attacks, 88% used stolen
credentials.
–<a href="https://www.strongdm.com/blog/data-breach-statistics">StrongDM data-breach-statistics</a></p>
</li>
<li>
<p>Close unused ports with a Firewall</p>
</li>
<li>
<p>Encrypt data in transit and at rest</p>
</li>
<li>
<p>Watch your Logs, and deploy intrusion detection systems such as AIDE.</p>
</li>
<li>
<p><a href="https://cwe.mitre.org/data/definitions/89.html">SQL Injection CWE</a>, SQL
injection is the most common critical web application vulnerability.</p>
</li>
<li>
<p><a href="https://owasp.org/www-community/attacks/xss/">Cross Site Scripting (XSS)</a></p>
</li>
</ul>
<hr />
<p><strong>Misconfiguration</strong></p>
<ul>
<li>
<p>With many new users trying NixOS, misconfiguration is common and an easy way
for an attacker to gain control over your system.</p>
</li>
<li>
<p>It is recommended to start slowly and try to ensure that you understand your
configuration. Avoid copy-pasting config files that you don’t understand yet.</p>
</li>
</ul>
<hr />
<p><strong>Zero Day Exploits</strong>:</p>
<p>The term “Zero-Day” refers to a security vulnerability or flaw that is unknown
to the software developers or security teams, meaning they have had zero days to
create a patch or fix for it. This term is often associated with concepts such
as Vulnerabilities, Exploits, and Threats, and it’s important to distinguish
among them:</p>
<ul>
<li>
<p>A <strong>Zero-Day Vulnerability</strong> is a previously undiscovered security weakness or
flaw in software that malicious actors can exploit.</p>
</li>
<li>
<p>A <strong>Zero-Day Exploit</strong> describes the specific method or technique attackers
use to take advantage of that vulnerability to compromise a system.</p>
</li>
<li>
<p>A <strong>Zero-Day Attack</strong> happens when malicious actors launch an attack using a
zero-day exploit before the software vendor has had a chance to patch or fix
the vulnerability.</p>
</li>
<li>
<p><a href="https://docs.google.com/spreadsheets/d/1lkNJ0uQwbeC1ZTRrxdtuPLCIl7mlUreoKfSIgajnSyY/view?gid=0#gid=0">Project Zero’s 0day spreadsheet</a>.
You’ll see that a majority of zero-days are Memory Corruption bugs.</p>
</li>
<li>
<p><a href="https://www.zero-day.cz/database/">Zero-Day tracking project</a></p>
</li>
<li>
<p><a href="https://www.zerodayinitiative.com/advisories/published/"> Trend Micro’s zero day inituative</a></p>
</li>
</ul>
</details>
<hr />
<h2>Minimal Installation with LUKS</h2>
<p>Begin with NixOS’s minimal installation image. This gives you a base system with
only essential tools and no extras that could introduce vulnerabilities.</p>
<p>NixOS’s declarative model makes auditing the installed packages and services
easy, do so regularly.</p>
<hr />
<h2>Manual Encrypted Install Following the Manual</h2>
<p>Encryption is the process of using an algorithm to scramble plaintext data into
ciphertext, making it unreadable except to a person who has the key to decrypt
it.</p>
<p><strong>Data at rest</strong> is data in storage, such as a computer’s or a servers hard
disk.</p>
<p><strong>Data at rest encryption</strong> (typically hard disk encryption), secures the
documents, directories, and files behind an encryption key. Encrypting your data
at rest prevents data leakage, physical theft, unauthorized access, and more as
long as the key management scheme isn’t compromised.</p>
<ul>
<li>
<p><a href="https://channels.nixos.org/nixos-25.05/latest-nixos-minimal-x86_64-linux.iso">Minimal ISO Download (64-bit Intel/AMD)</a></p>
</li>
<li>
<p><a href="https://nixos.org/manual/nixos/stable/#sec-installation">NixOS Manual Installation</a></p>
</li>
<li>
<p><a href="https://wiki.nixos.org/wiki/Full_Disk_Encryption">NixOS Wiki Full Disk Encryption</a></p>
</li>
<li>
<p>The
<a href="https://www.nsa.gov/Press-Room/Press-Releases-Statements/Press-Release-View/Article/3498776/post-quantum-cryptography-cisa-nist-and-nsa-recommend-how-to-prepare-now/">NSA, CISA, and NIST warn</a>
that nation-state actors are likely stockpiling encrypted data now, preparing
for a future when quantum computers could break today’s most widely used
encryption algorithms. Sensitive data with long-term secrecy needs is
especially at risk.</p>
</li>
<li>
<p><a href="https://www.nsa.gov/Press-Room/News-Highlights/Article/Article/3630145/cybersecurity-speaker-series-preparing-for-post-quantum/">NSA/CSS Preparing for Post-Quantum</a></p>
</li>
<li>
<p>This is a wake-up call to use the strongest encryption available today and to
plan early for post-quantum security.</p>
</li>
<li>
<p><a href="https://www.nist.gov/news-events/news/2024/08/nist-releases-first-3-finalized-post-quantum-encryption-standards">NIST First 3 Post-Quantum Encryption Standards</a>
Organizations and individuals should prepare to migrate cryptographic systems
to these new standards as soon as practical.</p>
</li>
<li>
<p>They chose
<a href="https://www.nist.gov/news-events/news/2022/07/nist-announces-first-four-quantum-resistant-cryptographic-algorithms">Four Quantum-Resistant Cryptographic Algorithms</a>
warning that public-key cryptography is especially vulnerable and widely used
to protect digital information.</p>
</li>
</ul>
<hr />
<h2>Guided Encrypted BTRFS Subvol install using disko</h2>
<p>Use LUKS encryption to protect your data at rest, the following guide is a
minimal disko encrypted installation:
<a href="https://saylesss88.github.io/installation/enc/enc_install.html">Encrypted Install</a></p>
<hr />
<h2>Installing Software</h2>
<ul>
<li>
<p><a href="https://determinate.systems/blog/nixpkgs-cooldown/">Nixpkgs cooldowns</a>, this
is a great addition after all of the AUR compromises. “<a href="https://flakehub.com/flake/DeterminateSystems/nixpkgs-weekly?view=usage">nixpkgs-weekly</a> still updates once a
week, but deliberately introduces a seven-day “cooldown” period, updating to a
new revision of Nixpkgs released by upstream only after seven days have elapsed.
This introduces a buffer period where major vulnerabilities or attacks can be
identified prior to it arriving in our users’ hands.“</p>
</li>
<li>
<p>Checkout <a href="https://cooldowns.dev/">cooldowns.dev</a> for more info on cooldowns.</p>
</li>
</ul>
<blockquote>
<p>The 2025 Edgescan study examined full-stack applications and found that
one-third contained critical or severe vulnerabilities, putting them at risk.
Over 45% of large enterprises leave unresolved vulnerabilities for more than a
year. This shows the necessity of containing your apps in sandboxes when
possible.
–<a href="https://www.edgescan.com/stats-report/">edgescan Vulnerability Report</a></p>
</blockquote>
<blockquote class="markdown-alert-caution">
<p>⚠️ For system security it is strongly advised to not install
<a href="https://en.wikipedia.org/wiki/Proprietary_software">proprietary</a>,
<a href="https://www.gnu.org/proprietary/proprietary.html">non-freedom</a> software.
Instead, use of
<a href="https://www.fsf.org/about/what-is-free-software">Free Software</a> is
<a href="https://www.gnu.org/philosophy/shouldbefree.html">recommended</a> –Kicksecure</p>
</blockquote>
<ul>
<li><a href="https://www.gnu.org/proprietary/proprietary.html">Proprietary Software is Often Malware</a>
NOTE: While I respect the importance of software freedom, I choose to focus on
practical, technical solutions rather than engage with the ideological tone
often present in related advocacy.
<ul>
<li>
<p><a href="https://www.kicksecure.com/wiki/Miscellaneous_Threats_to_User_Freedom">User Freedom Threats</a></p>
</li>
<li>
<p><a href="https://www.gnu.org/proprietary/proprietary-back-doors.html">Proprietary Back Doors</a></p>
</li>
<li>
<p><a href="https://www.eff.org/deeplinks/2015/02/who-really-owns-your-drones">EFF Back Doors</a></p>
</li>
</ul>
</li>
</ul>
<pre><code class="language-nix"># configuration.nix
nixpkgs.config.allowUnfree = false;
</code></pre>
<p>To explicitly disable it for flakes:</p>
<pre><code class="language-nix"># ...snip...
pkgs = import nixpkgs {
system = "x86_64-linux";
config = {
allowUnfree = false;
};
};
# ...snip...
</code></pre>
<p>Most users don’t fully understand that running any software without sandboxing
gives it unrestricted access to their user data and system resources. There is a
widespread lack of awareness that Linux apps generally run with the full
permissions of the user. It’s easy to overlook the fact that “trusted source”
doesn’t mean “safe to run uncontained”. –summarized from kicksecure docs</p>
<p><strong>Pre-Install Recommendations</strong></p>
<ul>
<li><a href="https://nixos.org/community/teams/security/">NixOS Security</a></li>
</ul>
<p>When installing software, first check
<a href="https://search.nixos.org/packages">search.nixos</a>, and follow the <code>Homepage</code>
link to ensure that said package is maintained.</p>
<p>For example, when I search for <code>doas</code>, and go to the
<a href="https://github.com/Duncaen/OpenDoas">Homepage</a> link, I can see that the most
recent commit was made 3 years ago. For certain software this might not be an
issue but <code>doas</code> isn’t one of them.</p>
<p>Looking at the <code>sudo-rs</code>
<a href="https://github.com/trifectatechfoundation/sudo-rs">Homepage</a> I can see that it
was updated yesterday (11-19-25) and might be a better alternative. It’s
maintained and written in a memory safe language.</p>
<p>For critical apps like <code>sudo</code>, you should also check for vulnerabilities in said
software. If you did so for <code>sudo-rs</code>, you’d see
<a href="https://nvd.nist.gov/vuln/detail/CVE-2025-64170">CVE-2025-64170</a> and see that
it’s been patched. You can then look at the
<a href="https://github.com/NixOS/nixpkgs/blob/master/pkgs/by-name/su/sudo-rs/package.nix">sudo-rs package.nix</a>
to ensure that the versions match. (As of 11-20-25 they match).</p>
<hr />
<p><strong>nixpkgs-unstable Security Overview</strong></p>
<ul>
<li>
<p><code>nixpkgs-unstable</code> tracks the master branch of the Nixpkgs repo and is
constantly updated.</p>
</li>
<li>
<p>This branch gets security updates faster, patching vulnerabilities faster.</p>
</li>
<li>
<p>Since it’s a rolling-release, packages are less thoroughly tested. This
increases the risk of new, undiscovered bugs or regressions. Some of which
could have security implications.</p>
</li>
<li>
<p>The packages are generally the most recent upstream versions, which is
important for security-sensitive software like browsers and kernels, as old
versions may have publicly known, unpatched vulnerabilities.</p>
</li>
<li>
<p>As the name states, <code>nixpkgs-unstable</code> is less stable and an update is more
likely to cause your system to fail to build due to breaking changes in Nix
expressions.</p>
</li>
<li>
<p>I personally use unstable for everything, but I don’t mind having to fix
issues that arise.</p>
</li>
</ul>
<hr />
<p><strong>Stable (e.g., <code>nixos-24.05</code>) Security Overview</strong></p>
<p>Stable Nixpkgs channels correspond to point release (e.g., released every 6
months) and are supported for a limited period (typically one month past the
next release).</p>
<ul>
<li>
<p>Stable channels generally only receive conservative bug and security fixes.
Major version bumps for features are typically avoided to maintain “stability
against deliberate changes”, which means you won’t get the latest upstream
features or general bug fixes.</p>
</li>
<li>
<p>While critical security updates are backported quickly, updates for less
critical packages may be slower or not happen at all if they require a
significant refactoring or version bump.</p>
</li>
<li>
<p>Stable channels are generally more stable, meaning updates are less likely to
introduce breaking changes to your configuration or system environment.</p>
</li>
<li>
<p>Many packages will be older versions. If a critical security vulnerability
requires a major upstream version update (which is often avoided in a stable
channel), the maintainers must backport the patch, a process which can
introduce its own set of risks and delays.</p>
</li>
</ul>
<hr />
<p><strong>What should you use?</strong></p>
<p>The primary security trade-off is between <strong>patching speed for known
vulnerabilities</strong> and <strong>stability/exposure to new bugs</strong>:</p>
<ul>
<li>
<p>Choose <code>unstable</code> if you prioritize getting the latest security fixes
(especially for end-user apps like browsers) as soon as they are available
upstream, accepting a higher risk of non-security-related system breakage or
new, undiscovered bugs.</p>
</li>
<li>
<p>Choose <code>stable</code> if you prioritize system predictability and stability, relying
on dedicated backports for critical vulnerabilities, while accepting that
non-critical security and bug fixes will be delayed or absent until the next
major release.</p>
</li>
</ul>
<p>A common hybrid approach is to use the <code>stable</code> channel as the base for the OS
and selectively pin specific packages from <code>unstable</code> to ensure they receive
rapid security updates.</p>
<p>With flakes it’s easy to add both <code>stable</code> and <code>unstable</code> as flake inputs and
access each with some simple logic.</p>
<details>
<summary> ✔️ Click to Expand Flake example using both stable & unstable </summary>
<pre><code class="language-nix">{
description = "NixOS configuration with two or more channels";
inputs = {
nixpkgs.url = "github:NixOS/nixpkgs/nixos-25.05";
nixpkgs-unstable.url = "github:NixOS/nixpkgs/nixos-unstable";
};
outputs =
{ nixpkgs, nixpkgs-unstable, ... }:
{
nixosConfigurations."your-host" = nixpkgs.lib.nixosSystem {
modules = [
{
nixpkgs.overlays = [
(final: prev: {
unstable = nixpkgs-unstable.legacyPackages.${prev.system};
# use this variant if unfree packages are needed:
# unstable = import nixpkgs-unstable {
# inherit prev;
# system = prev.system;
# config.allowUnfree = true;
# };
})
];
}
./configuration.nix
];
};
};
}
</code></pre>
<ul>
<li>This is also how you enable unfree packages for flakes rather than in your
<code>configuration.nix</code>.</li>
</ul>
<p>Now you can specify which packages are to be installed with which channel like
so:</p>
<pre><code class="language-nix"># configuration.nix
{ pkgs, ... }:
{
environment.systemPackages = [
pkgs.firefox
pkgs.unstable.helix
];
# ...
}
</code></pre>
</details>
<hr />
<h2>Users and SUID Binaries</h2>
<p><strong>Replacing sudo with run0</strong></p>
<blockquote class="markdown-alert-note">
<p>The point here is to avoid using the setuid binary (<code>sudo</code>), <code>run0</code> is a
wrapper over <code>systemd-run</code> which speaks over Inter-process Communication
Mechanisms (IPC) to PID1 which is considered safer than running a setuid
binary. We separate our daily user from administration tasks and authenticate
through our admin account. This reduces the attack surface by removing sudo as
well as reduces the risk of local privilege escalation.</p>
</blockquote>
<ul>
<li>
<p><strong>IPC</strong> is the mechanism that allows processes to communicate. There are two
methods of IPC, shared memory and message passing. An OS can implement both.</p>
</li>
<li>
<p><strong>PID 1</strong> is the first userspace process the kernel starts (the init system),
which becomes the ancestor and reaper of all other processes; because it runs
as root, is always present, and controls the system lifecycle, any bugs or
design issues in PID 1 have outsized security impact and can translate into
system-wide compromise or denial of service.</p>
</li>
</ul>
<details>
<summary> Click to Expand SUID and run0 resources </summary>
<ul>
<li>
<p><a href="https://mastodon.social/@pid_eins/112353324518585654">run0 explained by Lennart</a></p>
</li>
<li>
<p><a href="https://en.wikipedia.org/wiki/Setuid">setuid Wikipedia</a></p>
</li>
<li>
<p>Using <code>run0</code> removes of these classes of
<a href="https://ruderich.org/simon/notes/su-sudo-from-root-tty-hijacking">attacks</a></p>
</li>
<li>
<p>The following lists some of the downsides
<a href="https://www.kicksecure.com/wiki/Dev/secureblue">kicksecure vs secureblue</a></p>
</li>
</ul>
</details>
<p><code>run0</code> is not a SUID, it asks the service manager to invoke a command or shell
under the target user’s UID. The target command is invoked in an isolated exec
context, freshly forked off PID1 without inheriting any context from the client.</p>
<p>The core danger of <strong>setuid</strong> (Set User ID) lies in its ability to allow a
low-privilege user to execute a program with the <strong>permissions of the file’s
owner</strong>, which is most often the powerful <strong>root user</strong>.</p>
<h3>💥 The Danger of setuid</h3>
<p>For granting limited, controlled privilege escalation to apps, the primary
choices are broadly between traditional <strong>setuid/setgid permissions</strong> and more
modern <strong>Linux capabilities</strong>. <a href="https://saylesss88.github.io/nix/hardening_NixOS.html#capabilities">Jump to Capabilities</a></p>
<ul>
<li><a href="https://www.cbtnuggets.com/blog/technology/system-admin/linux-file-permissions-understanding-setuid-setgid-and-the-sticky-bit">Understanding setuid/setgid</a></li>
</ul>
<p>Use the following command to find all SUID binaries:</p>
<pre><code class="language-bash">sudo find / -perm -4000 -type f -ls 2>/dev/null
</code></pre>
<p>The <code>setuid</code> permission is dangerous because it creates a privilege escalation
pathway that can be exploited for malicious purposes.</p>
<ul>
<li>
<p>Temporary Root Access: When a file has the setuid bit set and is owned by
<code>root</code>, any user who executes that program instantly and temporarily gains the
full power of the root user while the program runs.</p>
</li>
<li>
<p>If a setuid program (such as <code>passwd</code>, or <code>sudo</code>) contain a security flaw,
such as a buffer overflow (Common in C) or improper input validation, an
attacker can exploit the flaw.</p>
</li>
<li>
<p>Since the program is running with root privileges, the attacker can execute
shell code or commands with root access, completely compromising the entire
system.</p>
</li>
</ul>
<p>Normally the root user (UID 0) gets unrestricted access to almost everything on
the entire system.</p>
<p>I rebuild/update way too often to completely separate the accounts and allow no
admin tasks for my daily user. That may be a better option for servers, etc.</p>
<p>Create an admin user for administrative tasks and remove your daily user from
the <code>wheel</code> group, and disable the <code>sudo</code>, <code>su</code>, and <code>pkexec</code> SUIDs:</p>
<p>(Edited: 2026-02-01): Changed from disabling the <code>setuid</code> bits to disabling the
wrapper entirely. Caught by <code>SuperSandro2000</code></p>
<pre><code class="language-nix">{ config, pkgs, lib }:
{
users.users.admin = {
isNormalUser = true;
description = "System administrator";
extraGroups = [ "wheel" ]; # wheel = sudo
# run `mkpasswd --method=yescrypt` and replace "changeme" w/ the result
initialHashedPassword = "changeme"; # change with `passwd admin` later
openssh.authorizedKeys.keys = [
# (optional) paste your SSH public key here
# "ssh-ed25519 AAAAC3NzaC1lZDI1NTE5AAAAI..."
];
};
users.groups.admin = {};
users.mutableUsers = false;
# --------------------------------------------------------------------
# 2. Existing daily user – remove from wheel, keep everything else
# --------------------------------------------------------------------
users.users.daily = {
isNormalUser = true;
description = "Daily driver account";
extraGroups = lib.mkForce [ "networkmanager" "audio" "video" ]; # keep useful groups
initialHashedPassword = "changeme";
# Remove `wheel` by *not* listing it (mkForce overrides any default)
};
users.groups.daily = {};
security = {
# alias sudo = 'run0'
run0.enableSudoAlias = true;
polkit.enable = true;
# Disable sudo
sudo.enable = false;
wrappers = {
su.enable = lib.mkForce false;
sudoedit.enable = lib.mkForce false;
sg.enable = lib.mkForce false;
fusermount.enable = lib.mkForce false;
fusermount3.enable = lib.mkForce false;
pkexec.setuid = lib.mkForce false;
newgrp.setuid = lib.mkForce false;
newgidmap.setuid = lib.mkForce false;
newuidmap.setuid = lib.mkForce false;
# `mount` Needed for `fileSystems.options`
# mount.enable = lib.mkForce false;
# Optional: if you disable mount, disable umount as well
# umount.enable = lib.mkForce false;
};
# Or hyprlock, required for swaylock to accept your password
pam.services.swaylock = {
text = ''
auth include login
account include login
password include login
session include login
'';
};
};
</code></pre>
<p>The <code>security.wrappers...</code> removes the setuid bit making the commands unusable
removing the SUID vulnerabilities for <code>su</code> and <code>pkexec</code>. You can find the other
SUID wrappers in <code>/run/wrappers/bin/</code>, such as <code>fusermount</code> and more.</p>
<p>SUID’s that can be disabled:</p>
<ul>
<li>
<p><code>umount</code>: Allows unprivileged users to unmount devices listed in your fstab.</p>
</li>
<li>
<p><code>mount</code>: Same as above but for mounting. It is recommended to set
<code>fileSystems."/boot".options = [ "fmask=0077" "dmask=0077" ];</code> this won’t work
without <code>mount</code>s setuid.</p>
</li>
<li>
<p><code>sg</code>: Executes a command as a different group.</p>
</li>
<li>
<p><code>mtr-packet</code>: Used by mtr to create network sockets.</p>
</li>
<li>
<p><code>fusermount</code>, <code>fusermount3</code>: Allows unprivileged users to mount FUSE
filesystems. Can be disabled if you don’t use FUSE (e.g., Appimages, etc.)</p>
</li>
<li>
<p><code>newuidmap</code>, <code>newgidmap</code>: Used for user namespace creation (Often used for
unprivileged containers). (Disable if you don’t use unprivileged
containers/namespaces)</p>
</li>
</ul>
<hr />
<p>Never Disable:</p>
<ul>
<li><code>unix_chkpwd</code>: This is a core PAM helper to securely check user passwords
against the root-readable <code>/etc/shadow</code>.</li>
</ul>
<p>Check again which SUID binaries are active:</p>
<pre><code class="language-bash">sudo find / -perm -4000 -type f -ls 2>/dev/null
# Example
-rwsr-xr-x root root /run/wrappers/bin/fusermount
^-- This 's' means setuid bit is set
</code></pre>
<pre><code class="language-bash">ls -la /run/wrappers/bin/
# Or
find /run/wrappers -perm -4000 -ls
</code></pre>
<p><strong>Only enable the wrappers you actually use!</strong></p>
<hr />
<p>You will have to use <code>run0</code> to authenticate your daily user, for example:</p>
<pre><code class="language-bash">run0 nixos-rebuild switch --flake .
</code></pre>
<p>Since <code>run0</code> doesn’t cache results and <code>nixos-rebuild</code> calls on Polkit 3 times,
so on every rebuild, you will be asked for your password 3 times which isn’t
ideal. I found the following workaround that will only ask for your password
once.</p>
<p>Add the following to your <code>configuration.nix</code>, replacing <code>user-name</code> with your
username:</p>
<pre><code class="language-nix"> security.polkit.extraConfig = ''
polkit.addRule(function(action, subject) {
if (subject.user == "user-name") {
if (action.id.indexOf("org.nixos") == 0) {
polkit.log("Caching admin authentication for single NixOS operation");
return polkit.Result.AUTH_ADMIN_KEEP;
}
}
});
'';
</code></pre>
<p>Create a zsh function for easy access:</p>
<pre><code class="language-nix"># zsh.nix
#...snip...
initContent = ''
fr() {
run0 nixos-rebuild switch --flake "/home/$USER/flake#"$(hostname)
}
'';
</code></pre>
<p>Needless to say, this is less secure but much more convenient than entering your
password 3 times on every single rebuild.</p>
<p>Without the <code>pam</code> settings for swaylock, it won’t accept your password to log
back in.</p>
<p><strong>run0 Usage Example</strong></p>
<p>When you are in a privileged shell, <code>run0</code> changes the color of the background
to red to remind you of this.</p>
<p>Example creating a user:</p>
<ol>
<li>
<p><code>run0</code></p>
</li>
<li>
<p><code>adduser admin</code></p>
</li>
<li>
<p><code>usermod -aG wheel admin</code></p>
</li>
<li>
<p><code>passwd admin</code></p>
</li>
<li>
<p><code>exit</code></p>
</li>
<li>
<p><code>reboot</code></p>
</li>
</ol>
<p>This is just an example, since we manage our users declaratively the user
created would be discarded on the next rebuild because of the
<code>users.mutableUsers = false;</code> setting. You could of course change this to <code>true</code>
to manage your users imperatively but I don’t recommend it.</p>
<hr />
<h3>Capabilities</h3>
<details>
<summary> ✔️ Click to expand capabilities examples </summary>
<p>One way to help get rid of setuid binaries is to replace them with capabilities.
I personally only remove the SUID bit and don’t try to replace with capabilities
as of now. You can still use the commands from <code>security.wrappers</code> such as
<code>run0 su -</code>.</p>
<p>Capabilities provide a subset of what is available to root to a process. This
breaks up root privileges into smaller units that can independently grant access
to processes. This reduces the full set of privileges, decreasing the risk of
exploitation.</p>
<p>(This is just an example):</p>
<pre><code class="language-nix">{
# a setuid root program
doas =
{ setuid = true;
owner = "root";
group = "root";
source = "${pkgs.doas}/bin/doas";
};
# a setgid program
locate =
{ setgid = true;
owner = "root";
group = "mlocate";
source = "${pkgs.locate}/bin/locate";
};
# a program with the CAP_NET_RAW capability
ping =
{ owner = "root";
group = "root";
capabilities = "cap_net_raw+ep";
source = "${pkgs.iputils.out}/bin/ping";
};
}
</code></pre>
<p>List the highest capability number for your kernel with:</p>
<pre><code class="language-bash">cat /proc/sys/kernel/cap_last_cap
# Output:
40
</code></pre>
<p>List available Linux capabilities:</p>
<pre><code class="language-bash">capsh --print
</code></pre>
<p>List processes:</p>
<pre><code class="language-bash">ps
# Example Output
PID TTY TIME CMD
8063 pts/1 02 zsh
</code></pre>
<pre><code class="language-bash">cat /proc/8063/status | grep Cap
# Output
CapInh: 0000000800000000
CapPrm: 0000000000000000
CapEff: 0000000000000000
CapBnd: 000001ffffffffff
CapAmb: 0000000000000000
</code></pre>
<pre><code class="language-bash">capsh --decode=000001ffffffffff
# Output
0x000001ffffffffff=cap_chown,cap_dac_override,cap_dac_read_search,cap_fowner,cap_fsetid,cap_kill,cap_setgid,cap_setuid,cap_setpcap,cap_linux_immutable,cap_net_bind_service,cap_net_broadcast,cap_net_admin,cap_net_raw,cap_ipc_lock,cap_ipc_owner,cap_sys_module,cap_sys_rawio,cap_sys_chroot,cap_sys_ptrace,cap_sys_pacct,cap_sys_admin,cap_sys_boot,cap_sys_nice,cap_sys_resource,cap_sys_time,cap_sys_tty_config,cap_mknod,cap_lease,cap_audit_write,cap_audit_control,cap_setfcap,cap_mac_override,cap_mac_admin,cap_syslog,cap_wake_alarm,cap_block_suspend,cap_audit_read,cap_perfmon,cap_bpf,cap_checkpoint_restore
</code></pre>
<p><code>cap_net_raw</code>: Allows the program to use raw and unbuffered network sockets,
which is what <code>ping</code> and <code>mtr-packet</code> need to send ICMP packets.</p>
<p><code>cap_sys_admin</code>: Grants a variety of system administration operations, including
the ability to perform FUSE mounts. This is a powerful capability, but it’s
still more restrictive than full root SUID.</p>
<ul>
<li><code>+ep</code>: This is crucial. It stands for:
<ul>
<li>
<p><code>e</code> (Effective): The set of capabilities actually used by the process when
running.</p>
</li>
<li>
<p><code>p</code> (Permitted): The set of capabilities that can be enabled by the process.</p>
</li>
</ul>
</li>
</ul>
<p>By using this approach, you are following the security principle of least
privilege, significantly reducing the attack surface compared to traditional
SUID binaries.</p>
<ul>
<li>
<p><a href="https://search.nixos.org/options?channel=unstable&show=security.wrappers&query=security.wrappers">security.wrappers</a></p>
</li>
<li>
<p><a href="https://linux-audit.com/kernel/capabilities/linux-capabilities-101/">Linux Audit capabilities 101</a></p>
</li>
<li>
<p><a href="https://www.kicksecure.com/wiki/Dev/secureblue#capabilities">Kicksecure’s take on capabilities</a></p>
</li>
<li>
<p><a href="https://man7.org/linux/man-pages/man7/capabilities.7.html">capabilities(7)</a></p>
</li>
<li>
<p><a href="https://docs.redhat.com/en/documentation/red_hat_enterprise_linux_atomic_host/7/html/container_security_guide/linux_capabilities_and_seccomp">capabilities and seccomp</a></p>
</li>
</ul>
</details>
<hr />
<h2>Impermanence</h2>
<p>Impermanence, especially when using a <code>tmpfs</code> as the root filesystem, provides
several significant security benefits. The core principle is that impermanence
defeats persistence, a fundamental goal for any attacker.</p>
<p>When you use a root-as-tmpfs setup on NixOS, the boot process loads the entire
operating system from the read-only Nix store into a <code>tmpfs</code> in RAM. The mutable
directories, such as <code>/etc</code> and <code>/var</code>, are then created on this RAM disk. When
the system is shut down, the <code>tmpfs</code> is wiped, leaving the on-disk storage
untouched and secure.</p>
<p>This means you get a fresh, secure boot every time, making it much harder for an
attacker to maintain a presence on your system.</p>
<ul>
<li>
<p><a href="https://grahamc.com/blog/erase-your-darlings/">Erase your Darlings (ZFS)</a></p>
</li>
<li>
<p><a href="https://saylesss88.github.io/installation/enc/encrypted_impermanence.html">Encrypted BTRFS Impermanence Guide</a>
Only follow this guide if you also followed the encrypted disko install,
impermanence is designed to be destructive and needs to match your config
exactly.</p>
</li>
</ul>
<h2>Replace timesyncd with a chron job that enables Network Time Security (NTS)</h2>
<p>This is implementing the GrapheneOS/secureblue NTS chrony settings to NixOS:</p>
<pre><code class="language-nix">{ config
, ...
}:
{
services.chrony = {
enable = true;
enableNTS = true;
servers = [
"server time.cloudflare.com iburst nts"
"server ntppool1.time.nl iburst nts"
"server nts.netnod.se iburst nts"
"server ptbtime1.ptb.de iburst nts"
"server time.dfm.dk iburst nts"
"server time.cifelli.xyz iburst nts"
];
# havent worked out the kinks yet
# extraConfig = ''
# minsources 3
# authselectmode require
# # EF
# dscp 46
# driftfile /var/lib/chrony/drift
# dumpdir /var/lib/chrony
# ntsdumpdir /var/lib/chrony
# leapseclist /usr/share/zoneinfo/leap-seconds.list
# makestep 1.0 3
# rtconutc
# cmdport 0
# noclientlog
# '';
};
}
</code></pre>
<p>Ensure NTS is being used with:</p>
<pre><code class="language-bash">sudo chronyc -N authdata
</code></pre>
<hr />
<h2>Secure Boot</h2>
<!--  -->
<p>Enable a UEFI password or Administrator password where it requires
authentication in order to access the UEFI/BIOS.</p>
<p>Secure Boot helps ensure only signed, trusted kernels and bootloaders are
executed at startup.</p>
<p>Useful Resources:</p>
<details>
<summary> ✔️ Click to Expand Secure Boot Resources </summary>
<ul>
<li>
<p><a href="https://0pointer.net/blog/authenticated-boot-and-disk-encryption-on-linux.html">The Strange State of Authenticated Boot and Encryption</a></p>
</li>
<li>
<p><a href="https://wiki.nixos.org/wiki/Secure_Boot">NixOS Wiki Secure Boot</a></p>
</li>
<li>
<p><a href="https://github.com/nix-community/lanzaboote">lanzaboote repo</a></p>
</li>
</ul>
</details>
<p>Practical Lanzaboote Secure Boot setup for NixOS:
<a href="https://saylesss88.github.io/installation/enc/lanzaboote.html">Guide:Secure Boot on NixOS with Lanzaboote</a></p>
<hr />
<h3>The Kernel</h3>
<p>The Kernel Self Protection Project:</p>
<ul>
<li><a href="https://kspp.github.io/Recommended_Settings">KSPP Recommended_Settings</a></li>
</ul>
<p>Given the kernel’s central role, it’s a frequent target for malicious actors,
making robust hardening essential.</p>
<p>NixOS provides a <code>hardened</code> profile that applies a set of security-focused
kernel and system configurations.</p>
<p>For flakes, you could do something like the following in your
<code>configuration.nix</code> or equivalent to import <code>hardened.nix</code> and enable
<code>profiles.hardened</code>:</p>
<pre><code class="language-nix"># configuration.nix
{ pkgs, inputs, ... }: let
modulesPath = "${inputs.nixpkgs}/nixos/modules";
in {
imports = [ "${modulesPath}/profiles/hardened.nix" ];
}
</code></pre>
<ul>
<li>
<p>There is a proposal to remove it completely that has gained ground, the
following thread discusses why:
<a href="https://discourse.nixos.org/t/proposal-to-deprecate-the-hardened-profile/63081">Discourse Thread</a></p>
</li>
<li>
<p><a href="https://github.com/NixOS/nixpkgs/pull/383438">PR #383438</a> Proposed removal
PR.</p>
</li>
<li>
<p>Check
<a href="https://github.com/NixOS/nixpkgs/blob/master/nixos/modules/profiles/hardened.nix">hardened.nix</a>
to see exactly what adding it enables to avoid duplicates and conflicts moving
on. I included this for completeness, the choice is yours if you want to use
it or not.</p>
</li>
</ul>
<h2>Choosing your Kernel</h2>
<p>See which kernel you’re currently using with:</p>
<pre><code class="language-bash"># show the kernel release
uname -r
# show kernel version, hostname, and architecture
uname -a
</code></pre>
<p>Show the configuration of your current kernel:</p>
<pre><code class="language-bash">zcat /proc/config.gz
# ...snip...
#
# Compression
#
CONFIG_CRYPTO_DEFLATE=m
CONFIG_CRYPTO_LZO=y
CONFIG_CRYPTO_842=m
CONFIG_CRYPTO_LZ4=m
CONFIG_CRYPTO_LZ4HC=m
CONFIG_CRYPTO_ZSTD=y
# end of Compression
# ...snip...
</code></pre>
<p>The <a href="https://nixos.org/manual/nixos/stable/#sec-kernel-config">NixOS Manual</a>
states that the default Linux kernel configuration should be fine for most
users.</p>
<p>The Linux kernel is typically released under two forms: stable and long-term
support (LTS). Choosing either has consequences, do your research.
<a href="https://madaidans-insecurities.github.io/guides/linux-hardening.html#stable-vs-lts">Stable vs. LTS kernels</a></p>
<ul>
<li><a href="https://www.kernel.org/category/releases.html">The Linux Kernel Archives Active kernel releases</a></li>
</ul>
<p><strong>OR</strong>, you can choose the hardened kernel for a kernel that prioritizes
security over everything else.</p>
<hr />
<h3>The Hardened Kernel</h3>
<blockquote class="markdown-alert-note">
<p>Expect breakage when using the hardened kernel. <code>linux-hardened</code> completely
disables
<a href="https://secureblue.dev/articles/userns">unprivileged user namespaces</a>, which
are required for Flatpak, chromium-based browsers, and more.</p>
</blockquote>
<p>The <code>linuxPackages_latest_hardened</code> attribute has been deprecated. If you want
to use a hardened kernel, it is now recommended to use <code>linux_hardened</code>, which
is aliased to <code>linux_default.kernel</code>.</p>
<p>You can find the latest available hardened kernel packages by searching
<a href="https://github.com/NixOS/nixpkgs/blob/master/pkgs/top-level/linux-kernels.nix">pkgs/top-level/linux-kernels.nix</a>.</p>
<p>It is recommended to use <code>linux_hardened</code> without specifying a version, such as:</p>
<pre><code class="language-nix">boot.kernelPackages = pkgs.linuxPackages_hardened;
</code></pre>
<p><code>linux_hardened</code> is aliased to the <code>linux_default.kernel</code>.</p>
<p>Note that this not only replaces the kernel, but also packages that are specific
to the kernel version, such as NVIDIA video drivers. This also removes your
ability to use the <code>.extend</code> kernel attribute, they are only available to
<em>kernel package sets</em> (e.g., <code>linuxPackages_hardened</code>)</p>
<ul>
<li>If you decide to use this, read further before rebuilding.</li>
</ul>
<p>You can inspect
<a href="https://github.com/NixOS/nixpkgs/blob/master/pkgs/os-specific/linux/kernel/hardened/patches.json">nixpkgs/pkgs/os-specific/linux/kernel/hardened/patches.json</a>
to see the metadata of the patches that are applied. You can then follow the
links in the <code>.json</code> file to see the patch diffs.</p>
<hr />
<h3>sysctl</h3>
<p>A tool for checking the security hardening options of the Linux kernel:</p>
<pre><code class="language-nix">environment.systemPackages = [ pkgs.kernel-hardening-checker ];
</code></pre>
<p><code>sysctl</code> is a tool that allows you to view or modify kernel settings and
enable/disable different features.</p>
<p>Check all <code>sysctl</code> parameters against the <code>kernel-hardening-checker</code>
recommendations:</p>
<pre><code class="language-bash">sudo sysctl -a > params.txt
kernel-hardening-checker -l /proc/cmdline -c /proc/config.gz -s ./params.txt
</code></pre>
<p>Check the value of a specific parameter:</p>
<pre><code class="language-bash">sudo sysctl -a | grep "kernel.kptr_restrict"
# Output:
kernel.kptr_restrict = 2
</code></pre>
<p>Check Active Linux Security Modules:</p>
<pre><code class="language-bash">cat /sys/kernel/security/lsm
# Output:
File: /sys/kernel/security/lsm
capability,landlock,yama,bpf,apparmor
</code></pre>
<p>Check Kernel Configuration Options:</p>
<pre><code class="language-bash">zcat /proc/config.gz | grep CONFIG_SECURITY_SELINUX
zcat /proc/config.gz | grep CONFIG_HARDENED_USERCOPY
zcat /proc/config.gz | grep CONFIG_STACKPROTECTOR
</code></pre>
<p>Since it is difficult to see exactly what enabling the hardened_kernel does.
Before rebuilding, you could do something like this to see exactly what is
added:</p>
<pre><code class="language-bash">sudo sysctl -a > before.txt
</code></pre>
<p>And after the rebuild:</p>
<pre><code class="language-bash">sudo sysctl -a > after.txt
</code></pre>
<p>And finally run a <code>diff</code> on them:</p>
<pre><code class="language-bash">diff before.txt after.txt
</code></pre>
<p>You can also diff against <code>after.txt</code> for future changes to avoid duplicates,
this seems easier to me than trying to parse through the patches.</p>
<hr />
<h2>Kernel Security Settings</h2>
<pre><code class="language-nix">security = {
protectKernelImage = true;
lockKernelModules = false; # this breaks iptables, wireguard, and virtd
# force-enable the Page Table Isolation (PTI) Linux kernel feature
forcePageTableIsolation = true;
# User namespaces are required for sandboxing.
# this means you cannot set `"user.max_user_namespaces" = 0;` in sysctl
allowUserNamespaces = true;
# Disable unprivileged user namespaces, unless containers are enabled
unprivilegedUsernsClone = config.virtualisation.containers.enable;
allowSimultaneousMultithreading = true;
}
</code></pre>
<hr />
<h2>Further Hardening with sysctl</h2>
<p><code>sysctl</code> hardening settings further reinforce kernel-level protections. The
hardened kernel includes security patches and stricter defaults, but it doesn’t
cover all runtime tunables. Refer to the above commands to get a diff of the
changes.</p>
<p><a href="https://nixos.org/manual/nixos/stable/options#opt-boot.kernel.sysctl">boot.kernel.sysctl</a>:
Runtime parameters of the Linux kernel, as set by sysctl(8). Note that the
sysctl parameters names must be enclosed in quotes. Values may be a string,
integer, boolean, or null.</p>
<p>Check what each setting does <a href="https://sysctl-explorer.net/">sysctl-explorer</a></p>
<p>Refer to
<a href="https://madaidans-insecurities.github.io/guides/linux-hardening.html#sysctl-kernel">madadaidans-insecurities#sysctl-kernel</a>
for the following settings and their explainations.</p>
<p>Also see the
<a href="https://kspp.github.io/Recommended_Settings#sysctls">Kernel Self Protection Projects sysctls</a></p>
<pre><code class="language-nix"> boot.kernel.sysctl = {
"fs.suid_dumpable" = 0;
# prevent pointer leaks
"kernel.kptr_restrict" = 2;
# restrict kernel log to CAP_SYSLOG capability
"kernel.dmesg_restrict" = 1;
# Note: certian container runtimes or browser sandboxes might rely on the following
# restrict eBPF to the CAP_BPF capability
"kernel.unprivileged_bpf_disabled" = 1;
# should be enabled along with bpf above
# "net.core.bpf_jit_harden" = 2;
# restrict loading TTY line disciplines to the CAP_SYS_MODULE
"dev.tty.ldisk_autoload" = 0;
# prevent exploit of use-after-free flaws
"vm.unprivileged_userfaultfd" = 0;
# kexec is used to boot another kernel during runtime and can be abused
"kernel.kexec_load_disabled" = 1;
# Kernel self-protection
# SysRq exposes a lot of potentially dangerous debugging functionality to unprivileged users
# 4 makes it so a user can only use the secure attention key. A value of 0 would disable completely
"kernel.sysrq" = 4;
# disable unprivileged user namespaces, Note: Docker, NH, and other apps may need this
# "kernel.unprivileged_userns_clone" = 0; # Set to 1 because it makes NH and other programs fail
# This should be set to 0 if you don't rely on flatpak, NH, Docker, etc.
"kernel.unprivileged_userns_clone" = 1;
# restrict all usage of performance events to the CAP_PERFMON capability
"kernel.perf_event_paranoid" = 3;
# Network
# protect against SYN flood attacks (denial of service attack)
"net.ipv4.tcp_syncookies" = 1;
# protection against TIME-WAIT assassination
"net.ipv4.tcp_rfc1337" = 1;
# enable source validation of packets received (prevents IP spoofing)
"net.ipv4.conf.default.rp_filter" = 1;
"net.ipv4.conf.all.rp_filter" = 1;
"net.ipv4.conf.all.accept_redirects" = 0;
"net.ipv4.conf.default.accept_redirects" = 0;
"net.ipv4.conf.all.secure_redirects" = 0;
"net.ipv4.conf.default.secure_redirects" = 0;
# Protect against IP spoofing
"net.ipv6.conf.all.accept_redirects" = 0;
"net.ipv6.conf.default.accept_redirects" = 0;
"net.ipv4.conf.all.send_redirects" = 0;
"net.ipv4.conf.default.send_redirects" = 0;
# prevent man-in-the-middle attacks
"net.ipv4.icmp_echo_ignore_all" = 1;
# ignore ICMP request, helps avoid Smurf attacks
"net.ipv4.conf.all.forwarding" = 0;
"net.ipv4.conf.default.accept_source_route" = 0;
"net.ipv4.conf.all.accept_source_route" = 0;
"net.ipv6.conf.all.accept_source_route" = 0;
"net.ipv6.conf.default.accept_source_route" = 0;
# Reverse path filtering causes the kernel to do source validation of
"net.ipv6.conf.all.forwarding" = 0;
"net.ipv6.conf.all.accept_ra" = 0;
"net.ipv6.conf.default.accept_ra" = 0;
## TCP hardening
# Prevent bogus ICMP errors from filling up logs.
"net.ipv4.icmp_ignore_bogus_error_responses" = 1;
# Userspace
# restrict usage of ptrace
"kernel.yama.ptrace_scope" = 2;
# ASLR memory protection (64-bit systems)
"vm.mmap_rnd_bits" = 32;
"vm.mmap_rnd_compat_bits" = 16;
# only permit symlinks to be followed when outside of a world-writable sticky directory
"fs.protected_symlinks" = 1;
"fs.protected_hardlinks" = 1;
# Prevent creating files in potentially attacker-controlled environments
"fs.protected_fifos" = 2;
"fs.protected_regular" = 2;
# Randomize memory
"kernel.randomize_va_space" = 2;
# Exec Shield (Stack protection)
"kernel.exec-shield" = 1;
## TCP optimization
# TCP Fast Open is a TCP extension that reduces network latency by packing
# data in the sender’s initial TCP SYN. Setting 3 = enable TCP Fast Open for
# both incoming and outgoing connections:
"net.ipv4.tcp_fastopen" = 3;
# Bufferbloat mitigations + slight improvement in throughput & latency
"net.ipv4.tcp_congestion_control" = "bbr";
"net.core.default_qdisc" = "cake";
};
</code></pre>
<blockquote>
<p>❗ Note: The above settings are fairly aggressive and can break common
programs, read the comment warnings.</p>
</blockquote>
<hr />
<h2>Hardening Boot Parameters</h2>
<p><code>boot.kernelParams</code> can be used to set additional kernel command line arguments
at boot time. It can only be used for built-in modules.</p>
<p>You can find the following settings in the
<a href="https://madaidans-insecurities.github.io/guides/linux-hardening.html#boot-parameters">Boot parameters section</a></p>
<pre><code class="language-nix"># boot.nix
boot.kernelParams = [
# make it harder to influence slab cache layout
"slab_nomerge"
# enables zeroing of memory during allocation and free time
# helps mitigate use-after-free vulnerabilaties
"init_on_alloc=1"
"init_on_free=1"
# randomizes page allocator freelist, improving security by
# making page allocations less predictable
"page_alloc.shuffel=1"
# enables Kernel Page Table Isolation, which mitigates Meltdown and
# prevents some KASLR bypasses
"pti=on"
# randomizes the kernel stack offset on each syscall
# making attacks that rely on a deterministic stack layout difficult
"randomize_kstack_offset=on"
# disables vsyscalls, they've been replaced with vDSO
"vsyscall=none"
# disables debugfs, which exposes sensitive info about the kernel
"debugfs=off"
# certain exploits cause an "oops", this makes the kernel panic if an "oops" occurs
"oops=panic"
# only alows kernel modules that have been signed with a valid key to be loaded
# making it harder to load malicious kernel modules
# can make VirtualBox or Nvidia drivers unusable
"module.sig_enforce=1"
# prevents user space code excalation
"lockdown=confidentiality"
# "rd.udev.log_level=3"
# "udev.log_priority=3"
];
</code></pre>
<p>This is a thoughtful start to hardening boot parameters, there are more
recommendations in the guide.</p>
<p>Kernel modules for hardware devices are generally loaded automatically by
<code>udev</code>. You can force a module to be loaded via <code>boot.kernelModules</code>.</p>
<hr />
<p><strong>Hardening Modprobe</strong></p>
<p>You can use both <code>extraModprobeConfig</code> & <code>blacklistedKernelModules</code> to disable
different features. If you prefer, you can place these in the next section as
well.</p>
<pre><code class="language-nix">boot.extraModprobeConfig = ''
# firewire and thunderbolt
install firewire-core /bin/false
install firewire_core /bin/false
install firewire-ohci /bin/false
install firewire_ohci /bin/false
install firewire_sbp2 /bin/false
install firewire-sbp2 /bin/false
install firewire-net /bin/false
install thunderbolt /bin/false
install ohci1394 /bin/false
install sbp2 /bin/false
install dv1394 /bin/false
install raw1394 /bin/false
install video1394 /bin/false
'';
# OR
#boot.blacklistedKernelModules = [
# "firewire-core"
# # ... snip ...
#];
</code></pre>
<hr />
<p><strong>Blacklisting Kernel Parameters</strong></p>
<p>Blacklisting unused kernel modules reduces the attack surface.</p>
<p><a href="https://nixos.org/manual/nixos/stable/options#opt-boot.blacklistedKernelModules">boot.blacklistedKernelModules</a>:
List of names of kernel modules that should not be loaded automatically by the
hardware probing code.</p>
<p>You can find the following settings in the
<a href="https://madaidans-insecurities.github.io/guides/linux-hardening.html#kasr-kernel-modules">Blacklisting Kernel Modules Section</a></p>
<pre><code class="language-nix"> boot.blacklistedKernelModules = [
# Obscure networking protocols
"dccp" # Datagram Congestion Control Protocol
"sctp" # Stream Control Transmission Protocol
"rds" # Reliable Datagram Sockets
"tipc" # Transparent Inter-Process Communication
"n-hdlc" # High-level Data Link Control
"ax25" # Amateur X.25
"netrom" # NetRom
"x25" # X.25
"rose"
"decnet"
"econet"
"af_802154" # IEEE 802.15.4
"ipx" # Internetwork Packet Exchange
"appletalk"
"psnap" # SubnetworkAccess Protocol
"p8023" # Novell raw IEE 802.3
"p8022" # IEE 802.3
"can" # Controller Area Network
"atm"
# Various rare filesystems
"cramfs"
"freevxfs"
"jffs2"
"hfs"
"hfsplus"
"udf"
# "squashfs" # compressed read-only file system used for Live CDs
# "cifs" # cmb (Common Internet File System)
# "nfs" # Network File System
# "nfsv3"
# "nfsv4"
# "ksmbd" # SMB3 Kernel Server
# "gfs2" # Global File System 2
# vivid driver is only useful for testing purposes and has been the
# cause of privilege escalation vulnerabilities
# "vivid"
];
</code></pre>
<p>As with the <code>kernelParameters</code> above, there are more suggestions in the guide, I
have used the above parameters along with the commented out ones and had no
issues.</p>
<p>Also see
<a href="https://github.com/secureblue/secureblue/blob/live/files/system/etc/modprobe.d/blacklist.conf">SecureBlue’s blacklist.conf</a>
for more ideas.</p>
<hr />
<h2>Hardened Memory Allocator</h2>
<blockquote class="markdown-alert-note">
<p>There is a performance cost to enabling a hardened memory allocator, and
some apps will not work without a workaround such as Firefox, Thunderbird,
Torbrowser, LibreWolf, and ZenBrowser to name a few.</p>
</blockquote>
<p>With memory corruption bugs being the leading zero day category, it’s clearly
something that you should be concerned with.</p>
<p>The grapheneOS <code>hardened_malloc</code> is available for NixOS in two variants, add
either to your <code>configuration.nix</code> or equivalent to apply them:</p>
<ol>
<li>
<p><code>environment.memoryAllocator.provider = "graphene-hardened";</code>: This is the
default configuration template that has all normal optional security features
enabled. It’s aggressive, you can expect app breakage and a performance cost.</p>
</li>
<li>
<p><code>environment.memoryAllocator.provider = "graphene-hardened-light";</code>: The
light template disables the slap quarantines, write after free check, slot
randomization and raises the guard slab interval from 1 to 8 but leaves
zero-on-free and slab canaries enabled. This version has solid performance
and is still far more secure than the standard allocator.</p>
</li>
</ol>
<p><code>libhardened_malloc.so</code> is typically installed to
<code>/usr/local/lib/libhardened_malloc.so</code> and referenced from <code>/etc/ld.so.preload</code>.</p>
<ul>
<li>
<p><a href="https://nixos.org/manual/nixos/stable/options#opt-environment.memoryAllocator.provider">NixOS Manual memoryAllocator</a></p>
</li>
<li>
<p><a href="https://github.com/GrapheneOS/hardened_malloc?tab=readme-ov-file#traditional-linux-based-operating-systems">GrapheneOS hardened_malloc</a></p>
</li>
<li>
<p><a href="https://github.com/secureblue/secureblue/issues/193#issuecomment-1953323680">GrapheneOS/secureblue discussion on hardened_malloc issues</a></p>
</li>
<li>
<p><a href="https://man7.org/linux/man-pages/man8/ld.so.8.html">ld.so man page</a></p>
</li>
<li>
<p><a href="https://www.synacktiv.com/en/publications/exploring-grapheneos-secure-allocator-hardened-malloc">Exploring hardened_malloc</a></p>
</li>
</ul>
<hr />
<h2>Hardening Systemd</h2>
<!--  -->
<p><code>systemd</code> is the core “init system” and service manager that controls how
services, daemons, and basic system processes are started, stopped and
supervised on modern Linux distributions, including NixOS. It provides a suite
of basic building blocks for a Linux system as well as a system and service
manager that runs as <code>PID 1</code> and starts the rest of the system.</p>
<p>Stage 1 (initrd) is now based on systemd by default, the old scripted
implimentation is deprecated.</p>
<p>Because it launches and supervises almost all system services, hardening systemd
means raising the baseline security of your entire system.</p>
<p>Disable coredumps:</p>
<pre><code class="language-nix">systemd.coredump.enable = false;
# ➡️ Sets the kernel's resource limit (ulimit -c 0)
security.pam.loginLimits = [
{
domain = "*"; # Applies to all users/sessions
type = "-"; # Set both soft and hard limits
item = "core"; # The soft/hard limit item
value = "0"; # Core dumps size is limited to 0 (effectively disabled)
}
];
</code></pre>
<p>Disabling coredumps helps save space and improves security/privacy because when
a program fails, a coredump contains an exact copy of a programs running memory
at the time of the crash. This can inadvertently expose sensitive data.</p>
<p>If a program is handling private information when it crashes, the core dump file
could contain:</p>
<ul>
<li>
<p><strong>Passwords</strong>: Stored in memory before being sent or hashed.</p>
</li>
<li>
<p><strong>Encryption Keys</strong>: Used for securing network connections.</p>
</li>
<li>
<p><strong>Personal Info</strong>: Chat messages, website forms, etc.</p>
</li>
</ul>
<p>It can give a minor performance upgrade and does reduce the attack surface. If a
malicious program were to gain access to your system, one of the first things it
might look for are core dump files to extract sensitive data. By disabling them,
you eliminate this potential source of information leakage.</p>
<p><del><code>dbus-broker</code> is generally considered more secure and robust but isn’t the
default as of yet.</del></p>
<p><code>dbus-broker</code> is now the default, it’s faster and more reliable.</p>
<pre><code class="language-nix"> users.groups.netdev = {};
services = {
dbus.implementation = "broker";
logrotate.enable = true;
journald = {
storage = "volatile"; # Store logs in memory
upload.enable = false; # Disable remote log upload (the default)
extraConfig = ''
SystemMaxUse=500M
SystemMaxFileSize=50M
'';
};
};
</code></pre>
<ul>
<li>
<p><code>dbus-broker</code> is more resilient to resource exhaustion attacks and integrates
better with Linux security features.</p>
</li>
<li>
<p><a href="https://dvdhrm.github.io/rethinking-the-dbus-message-bus/">Rethinking-the-dbus-message-bus</a></p>
</li>
<li>
<p>Setting <code>storage = "volatile"</code> tells journald to keep log data only in memory.
There is a tradeoff though, If you need long-term auditing or troubleshooting
after a reboot, this will not preserve system logs.</p>
</li>
<li>
<p><code>upload.enable</code> is for forwarding log messages to remote servers, setting this
to false prevents accidental leaks of potentially sensitive or internal system
information.</p>
</li>
<li>
<p>Enabling <code>logrotate</code> prevents your disk from filling with excessive
<strong>legacy/service</strong> log files. These are the classic plain-text logs.</p>
</li>
<li>
<p>Systemd uses <code>journald</code> which stores logs in a binary format</p>
</li>
</ul>
<p>You can check the security status with:</p>
<pre><code class="language-bash">systemd-analyze security
# or for a detailed view of individual services security posture
systemd-analyze security NetworkManager
</code></pre>
<p>Optionally disable vulnerable services to reduce the attack surface, obviously
don’t disable what you need, or change your habits:</p>
<pre><code class="language-nix">services = {
# mDNS/DNS-SD
avahi.enable = false;
# Geoclue (location services)
geoclue2.enable = false;
udisks2.enable = false;
accounts-daemon.enable = false;
};
# Only needed for WWAN/3G/4G modems, otherwise it runs `mmcli` unnecessarily
networking.modemmanager.enable = false;
# Bluetooth has a long history of vulnerabilities
hardware.bluetooth.enable = false;
# Prefer manual upgrades on a hardened system
system.autoUpgrade.enable = false;
</code></pre>
<p>Further reading on systemd:</p>
<details>
<summary> ✔️ Click to Expand Systemd Resources </summary>
<ul>
<li>
<p><a href="https://systemd.io/">systemd.io</a></p>
</li>
<li>
<p><a href="https://0pointer.de/blog/projects/systemd.html">Rethinking PID 1</a></p>
</li>
<li>
<p><a href="https://0pointer.de/blog/projects/the-biggest-myths.html">Biggest Myths about Systemd</a></p>
</li>
</ul>
</details>
<p>The following is a repo containing many of the Systemd hardening settings in
NixOS format:</p>
<p><a href="https://github.com/wallago/nix-system-services-hardened">nix-system-services-hardened</a></p>
<p>For example, to harden bluetooth you could add the following to your
<code>configuration.nix</code> or equivalent:</p>
<pre><code class="language-nix">systemd.services = {
bluetooth.serviceConfig = {
ProtectKernelTunables = lib.mkDefault true;
ProtectKernelModules = lib.mkDefault true;
ProtectKernelLogs = lib.mkDefault true;
ProtectHostname = true;
ProtectControlGroups = true;
ProtectProc = "invisible";
SystemCallFilter = [
"~@obsolete"
"~@cpu-emulation"
"~@swap"
"~@reboot"
"~@mount"
];
SystemCallArchitectures = "native";
};
}
</code></pre>
<p>As you can see from above, you typically use the <code>serviceConfig</code> attribute to
harden settings for systemd services.</p>
<pre><code class="language-bash">systemd-analyze security bluetooth
→ Overall exposure level for bluetooth.service: 3.3 OK 🙂
</code></pre>
<details>
<summary> Click to expand `systemd.nix` example implementing many of the recommendations </summary>
<pre><code class="language-nix">{lib, ...}: {
systemd.services = {
# "home-manager-jr".after = ["network-online.target"];
# "home-manager-jr".wantedBy = ["multi-user.target"];
"user@".serviceConfig = {
ProtectSystem = "strict";
ProtectClock = true;
ProtectHostname = true;
ProtectKernelTunables = true;
ProtectKernelModules = true;
ProtectKernelLogs = true;
ProtectProc = "invisible";
PrivateTmp = true;
PrivateNetwork = true;
MemoryDenyWriteExecute = false;
RestrictAddressFamilies = [
"AF_UNIX"
"AF_NETLINK"
"AF_BLUETOOTH"
];
RestrictNamespaces = true;
RestrictRealtime = true;
RestrictSUIDSGID = true;
SystemCallFilter = [
"~@keyring"
"~@swap"
"~@debug"
"~@module"
"~@obsolete"
"~@cpu-emulation"
];
SystemCallArchitectures = "native";
};
acpid.serviceConfig = {
ProtectSystem = "full";
ProtectHome = true;
RestrictAddressFamilies = ["AF_INET" "AF_INET6"];
SystemCallFilter = "~@clock @cpu-emulation @debug @module @mount @raw-io @reboot @swap";
ProtectKernelTunables = true;
ProtectKernelModules = true;
};
auditd.serviceConfig = {
NoNewPrivileges = true;
ProtectSystem = "full";
ProtectHome = true;
ProtectHostname = true;
ProtectKernelTunables = true;
ProtectKernelModules = true;
ProtectControlGroups = true;
ProtectProc = "invisible";
ProtectClock = true;
PrivateTmp = true;
PrivateNetwork = true;
PrivateMounts = true;
PrivateDevices = true;
RestrictNamespaces = true;
RestrictRealtime = true;
RestrictSUIDSGID = true;
RestrictAddressFamilies = [
"~AF_INET6"
"~AF_INET"
"~AF_PACKET"
];
MemoryDenyWriteExecute = true;
LockPersonality = true;
SystemCallFilter = [
"~@clock"
"~@module"
"~@mount"
"~@swap"
"~@obsolete"
"~@cpu-emulation"
];
SystemCallArchitectures = "native";
CapabilityBoundingSet = [
"~CAP_CHOWN"
"~CAP_FSETID"
"~CAP_SETFCAP"
];
};
cups.serviceConfig = {
NoNewPrivileges = true;
ProtectSystem = "full";
ProtectHome = true;
ProtectKernelModules = true;
ProtectKernelTunables = true;
ProtectKernelLogs = true;
ProtectControlGroups = true;
ProtectHostname = true;
ProtectClock = true;
ProtectProc = "invisible";
RestrictRealtime = true;
RestrictNamespaces = true;
RestrictSUIDSGID = true;
RestrictAddressFamilies = [
"AF_UNIX"
"AF_NETLINK"
"AF_INET"
"AF_INET6"
"AF_PACKET"
];
MemoryDenyWriteExecute = true;
SystemCallFilter = [
"~@clock"
"~@reboot"
"~@debug"
"~@module"
"~@swap"
"~@obsolete"
"~@cpu-emulation"
];
SystemCallArchitectures = "native";
LockPersonality = true;
};
NetworkManager.serviceConfig = {
NoNewPrivileges = true;
ProtectHome = true;
ProtectKernelModules = true;
ProtectKernelLogs = true;
ProtectControlGroups = true;
ProtectClock = true;
ProtectHostname = true;
ProtectProc = "invisible";
PrivateTmp = true;
RestrictRealtime = true;
RestrictAddressFamilies = [
"AF_UNIX"
"AF_NETLINK"
"AF_INET"
"AF_INET6"
"AF_PACKET"
];
RestrictNamespaces = true;
RestrictSUIDSGID = true;
MemoryDenyWriteExecute = true;
SystemCallFilter = [
"~@mount"
"~@module"
"~@swap"
"~@obsolete"
"~@cpu-emulation"
"ptrace"
];
SystemCallArchitectures = "native";
LockPersonality = true;
};
wpa_supplicant.serviceConfig = {
NoNewPrivileges = true;
ProtectSystem = "strict";
ProtectHome = true;
ProtectKernelModules = true;
ProtectKernelLogs = true;
ProtectControlGroups = true;
ProtectClock = true;
ProtectHostname = true;
ProtectProc = "invisible";
PrivateTmp = true;
PrivateMounts = true;
RestrictRealtime = true;
RestrictAddressFamilies = [
"AF_UNIX"
"AF_NETLINK"
"AF_INET"
"AF_INET6"
"AF_PACKET"
];
RestrictNamespaces = true;
RestrictSUIDSGID = true;
MemoryDenyWriteExecute = true;
SystemCallFilter = [
"~@mount"
"~@raw-io"
"~@privileged"
"~@keyring"
"~@reboot"
"~@module"
"~@swap"
"~@resources"
"~@obsolete"
"~@cpu-emulation"
"ptrace"
];
SystemCallArchitectures = "native";
LockPersonality = true;
CapabilityBoundingSet = "CAP_NET_ADMIN CAP_NET_RAW";
};
dbus.serviceConfig = {
NoNewPrivileges = true;
ProtectSystem = "stric";
ProtectControlGroups = true;
ProtectHome = true;
ProtectHostname = true;
ProtectKernelTunables = true;
ProtectKernelModules = true;
ProtectKernelLogs = true;
PrivateMounts = true;
PrivateDevices = true;
PrivateTmp = true;
RestrictSUIDSGID = true;
RestrictRealtime = true;
RestrictAddressFamilies = [
"AF_UNIX"
];
RestrictNamespaces = true;
SystemCallErrorNumber = "EPERM";
SystemCallArchitectures = "native";
SystemCallFilter = [
"~@obsolete"
"~@resources"
"~@debug"
"~@mount"
"~@reboot"
"~@swap"
"~@cpu-emulation"
];
LockPersonality = true;
IPAddressDeny = ["0.0.0.0/0" "::/0"];
MemoryDenyWriteExecute = true;
DevicePolicy = "closed";
UMask = 0077;
};
nscd.serviceConfig = {
ProtectClock = true;
ProtectHostname = true;
ProtectKernelTunables = true;
ProtectKernelModules = true;
ProtectKernelLogs = true;
ProtectControlGroups = true;
ProtectProc = "invisible";
RestrictNamespaces = true;
RestrictRealtime = true;
MemoryDenyWriteExecute = true;
LockPersonality = true;
SystemCallFilter = [
"~@mount"
"~@swap"
"~@clock"
"~@obsolete"
"~@cpu-emulation"
];
SystemCallArchitectures = "native";
CapabilityBoundingSet = [
"~CAP_CHOWN"
"~CAP_FSETID"
"~CAP_SETFCAP"
];
};
bluetooth.serviceConfig = {
ProtectKernelTunables = lib.mkDefault true;
ProtectKernelModules = lib.mkDefault true;
ProtectKernelLogs = lib.mkDefault true;
ProtectHostname = true;
ProtectControlGroups = true;
ProtectProc = "invisible";
SystemCallFilter = [
"~@obsolete"
"~@cpu-emulation"
"~@swap"
"~@reboot"
"~@mount"
];
SystemCallArchitectures = "native";
};
systemd-rfkill.serviceConfig = {
ProtectSystem = "strict";
ProtectHome = true;
ProtectKernelTunables = true;
ProtectKernelModules = true;
ProtectControlGroups = true;
ProtectClock = true;
ProtectProc = "invisible";
ProcSubset = "pid";
PrivateTmp = true;
MemoryDenyWriteExecute = true;
NoNewPrivileges = true;
LockPersonality = true;
RestrictRealtime = true;
SystemCallArchitectures = "native";
UMask = "0077";
IPAddressDeny = "any";
};
systemd-machined.serviceConfig = {
NoNewPrivileges = true;
ProtectSystem = "strict";
ProtectHome = true;
ProtectClock = true;
ProtectHostname = true;
ProtectKernelTunables = true;
ProtectKernelModules = true;
ProtectKernelLogs = true;
ProtectProc = "invisible";
PrivateTmp = true;
PrivateMounts = true;
PrivateUsers = true;
PrivateNetwork = true;
RestrictNamespaces = true;
RestrictRealtime = true;
RestrictSUIDSGID = true;
RestrictAddressFamilies = ["AF_UNIX"];
MemoryDenyWriteExecute = true;
SystemCallArchitectures = "native";
};
systemd-udevd.serviceConfig = {
NoNewPrivileges = true;
ProtectSystem = "strict";
ProtectHome = true;
ProtectKernelLogs = true;
ProtectControlGroups = true;
ProtectClock = true;
ProtectProc = "invisible";
RestrictNamespaces = true;
CapabilityBoundingSet = "~CAP_SYS_PTRACE ~CAP_SYS_PACCT";
};
nix-daemon.serviceConfig = {
NoNewPrivileges = true;
ProtectControlGroups = true;
ProtectKernelModules = true;
PrivateMounts = true;
PrivateTmp = true;
PrivateDevices = true;
RestrictSUIDSGID = true;
RestrictRealtime = true;
RestrictNamespaces = ["~cgroup"];
RestrictAddressFamilies = [
"AF_UNIX"
"AF_NETLINK"
"AF_INET6"
"AF_INET"
];
CapabilityBoundingSet = [
"~CAP_SYS_CHROOT"
"~CAP_BPF"
"~CAP_AUDIT_WRITE"
"~CAP_AUDIT_CONTROL"
"~CAP_AUDIT_READ"
"~CAP_SYS_PTRACE"
"~CAP_SYS_NICE"
"~CAP_SYS_RESOURCE"
"~CAP_SYS_RAWIO"
"~CAP_SYS_TIME"
"~CAP_SYS_PACCT"
"~CAP_LINUX_IMMUTABLE"
"~CAP_IPC_LOCK"
"~CAP_WAKE_ALARM"
"~CAP_SYS_TTY_CONFIG"
"~CAP_SYS_BOOT"
"~CAP_LEASE"
"~CAP_BLOCK_SUSPEND"
"~CAP_MAC_ADMIN"
"~CAP_MAC_OVERRIDE"
];
SystemCallErrorNumber = "EPERM";
SystemCallArchitectures = "native";
SystemCallFilter = [
"~@resources"
"~@module"
"~@obsolete"
"~@debug"
"~@reboot"
"~@swap"
"~@cpu-emulation"
"~@clock"
"~@raw-io"
];
LockPersonality = true;
MemoryDenyWriteExecute = false;
DevicePolicy = "closed";
UMask = 0077;
};
systemd-journald.serviceConfig = {
NoNewPrivileges = true;
ProtectProc = "invisible";
ProtectHostname = true;
PrivateMounts = true;
};
};
}
</code></pre>
</details>
<hr />
<h2>Lynis and other tools</h2>
<p>Lynis is a security auditing tool for systems based on UNIX like Linux, macOS,
BSD, and others.–<a href="https://github.com/CISOfy/lynis">lynis repo</a></p>
<p><code>chkrootkit</code> was removed as it is unmaintained and archived upstream.</p>
<p>Installation:</p>
<pre><code class="language-nix">environment.systemPackages = [
pkgs.lynis
pkgs.clamav
pkgs.aide
];
</code></pre>
<details>
<summary> ✔️ Click to Expand AIDE Example </summary>
<p>AIDE is an intrusion detection system (IDS) that will notify us whenever it
detects that a potential intrusion has occurred. When a system is compromised,
attackers typically will try to change file permissions and escalate to the root
user account and start to modify system files, AIDE can detect this.</p>
<p>To set up AIDE on your system follow these steps:</p>
<ol>
<li>Create the <code>aide.conf</code>:</li>
</ol>
<pre><code class="language-bash">sudo mkdir -p /var/lib/aide && cd /var/lib/aide/
sudo hx aide.conf
</code></pre>
<p>Add the following content to <code>/var/lib/aide/aide.conf</code>:</p>
<pre><code class="language-text"># aide.conf
# Example configuration file for AIDE.
@@define DBDIR /var/lib/aide
# The location of the database to be read.
database_in=file:@@{DBDIR}/aide.db.gz
# The location of the database to be written.
#database_out=sql:host:port:database:login_name:passwd:table
#database_out=file:aide.db.new
database_out=file:@@{DBDIR}/aide.db.new.gz
# Whether to gzip the output to database
gzip_dbout=yes
log_level=info
report_url=file:/var/log/aide/aide.log
report_url=stdout
#report_url=stderr
#NOT IMPLEMENTED report_url=mailto:root@foo.com
#NOT IMPLEMENTED report_url=syslog:LOG_AUTH
# These are the default rules.
#
#p: permissions
#i: inode:
#n: number of links
#u: user
#g: group
#s: size
#b: block count
#m: mtime
#a: atime
#c: ctime
#S: check for growing size
#md5: md5 checksum
#sha1: sha1 checksum
#rmd160: rmd160 checksum
#tiger: tiger checksum
#haval: haval checksum
#gost: gost checksum
#crc32: crc32 checksum
#R: p+i+n+u+g+s+m+c+md5
#L: p+i+n+u+g
#E: Empty group
#>: Growing logfile p+u+g+i+n+S
# You can create custom rules like this.
NORMAL = R+b+sha512
DIR = p+i+n+u+g
# Next decide what directories/files you want in the database.
/boot NORMAL
/bin NORMAL
/sbin NORMAL
/lib NORMAL
/opt NORMAL
/usr NORMAL
/root NORMAL
# Check only permissions, inode, user and group for /etc, but
# cover some important files closely.
/etc p+i+u+g
!/etc/mtab
/etc/exports NORMAL
/etc/fstab NORMAL
/etc/passwd NORMAL
/etc/group NORMAL
/etc/gshadow NORMAL
/etc/shadow NORMAL
/var/log p+n+u+g
# With AIDE's default verbosity level of 5, these would give lots of
# warnings upon tree traversal. It might change with future version.
#
#=/lost\+found DIR
#=/home DIR
</code></pre>
<p>Create the logfile:</p>
<pre><code class="language-bash">sudo mkdir -p /var/log/aide
sudo touch /var/log/aide/aide.log
</code></pre>
<ol start="2">
<li>Generate the initial database, this will store the checksums of all files
that it’s configured to monitor. Take note of the location of the new
database, mine was <code>/etc/aide.db.new</code></li>
</ol>
<pre><code class="language-bash">sudo aide --config /var/lib/aide/aide.conf --init
</code></pre>
<ol start="3">
<li>Move the new database and remove the <code>.new</code>:</li>
</ol>
<pre><code class="language-bash">sudo mv /var/lib/aide/aide.db.new.gz /var/lib/aide/aide.db.gz
</code></pre>
<pre><code class="language-bash">ls /var/lib/aide/
aide.conf aide.db.gz
</code></pre>
<ol start="4">
<li>Check with AIDE:</li>
</ol>
<pre><code class="language-bash">sudo aide --check --config /var/lib/aide/aide.conf
Start timestamp: 2025-09-05 09:50:07 -0400 (AIDE 0.19.2)
AIDE found NO differences between database and filesystem. Looks okay!!
</code></pre>
<ol start="5">
<li>Whenever you make changes to system files, or especially after running a
system update or installing new tools, you have to rescan all files to update
their checksums in the AIDE database:</li>
</ol>
<pre><code class="language-bash">sudo aide --update --config /var/lib/aide/aide.conf
</code></pre>
<p>Unfortunately, AIDE doesn’t automatically replace the old database so you have
to rename the new one again:</p>
<pre><code class="language-bash">sudo mv /var/lib/aide/aide.db.new.gz /var/lib/aide/aide.db.gz
</code></pre>
<p>And finally check again:</p>
<pre><code class="language-bash">sudo aide --check --config /var/lib/aide/aide.conf
</code></pre>
<ul>
<li><a href="https://linux.die.net/man/1/aide">aide(1) man page</a></li>
</ul>
</details>
<details>
<summary> ✔️ Click to Expand clamav.nix Example </summary>
<pre><code class="language-nix">{pkgs, ...}: {
environment.systemPackages = with pkgs; [
clamav
];
services.clamav = {
# Enable clamd daemon
daemon.enable = true;
updater.enable = true;
updater.frequency = 12; # Number of database checks per day
scanner = {
enable = true;
# 4:00 AM
interval = "*-*-* 04:00:00";
scanDirectories = [
"/home"
"/var/lib"
"/tmp"
"/etc"
"/var/tmp"
];
};
};
}
</code></pre>
</details>
<p>Lynis Usage:</p>
<pre><code class="language-bash">sudo lynis show commands
# Output:
Commands:
lynis audit
lynis configure
lynis generate
lynis show
lynis update
lynis upload-only
sudo lynis audit system
# Output:
Lynis security scan details:
Hardening index : 79 [############### ]
Tests performed : 234
Plugins enabled : 0
Components:
- Firewall [V]
- Malware scanner [V]
Scan mode:
Normal [V] Forensics [ ] Integration [ ] Pentest [ ]
Lynis modules:
- Compliance status [?]
- Security audit [V]
- Vulnerability scan [V]
</code></pre>
<ul>
<li>
<p>The “Lynis hardening index” is an overall impression on how well a system is
hardened. However, this is just an indicator on measures taken - not a
percentage of how safe a system might be. A score over 75 typically indicates
a system with more than average safety measures implemented.</p>
</li>
<li>
<p>Lynis will give you more recommendations for securing your system as well.</p>
</li>
</ul>
<p>If you use <code>clamscan</code>, create the following log file:</p>
<pre><code class="language-bash">sudo touch /var/log/clamscan.log
</code></pre>
<p>Example cron job for <code>clamav</code> & <code>aide</code>:</p>
<pre><code class="language-nix">{pkgs, ...}: {
services.cron = {
enable = true;
# messages.enable = true;
systemCronJobs = [
# Every day at 2:00 AM, run clamscan as root and append output to a log file
"0 2 * * * root ${pkgs.clamav}/bin/clamscan -r /home >> /var/log/clamscan.log"
"0 11 * * * ${pkgs.aide}/bin/aide --check --config /var/lib/aide/aide.conf"
];
};
}
</code></pre>
<p>ClamAV usage:</p>
<p>You can run <code>clamav</code> manually with:</p>
<pre><code class="language-bash"># Recursive Scan:
sudo clamscan -r ~/home
</code></pre>
<blockquote class="markdown-alert-note">
<p>You only need either the individual <code>pkgs.clamav</code> with the cron job <strong>OR</strong> the
<code>clamd-daemon</code> module. <code>clamdscan</code> is for software integration and
uses a different user that doesn’t have permission to scan your files. You can
use <code>clamdscan --fdpass /path/to/scan</code> to pass the necessary file permissions.
<code>clamdscan</code> runs in the background, you can watch it with <code>top</code>.</p>
</blockquote>
<h2>Securing SSH</h2>
<blockquote>
<p><strong>Security information</strong>: Changing SSH configuration settings can
significantly impact the security of your system(s). It is crucial to have a
solid understanding of what you are doing before making any adjustments. Avoid
blindly copying and pasting examples, including those from this Wiki page,
without conducting a thorough analysis. Failure to do so may compromise the
security of your system(s) and lead to potential vulnerabilities. Take the
time to comprehend the implications of your actions and ensure that any
changes made are done thoughtfully and with care. –NixOS Wiki</p>
</blockquote>
<blockquote class="markdown-alert-note">
<p>Choose one, either <code>ssh-agent</code> or <code>gpg-agent</code></p>
</blockquote>
<ol>
<li>Use normal SSH keys generated with <code>ssh-keygen</code>, this is recommended unless
you have a good reason for not using it.</li>
</ol>
<p><strong>OR</strong></p>
<ol start="2">
<li>Use a GPG key with <code>gpg-agent</code> (which acts as your SSH agent). Complex, and
harder to understand in my opinion.</li>
</ol>
<p>My setup caused conflicts when enabling <code>programs.ssh.startAgent</code> so I chose
<code>gpg-agent</code> personally.</p>
<p>There are situations where you are required to use one or the other like for
headless CI/CD environments, <code>ssh-keygen</code> is required.</p>
<ul>
<li><a href="https://saylesss88.github.io/nix/gpg-agent.html">Click Here for GnuPG and gpg-agent chapter</a></li>
</ul>
<p>Further reading:</p>
<details>
<summary> ✔️ Click to Expand Resourses on OpenSSH </summary>
<ul>
<li>
<p><a href="https://wiki.archlinux.org/title/OpenSSH">Arch Wiki OpenSSH</a></p>
</li>
<li>
<p><a href="https://wiki.gentoo.org/wiki/GnuPG">Gentoo GnuPG</a></p>
</li>
<li>
<p><a href="https://rgoulter.com/blog/posts/programming/2022-06-10-a-visual-explanation-of-gpg-subkeys.html">A Visual Explanation of GPG Subkeys</a></p>
</li>
<li>
<p><a href="https://blog.stribik.technology/2015/01/04/secure-secure-shell.html">Secure Secure Shell</a></p>
</li>
</ul>
</details>
<hr />
<h2>Key generation</h2>
<h3>ssh-keygen</h3>
<p>The <code>ed25519</code> algorithm is significantly faster and more secure when compared to
<code>RSA</code>. You can also specify the key derivation function (KDF) rounds to
strengthen protection even more.</p>
<p>For example, to generate a strong key for GitHub:</p>
<pre><code class="language-bash">ssh-keygen -t ed25519 -a 32 -f ~/.ssh/id_ed25519_github_$(date +%Y-%m-%d) -C "SSH Key for GitHub"
</code></pre>
<ul>
<li>
<p><code>-t</code> is for type</p>
</li>
<li>
<p><code>-a 32</code> sets the number of KDF rounds. The standard is usually good enough,
adding extra rounds can make it harder to brute-force.</p>
</li>
<li>
<p><code>-f</code> is for filename</p>
</li>
</ul>
<h3>OpenSSH Server</h3>
<p>First of all, if you don’t use SSH don’t enable it in the first place. If you do
use SSH, it’s important to understand what that opens you up to.</p>
<p>The following are some recommendations from Mozilla on OpenSSH:</p>
<ul>
<li><a href="https://infosec.mozilla.org/guidelines/openssh.html">Mozilla OpenSSH guidelines</a></li>
</ul>
<p>The following OpenSSH setup is based on the above guidelines with strong
algorithms, and best practices: (EDITED: 10-07-25 to follow best-practices on
post-quantum crypto)</p>
<pre><code class="language-nix">{config, ...}: {
config = {
services = {
fail2ban = {
enable = true;
maxretry = 5;
bantime = "1h";
# ignoreIP = [
# "172.16.0.0/12"
# "192.168.0.0/16"
# "2601:881:8100:8de0:31e6:ac52:b5be:462a"
# "matrix.org"
# "app.element.io" # don't ratelimit matrix users
# ];
bantime-increment = {
enable = true; # Enable increment of bantime after each violation
multipliers = "1 2 4 8 16 32 64 128 256";
maxtime = "168h"; # Do not ban for more than 1 week
overalljails = true; # Calculate the bantime based on all the violations
};
};
openssh = {
enable = true;
settings = {
PasswordAuthentication = false;
PermitEmptyPasswords = false;
PermitTunnel = false;
UseDns = false;
KbdInteractiveAuthentication = false;
X11Forwarding = config.services.xserver.enable;
MaxAuthTries = 3;
MaxSessions = 2;
ClientAliveInterval = 300;
ClientAliveCountMax = 0;
AllowUsers = ["your-user"];
TCPKeepAlive = false;
AllowTcpForwarding = false;
AllowAgentForwarding = false;
LogLevel = "VERBOSE";
PermitRootLogin = "no";
KexAlgorithms = [
# Post-Quantum: https://www.openssh.org/pq.html
"mlkem768x25519-sha256"
"sntrup761x25519-sha512"
"curve25519-sha256@libssh.org"
"ecdh-sha2-nistp521"
"ecdh-sha2-nistp384"
"ecdh-sha2-nistp256"
"diffie-hellman-group-exchange-sha256"
];
Ciphers = [
"aes256-gcm@openssh.com"
"aes128-gcm@openssh.com"
# stream cipher alternative to aes256, proven to be resilient
# Very fast on basically anything
"chacha20-poly1305@openssh.com"
# industry standard, fast if you have AES-NI hardware
"aes256-ctr"
"aes192-ctr"
"aes128-ctr"
];
Macs = [
# Combines the SHA-512 hash func with a secret key to create a MAC
"hmac-sha2-512-etm@openssh.com"
"hmac-sha2-256-etm@openssh.com"
"umac-128-etm@openssh.com"
"hmac-sha2-512"
"hmac-sha2-256"
"umac-128@openssh.com"
];
};
# These keys will be generated for you
hostKeys = [
{
path = "/etc/ssh/ssh_host_ed25519_key";
type = "ed25519";
}
];
};
};
};
}
</code></pre>
<p>TCP port 22 (ssh) is opened automatically if the SSH daemon is enabled
(<code>services.openssh.enable = true;</code>)</p>
<p>Much of the SSH hardening settings came from
<a href="https://ryanseipp.com/post/nixos-secure-ssh/">ryanseipp’s secure-ssh Guide</a>
with some additions of my own.</p>
<p>Fail2Ban is an intrusion prevention software framework. It’s designed to prevent
brute-force attacks by scanning log files for suspicious activity, such as
repeated failed login attempts.</p>
<p>As of 26.05, <a href="https://reaction.ppom.me/">reaction</a> was added to nixpkgs.
“A daemon that scans program outputs for repeated patterns, and takes action.”
It labels itself as a more modern alternative to fail2ban, implemented in Rust.
The initial rust commit was authored May 20, 2024 and it has not received an
external security audit yet. Worth checking out, probably not a primary
recommendation yet.</p>
<p>OpenSSH is the primary tool for secure remote access for NixOS. Enabling it
activates the OpenSSH server on the system, allowing incoming SSH connections.</p>
<p>The above configuration is a robust setup for securing an SSH server by:</p>
<ul>
<li>
<p>Preventing brute-force attacks with Fail2Ban</p>
</li>
<li>
<p>Eliminating password authentication in favor of more secure SSH keys</p>
</li>
<li>
<p>Restricting user access and preventing root login</p>
</li>
<li>
<p>Disabling potentially risky forwarding features (tunnel, TCP, agent)</p>
</li>
<li>
<p>Enforce the use of strong, modern cryptographic algorithms for all SSH
communications.</p>
</li>
<li>
<p>Enhanced logging for better auditing.</p>
</li>
</ul>
<p>Further Reading:</p>
<ul>
<li>
<p><a href="https://www.openssh.com/">OpenSSH</a></p>
</li>
<li>
<p><a href="https://www.digitalocean.com/community/tutorials/how-fail2ban-works-to-protect-services-on-a-linux-server">DigitalOcean how fail2ban works</a></p>
</li>
</ul>
<hr />
<h2>Encrypted Secrets</h2>
<p>Never store secrets in plain text in repositories. Use something like
<a href="https://github.com/Mic92/sops-nix">sops-nix</a>, which lets you keep encrypted
secrets under version control declaratively.</p>
<p>Another option is <a href="https://github.com/ryantm/agenix">agenix</a></p>
<ul>
<li><a href="https://wiki.nixos.org/wiki/Agenix">NixOS Wiki Agenix</a></li>
</ul>
<h3>Sops-nix Guide</h3>
<p>Protect your secrets, the following guide is on setting up Sops on NixOS:
<a href="https://saylesss88.github.io/installation/enc/sops-nix.html">Sops Encrypted Secrets</a></p>
<hr />
<h2>Auditd</h2>
<p>To enable the Linux Audit Daemon (<code>auditd</code>) and define a very basic rule set,
you can use the following NixOS configuration. This example demonstrates how to
log every program execution (<code>execve</code>) on a 64-bit architecture.</p>
<pre><code class="language-nix"># modules/security/auditd-minimal.nix (or directly in configuration.nix)
{
# start as early in the boot process as possible
boot.kernelParams = ["audit=1"];
security.auditd.enable = true;
security.audit.enable = true;
security.audit.rules = [
# Log all program executions on 64-bit architecture
"-a exit,always -F arch=b64 -S execve"
];
}
</code></pre>
<ul>
<li>
<p><code>audit=1</code> Enables auditing at the kernel level very early in the boot process.
Without this, some events could be missed.</p>
</li>
<li>
<p><code>security.auditd.enable = true;</code> Ensures the <code>auditd</code> userspace daemon is
started.</p>
</li>
<li>
<p>While often enabled together, <code>security.audit.enable</code> specifically refers to
enabling the NixOS module for audit rules generation.</p>
</li>
<li>
<p><code>execve</code> (program executions)</p>
</li>
<li>
<p>This is just a basic configuration, there is much more that can be tracked.</p>
</li>
</ul>
<hr />
<h2>USB Port Protection</h2>
<p>It’s important to protect your USB ports to prevent BadUSB attacks, data
exfiltration, unauthorized device access, malware injection, etc.</p>
<p>To get a list of your connected USB devices you can use <code>lsusb</code> from the
<code>usbutils</code> package.</p>
<pre><code class="language-bash">lsusb
</code></pre>
<p>To list the devices recognized by USBGuard, run:</p>
<pre><code class="language-bash">sudo usbguard list-devices
</code></pre>
<ul>
<li><a href="https://mynixos.com/options/services.usbguard">MyNixOS services.usbguard</a></li>
</ul>
<p>Change <code>your-user</code> to your username:</p>
<pre><code class="language-nix"># usbguard.nix
{
config,
pkgs,
lib,
...
}: let
inherit (lib) mkIf;
cfg = config.custom.security.usbguard;
in {
options.custom.security.usbguard = {
enable = lib.mkEnableOption "usbguard";
};
config = mkIf cfg.enable {
services.usbguard = {
enable = true;
IPCAllowedUsers = ["root" "your-user"];
# presentDevicePolicy refers to how to treat USB devices that are already connected when the daemon starts
presentDevicePolicy = "allow";
rules = ''
# allow `only` devices with mass storage interfaces (USB Mass Storage)
allow with-interface equals { 08:*:* }
# allow mice and keyboards
# allow with-interface equals { 03:*:* }
# Reject devices with suspicious combination of interfaces
reject with-interface all-of { 08:*:* 03:00:* }
reject with-interface all-of { 08:*:* 03:01:* }
reject with-interface all-of { 08:*:* e0:*:* }
reject with-interface all-of { 08:*:* 02:*:* }
'';
};
environment.systemPackages = [pkgs.usbguard];
};
}
</code></pre>
<p>The above settings can be found in
<a href="https://docs.redhat.com/en/documentation/red_hat_enterprise_linux/7/html/security_guide/sec-using-usbguard">RedHat UsbGuard</a></p>
<p>The only <code>allow</code> rule is for devices with <strong>only</strong> mass storage interfaces
(<code>08:*:*</code>) i.e., USB Mass storage devices, devices like keyboards and mice
(which use interface class <code>03:*:*</code>) implicitly <strong>not allowed</strong>.</p>
<p>The <code>reject</code> rules reject devices with a suspicious combination of interfaces. A
USB drive that implements a keyboard or a network interface is very suspicious,
these <code>reject</code> rules prevent that.</p>
<p>The <code>presentDevicePolicy = "allow";</code> allows any device that is present at daemon
start up even if they’re not explicitly allowed. However, newly plugged in
devices must match an <code>allow</code> rule or get denied implicitly.</p>
<p>The <code>presentDevicePolicy</code> should be one of: # one of <code>"apply-policy"</code>(default,
evaluate the rule set for every present device), <code>"block"</code>, <code>"reject"</code>, <code>"keep"</code>
(keep whatever state the device is currently in), or <code>"allow"</code>, which is used in
the example.</p>
<p>There is also the
<a href="https://github.com/Cropi/usbguard-notifier">usbguard-notifier</a></p>
<p>And enable it with the following in your <code>configuration.nix</code> or equivalent:</p>
<pre><code class="language-nix"># configuration.nix
imports = [
./usbguard.nix
];
custom.security.usbguard.enable = true;
</code></pre>
<blockquote>
<p>❗ If you are ever unsure about a setting that you want to harden and think
that it could possibly break your system you can always use a specialisation
reversing the action and choose it’s generation at boot up. For example, to
force-reverse the above settings you could:</p>
<pre><code class="language-nix"># configuration.nix
specialisation.no-usbguard.configuration = {
services.usbguard.enable = lib.mkForce false;
};
</code></pre>
<ul>
<li>This is a situation where I recommend this, it’s easy to lock yourself out
of your keyboard, mouse, etc. when trying to configure this.</li>
</ul>
</blockquote>
<p>Further Reading:</p>
<ul>
<li>
<p><a href="https://www.ninjaone.com/it-hub/endpoint-security/what-is-badusb/">NinjaOne BadUSB</a></p>
</li>
<li>
<p><a href="https://usbguard.github.io/">USBGuard</a></p>
</li>
<li>
<p><a href="https://www.cyberciti.biz/security/how-to-protect-linux-against-rogue-usb-devices-using-usbguard/">NixCraft USBGuard</a></p>
</li>
</ul>
<hr />
<h2>Doas over sudo (Warning Doas is unmaintained)</h2>
<details>
<summary> ✔️ Click to Expand Unmaintained Doas example </summary>
<blockquote class="markdown-alert-note">
<p>I have moved to <code>run0</code> for authentication which is included by default with
systemd. It’s actually a symlink to the existing <code>systemd-run</code> tool. It
behaves like a secure <code>sudo</code> alternative: it spawns a transient service under
PID 1 for privilege escalation, without relying on SUID (set user ID)
binaries.</p>
</blockquote>
<blockquote class="markdown-alert-warning">
<p>the Nixpkgs version of <code>doas</code>,<a href="https://github.com/Duncaen/OpenDoas">OpenDoas</a>
is unmaintained and hasn’t been updated in 3 to 4 years. If you don’t like
<code>run0</code>, consider using <code>sudo-rs</code>. I’m leaving this here for now, may remove it
in the future to not promote using unmaintained software, you’ve been warned.</p>
</blockquote>
<ul>
<li>
<p><a href="https://mastodon.social/@pid_eins/112353324518585654">Why run0</a></p>
</li>
<li>
<p>SUID = “Set User ID”: When a binary has the SUID bit set, it runs with the
privileges of the file’s owner (often root). There is a long history of
vulnerabilities with SUID binaries.</p>
</li>
</ul>
<p>For a more minimalist version of <code>sudo</code> with a smaller codebase and attack
surface, consider <code>doas</code>. Replace <code>userName</code> with your username:</p>
<pre><code class="language-nix"># doas.nix
{
lib,
config,
pkgs, # Add pkgs if you need to access user information
...
}: let
cfg = config.custom.security.doas;
in {
options.custom.security.doas = {
enable = lib.mkEnableOption "doas";
};
config = lib.mkIf cfg.enable {
# Disable sudo
security.sudo.enable = false;
# Enable and configure `doas`.
security.doas = {
enable = true;
extraRules = [
{
# Grant doas access specifically to your user
users = ["userName"]; # <--- Only give access to your user
# persist = true; # Convenient but less secure
# noPass = true; # Convenient but even less secure
keepEnv = true; # Often necessary
# Optional: You can also specify which commands they can run, e.g.:
# cmd = "ALL"; # Allows running all commands (default if not specified)
# cmd = "/run/current-system/sw/bin/nixos-rebuild"; # Only allow specific command
}
];
};
# Add an alias to the shell for backward-compat and convenience.
environment.shellAliases = {
sudo = "doas";
};
};
}
</code></pre>
<p>You would then import this into your <code>configuration.nix</code> and enable/disable it
with the following:</p>
<pre><code class="language-nix"># configuration.nix
imports = [
./doas.nix
];
custom.security.doas.enable = true;
</code></pre>
<blockquote>
<p>[!NOTE]: Many people opt for the less secure <code>groups = ["wheel"];</code> in the
above configuration instead of <code>users = ["userName"];</code> to give wider access,
the choice is yours.</p>
</blockquote>
</details>
<hr />
<h2>Firejail</h2>
<blockquote>
<p>❗️ Critics such as madaidan say that Firejail worsens security by acting as a
privilege escalation hole. Firejail requires the executable to be setuid,
meaning it runs with root privileges.This is risky because any vulnerability
in Firejail can lead to privilege escalation. This combined with many
convenience features and complicated command line flags leads to a large
attack surface.</p>
</blockquote>
<ul>
<li>
<p>I haven’t personally tried
<a href="https://github.com/Naxdy/nix-bwrapper">nix-bwrapper</a> myself yet, but it’s
another sandboxing option that looks interesting. Bubblewrap is known for
having a more minimal design and smaller attack surface.</p>
<ul>
<li>Also see: <a href="https://saylesss88.github.io/nix/hardening_NixOS.html#flatpak">Flatpak section</a> for another option for sandboxing.</li>
</ul>
</li>
<li>
<p><a href="https://sr.ht/~fgaz/nix-bubblewrap/">nix-bubblewrap</a> is another option.</p>
</li>
<li>
<p><a href="https://wiki.nixos.org/wiki/Firejail">NixOS Wiki Firejail</a></p>
</li>
<li>
<p><a href="https://wiki.archlinux.org/title/Firejail">Arch Wiki Firejail</a></p>
</li>
</ul>
<blockquote class="markdown-alert-warning">
<p>Running untrusted code is never safe, sandboxing cannot change this.
–Arch Wiki</p>
</blockquote>
<pre><code class="language-nix"># firejail.nix
{
pkgs,
lib,
...
}: {
programs.firejail = {
enable = true;
wrappedBinaries = {
# Sandbox a web browser
librewolf = {
executable = "${lib.getBin pkgs.librewolf}/bin/librewolf";
profile = "${pkgs.firejail}/etc/firejail/librewolf.profile";
};
# Sandbox a file manager
thunar = {
executable = "${lib.getBin pkgs.xfce.thunar}/bin/thunar";
profile = "${pkgs.firejail}/etc/firejail/thunar.profile";
};
# Sandbox a document viewer
zathura = {
executable = "${lib.getBin pkgs.zathura}/bin/zathura";
profile = "${pkgs.firejail}/etc/firejail/zathura.profile";
};
};
};
}
</code></pre>
<p><code>wrappedBinaries</code> is a list of applications you want to run inside a sandbox.
Only the apps in the <code>wrappedBinaries</code> attribute set will be automatically
firejailed when launched the usual way.</p>
<p>Other apps may be started manually using <code>firejail <app></code>, or added to
<code>wrappedBinaries</code> if you want automatic sandboxing, just make sure the profile
exists.</p>
<p>To inspect which profiles are available, after rebuilding go to <code>/nix/store/</code>, I
used Yazi to search for <code>/firejail</code> and followed it to <code>firejail/etc</code>, where the
profiles are.</p>
<p>There are many flags and options available with firejail, I suggest checking out
<code>man firejail</code>.</p>
<p>There are comments explaining what’s going on in:
<a href="https://github.com/NixOS/nixpkgs/blob/master/pkgs/by-name/fi/firejail/package.nix">firejail/package.nix</a></p>
<p>Firejail is a SUID program that reduces the risk of security breaches by
restricting the running environment of untrusted applications using
<a href="https://lwn.net/Articles/531114/">Linux namespaces</a> and
<a href="https://l3net.wordpress.com/2015/04/13/firejail-seccomp-guide/">seccomp-bpf</a>–<a href="https://firejail.wordpress.com/">Firejail Security Sandbox</a></p>
<p>It provides sandboxing and access restriction per application, much like what
AppArmor/SELinux does at a kernel level. However, it’s not as secure or
comprehensive as kernel-enforced MAC systems (AppArmor/SELinux), since it’s a
userspace tool and can potentially be bypassed by privilege escalation exploits.</p>
<hr />
<h2>Flatpak</h2>
<blockquote class="markdown-alert-note">
<p>You cannot effectively use Firejail with Flatpak apps because of how
their sandboxing technologies operate. Flatpak also won’t work with the
hardened kernel because they require unprivileged user namespaces which the
hardened kernel completely disables.</p>
</blockquote>
<ul>
<li>
<p><a href="https://docs.flatpak.org/en/latest/sandbox-permissions.html#permissions-guidelines">Flatpak permissions & What they Do</a>
Reference this while setting permissions with Flatseal, many apps come with
more permissions than they need to function effectively breaking the sandbox.</p>
</li>
<li>
<p><a href="https://docs.flatpak.org/en/latest/sandbox-permissions.html#portals">Portals</a>
provide mediated, user-controlled access to host resources outside the
sandbox, so apps don’t need broad blanket permissions.</p>
</li>
</ul>
<p>Apps that don’t have a flatpak equivalent can be further hardened with
bubblewrap independently but bubblewrap is not needed on Flatpak apps.</p>
<p>Because of this limited native MAC (Mandatory Access Control) support on NixOS,
using Flatpak is often a good approach to get sandboxing and isolation for many
GUI apps.</p>
<ul>
<li>
<p>Flatpak bundles runtimes and sandbox mechanisms that provide app isolation
independently of the host system’s AppArmor or SELinux infrastructure. This
can improve security and containment for GUI applications running on NixOS
despite the system lacking full native MAC coverage.</p>
</li>
<li>
<p>Flatpak apps benefit from sandboxing through bubblewrap, which isolate apps
and restrict access to user/home and system resources.</p>
</li>
</ul>
<p>Add Flatpak with the FlatHub repository for all users:</p>
<pre><code class="language-nix">services.flatpak.enable = true;
systemd.services.flatpak-repo = {
wantedBy = [ "multi-user.target" ];
path = [ pkgs.flatpak ];
script = ''
flatpak remote-add --if-not-exists flathub https://flathub.org/repo/flathub.flatpakrepo
# Only apps that are verified
# flatpak remote-add --if-not-exists --subset=verified flathub-verified https://flathub.org/repo/flathub.flatpakrepo
'';
};
xdg = {
portal = {
enable = true;
extraPortals = [ pkgs.xdg-desktop-portal-gtk ];
config.common.default = [ "gtk" ];
};
};
# Disables screencopy
systemd.user.services."xdg-desktop-portal-wlr" = {
enable = false;
};
</code></pre>
<details>
<summary> ✔️ declarative-flatpak </summary>
<ol>
<li>Add the flake input to your <code>flake.nix</code>:</li>
</ol>
<pre><code class="language-nix">inputs = {
flatpaks.url = "github:in-a-dil-emma/declarative-flatpak/latest";
};
</code></pre>
<ol start="2">
<li>The following is a NixOS module that installs Firefox & Bitwarden:</li>
</ol>
<pre><code class="language-nix"># flatpak.nix
{
pkgs,
inputs,
...
}: {
imports = [
inputs.flatpaks.nixosModules.default
];
services.flatpak = {
enable = true;
remotes = {
"flathub" = "https://dl.flathub.org/repo/flathub.flatpakrepo";
# "flathub-beta" = "https://dl.flathub.org/beta-repo/flathub-beta.flatpakrepo";
};
packages = [
"flathub:app/org.mozilla.firefox//stable"
"flathub:app/com.bitwarden.desktop//stable"
# "flathub-beta:app/org.kde.kdenlive/x86_64/stable"
# ":${./foobar.flatpak}"
"flathub:/root/testflatpak.flatpakref"
];
overrides = {
# note: "global" is a flatpak thing
# if you ever ran "flatpak override" without specifying a ref you will know
"global".Context = {
filesystems = [
"home"
];
sockets = [
"!wayland"
"!fallback-x11"
];
};
"org.mozilla.Firefox" = {
Environment = {
"MOZ_ENABLE_WAYLAND" = 1;
};
Context.sockets = [
"!wayland"
"!fallback-x11"
# "x11"
];
};
};
};
xdg.portal = {
enable = true;
extraPortals = [
pkgs.xdg-desktop-portal-gtk
];
config = {
common.default = ["gtk"];
};
};
}
</code></pre>
<blockquote class="markdown-alert-note">
<p>I got the above configuration to build successfully, one of the hardening
steps I took isn’t allowing either app to launch. I’ll update once I find
which setting it is exactly. (01-13-26)</p>
</blockquote>
</details>
<ul>
<li>
<p><a href="https://docs.flathub.org/docs/for-users/verification">Flathub Verified Apps</a></p>
</li>
<li>
<p><a href="https://secureblue.dev/articles/flatpak">Flatpak the good the bad the ugly</a></p>
</li>
</ul>
<p>Then you can either find apps through <a href="https://flathub.org/en">FlatHub</a> or on
the cmdline with <code>flatpak search <app></code>. Flatpak is best used for GUI apps, some
CLI apps can be installed through it but not all.</p>
<ul>
<li>
<p>There is also <a href="https://github.com/gmodena/nix-flatpak">nix-flatpak</a>, which
enables you to manage your flatpaks declaratively.</p>
</li>
<li>
<p><a href="https://flathub.org/en/apps/com.github.tchx84.Flatseal">Flatseal</a> is GUI
utility that enables you to review and modify permissions from your Flatpak
apps. Many apps by default come with smart-card support, X11 & Wayland
support, and more, disabling unnecessary permissions is recommended.</p>
</li>
<li>
<p><a href="https://flathub.org/en/apps/io.github.flattool.Warehouse">Warehouse</a> provides
a simple UI to control complex Flatpak options, no cmdline required.</p>
</li>
</ul>
<p>I have heard that it is not recommended to use Flatpak browsers because in order
for flatpak to work it has to disable some of the built-in browser sandboxing
which can reduce security. I haven’t found any examples of Flatpak browsers
being exploited but it’s something to keep in mind.</p>
<hr />
<h2>SeLinux/AppArmor MAC (Mandatory Access Control)</h2>
<p><strong>AppArmor</strong> is available on NixOS, but is still in a somewhat experimental and
evolving state. There are only a few profiles that have been adapted to NixOS,
see here
<a href="https://discourse.nixos.org/t/apparmor-default-profiles/16780">Discourse on default-profiles</a>
Which guides you here
<a href="https://github.com/NixOS/nixpkgs/blob/2acaef7a85356329f750819a0e7c3bb4a98c13fe/nixos/modules/security/apparmor/includes.nix">apparmor/includes.nix</a>
where you can see some of the abstractions and tunables to follow progress.</p>
<p><strong>SELinux</strong>: Experimental, not fully integrated, recent progress for
advanced/curious users; expect rough edges and manual intervention if you want
to try it. Most find SELinux more complex to configure and maintain than
AppArmor.</p>
<p>This isn’t meant to be a comprehensive guide, more to get people thinking about
security on NixOS.</p>
<p>See the following guide on hardening networking:</p>
<ul>
<li><a href="https://saylesss88.github.io/nix/hardening_networking.html">Hardening Networking</a></li>
</ul>
<hr />
<h2>Resources</h2>
<h3>Advanced Hardening with <code>nix-mineral</code> (Community Project)</h3>
<details>
<summary> ✔️ Click to Expand section on `nix-mineral` </summary>
<p>For users seeking a more comprehensive and opinionated approach to system
hardening beyond the built-in <code>hardened</code> profile, the community project
<a href="https://github.com/cynicsketch/nix-mineral"><code>nix-mineral</code></a> offers a declarative
NixOS module.</p>
<p><code>nix-mineral</code> aims to apply a wide array of security configurations, focusing on
tweaking kernel parameters, system settings, and file permissions to reduce the
attack surface.</p>
<ul>
<li><strong>Community Project Status:</strong> <code>nix-mineral</code> is a community-maintained project
and is not officially part of the Nixpkgs repository or NixOS documentation.
Its development status is explicitly stated as “Alpha software,” meaning it
may introduce stability issues or unexpected behavior.</li>
</ul>
<p>For detailed information on <code>nix-mineral</code>’s capabilities and current status,
refer directly to its
<a href="https://github.com/cynicsketch/nix-mineral">GitHub repository</a>.</p>
</details>
<details>
<summary> ✔️ Click to Expand Resources </summary>
<ul>
<li>
<p><a href="https://hedgedoc.grimmauld.de/s/hWcvJEniW#">AppArmor and apparmor.d on NixOS</a></p>
</li>
<li>
<p><a href="https://tristanxr.com/post/selinux-on-nixos/">SELinux on NixOS</a></p>
</li>
<li>
<p><a href="https://xeiaso.net/blog/paranoid-nixos-2021-07-18/">Paranoid NixOS</a></p>
</li>
<li>
<p><a href="https://wiki.nixos.org/wiki/Security">NixOS Wiki Security</a></p>
</li>
<li>
<p><a href="https://nixos.org/manual/nixos/unstable/index.html#sec-luks-file-systems">Luks Encrypted File Systems</a></p>
</li>
<li>
<p><a href="https://discourse.nixos.org/t/a-modern-and-secure-desktop-setup/41154">Discourse A Modern and Secure Desktop</a></p>
</li>
<li>
<p><a href="https://notashelf.dev/posts/insecurities-remedies-i">notashelf NixOS Security 1 Systemd</a></p>
</li>
<li>
<p><a href="https://ryanseipp.com/post/hardening-nixos/">ryanseipp hardening-nixos</a></p>
</li>
<li>
<p><a href="https://madaidans-insecurities.github.io/guides/linux-hardening.html">madaidans Linux Hardening Guide</a></p>
</li>
<li>
<p><a href="https://cybersecuritynews.com/hardening-linux-servers">Hardening-Linux-Servers</a></p>
</li>
<li>
<p><a href="https://linux-audit.com/linux-server-hardening-most-important-steps-to-secure-systems/">linux-audit Linux Server hardening best practices</a></p>
</li>
<li>
<p><a href="https://linux-audit.com/linux-security-guide-extended-version/">linux-audit Linux security guide extended</a></p>
</li>
<li>
<p><a href="https://wiki.archlinux.org/title/Security">Arch Wiki Security</a></p>
</li>
<li>
<p><a href="https://wiki.gentoo.org/wiki/Security_Handbook/Concepts">Gentoo Security_Handbook Concepts</a></p>
</li>
<li>
<p><a href="https://secureblue.dev/faq">secureblue FAQ</a></p>
</li>
<li>
<p><a href="https://www.kicksecure.com/wiki/Documentation">Excellent Kicksecure Docs</a></p>
</li>
<li>
<p><a href="https://github.com/decalage2/awesome-security-hardening">Awesome-Security-Hardening List</a></p>
</li>
<li>
<p><a href="https://factorable.net/faq.html">factorable.net (study of RSA and DSA crypto keys) FAQ</a></p>
</li>
<li>
<p><a href="https://blog.cr.yp.to/20140205-entropy.html">The cr.yp.to blog Entropy</a></p>
</li>
<li>
<p><a href="https://delroth.net/posts/nixos-security-wishlist/">NixOS Security wishlist</a></p>
</li>
<li>
<p><a href="https://beej.us/guide/bgipc/html/">Beejus IPC guide</a></p>
</li>
<li>
<p><a href="https://www.geeksforgeeks.org/operating-systems/inter-process-communication-ipc/">GeeksforGeeks IPC</a></p>
</li>
</ul>
<p>neal.codes vulnerability scan script:</p>
<pre><code class="language-bash">nix-shell -p grype sbomnix --run '
sbomnix /run/current-system --csv /dev/null --spdx /dev/null --cdx sbom.cdx.json;
grype sbom.cdx.json
'
</code></pre>
<ul>
<li>
<p><a href="https://github.com/nealfennimore/nixos-stig-anduril">neal.codes nixos-stig-anduril</a></p>
</li>
<li>
<p><a href="https://www.suse.com/c/linux-hardeningthe-complete-guide-to-securing-your-systems/">Suse Linux Hardening Guide</a></p>
</li>
</ul>
<p><strong>Government Resources 1st 6 come from gentoo’s Security_Handbook)</strong></p>
<ul>
<li>
<p><a href="https://www.cyber.gov.au/sites/default/files/2023-03/Information%20Security%20Manual%20-%20%28March%202023%29.pdf">The Austrailian Cyber Security Centre’s Informational Security Manual (ISM)</a></p>
</li>
<li>
<p><a href="https://www.protectivesecurity.gov.au/policies">The Australian Government’s Protective Security Policy Framework (PSPF)</a></p>
</li>
<li>
<p><a href="https://www.cyber.gov.au/protect-yourself">The Australian Cyber Security Centre’s Protect Yourself page</a></p>
</li>
<li>
<p><a href="https://www.gov.uk/government/publications/security-policy-framework/hmg-security-policy-framework">The UK Government’s Security Policy Framework (SPF)</a></p>
</li>
<li>
<p><a href="https://www.gov.uk/government/publications/information-security-policy-framework">The UK Government’s Information Security Policy Framework (ISF)</a></p>
</li>
<li>
<p><a href="https://www.nist.gov/cybersecurity">The US National Institute of Standards and Technology’s Cybersecurity page</a></p>
</li>
<li>
<p><a href="https://stigviewer.com/stigs/anduril_nixos">NixOS STIG</a></p>
</li>
<li>
<p>STIGs are configuration standards developed by the Defense Information Systems
Agency (DISA) to secure systems and software for the U.S. Department of
Defense (DoD). They are considered a highly authoritative source for system
hardening.There are recommendations for hardening all kinds of software in the
<a href="https://stigviewer.com/stigs">Stig Viewer</a></p>
</li>
<li>
<p><a href="https://www.cisecurity.org/cis-benchmarks">CIS Benchmarks</a></p>
</li>
<li>
<p><a href="https://github.com/nsacyber">NSA Cybersecurity Directorate</a></p>
</li>
<li>
<p><a href="https://github.com/alam00000/bentopdf">bentopdf</a>: looks interesting, haven’t
checked it out yet though.</p>
</li>
<li>
<p><a href="https://media.defense.gov/2023/Sep/08/2003296489/-1/-1/0/WHITFIELD%20DIFFIE_CRYPTOLOGIC%20ICONOCLAST.PDF">Non-Secret Encryption a “SECRET” no longer</a></p>
</li>
<li>
<p><a href="https://www.nsa.gov/Cybersecurity/Post-Quantum-Cybersecurity-Resources/">Post-Quantum Cybersecurity Resources</a></p>
</li>
</ul>
</details>
Top-Level Attributeshttps://saylesss88.github.io/Understanding_Top-Level_Attributes_5.html2026-05-31T00:00:00+00:00saylesss87@proton.me (saylesss88)<h1>Chapter 5</h1>
<details>
<summary> ✔️ Click to Expand Table of Contents</summary>
<!-- toc -->
</details>
<!--  -->
<img src="https://saylesss88.github.io/images/gruv9.png" width="800" height="600">
<h2>Understanding Top-Level Attributes in NixOS Modules</h2>
<p>This explanation is based on insights from Infinisil, a prominent figure in the
Nix community, to help clarify the concept of top-level attributes within NixOS
modules.</p>
<blockquote>
<p>[!NOTE] “top-level attributes” here refers to the attributes at the top level
of a module file (imports, options, config), not to be confused with
<code>system.build.toplevel</code>, which is the final system derivation everything
builds toward.</p>
</blockquote>
<p>To understand why top-level module attributes matter, it helps to first
understand what they’re ultimately building toward: <code>system.build.toplevel</code>, the
final derivation that represents your entire NixOS system.</p>
<hr />
<h3>The Core of a NixOS System: <code>system.build.toplevel</code></h3>
<details>
<summary> ✔️ `system.build.toplevel` Explained (Click to Expand) </summary>
<p>In a NixOS system, everything is built from a single “system derivation.” The
command <code>nix-build '<nixpkgs/nixos>' -A system</code> initiates this build process.</p>
<p>The <code>-A system</code> part tells Nix to focus on the <code>system</code> attribute defined in the
<code>'<nixpkgs/nixos>'</code> file (which is essentially <code>./default.nix</code> within the
Nixpkgs repository).</p>
<p>This <code>system</code> attribute is specifically the NixOS option <code>system.build.toplevel</code>
. Think of <code>system.build.toplevel</code> as the <strong>very top of the configuration
hierarchy</strong> for your entire NixOS system. Almost every setting you configure
eventually influences this top-level derivation, often through a series of
intermediate steps.</p>
</details>
<h3>How Options Relate: A Chain of Influence</h3>
<p>Options in NixOS are not isolated; they often build upon each other.</p>
<details>
<summary>Example: Nginx Option Chain (Click to Expand)</summary>
<p>Here’s an example of how a high-level option can lead down to a low-level system
configuration:</p>
<ul>
<li>You enable Nginx with <code>services.nginx.enable = true;</code>.</li>
<li>This setting influences the lower-level option <code>systemd.services.nginx</code>.</li>
<li>Which, in turn, affects the even lower-level option
<code>systemd.units."nginx.service"</code>.</li>
<li>Ultimately, this leads to the creation of a systemd unit file within
<code>environment.etc."systemd/system"</code>.</li>
<li>Finally, this unit file ends up as <code>result/etc/systemd/system/nginx.service</code>
within the final <code>system.build.toplevel</code> derivation.</li>
</ul>
</details>
<h3>The NixOS Module System: Evaluating Options</h3>
<p>So, how do these options get processed and turned into the final system
configuration? That’s the job of the <strong>NixOS module system</strong>, located in the
<code>./lib</code> directory of Nixpkgs (specifically in <code>modules.nix</code>, <code>options.nix</code>, and
<code>types.nix</code>).</p>
<p>Interestingly, the module system isn’t exclusive to NixOS; you can use it to
manage option sets in your own Nix projects.</p>
<p>Here’s a simplified example of using the module system outside of NixOS:</p>
<pre><code class="language-nix">let
systemModule = { lib, config, ... }: {
options.toplevel = lib.mkOption {
type = lib.types.str;
};
options.enableFoo = lib.mkOption {
type = lib.types.bool;
default = false;
};
config.toplevel = ''
Is foo enabled? ${lib.boolToString config.enableFoo}
'';
};
userModule = {
enableFoo = true;
};
in (import <nixpkgs/lib>).evalModules {
modules = [ systemModule userModule ];
}
</code></pre>
<p><strong>You can evaluate the <code>config.toplevel</code> option from this example using:</strong></p>
<pre><code class="language-bash">nix-instantiate --eval file.nix -A config.toplevel
</code></pre>
<hr />
<h3>How the Module System Works: A Simplified Overview</h3>
<p>The module system processes a set of “modules” through these general steps:</p>
<ol>
<li>
<p><strong>Importing Modules</strong>: It recursively finds and includes all modules
specified in <code>imports = [ ... ];</code> statements.</p>
</li>
<li>
<p><strong>Declaring Options</strong>: It collects all option declarations defined using
<code>options = { ... };</code> from all the modules and merges them. If the same option
is declared in multiple modules, the module system handles this (details
omitted for simplicity).</p>
</li>
<li>
<p><strong>Defining Option Values</strong>: For each declared option, it gathers all the
value assignments (defined using <code>config = { ... };</code> or directly at the top
level if no <code>options</code> or <code>config</code> are present) from all modules and merges
them according to the option’s defined type.</p>
</li>
</ol>
<blockquote>
<p>[!NOTE] Option evaluation is lazy, meaning an option’s value is only computed
when it’s actually needed. It can also depend on the values of other options.</p>
</blockquote>
<hr />
<p><strong>Top-Level Attributes in a Module: <code>imports</code>, <code>options</code>, and <code>config</code></strong></p>
<p>Within a NixOS module (the files that define parts of your system configuration)
, the attributes defined directly at the top level of the module’s function have
specific meanings:</p>
<ul>
<li>
<p><code>imports</code>: This attribute is a list of other module files to include. Their
options and configurations will also be part of the evaluation.</p>
</li>
<li>
<p><code>options</code>: This attribute is where you declare new configuration options. You
define their type, default value, description, etc., using functions like
<code>lib.mkOption</code> or <code>lib.mkEnableOption</code>.</p>
</li>
<li>
<p><code>config</code>: This attribute is where you assign values to the options that have
been declared (either in the current module or in imported modules).</p>
</li>
</ul>
<p><strong>The Rule: Move Non-Option Attributes Under <code>config</code></strong></p>
<p>If you define either an <code>options</code> or a <code>config</code> attribute at the top level of
your module, any other attributes that are not option declarations must be moved
inside the config attribute.</p>
<details>
<summary> ✔️ Examples of Correct and Incorrect Usage (Click to Expand)</summary>
<p>Let’s look at an example of what not to do:</p>
<pre><code class="language-nix">{ pkgs, lib, config, ... }:
{
imports = [];
# Defining an option at the top level
options.mine.desktop.enable = lib.mkEnableOption "desktop settings";
# This will cause an error because 'environment' and 'appstream'
# are not 'options' and 'config' is also present at the top level.
environment.systemPackages =
lib.mkIf config.appstream.enable [ pkgs.git ];
appstream.enable = true;
}
</code></pre>
<p>This will result in the error:
<code>error: Module has an unsupported attribute 'appstream' This is caused by introducing a top-level 'config' or 'options' attribute. Add configuration attributes immediately on the top level instead, or move all of them into the explicit 'config' attribute</code>.</p>
<p><strong>The Correct Way</strong>: Using the <code>config</code> Attribute</p>
<p>To fix the previous example, you need to move the value assignments for
<code>environment.systemPackages</code> and <code>appstream.enable</code> inside the config attribute:</p>
<pre><code class="language-nix">{ pkgs, lib, config, ... }:
{
imports = [];
# Defining an option at the top level
options.mine.desktop.enable = lib.mkEnableOption "desktop settings";
config = {
environment.systemPackages =
lib.mkIf config.appstream.enable [ pkgs.git ];
appstream.enable = true;
};
}
</code></pre>
<p>Now, Nix knows that you are declaring an option (<code>options.mine.desktop.enable</code>)
and then setting values for other options (<code>environment.systemPackages</code>,
<code>appstream.enable</code>) within the <code>config</code> block.</p>
<p><strong>Implicit <code>config</code>: When <code>options</code> is Absent</strong></p>
<p>If your module does not define either <code>options</code> or <code>config</code> at the top level,
then any attributes you define directly at the top level are implicitly treated
as being part of the config.</p>
<p>For example, this is valid:</p>
<pre><code class="language-nix">{ pkgs, lib, config, ... }:
{
environment.systemPackages =
lib.mkIf config.appstream.enable [ pkgs.git ];
appstream.enable = true;
}
</code></pre>
<p>Nix will implicitly understand that <code>environment.systemPackages</code> and
<code>appstream.enable</code> are configuration settings.</p>
<p><strong>Removing an Option: What Happens to <code>config</code></strong></p>
<p>Even if you remove the <code>options</code> declaration from a module that has a <code>config</code>
section, the <code>config = { environment.systemPackages = ... };</code> part will still
function correctly, assuming the option it’s referencing (<code>appstream.enable</code> in
this case) is defined elsewhere (e.g., in an imported module).</p>
</details>
<h4>Conclusion</h4>
<p>Understanding the nuances of top-level attributes within NixOS modules,
particularly <code>imports</code>, <code>options</code>, and <code>config</code>, is fundamental to structuring
and managing your system’s configuration effectively. As we’ve seen, the module
system provides a powerful and declarative way to define and evaluate system
settings, ultimately contributing to the construction of the
<code>system.build.toplevel</code> derivation that represents your entire NixOS
environment.</p>
<p>The concepts of option declaration and value assignment, along with the crucial
rule of organizing non-option attributes under the <code>config</code> attribute when
<code>options</code> is present, provide a clear framework for building modular and
maintainable configurations.</p>
<p>Now that we have a solid grasp of how NixOS modules are structured and how they
contribute to the final system derivation, it’s a natural next step to explore
the tangible results of these configurations: the software and system components
themselves. These are built and managed by a core concept in Nix, known as
<strong>derivations</strong>.</p>
<p>In the next chapter,
<a href="https://saylesss88.github.io/Package_Definitions_Explained_6.html">Package Definitions Explained</a>
we will shift our focus from the abstract configuration to the concrete software
packages. We will learn how Nix uses <em>package definitions</em> to create
<em>derivations</em>, which are the actual build plans that produce the software we use
on our NixOS systems. This will bridge the gap between configuring your system
and understanding how the software within it is managed.</p>
Practical Jujutsuhttps://saylesss88.github.io/vcs/practical_jj.html2026-03-16T00:00:00+00:00saylesss87@proton.me (saylesss88)<h1>Practical Jujutsu</h1>
<p>This post assumes basic understanding of Git and GitHub.</p>
<p>I’ve spent enough time hovering between the familiarity of Git and the potential
of Jujutsu. It’s time to move past a ‘primitive’ workflow. By truly mastering
one of these tools, I want to turn version control from a chore into a way to
precisely navigate my development stages and build a history that future
contributors can actually follow.</p>
<p>JJ simplifies keeping a linear history and makes it easy to break down big
changes into smaller atomic changes.</p>
<details>
<summary> Atomic commits & Linear History explained </summary>
<blockquote>
<ul>
<li><a href="https://github.com/angular/angular/blob/main/contributing-docs/commit-message-guidelines.md">Angular Commit Message Format</a></li>
</ul>
<pre><code class="language-text"><header>
<BLANK LINE>
<body>
<BLANK LINE>
<footer>
</code></pre>
<ul>
<li>The <code>header</code> is mandatory.</li>
<li>The <code>body</code> is mandatory for all commits except “doc” type commits.</li>
<li>The <code>footer</code> is optional</li>
</ul>
</blockquote>
<ol>
<li>Atomic Commits</li>
</ol>
<ul>
<li>
<p>An atomic commit is a single unit of work that cannot be broken down further
without losing its meaning.</p>
</li>
<li>
<p>One commit should do one thing.</p>
</li>
<li>
<p>If you had to “undo” that commit later, would it break unrelated features? If
“Yes,” it’s not atomic.</p>
</li>
</ul>
<p>If you find a bug, you can pinpoint the exact 10 lines of code that caused it.
In <code>jj</code>, the <code>split -i</code> and <code>commit -i</code> commands are the ultimate tools for
“atomizing” a messy afternoon of coding.</p>
<ol start="2">
<li>Linear History</li>
</ol>
<p>A linear history is a straight line of commits without “merge bubbles” (those
criss-crossing lines you see in Git logs when people use git merge).</p>
<ul>
<li>
<p>Every commit has exactly one parent and one child.</p>
</li>
<li>
<p>It reads like a story. You can follow the evolution of the project from bottom
to top without getting lost in a maze of branches.</p>
</li>
<li>
<p><code>jj</code> defaults to a rebase-heavy workflow. Instead of “merging” your work and
creating a mess, you are constantly “sliding” your changes on top of the
latest work, keeping that line perfectly straight.</p>
</li>
</ul>
<p>You can even insert a commit anywhere in your history with <code>jj new -A</code>
(<code>--insert-after</code>), and <code>jj new -B</code> (<code>--insert-before</code>) and JJ will rebase every
child in the history.</p>
<p>Use <code>jj show -r <revision></code> to see a diff of the changes made at that Change ID,
and trivially craft it with <code>jj edit -r <revision></code>.</p>
</details>
<p>Let’s learn about <code>jj</code> by using it to version control a system Nix Flake.</p>
<h2>Quick Overview</h2>
<ul>
<li><a href="https://docs.jj-vcs.dev/latest/glossary/">Jujutsu docs Glossary</a></li>
</ul>
<details>
<summary>Key Terms</summary>
<blockquote>
<p>“One of the first things to wrap your head around when first coming to Jujutsu
is its approach to its revisions and revsets, i.e. “sets of revision”.
Revisions are the fundamental elements of changes in Jujutsu, not “commits” as
in Git. Revsets are then expressions in a functional language for selecting a
set of revisions.”
–<a href="https://v5.chriskrycho.com/essays/jj-init/">Chris Krycho jj init</a></p>
</blockquote>
<table><thead><tr><th>Term</th><th>What it is</th><th>Git Equivalent</th><th>JJ Behavior</th></tr></thead><tbody>
<tr><td><strong>Working Copy (<code>@</code>)</strong></td><td>Your current editable commit. <strong>Everything you do affects <code>@</code> by default.</strong> Auto‑amends as you save files.</td><td>Untracked files + staging area + HEAD</td><td>Always a full commit. No staging. <code>jj st</code> shows changes relative to <code>@-</code>.</td></tr>
<tr><td><strong>Change ID</strong></td><td>Stable ID for a logical unit of work (the <code>k</code>, <code>y</code> labels in logs). Survives edits/rebases.</td><td>N/A</td><td>Prefix like <code>k</code> or <code>y</code>. Use <code>jj edit k1234</code> to jump to any change.</td></tr>
<tr><td><strong>Commit ID</strong></td><td>Unique ID for a specific snapshot (the long hex like <code>41deb985</code>). Changes when you amend.</td><td>Commit hash</td><td>Full ID for exact snapshots. Rarely used directly.</td></tr>
<tr><td><strong>Bookmarks</strong></td><td>Named pointers to commits (like <code>main</code>, <code>feature-x</code>). <strong>Don’t auto‑move</strong> like Git branches.</td><td>Branches</td><td><code>jj bookmark set main -r @</code> moves it. <code>*</code> shows if local/remote match.</td></tr>
<tr><td><strong>Parent (<code>@-</code>)</strong></td><td>The commit <code>@</code> is built on top of.</td><td>Previous commit</td><td>Use <code>-r @-</code> to target it. Key for squash workflow.</td></tr>
<tr><td><strong>Immutable (<code>◆</code>)</strong></td><td>Commits that shouldn’t be rewritten (pushed changes, trunk).</td><td>Protected branches</td><td><code>jj log</code> shows <code>◆</code>. Still editable with force flags.</td></tr>
<tr><td><strong>Revset</strong></td><td>Query language for commits (<code>main..@</code>, <code>mine()</code>).</td><td><code>git log --grep</code></td><td>Super powerful. <code>jj log -r "main..@"</code> = changes since main.</td></tr>
<tr><td><strong>Revision</strong></td><td>“revision” is synonymous with “commit”</td><td>Commit</td><td>A synonym for Commit</td></tr>
</tbody></table>
<p><strong>Pro tip</strong>: <code>@</code> is <strong>always</strong> your current position. <code>jj new</code>, <code>jj desc</code>,
<code>jj squash</code> all default to it. <strong>Bookmarks like <code>main</code> are just labels</strong> - move
them explicitly with <code>jj bookmark set</code>.</p>
</details>
<p>See
<a href="https://zerowidth.com/2025/jj-tips-and-tricks/">zerowidths jj-tips-and-tricks</a>,
for a more intuitive <code>--interactive</code> workflow (The <code>git add -p</code> Hunk-wise
style).</p>
<h2>Getting Started</h2>
<p>It’s helpful to grasp a few Git concepts to fully understand some of the
benefits and strengths of jujutsu. I highly suggest reading
<a href="https://www.w3tutorials.net/blog/how-to-compare-the-working-copy-staging-copy-and-committed-copy-of-a-file-using-git/">W3Tutorials.net How to Compare Working Copy, Staging Copy, and Committed Copy of a File in Git</a>,
it covers most of the concepts that make understanding <code>jj</code> easier.</p>
<ul>
<li>
<p>The <strong>Working Copy</strong> is the version of the file you’re actively editing in
your filesystem. It’s the “live” version you see in your text editor or IDE.
–W3Tutorials.net</p>
</li>
<li>
<p><a href="https://docs.jj-vcs.dev/latest/working-copy/">Jujutsu’s Working copy commit</a></p>
</li>
</ul>
<blockquote>
<p>“Unlike most other VCSs, Jujutsu will automatically create commits from the
working-copy contents when they have changed. Most <code>jj</code> commands you run will
commit the working-copy changes if they have changed. The resulting revision
will replace the previous working-copy revision.”</p>
</blockquote>
<p>In Git, <code>HEAD</code> is a pointer (usually to a branch like <code>main</code>), and that branch
points to the current commit.</p>
<p>In jj, the working copy <code>@</code> is itself the current commit. Bookmarks like <code>main</code>
simply point at other commits in the graph, so your working copy is often a
child of a bookmark, but it can also be off on its own.</p>
<ul>
<li><code>❯</code> will indicate a command that I ran, the rest is output.</li>
</ul>
<p>Let’s start by cloning a project of mine to see how <code>jj</code> works:</p>
<pre><code class="language-bash">❯ jj git clone git@github.com:sayls8/nix-snake.git
Fetching into new repo in "/home/jr/projects/nix-snake"
remote: Enumerating objects: 88, done.
remote: Total 88 (delta 38), reused 78 (delta 30), pack-reused 0 (from 0)
bookmark: main@origin [new] tracked
Setting the revset alias `trunk()` to `main@origin`
Working copy (@) now at: s f143a1da (empty) (no description set)
Parent commit (@-) : l 3b759dfe main | feat: fix clippy lints & optimize
Added 12 files, modified 0 files, removed 0 files
Hint: Running `git clean -xdf` will remove `.jj/`!
</code></pre>
<ul>
<li>We can see above that the <code>main@origin</code> bookmark is automatically tracked with
a revset alias of <code>trunk()</code>.</li>
</ul>
<blockquote>
<p>NOTE: My jj commands show the shortest possible IDs because of the setting:</p>
<pre><code class="language-nix">programs.jujutsu.settings = {
template-aliases = {
"format_short_change_id(id)" = "id.shortest()";
};
};
</code></pre>
</blockquote>
<p>Running <code>jj st</code> & <code>jj log</code>:</p>
<pre><code class="language-bash">❯ jj st
The working copy has no changes.
Working copy (@) : s f143a1da (empty) (no description set)
Parent commit (@-): l 3b759dfe main | feat: fix clippy lints & optimize
❯ jj log
@ s sayls8@proton.me 2026-03-21 16:31:59 f143a1da
│ (empty) (no description set)
◆ l sayls8@proton.me 2026-01-29 16:50:51 main 3b759dfe
│ feat: fix clippy lints & optimize
~
</code></pre>
<p>To show all ancestors of the most recent commit, <code>s</code> in this case:</p>
<pre><code class="language-bash">jj log -r ::s
</code></pre>
<ul>
<li>
<p>The <code>@</code> indicates the working-copy commit. The first ID on a line (e.g. “s”
above) is the change ID. The second ID is the commit ID (“f143a1da”). You can
give either ID to commands that take revisions as arguments.</p>
</li>
<li>
<p><code>jj log</code> defaults to the <code>ui.default-revset</code> setting, or
<code>@ | ancestors(immutable_heads().., 2) | heads(immutable_heads())</code> if it’s not
set. (A revset)</p>
</li>
<li>
<p><code>jj</code> commands default to operating on the working copy, <code>@</code>. <code>jj undo</code>, undoes
your previous <code>jj</code> command. List all previous <code>jj</code> commands with <code>jj op log</code>.</p>
</li>
</ul>
<p>In JJ, you are never “on” a branch. You are always “on” a specific change,
building a stack of changes. Until you push those changes, you can continue to
jump around and edit them with <code>jj edit</code>. Once you push those changes to a
remote, they then become immutable.</p>
<p>You don’t have to merge <code>Change A</code> into <code>Change B</code>, because <code>Change B</code> is
already built on top of <code>Change A</code>. It inherits every line of code from the
floors below it.</p>
<p>In Git, the working copy is the files on disk; changes only become part of the
next commit when you stage them in the index with git add. In Jujutsu, the
working copy is the current commit: your edits live in a “working copy commit”
(<code>@</code>), which <code>jj</code> automatically updates from the files on disk, and there is no
separate staging area.</p>
<p>When you’re ready to push to GitHub, make sure you know where your changes are.
In the example above, the working copy is empty, so to push I’d run
<code>jj bookmark set main -r @-</code> to point the <code>main</code> bookmark at the latest changes,
then <code>jj git push</code>.</p>
<ul>
<li><code>jj git push</code>: By default, pushes tracking bookmarks pointing to
<code>remote_bookmarks(remote=<remote>)..@</code>. Use <code>--bookmark</code> to push specific
bookmarks. Use <code>--all</code> to push all bookmarks. Use <code>--change</code> to generate
bookmark names based on the change IDs of specific commits.</li>
</ul>
<p>If the working copy isn’t empty and those changes are what I want to push, I’d
instead run <code>jj bookmark set main -r @</code>, followed by <code>jj git push</code>. Once you
understand this distinction, the rest of the workflow feels fairly intuitive.</p>
<ul>
<li>
<p><code>jj</code> is smart enough to know that: If <code>main</code> is on your Working Copy (<code>@</code>) and
you have uncommitted changes, it pushes those.</p>
</li>
<li>
<p>If your Working Copy (<code>@</code>) is empty , and <code>main</code> is on the Parent (<code>@-</code>), it
pushes the parent.</p>
</li>
</ul>
<p>In the above example, if I remove the <code>config</code> argument to the
<code>configuration.nix</code> and remove a few comments, then run <code>jj diff</code>:</p>
<p><img src="https://saylesss88.github.io/../images/jj-diff.png" alt="jj diff" /></p>
<ul>
<li>
<p>The <code>squash</code> workflow would benefit especially from <code>jj diff</code>. It’s like
saying “take the diff I’m looking at right now and bake it directly into the
parent”.</p>
</li>
<li>
<p>A <strong>change</strong> is a commit that can evolve while keeping a stable identifier,
the <strong>change ID</strong>.</p>
</li>
</ul>
<hr />
<h2>Version Control Best Practices</h2>
<p>It’s helpful to use
<a href="https://www.conventionalcommits.org/en/v1.0.0/">Conventional Commits</a>, a set of
rules for creating an explicit commit history.</p>
<p>Commit message standard syntax:</p>
<pre><code class="language-text"><type>[optional scope]: <description>
[optional body]
[optional footer(s)]
</code></pre>
<p>Example:</p>
<pre><code class="language-bash">feat: implement dendretic pattern for boot module
</code></pre>
<p><strong>Useful Utils</strong></p>
<ul>
<li>
<p>There is a new project that helps you create conventional commits for jj,
<a href="https://crates.io/crates/jj-commit">jj-commit</a>.</p>
</li>
<li>
<p><a href="https://crates.io/crates/commitlint-rs">commitlint-rs</a> can be used as a Git
hook on push to enforce conventional commits.</p>
</li>
<li>
<p><a href="https://github.com/semantic-release/semantic-release">semantic-release</a>
automates the whole package release workflow.</p>
</li>
</ul>
<p><strong>Using Tags</strong></p>
<p>Tags are just named pointers to commits. Create one pointing to your latest
change:</p>
<pre><code class="language-bash">jj st
The working copy has no changes.
Working copy (@) : ysrlmzlt 7d093162 (empty) (no description set)
Parent commit (@-): wmuwoply ea03805e chore: add 'release version' to justfile
</code></pre>
<pre><code class="language-bash">jj tag set v0.1.5 --revision @-
jj git push --tags
cargo publish
</code></pre>
<p>When you publish next, create a new tag <code>v0.1.6</code>.</p>
<p>The simple order:</p>
<ol>
<li>
<p>Write code, commit, <code>jj git push</code> as normal (many times)</p>
</li>
<li>
<p>When ready to release:</p>
</li>
</ol>
<ul>
<li>bump version in <code>Cargo.toml</code> to <code>0.1.6</code></li>
<li>update CHANGELOG</li>
<li>commit</li>
<li><code>jj git push</code></li>
<li><code>jj tag set v0.1.6 --revision @-</code></li>
<li><code>jj git push --tag v0.1.6</code> # This only pushes the tag, not the commit again</li>
<li><code>cargo publish</code></li>
</ul>
<p>That’s it. Tags only appear at step 2, once per release.</p>
<p><strong>One tag per release, on the commit you publish. Everything in between is just
normal commits with no tags involved.</strong></p>
<p>You can also use <code>-dev</code> tags between releases. Right after the release, set your
version in your <code>Cargo.toml</code> to <code>0.1.7-dev</code> and that will make clear which
commit’s haven’t been published yet.</p>
<h3>The edit workflow</h3>
<p>Initialize and colocate the repository:</p>
<pre><code class="language-bash">❯ mkdir learn-jj
~/projects
❯ cd learn-jj
~/projects/learn-jj
❯ nix flake new . -t github:nix-community/home-manager#nixos
wrote: "/home/jr/projects/learn-jj/flake.nix"
~/projects/learn-jj ✗
❯ jj git init --colocate
Initialized repo in "."
Hint: Running `git clean -xdf` will remove `.jj/`!
learn-jj main [?]
❯ jj git remote add origin git@github.com:sayls8/learn-jj.git
learn-j main [?]
❯ jj bookmark create main -r @
Done importing changes from the underlying Git repo.
Created 1 bookmarks pointing to l bd3847c0 main | (no description set)
learn-jj refs/jj/root [!]
❯ jj bookmark track main --remote=origin
Started tracking 1 remote bookmarks.
</code></pre>
<p>Let’s give it our current change a description:</p>
<pre><code class="language-bash">❯ jj desc -m "chore: Initialize system flake"
Working copy (@) now at: l 743b170d main* | chore: Initialize system flake
Parent commit (@-) : z 00000000 (empty) (no description set)
</code></pre>
<p>In this example, the Parent commit is the <em>root commit</em>. The root commit is a
virtual commit at the root of every repository. It has a commit ID consisting of
all ’0’s (<code>00000000...</code>) and a change ID consisting of all ’z’s (<code>zzzzzzzz...</code>).
It can be referred to in revsets by the function <code>root()</code>.</p>
<ul>
<li>
<p>With this workflow, your working copy is typically at your current change.</p>
</li>
<li>
<p>JJ treats the working copy as a commit rather than having an index like Git.</p>
</li>
</ul>
<p>If we wanted to push right now we could with <code>jj git push</code> (or equivalently
<code>jj git push --bookmark main</code>), but let’s first learn a bit more about how <code>jj</code>
works.</p>
<p>Let’s say we’re done with the current change and we’re ready to make it
immutable and start a new change:</p>
<pre><code class="language-bash">❯ jj new -m "chore: change username & hostname in flake.nix"
Working copy (@) now at: p 6524f35a (empty) chore: change username & hostname in flake.nix
Parent commit (@-) : l 743b170d main* | chore: Initialize system flake
</code></pre>
<ul>
<li>
<p>As stated above, <code>jj</code> commands default to the working copy. So <code>jj new</code> is the
same as <code>jj new -r @</code>. By running <code>jj new</code> repeatedly, we build a linear stack
where each change is a child of the previous one. When we’re ready to ‘check
in’ our work, we don’t merge; we simply move the <code>main</code> bookmark to our
current position and push.</p>
<ul>
<li>If we want to start a separate task without including our current work, we
can run <code>jj new main</code> (or any other Change ID). This creates a sibling
change. Our previous stack isn’t “lost”; it stays exactly where it was in
the graph, waiting to be described, rebased, or merged later.</li>
</ul>
</li>
<li>
<p>Now our Working copy <code>@</code> is at an <code>(empty)</code> change with the description
“chore: change username & hostname in flake.nix”.</p>
</li>
<li>
<p>As you can see, running <code>jj new</code>, does not move the <code>main</code> bookmark. This is
the hardest part to grasp when coming from Git IMO. Let’s make some more
changes to hammer this home.</p>
</li>
</ul>
<p>I’ve added my hostname and username to the <code>flake.nix</code> template, let’s make them
a part of the permanent record.</p>
<p>I create a minimal <code>configuration.nix</code>, check my status and notice that I forgot
to run <code>jj new -m "feat: create minimal configuration.nix"</code>. Let’s see how to
recover from this and keep our commits atomic.</p>
<pre><code class="language-bash">jj split -i
</code></pre>
<ul>
<li>This opens up a diff editor, I’ll only press <code>y</code> for the changes related to
username and hostname. After you pass on what you don’t want in this change
and press <code>y</code> on what you do want, your $EDITOR will open with your previous
commit message. Save it and another commit message will open up in $EDITOR,
this is whatever you didn’t press <code>y</code> on i.e., the <code>configuration.nix</code>
changes, just give the second set of changes a different description and
you’re all set.</li>
</ul>
<p>Another cool thing about <code>jj</code> is that you can add a description whenever you
want. Running <code>jj desc -m "add configuration.nix"</code> doesn’t finalize your commit
like it does with Git. So, you can put the description first, last, or in the
middle of a current change with no issue. The equivalent command to
<code>git commit -m "message"</code> is <code>jj commit -m "message" && jj new</code></p>
<p>Let’s see what the <code>jj split -i</code> command left us with:</p>
<pre><code class="language-bash">❯ jj
Working copy changes:
A configuration.nix
Working copy (@) : m b3cc09db feat: create minimal configuration.nix
Parent commit (@-): p cddde3b4 chore: change username & hostname in flake.nix
</code></pre>
<ul>
<li>To see a diff of the changes in the parent commit:</li>
</ul>
<pre><code class="language-bash">jj show -r @-
</code></pre>
<p>And our <code>log</code>:</p>
<pre><code class="language-bash">❯ jj log
@ m sayles8@proton.me 2026-03-15 13:43:31 b3cc09db
│ feat: create minimal configuration.nix
○ p sayls8@proton.me 2026-03-15 13:41:19 cddde3b4
│ chore: change username & hostname in flake.nix
○ l sayls8@proton.me 2026-03-15 13:37:29 main* 743b170d
│ chore: Initialize system flake
◆ z root() 00000000
</code></pre>
<p>As you can see, <code>main*</code> is all the way back at change <code>l</code>. Let’s move our <code>main</code>
bookmark to our current Working copy.</p>
<pre><code class="language-bash">❯ jj bookmark set main -r @
Moved 1 bookmarks to m b3cc09db main* | feat: create minimal configuration.nix
</code></pre>
<pre><code class="language-bash">❯ jj log
@ m sayls8@proton.me 2026-03-15 13:43:31 main* b3cc09db
│ feat: create minimal configuration.nix
○ p sayls8@proton.me 2026-03-15 13:41:19 cddde3b4
│ chore: change username & hostname in flake.nix
○ l sayls8@proton.me 2026-03-15 13:37:29 743b170d
│ chore: Initialize system flake
◆ z root() 00000000
</code></pre>
<pre><code class="language-bash">❯ jj git push
Changes to push to origin:
Add bookmark main to b3cc09dba32c
git: Enumerating objects: 9, done.
git: Counting objects: 100% (9/9), done.
git: Delta compression using up to 16 threads
git: Compressing objects: 100% (7/7), done.
git: Writing objects: 100% (9/9), 1.99 KiB | 1019.00 KiB/s, done.
git: Total 9 (delta 1), reused 0 (delta 0), pack-reused 0 (from 0)
remote: Resolving deltas: 100% (1/1), done.
Warning: The working-copy commit in workspace 'default' became immutable, so a new commit has been created on top of it.
Working copy (@) now at: u 551e83ad (empty) (no description set)
Parent commit (@-) : m b3cc09db main | feat: create minimal configuration.nix
</code></pre>
<pre><code class="language-bash">❯ jj log
@ u sayls8@proton.me 2026-03-15 13:47:27 551e83ad
│ (empty) (no description set)
◆ m sayls8@proton.me 2026-03-15 13:43:31 main b3cc09db
│ feat: create minimal configuration.nix
</code></pre>
<ul>
<li>
<p>Notice <code>jj log</code> now shows <code>main</code> instead of <code>main*</code>, indicating that <code>main</code>
and <code>origin@main</code> are in sync!</p>
</li>
<li>
<p>Also notice the <code>◆</code> next to the <code>m</code> change, this indicates that this change is
now immutable. This is mentioned in the output of <code>jj git push</code> above.</p>
<ul>
<li><code>jj</code> does this so you don’t accidentally rewrite history that others might
have pulled. You can still force-edit if you need to but it’s <code>jj</code>s way of
saying, “This is now part of the public record”.</li>
</ul>
</li>
</ul>
<p>I now need to add a minimal <code>home.nix</code>, then run <code>nix flake check</code> to see if I
forgot anything.</p>
<p>If something isn’t being picked up by <code>jj</code> try running <code>jj st</code> and check again.
Running any <code>jj</code> command updates the Working copy.</p>
<p>Since when running <code>jj git push</code> <code>jj</code> automatically creates a new commit on top
of the last one, the next step is to describe this change.</p>
<p>I ran <code>nix flake check</code> and needed to add a <code>hardware-configuration.nix</code>, and
<code>networking.hostId</code> required by ZFS, if I wanted to be a stickler about atomic
commits I’d run <code>jj split -i</code> again but it’s fine by me to make 2 small changes
to get the flake to pass the <code>check</code>.</p>
<h2>The squash Workflow</h2>
<p>The last section left me with:</p>
<pre><code class="language-bash">❯ jj st
Working copy changes:
M configuration.nix
A flake.lock
A hardware-configuration.nix
A home.nix
Working copy (@) : u e57a7a39 feat: add minimal home.nix
Parent commit (@-): m b3cc09db main | feat: create minimal configuration.nix
</code></pre>
<p>Let’s push what we have:</p>
<pre><code class="language-bash">❯ jj bookmark set main -r @
Moved 1 bookmarks to u e57a7a39 main* | feat: add minimal home.nix
learn-jj HEAD [!]
❯ jj git push
Changes to push to origin:
Move forward bookmark main from b3cc09dba32c to e57a7a39957a
git: Enumerating objects: 8, done.
git: Counting objects: 100% (8/8), done.
git: Delta compression using up to 16 threads
git: Compressing objects: 100% (6/6), done.
git: Writing objects: 100% (6/6), 1.98 KiB | 1.98 MiB/s, done.
git: Total 6 (delta 1), reused 0 (delta 0), pack-reused 0 (from 0)
remote: Resolving deltas: 100% (1/1), completed with 1 local object.
Warning: The working-copy commit in workspace 'default' became immutable, so a new commit has been created on top of it.
Working copy (@) now at: y 53e8a3d9 (empty) (no description set)
Parent commit (@-) : u e57a7a39 main | feat: add minimal home.nix
</code></pre>
<pre><code class="language-bash">❯ jj st
The working copy has no changes.
Working copy (@) : y 53e8a3d9 (empty) (no description set)
Parent commit (@-): u e57a7a39 main | feat: add minimal home.nix
</code></pre>
<p>Great, just what we need, an empty change! Let’s describe what we plan on doing:</p>
<pre><code class="language-bash">jj desc -m "refactor: restructure flake to multi-host layout in hosts/magic"
</code></pre>
<p>Now we create a new change on top of this one:</p>
<pre><code class="language-bash">❯ jj new
Working copy (@) now at: w 43195106 (empty) (no description set)
Parent commit (@-) : y c66bc991 (empty) refactor: restructure flake to multi-host layout in hosts/magic
</code></pre>
<p>Now we make our changes to the descriptionless Working copy and <code>squash</code> our
changes into the parent commit.</p>
<pre><code class="language-bash">mkdir -p hosts/magic
</code></pre>
<pre><code class="language-bash">jj st
The working copy has no changes.
Working copy (@) : w 43195106 (empty) (no description set)
Parent commit (@-): y c66bc991 (empty) refactor: restructure flake to multi-host layout in hosts/magic
</code></pre>
<p>Ahh, <code>jj</code> doesn’t pick up empty directories…</p>
<pre><code class="language-bash">mv configuration.nix home.nix hosts/magic
</code></pre>
<pre><code class="language-bash"> jj st
Working copy changes:
R {configuration.nix => hosts/magic/configuration.nix}
R {home.nix => hosts/magic/home.nix}
Working copy (@) : w 8c49fc64 (no description set)
Parent commit (@-): y c66bc991 (empty) refactor: restructure flake to multi-host layout in hosts/magic
</code></pre>
<ul>
<li><code>R</code> = Renamed. <code>jj</code> is pretty clever here. Since I moved the files but their
contents stayed the same, <code>jj</code> detected that I didn’t just “delete” one file
and “add” a new one, I actually moved an object from point A to point B.
<ul>
<li>The fact that <code>jj</code> shows <code>R {home.nix => hosts/magic/home.nix}</code> means it is
keeping the history of that file intact. If you were to look at the log for
<code>hosts/magic/home.nix</code> later, <code>jj</code> would know to look back into the history
of the old <code>home.nix</code> as well.</li>
</ul>
</li>
</ul>
<p>I’m happy with the changes so far:</p>
<pre><code class="language-bash">❯ jj squash
Working copy (@) now at: k 41deb985 (empty) (no description set)
Parent commit (@-) : y 2bee669a refactor: restructure flake to multi-host layout in hosts/magic
</code></pre>
<ul>
<li>Notice how change <code>w</code> disappeared and <code>y</code> is no longer empty? That’s because
we squashed the changes from our Working copy into the parent commit!</li>
</ul>
<h3>Pushing from the squash workflow</h3>
<p>Let’s look at what we have:</p>
<pre><code class="language-bash">❯ jj st
The working copy has no changes.
Working copy (@) : k 41deb985 (empty) (no description set)
Parent commit (@-): y 2bee669a refactor: restructure flake to multi-host layout in hosts/magic
</code></pre>
<p>Since the working copy is at an <code>(empty)</code> change, it wouldn’t make sense to push
it. We have to move our bookmark to the parent commit, and then push!</p>
<pre><code class="language-bash">❯ jj bookmark set main -r @-
Moved 1 bookmarks to y 2bee669a main* | refactor: restructure flake to multi-host layout in hosts/magic
</code></pre>
<pre><code class="language-bash">❯ jj git push
Changes to push to origin:
Move forward bookmark main from e57a7a39957a to 2bee669ac276
git: Enumerating objects: 5, done.
git: Counting objects: 100% (5/5), done.
git: Delta compression using up to 16 threads
git: Compressing objects: 100% (3/3), done.
git: Writing objects: 100% (4/4), 452 bytes | 452.00 KiB/s, done.
git: Total 4 (delta 1), reused 0 (delta 0), pack-reused 0 (from 0)
remote: Resolving deltas: 100% (1/1), completed with 1 local object.
</code></pre>
<p>This was the biggest Aha moment I had. It makes perfect sense that you wouldn’t
want to push a change that changes nothing. Since we squashed the contents of
the Working copy into <code>@-</code>, that is where we need <code>main</code> to point.</p>
<p>I have an alias:</p>
<pre><code class="language-nix"> la = [
"log"
"-r"
"all()"
];
</code></pre>
<p>You can also list all commits with:</p>
<pre><code class="language-bash">jj log -r ::
# or
jj log r 'all()'
</code></pre>
<p>Let’s check out our full history so far:</p>
<pre><code class="language-bash">❯ jj la
@ k sayls8@proton.me 2026-03-15 14:30:43 41deb985
│ (empty) (no description set)
◆ y sayls8@proton.me 2026-03-15 14:30:43 main 2bee669a
│ refactor: restructure flake to multi-host layout in hosts/magic
◆ u sayls8@proton.me 2026-03-15 14:07:28 e57a7a39
│ feat: add minimal home.nix
◆ m sayls8@proton.me 2026-03-15 13:43:31 b3cc09db
│ feat: create minimal configuration.nix
◆ p sayls8@proton.me 2026-03-15 13:41:19 cddde3b4
│ chore: change username & hostname in flake.nix
◆ l sayls8@proton.me 2026-03-15 13:37:29 743b170d
│ chore: Initialize system flake
◆ z root() 00000000
</code></pre>
<ul>
<li>
<p>Textbook linear history. Every single commit has exactly one parent, forming a
single, unbroken chain from the <code>root()</code> up to the current working copy.</p>
</li>
<li>
<p>The diamonds <code>◆</code> show that everything from <code>y</code> down is now part of the
permanent record (pushed to the remote).</p>
</li>
</ul>
<p>In Git, achieving this usually requires <code>git add</code>, <code>git commit --amend</code>, or an
interactive rebase. In jj, you just worked in the working copy and pushed, the
tool handled the “shaping” of the history for you.</p>
<hr />
<h2>Bookmarks and Branches</h2>
<p>Bookmarks are named pointers to revisions (just like branches are in Git). You
can move them without affecting the target revision’s identity. – Jujutsu docs</p>
<p>Branches are just multiple “changes” with the same parent.</p>
<p>List all available bookmarks</p>
<pre><code class="language-bash">❯ jj bookmark list --all
feat1 (deleted)
@origin: xo 9067e7b7 mangowc flake-parts module
main: s b250e6ed testing the push-on-new non working bs
@git: s b250e6ed testing the push-on-new non working bs
@origin (behind by 2 commits): o 65e79e4b jj bookmarks push-on-new
Hint: Bookmarks marked as deleted can be *deleted permanently* on the remote by running `jj git push --deleted`. Use `jj bookmark forget` if you don't want that.
</code></pre>
<p>Every time you run <code>jj git push</code>, <code>jj</code> automatically runs <code>jj new main</code> for you
because the working copy becomes immutable after the push.</p>
<p>Show heads of all anonymous branches:</p>
<pre><code class="language-bash">jj log -r 'heads(all())'
</code></pre>
<p>To visualize an anonymous branch, Steve’s Jujutsu tutorial does a great job of
displaying this:</p>
<pre><code class="language-text">
┌───┐ ┌───┐
┌───┤ F ◄─┤ G │
│ └───┘ └───┘
│
┌───┐ ┌───┐ ┌─▼─┐ ┌───┐ ┌───┐
│ A ◄──┤ B ◄──┤ C ◄─┤ D ◄─┤ E │
└───┘ └───┘ └───┘ └───┘ └───┘
</code></pre>
<p>Here, we’d say that <code>F</code> and <code>G</code> are two changes that are “on a branch,” because
it looks like they’re branching off from <code>D</code> and <code>E</code>.
<a href="https://steveklabnik.github.io/jujutsu-tutorial/branching-merging-and-conflicts/anonymous-branches.html#what-is-a-branch-conceptually">Steves Jujutsu tutorial What is a branch conceptually?</a></p>
<p>The above sentence confused me a bit. <code>F</code> and <code>G</code> are described as branching
“off” of the line containing <code>D</code> and <code>E</code>. However, in the literal graph
structure, they diverge from <code>C</code>.</p>
<p>Since <code>F</code> and <code>D</code> both point to <code>C</code>, they are “siblings”. Because no other
commits point back to <code>E</code> and <code>G</code>, they are the only two heads.</p>
<p>In Jujutsu, a branch is just any path of commits that hasn’t been merged yet.
Since E and G are both visible and unmerged, we have two “anonymous branches”
currently active.</p>
<p>The output of <code>jj log -r 'heads(all())'</code> with the above example, would yield:</p>
<pre><code class="language-text">○ G
│
~
│
○ E
│
~
</code></pre>
<ul>
<li><code>G</code> and <code>E</code> are the heads of the anonymous branches.</li>
</ul>
<h2>Examples</h2>
<p>Start at an empty change:</p>
<pre><code class="language-bash">❯ jj log
@ p saylesss87@proton.me 2026-03-24 18:05:54 6469af06
│ (no description set)
</code></pre>
<p>Give the current change a description:</p>
<pre><code class="language-bash">jj desc -m "refactor(waybar): waybar flake-parts module"
</code></pre>
<pre><code class="language-bash">❯ jj log
@ p saylesss87@proton.me 2026-03-24 18:06:31 627d846c
│ refactor(waybar): waybar flake-parts module
○ yl saylesss87@proton.me 2026-03-24 17:55:00 56d13161
│ refactor(foot): foot flake-parts module
</code></pre>
<p>To create a branch we need 2 changes with the same parent, our current changes
parent is <code>yl</code> so let’s make our new change off of that:</p>
<pre><code class="language-bash">❯ jj new yl -m "chore: add better documentation to README"
Working copy (@) now at: v 4697897a (empty) chore: add better documentation to README
Parent commit (@-) : yl 56d13161 refactor(foot): foot flake-parts module
Added 1 files, modified 1 files, removed 1 files
</code></pre>
<p>Let’s check out our log to see our anonymous branches:</p>
<pre><code class="language-bash">❯ jj
@ v saylesss87@proton.me 2026-03-24 18:12:04 4697897a
│ (empty) chore: add better documentation to README
│ ○ p saylesss87@proton.me 2026-03-24 18:06:31 627d846c
├─╯ refactor(waybar): waybar flake-parts module
○ yl saylesss87@proton.me 2026-03-24 17:55:00 56d13161
│ refactor(foot): foot flake-parts module
</code></pre>
<p>We can see that <code>p</code> branches off from <code>yl</code>, let’s make this change before
switching to the other branch.</p>
<pre><code class="language-bash">❯ jj st
Working copy changes:
M README.md
Working copy (@) : v 23d94e56 chore: add better documentation to README
Parent commit (@-): yl 56d13161 refactor(foot): foot flake-parts module
</code></pre>
<pre><code class="language-bash"># This effectively moves the working copy to the other "branch"
❯ jj edit p
Working copy (@) now at: p 627d846c refactor(waybar): waybar flake-parts module
Parent commit (@-) : yl 56d13161 refactor(foot): foot flake-parts module
Added 1 files, modified 2 files, removed 1 files
</code></pre>
<blockquote>
<p>In Git, you <code>checkout</code> a branch name; in <code>jj</code>, you just move your working copy
(<code>@</code>) to whichever commit you want to build on.</p>
</blockquote>
<p>I’ve added the new flake-parts module and deleted the old home-manager style
module:</p>
<pre><code class="language-bash">❯ jj st
Working copy changes:
D home/waybar.nix
M hosts/magic/home.nix
A parts/waybar.nix
Working copy (@) : p 627d846c refactor(waybar): waybar flake-parts module
Parent commit (@-): yl 56d13161 refactor(foot): foot flake-parts module
</code></pre>
<p>Let’s add another change on this branch to solidify these concepts:</p>
<pre><code class="language-bash">❯ jj new -m "refactor(nh): nh flake-parts module"
Working copy (@) now at: n ac086b55 (empty) refactor(nh): nh flake-parts module
Parent commit (@-) : p 627d846c refactor(waybar): waybar flake-parts module
</code></pre>
<p>And our log to show that this branch has grown:</p>
<pre><code class="language-bash">❯ jj log
@ n saylesss87@proton.me 2026-03-24 18:22:12 ac086b55
│ (empty) refactor(nh): nh flake-parts module
○ p saylesss87@proton.me 2026-03-24 18:06:31 627d846c
│ refactor(waybar): waybar flake-parts module
│ ○ v saylesss87@proton.me 2026-03-24 18:17:51 23d94e56
├─╯ chore: add better documentation to README
○ yl saylesss87@proton.me 2026-03-24 17:55:00 56d13161
│ refactor(foot): foot flake-parts module
</code></pre>
<p>Now, let’s first merge the README branch into this one. We are worried about the
heads of the anonymous branches right now:</p>
<pre><code class="language-bash">❯ jj log -r 'heads(all())'
@ n saylesss87@proton.me 2026-03-24 18:22:12 ac086b55
│ (empty) refactor(nh): nh flake-parts module
~
○ v saylesss87@proton.me 2026-03-24 18:17:51 23d94e56
│ chore: add better documentation to README
</code></pre>
<p>A merge is a new change that has more than one parent. With JJ, you make a
change with <code>jj new</code>. We can see that we need to make a change with both <code>n</code> and
<code>v</code> as parents from the log output above:</p>
<pre><code class="language-bash">❯ jj new n v -m "feat: merge in README docs"
Working copy (@) now at: yn a923db65 (empty) feat: merge in README docs
Parent commit (@-) : n ac086b55 (empty) refactor(nh): nh flake-parts module
Parent commit (@-) : v 23d94e56 chore: add better documentation to README
Added 0 files, modified 1 files, removed 0 files
</code></pre>
<pre><code class="language-bash">❯ jj log
@ yn saylesss87@proton.me 2026-03-24 18:28:47 a923db65
├─╮ (empty) feat: merge in README docs
│ ○ v saylesss87@proton.me 2026-03-24 18:17:51 23d94e56
│ │ chore: add better documentation to README
○ │ n saylesss87@proton.me 2026-03-24 18:22:12 ac086b55
│ │ (empty) refactor(nh): nh flake-parts module
○ │ p saylesss87@proton.me 2026-03-24 18:06:31 627d846c
├─╯ refactor(waybar): waybar flake-parts module
○ yl saylesss87@proton.me 2026-03-24 17:55:00 56d13161
│ refactor(foot): foot flake-parts module
</code></pre>
<p>That messes up our perfectly linear history, let’s rebase instead.</p>
<pre><code class="language-bash">❯ jj undo
Undid operation: a74a45f02043 (2026-03-24 18:28:47) new empty commit
Restored to operation: 848c180f2a04 (2026-03-24 18:22:12) new empty commit
Working copy (@) now at: n ac086b55 (empty) refactor(nh): nh flake-parts module
Parent commit (@-) : p 627d846c refactor(waybar): waybar flake-parts module
Added 0 files, modified 1 files, removed 0 files
</code></pre>
<p>Rebase is your tool for changing the ‘parent’ of a commit. If you have two
parallel features (siblings) and you decide one should follow the other (linear
stack), you rebase the second feature onto the first.</p>
<pre><code class="language-bash">❯ jj rebase -r v -o n
Rebased 1 commits to destination
</code></pre>
<p>Now our history is back to being completely linear:</p>
<pre><code class="language-bash">❯ jj log
○ v saylesss87@proton.me 2026-03-24 18:30:36 8101b0dd
│ chore: add better documentation to README
@ n saylesss87@proton.me 2026-03-24 18:22:12 ac086b55
│ (empty) refactor(nh): nh flake-parts module
○ p saylesss87@proton.me 2026-03-24 18:06:31 627d846c
│ refactor(waybar): waybar flake-parts module
○ yl saylesss87@proton.me 2026-03-24 17:55:00 56d13161
│ refactor(foot): foot flake-parts module
</code></pre>
<p>To move a stack of changes, use <code>jj rebase -s [Source] -d [Destination]</code>. If you
want to move a feature to the very tip of your main line, destination is <code>main</code>.
If you want to chain features together, destination is the previous feature’s
head.</p>
<p>Pay attention to where <code>@</code> is while rebasing, to continue on this linear stack
I’ll have to run <code>jj new v</code>.</p>
<hr />
<h2>Collaborating and opening PRs</h2>
<p>So far all the examples assumed you are the only person touching this repo. For
collaboration (GitHub / GitLab PRs, code review, etc.), the mental model is:</p>
<ul>
<li>
<p>GitHub only understands <em>branches</em> and <em>commits</em>.</p>
</li>
<li>
<p>Jujutsu gives you <em>changes</em> and <em>bookmarks</em>.</p>
</li>
<li>
<p>You use <code>jj git push</code> to translate your clean JJ history into a Git branch
that others can review.</p>
</li>
</ul>
<p>A simple pattern that works well for feature branches and PRs:</p>
<ol>
<li>Start from <code>main</code></li>
</ol>
<p>Make sure main is up to date and your working copy is clean:</p>
<pre><code class="language-bash">jj git fetch
jj edit main
jj st
</code></pre>
<p>You should see an <code>(empty)</code> working copy with <code>main</code> as the parent.</p>
<ol start="2">
<li>Create a named feature branch as a bookmark</li>
</ol>
<p>In JJ, you don’t “checkout” a branch, you create a new change and (optionally)
give it a bookmark name:</p>
<pre><code class="language-bash"># Create a new change on top of main and start working there
jj new main -m "feat: add magic host"
# Optionally create a bookmark that GitHub will see as a branch
jj bookmark create feature/magic-host -r @
</code></pre>
<ul>
<li>
<p><code>jj new main</code> makes a sibling of any in‑progress work and starts a fresh
change on top of <code>main</code>.</p>
</li>
<li>
<p>The bookmark <code>feature/magic-host</code> is what will become the Git branch name when
you push.</p>
</li>
</ul>
<ol start="3">
<li>Hack, split, squash as usual</li>
</ol>
<p>Work in your normal JJ style:</p>
<pre><code class="language-bash"># edit files
jj st
jj split -i
jj desc -m "feat: add magic host"
jj new
# more changes, more desc/split/squash, etc.
</code></pre>
<p>All of this is still local, fully mutable history.</p>
<ol start="4">
<li>Point your feature bookmark at the top of the stack</li>
</ol>
<p>When you’re happy with the stack you want to send for review, move the bookmark
to the tip:</p>
<pre><code class="language-bash"># If your working copy @ is the commit you want reviewed:
jj bookmark set feature/magic-host -r @
# If you used the squash workflow and @ is empty:
jj bookmark set feature/magic-host -r @-
</code></pre>
<p>Rule of thumb:</p>
<ul>
<li>
<p>If <code>jj st</code> shows actual changes or a non‑empty description at <code>@</code>, use <code>@</code>.</p>
</li>
<li>
<p>If <code>@</code> is (empty) because you squashed into the parent, use <code>@-</code>.</p>
</li>
</ul>
<ol start="5">
<li>Push to Git and open the PR</li>
</ol>
<p>Now push just like before, but your feature bookmark will become a branch on the
remote:</p>
<pre><code class="language-bash">jj git push
</code></pre>
<p>This will:</p>
<ul>
<li>
<p>Update <code>origin/feature/magic-host</code> to point at the same commit as your local
<code>feature/magic-host</code>.</p>
</li>
<li>
<p>Leave <code>main</code> alone until you explicitly move and push it.</p>
</li>
</ul>
<p>On GitHub/GitLab:</p>
<ul>
<li>
<p>You’ll see a branch named <code>feature/magic-host</code>.</p>
</li>
<li>
<p>Open a PR from <code>feature/magic-host</code> into <code>main</code> as usual.</p>
</li>
</ul>
<ol start="6">
<li>Iterate on review feedback</li>
</ol>
<p>If a reviewer asks for changes:</p>
<ol>
<li>Come back to your feature branch stack:</li>
</ol>
<pre><code class="language-bash">jj edit feature/magic-host
</code></pre>
<ol start="2">
<li>
<p>Make your edits, split/squash/reword history freely.</p>
</li>
<li>
<p>Move the bookmark to the new tip and push again:</p>
</li>
</ol>
<pre><code class="language-bash">jj bookmark set feature/magic-host -r @
jj git push
</code></pre>
<p>GitHub will show the PR updating in place, but you got to reshuffle history
locally without <code>git rebase -i</code> pain.</p>
<p>“I just want a one‑off PR, no named bookmark”</p>
<p>If you don’t care about a persistent bookmark and just want a quick “one‑shot”
PR from whatever you’re currently working on:</p>
<ol>
<li>
<p>Make sure your stack is in the shape you want.</p>
</li>
<li>
<p>Put main on the top of that stack:</p>
</li>
</ol>
<pre><code class="language-bash"># Working copy @ is the tip you want:
jj bookmark set main -r @
# Or equivalently `jj bookmark set main` since commands default to the working copy
jj git push
</code></pre>
<ol start="3">
<li>On GitHub, create the PR from your fork’s main to upstream main.</li>
</ol>
<p>This is essentially the same pattern we already use in the “squash workflow,”
but applied with the mental model: “move the bookmark people care about (<code>main</code>
or a feature name) to the commit I want them to review, then push.”</p>
<h3>Workflow Considerations</h3>
<p>You may want to change up how you work depending on your requirements…</p>
<ol>
<li>The Tower Workflow (The “Dependent Stack”)</li>
</ol>
<p>You use a tower when your changes build on top of each other.</p>
<ul>
<li>
<p><code>main</code> → <code>Feature A</code> → <code>Feature B</code> → <code>Feature C</code></p>
</li>
<li>
<p>Use it when you are refactoring a Nix module (Feature A), and then you need to
use that new module to configure your desktop (Feature B). You literally
cannot do B without A.</p>
</li>
</ul>
<p>The Collaborative Benefit: You can push the entire stack. Your teammates see the
logical progression of your thought process. They can review “Feature A” while
you are already working on “Feature C.”</p>
<ol start="2">
<li>The Sibling Workflow (<code>jj new main</code>) You use <code>jj new main</code> when you are
working on independent ideas that have nothing to do with each other.</li>
</ol>
<ul>
<li>How it looks: * <code>main</code> → <code>Fix-Helix-Keys</code>
<ul>
<li>
<p><code>main</code> → <code>Update-Nix-Channel</code></p>
</li>
<li>
<p><code>main</code> → <code>New-Wallpaper-Script</code></p>
</li>
</ul>
</li>
</ul>
<p>When to use it: You’re in the middle of a massive system refactor, but you
suddenly notice your Helix C-p bind is broken. You don’t want the Helix fix to
be “trapped” behind the refactor.</p>
<p>The Collaborative Benefit: Isolation. If your “System Refactor” is buggy and
takes three days to fix, you can still <code>jj git push</code> the “Helix Fix” to <code>main</code>
immediately because it’s a direct child of <code>main</code>. It isn’t “waiting” for the
other commits.</p>
<p><strong>Fixing Divergent Branches</strong></p>
<p><code>jj</code> makes it easy to fix divergent branches with <code>jj forget</code>.</p>
<p>As an example imagine this scenario:</p>
<ol>
<li>
<p>On your Laptop: You finish a feature and jj git push. Local main and
origin/main are now at Revision B.</p>
</li>
<li>
<p>On your Desktop: You forgot to pull. Local main is still at Revision A. You
start hacking and create Revision C.</p>
</li>
<li>
<p>The Mess: You run <code>jj git fetch</code>. Now your Desktop sees:</p>
</li>
</ol>
<ul>
<li>
<p><code>main</code> (local) at C</p>
</li>
<li>
<p><code>main@origin</code> at B</p>
</li>
<li>
<p><code>jj</code> freaks out and marks the bookmark as diverged (main*).</p>
</li>
</ul>
<p><code>jj bookmark forget main</code> is the “I don’t want to think about it” button. It
deletes the <code>main*</code> label on your Desktop so you can just fetch the “real” one
from the Laptop/GitHub and rebase your new work (C) on top of it.</p>
<hr />
<h2>Tips & Tricks</h2>
<p>Your History is just a stack of diffs:</p>
<ul>
<li>
<p><code>jj commit -i</code>: Slices a diff off your current work.</p>
</li>
<li>
<p><code>jj split -i</code>: Slices an existing diff into two.</p>
</li>
<li>
<p><code>jj bookmark forget</code>: Deletes a label that got messy.</p>
</li>
</ul>
<p><strong>The Ghost Refactor</strong></p>
<p><strong>The Scenario</strong>: You’re in the middle of a complex Rust feature (Change C), and
you realize a function in the base (Change A) needs to be public or renamed for
this to work.</p>
<ol>
<li>
<p><code>jj new A -m "quick fix"</code> → Creates a new “slice” right after A.</p>
</li>
<li>
<p>Make your change.</p>
</li>
<li>
<p><code>jj squash</code> → This “melts” the fix directly into A.</p>
</li>
</ol>
<hr />
<p><strong>Use <code>jj describe</code> as a Task List</strong></p>
<p>Because <code>jj</code> doesn’t require a “commit” to save work, you can use descriptions
to manage your focus.</p>
<p>When you start a session, create a few empty changes:</p>
<ol>
<li>
<p><code>jj new main -m "Update Cargo.toml"</code></p>
</li>
<li>
<p><code>jj new -m "Add pixel conversion logic"</code></p>
</li>
<li>
<p><code>jj new -m "Fix CLI output formatting"</code></p>
</li>
</ol>
<p>Now we have a roadmap. Use <code>jj edit</code> to jump into whichever task you feel like
doing. <code>jj</code> tracks the progress of each. No need to <code>stash</code> when jumping between
tasks because of the working copy commit.</p>
<hr />
<p><strong>Breaking up your Current set of Changes into Atomic Commits: “The Atomic
Shredder” <code>jj split</code></strong></p>
<p>Often I’ll just keep working on a bug or feature until it works, not
particularly concerned about my VCS history. Let’s say I spent 3 hours hacking
on a project of mine to get a feature working and I touched 10 files. It works,
but the commit is a mess.</p>
<p>With the <code>gitpatch</code> tool, <code>jj split -i</code> makes it simple to break down many
changes into logical “atomic commits” using a simple <code>y</code>/ <code>n</code> interface.</p>
<p>You can actually use both <code>jj commit -i</code> & <code>jj split -i</code> to break down changes
in <code>@</code> into smaller changes. <code>jj commit -i</code> is ergonomically tuned for “push
some current work down, leave the rest in @”.</p>
<p>If your changes are already in <code>@-</code> (or any earlier commit):</p>
<ul>
<li>
<p><code>jj commit -i</code> can’t help, because it only ever operates on <code>@</code>.</p>
</li>
<li>
<p><code>jj split -i -r @-</code> (or equivalent) can be used to modify an existing commit
in history.</p>
</li>
</ul>
<p><strong>As a rule of thumb</strong>:</p>
<ul>
<li>
<p>Changes in <code>@</code> → use <code>jj commit -i</code> to peel off a clean piece, and also
<code>jj squash -i</code> to squash a subset of changes from the working copy into the
parent commit.</p>
</li>
<li>
<p>Changes in <code>@-</code> (or earlier) → use <code>jj split -i</code> to rewrite that commit</p>
</li>
</ul>
The Dendritic Pattern with flake-partshttps://saylesss88.github.io/flakes/dendritic_flake_parts.html2026-03-07T00:00:00+00:00saylesss87@proton.me (saylesss88)<h1>The Dendritic Pattern with flake-parts</h1>
<p><img src="https://saylesss88.github.io/../images/dendritic_nix.png" alt="Dendritic Logo" />–<a href="https://github.com/mightyiam/dendritic">dendretic repo</a></p>
<p>In the early days of Flakes, users often ended up with a massive, monolithic
<code>flake.nix</code> or a spaghetti-like web of manual imports. The Dendritic (Tree-like)
Pattern solves this by treating your filesystem as the source of truth, using
<code>flake-parts</code> as the nervous system that routes code to the correct outputs.</p>
<h2>Flake-Parts</h2>
<p>IMO the <code>flake-parts</code> docs could do a lot better at explaining how to use it to
configure your system. I’ll attempt to explain how to use it and why you might
want to.</p>
<p>While <code>flake-parts</code> provides the core structure for standard flake outputs, its
real power lies in its modular ecosystem. You can plug in opinionated modules to
instantly add specialized features to your system’s nervous system.</p>
<ul>
<li>When people say “top-level flake attribute”, they mean putting your
configuration inside the <code>flake = { ... };</code> block.</li>
</ul>
<h3>The “Top-Level” (<code>flake</code>):</h3>
<p>This is for things that are <strong>global</strong> and don’t change regardless of whether
you’re on a Mac, PC or ARM server.</p>
<ul>
<li>
<p>Example: Your <code>nixosConfigurations</code> or <code>homeConfigurations</code>.</p>
</li>
<li>
<p>A NixOS configuration for a specific laptop is a single, static definition. It
doesn’t need to be “multiplied” by system types.</p>
</li>
</ul>
<h2>The “Per-System” (<code>perSystem</code>)</h2>
<ul>
<li>
<p><code>perSystem</code> is for things that must be built for a specific architecture.
(e.g., <code>devShells</code>, <code>packages</code>, <code>formatter</code>)</p>
<ul>
<li>You can’t run an <code>x86_64</code> version of <code>helix</code> on an <code>aarch64</code> (ARM) MacBook.</li>
</ul>
</li>
<li>
<p>Our <code>nixosConfigurations</code> don’t live in a system specific attribute so it goes
under <code>flake</code> instead of <code>perSystem</code>.</p>
</li>
</ul>
<p>You can place everything in the same file:</p>
<pre><code class="language-nix">outputs = inputs@{ flake-parts, ... }:
# https://flake.parts/module-arguments.html
flake-parts.lib.mkFlake { inherit inputs; } (top@{ config, withSystem, moduleWithSystem, ... }: {
imports = [
# Optional: use external flake logic, e.g.
# inputs.foo.flakeModules.default
];
flake = {
# Put your original flake attributes here.
};
systems = [
# systems for which you want to build the `perSystem` attributes
"x86_64-linux"
# ...
];
perSystem = { config, pkgs, ... }: {
# Recommended: move all package definitions here.
# e.g. (assuming you have a nixpkgs input)
# packages.foo = pkgs.callPackage ./foo/package.nix { };
# packages.bar = pkgs.callPackage ./bar/package.nix {
# foo = config.packages.foo;
# };
};
});
</code></pre>
<p>Or you can break it down into modules:</p>
<pre><code class="language-nix">{
inputs = {
nixpkgs.url = "github:nixos/nixpkgs/nixos-unstable";
flake-parts.url = "github:hercules-ci/flake-parts";
};
outputs = inputs @ { flake-parts, ... }:
flake-parts.lib.mkFlake { inherit inputs; }
{
# Supported Systems
systems = [ "x86_64-linux" "x86_64-darwin"];
imports = [ ./devShell.nix ./package.nix ./nixos.nix ]
};
}
</code></pre>
<p><code>devShell.nix</code>:</p>
<pre><code class="language-nix">{
perSystem = { pkgs, ...}: {
devShells.default = pkgs.mkShell {
packages = [ pkgs.ripgrep pkgs.fd ];
};
};
}
</code></pre>
<p><code>package.nix</code>:</p>
<pre><code class="language-nix">{
perSystem = { pkgs, ...}: {
packages.myPackage = pkgs.myPackage;
};
}
</code></pre>
<h2>Getting Started</h2>
<p>This is the flake that I’m currently using to slowly adopt the dendritic
pattern, or not if I choose not to. Maybe making every single thing a flake
output isn’t necessary or the best idea, we’ll see. With this, you can use both
regular NixOS/home-manager modules and NixOS/home-manager flake-parts modules.</p>
<p><strong>Scalability Toggle</strong>:</p>
<ul>
<li>
<p>I have <code>++ (builtins.attrValues ...)</code> set for both home-manager and NixOS
where it automatically adds the inputs for files in the <code>~/flake/parts</code>
directory. This is fine for personal use where you want the custom modules
available everywhere instantly.</p>
</li>
<li>
<p>If the flake gets too big and you want more control just comment out those 2
lines in the <code>nixos.nix</code> and start explicitly adding the <code>inputs</code> to your
<code>imports</code> list. Now the <code>parts/</code> directory will act like a library rather than
a Registry, you manually pick what you want for each host.</p>
</li>
<li>
<p><a href="https://nix-community.github.io/home-manager/index.xhtml#sec-flakes-flake-parts-module">home-manager flake-parts module</a></p>
</li>
</ul>
<p>Example: Let’s call this <code>~/flake/flake.nix</code></p>
<pre><code class="language-nix"># In this example the top-level configuration is a [`flake-parts`](https://flake.parts) one.
# Therefore, every Nix file (other than this) is a flake-parts module.
# https://github.com/mightyiam/dendritic/blob/master/example/flake.nix
{
# Declares flake inputs
inputs = {
flake-parts = {
url = "github:hercules-ci/flake-parts";
inputs.nixpkgs-lib.follows = "nixpkgs";
};
import-tree.url = "github:vic/import-tree";
nixpkgs.url = "github:nixos/nixpkgs/25.11";
};
outputs =
inputs:
inputs.flake-parts.lib.mkFlake { inherit inputs; } {
# This tells flake-parts which systems to generate outputs for
systems = import inputs.systems;
imports = [
# Optional: use external flake logic, e.g.
inputs.treefmt-nix.flakeModule
# Import home-manager's flake module
# The flake module defines flake.homeModules and flake.homeConfigurations options,
# allowing them to be properly merged if they are defined in multiple modules
inputs.home-manager.flakeModules.default
./nixos.nix
]
++ (inputs.import-tree ./parts).imports;
hosts = {
magic = {
username = "jr";
system = "x86_64-linux";
};
# Adding a second machine is now 4 lines of code:
# secondary = { username = "jr"; system = "aarch64-linux"; };
};
perSystem =
{
system,
...
}:
{
# Access pkgs with your specific config
_module.args.pkgs = import inputs.nixpkgs {
inherit system;
config.allowUnfree = false;
};
};
};
}
</code></pre>
<blockquote>
<p><code>import-tree</code> is essentially a “smarter” version of the <code>scanPaths</code> function
that we’ll see later specifically designed for <code>flake-parts</code>. It ensures that
every file in <code>./parts</code> is treated as a module that the <code>mkFlake</code> engine can
digest.</p>
</blockquote>
<p>Note, this example has more code than for example the dendritic nix repo has
because it enables you to automatically import <code>flake-parts</code> modules as well as
standard NixOS and home-manager modules as you move to the new system/pattern.</p>
<p>And <code>~/flake/nixos.nix</code>:</p>
<pre><code class="language-nix">/**
System Configuration Factory Module
This module defines a custom schema for describing multiple NixOS hosts
and automatically generates the corresponding `nixosConfigurations` flakes output.
*/
{
inputs,
self,
lib,
config,
...
}:
let
# Internal Library & Module Imports
# Initialize a custom library using the project's internal lib and nixpkgs
myLib = import "${self}/lib/default.nix" { inherit (inputs.nixpkgs) lib; };
# Import entry points for global NixOS and Home Manager shared modules
# `self` points to the root of the flake (requires passing `self` throuth specialArgs)
nixosModules = import "${self}/nixos";
homeManagerModules = import "${self}/home";
# Shared Binary Cache Configuration
caches = {
nix.settings = {
builders-use-substitutes = true;
substituters = [ "https://cache.nixos.org" ];
trusted-public-keys = [ "cache.nixos.org-1:6NCHdD59X431o0gWypbMrAURkbJ16ZPMQFGspcDShjY=" ];
};
};
in
{
/**
SCHEMA DEFINITION
Defines the 'hosts' option, allowing us to declare system metadata
(e.g., username, architecture) in a structured attribute set.
*/
options.hosts = lib.mkOption {
description = "An attribute set of host definitions to be generated.";
type = lib.types.attrsOf (
lib.types.submodule {
options = {
username = lib.mkOption {
type = lib.types.str;
default = "jr";
description = "Primary user account name for this host.";
};
system = lib.mkOption {
type = lib.types.str;
default = "x86_64-linux";
description = "The target system architecture.";
};
};
}
);
};
/**
CONFIGURATION GENERATION
Iterates through the 'config.hosts' defined above and maps them to
actual 'nixosSystem' instances for the Flake output.
*/
config.flake.nixosConfigurations = lib.mapAttrs (
host: cfg:
inputs.nixpkgs.lib.nixosSystem {
# Pass global context and metadata into the module system
specialArgs = {
inherit
inputs
self
host
myLib
;
inherit (cfg) username;
};
modules = [
# 1. Project-wide NixOS logic
nixosModules
# 2. Host-specific hardware/system configuration file
"${self}/hosts/${host}/configuration.nix"
# 3. Home Manager NixOS module (allows configuring HM within NixOS)
inputs.home-manager.nixosModules.home-manager
# 4. Standardized cache settings defined in 'let' block
caches
# 5. Inline configuration for system-specific and user-specific settings
{
nixpkgs.hostPlatform = cfg.system;
home-manager = {
# By default, Home Manager uses a private pkgs instance that is configured
# via the home-manager.users.<name>.nixpkgs options. To instead use the
# global pkgs that is configured via the system level nixpkgs options, set
useGlobalPkgs = true;
# Install packages to /etc/profiles rather than $HOME/.nix-profile
useUserPackages = true;
# Dynamically import the user's home configuration based on host/username
users.${cfg.username} = {
imports = [
(import "${self}/hosts/${host}/home.nix")
]
# Automatically import `homeModules` in `./parts`
# Comment out if you want to be explicit and add
# e.g., inputs.self.homeModules.helix
++ (builtins.attrValues config.flake.homeModules);
};
extraSpecialArgs = {
inherit
inputs
homeManagerModules
myLib
host
;
inherit (cfg) username;
};
};
}
]
# Automatically import `nixosModules` in `./parts`
++ (builtins.attrValues config.flake.nixosModules);
}
) config.hosts;
}
</code></pre>
<p>Now, any <code>flake-parts</code> module that we place in the <code>~/flake/parts/</code> directory
will be automatically imported with <code>import-tree</code>. The key here is that it has
to be a <code>flake-parts</code> module, i.e. wrapped in <code>flake</code> or <code>perSystem</code>, etc.</p>
<p>You can place both NixOS modules and home-manager modules in the <code>~/flake/parts</code>
directory. Just import it to the correct location and you’re good.</p>
<p>Example NixOS module for amd drivers <code>~/flake/parts/amd-drivers.nix</code>:</p>
<pre><code class="language-nix">{
flake.nixosModules.amd-drivers =
{
lib,
pkgs,
config,
...
}:
with lib;
let
cfg = config.custom.amd-drivers;
in
{
options.custom.amd-drivers.enable = mkEnableOption "AMD GPU/CPU optimized for AM06 Pro";
config = mkIf cfg.enable {
# Modern ROCm/HIP support
systemd.tmpfiles.rules = [ "L+ /opt/rocm/hip - - - - ${pkgs.rocmPackages.clr}" ];
services.xserver.videoDrivers = [ "amdgpu" ];
hardware = {
amdgpu.initrd.enable = true;
graphics = {
enable = true;
enable32Bit = true;
extraPackages = with pkgs; [
rocmPackages.clr.icd # For OpenCL/Compute
# Hardware Acceleration (Video Encoding/Decoding)
libva
libva-utils
libva-vdpau-driver
libvdpau-va-gl
];
};
cpu.amd.updateMicrocode = true;
};
boot = {
kernelModules = [
"kvm-amd"
"amdgpu"
];
kernelParams = [
"amd_pstate=active" # Best for Ryzen 5000+ power management
];
};
boot.kernelPackages = pkgs.linuxPackages_latest;
};
};
}
</code></pre>
<p>Now, to enable this module, I’ll add this to my <code>configuration.nix</code> or
equivalent:</p>
<pre><code class="language-nix"> {...}: {
imports = [
# Not necessary because of the `++ (builtins.attrValues config.flake.nixosModules)` in nixos.nix
# for more control remove those lines and explicitly add:
# inputs.self.nixosModules.amd-drivers
];
custom = {
amd-drivers.enable = true;
};
}
# ---snip---
</code></pre>
<hr />
<p>Example home-manager module <code>~/flake/parts/fzf.nix</code>:</p>
<pre><code class="language-nix">{
flake.homeModules.fzf =
{ lib, config, ... }:
let
cfg = config.custom.fzf;
in
{
options.custom.fzf.enable = lib.mkEnableOption "Enable fzf module";
config = lib.mkIf cfg.enable {
programs.fzf = {
enable = true;
# colors = lib.mkForce { };
defaultOptions = [
"--height 40%"
"--reverse"
"--border"
"--color=16"
];
defaultCommand = "rg --files --hidden --glob=!.git/";
};
};
};
}
</code></pre>
<p>And enable with <code>custom.fzf.enable = true;</code> in your <code>home.nix</code> or equivalent.</p>
<p>And this will be automatically imported, same as above but because of the added
<code>++ (builtins.attrValues config.flake.homeModules);</code> in <code>nixos.nix</code>. Without
the automatic import, add <code>inputs.self.homeModules.fzf</code> to your <code>imports</code> list
in your <code>home.nix</code> or equivalent.</p>
<p>If you don’t like the auto-import behavior, just delete or comment out that
line, after that, the <code>import</code> statements become necessary.</p>
<hr />
<details>
<summary>Example of a module thats both NixOS and home-manager zsh.nix </summary>
<p><code>~/flake/parts/shells/zsh.nix</code>:</p>
<pre><code class="language-nix">{
flake.nixosModules.zsh =
{
pkgs,
lib,
config,
username,
...
}:
let
cfg = config.custom.zsh;
in
{
options.custom.zsh = {
enable = lib.mkEnableOption "User zsh configuration";
};
config = lib.mkIf cfg.enable {
# 1. NixOS System-Level (The "Foundation")
programs.zsh.enable = true;
users.defaultUserShell = pkgs.zsh;
environment.pathsToLink = [ "/share/zsh" ]; # Fixes completion for system packages
# 2. Home Manager (User Configuration)
home-manager.users.${username} = {
programs.zsh = {
enable = true;
enableCompletion = true;
completionInit = "autoload -U compinit && compinit";
autosuggestion.enable = true;
syntaxHighlighting.enable = true;
oh-my-zsh = {
package = pkgs.oh-my-zsh;
enable = true;
plugins = [
"git"
"sudo"
"rust"
"fzf"
];
};
profileExtra = ''
if [ -z "$DISPLAY" ] && [ "$XDG_VTNR" = 1 ]; then
exec mango
fi
# ---snip----
}
</code></pre>
<blockquote>
<p>NOTE: Passing <code>username</code> through <code>specialArgs</code> is what makes this bridge work,
you can also just use your username.</p>
</blockquote>
<p>This is what <code>~/flake/parts/shells/default.nix</code> looks like, I had to explicitly
add <code>myLib</code> in a <code>let</code> statement to prevent infinite recursion:</p>
<pre><code class="language-nix">{ lib, ... }:
let
# prevents infinite recursion error
myLib = import ../../lib { inherit lib; };
in
{
# Now we can use it safely
imports = myLib.scanPaths ./.;
}
</code></pre>
<p>Enable it in <code>configuration.nix</code> or equivalent:</p>
<pre><code class="language-nix">custom.zsh.enable = true;
</code></pre>
<p><code>lib/default.nix</code> is just a function that automatically imports any <code>.nix</code> file,
skipping <code>default.nix</code>:</p>
<details>
<summary> `lib/default.nix` </summary>
<pre><code class="language-nix">{ lib, ... }:
{
# Returns a list of all .nix files and directories in a path,
# skipping default.nix. Perfect for the 'imports' list.
scanPaths =
path:
let
content = builtins.readDir path;
in
map (name: path + "/${name}") (
builtins.attrNames (
lib.filterAttrs (
name: type: (type == "directory") || (name != "default.nix" && lib.hasSuffix ".nix" name)
) content
)
);
relativeToRoot = lib.path.append ../.;
}
</code></pre>
</details>
<p>The key here is wrapping the home-manager logic in
<code>home-manager.users.${username} = {}</code>, this effectively creates a home-manager
sandbox enabling configuration of both in the same file.</p>
<blockquote>
<p>NOTE: You can do this without <code>flake-parts</code> also but often wasn’t recommended
because the files become a mess that’s hard to understand.</p>
</blockquote>
</details>
<hr />
<h1>Example using perSystem</h1>
<p>In the <code>flake.nix</code>, notice the <code>inputs.treefmt-nix.flakeModule</code>. Since a
formatter is something that you would want to run on every system, you use the
<code>perSystem</code> attribute.</p>
<p>Adding the <code>inputs.treefmt-nix.flakeModule</code> makes the <code>treefmt</code> options
available</p>
<p><code>~/flake/parts/treefmt.nix</code>:</p>
<pre><code class="language-nix">{
perSystem = _: {
treefmt = {
projectRootFile = "flake.nix";
programs = {
deadnix.enable = true;
statix.enable = true;
keep-sorted.enable = true;
nixfmt = {
enable = true;
# package = pkgs.nixfmt;
};
};
settings = {
global.excludes = [
"LICENSE"
"README.md"
".adr-dir"
"nu_scripts"
"*.{gif,png,svg,tape,mts,lock,mod,sum,toml,env,envrc,gitignore,sql,conf,pem,key,pub,py,narHash}"
"Cargo.lock"
"flake.lock"
"justfile"
".jj/*"
];
formatter = {
nixfmt.priority = 1;
statix.priority = 2;
deadnix.priority = 3;
};
};
};
};
}
</code></pre>
<blockquote>
<p>By using <code>perSystem</code>, your <code>treefmt</code> configuration is automatically available
for every architecture you support (x86, ARM, etc.), allowing you to run
<code>nix fmt</code> on any machine without rewriting the logic.</p>
</blockquote>
<p><code>import-tree</code> automatically imports this because it’s a <code>flake-parts</code> module &
flake output.</p>
<hr />
<h1>flake-parts & numtide devshells</h1>
<p>Adding this flake input and <code>flakeModule</code> make the options available, they’re
similar to NixOS’s <code>devShell</code> but not the same:</p>
<pre><code class="language-nix">devshell.url = "github:numtide/devshell";
</code></pre>
<p><code>~/flake/parts/dev-shell.nix</code>:</p>
<pre><code class="language-nix">{
perSystem =
{ pkgs, system, ... }:
{
devshells.default = {
name = "nixos-dev";
packages = with pkgs; [
nixfmt
deadnix
nixd
nil
nh
nix-diff
nix-tree
helix
git
ripgrep
jq
tree
];
# Message of the Day
motd = ''
{2}── NixOS Dev Shell ──────────────────────────────────────────{reset}
{9} System: {reset} ${system}
{2}──────────────────────────────────────────────────────────────{reset}
'';
commands = [
{
name = "rebuild";
package = "nh";
help = "Run nh os switch on the current flake";
command = "nh os switch .";
}
{
name = "fmt";
package = "nixfmt";
help = "Format all nix files in the project";
command = "nix fmt";
}
];
};
};
}
</code></pre>
<p>Enter devShell:</p>
<pre><code class="language-bash">cd ~/flake
nix develop
</code></pre>
ZFS Bare Metal Impermanencehttps://saylesss88.github.io/installation/enc/zfs_bare-metal.html2026-03-01T00:00:00+00:00saylesss87@proton.me (saylesss88)<h1>ZFS Imperm Bare-Metal</h1>
<p>I couldn’t get disko to bend to my will so I wrote the following bash script.
The script automates the steps in Graham Christensen’s
<a href="https://grahamc.com/blog/erase-your-darlings/">Erase your darlings</a></p>
<h2>The Storage Architecture</h2>
<p>The script below automates the “Erase Your Darlings” setup. It organizes your
data into three distinct “levels” of persistence:</p>
<ul>
<li>
<p><strong>The Volatile (<code>/</code>)</strong>: A ZFS dataset that is blank at boot. We take a
snapshot called @blank immediately after creation. In your NixOS
configuration, you will set up a boot-time script to roll back to this @blank
snapshot, effectively “formatting” your root in milliseconds.</p>
</li>
<li>
<p><strong>The Store (<code>/nix</code>)</strong>: A separate dataset for the Nix store. This doesn’t
need to be wiped because Nix already manages its own integrity.</p>
</li>
<li>
<p><strong>The Safe (<code>/persist</code> and <code>/home</code>)</strong>: These datasets hold the things you
actually care about—your SSH keys, browser profiles, and project files.</p>
</li>
</ul>
<p><strong>What this script automates</strong></p>
<p>This bash script handles the “Stage 0” heavy lifting. It will:</p>
<ol>
<li>
<p><strong>Partition</strong> your disk with an EFI boot partition and a LUKS2 encrypted
container.</p>
</li>
<li>
<p><strong>Initialize</strong> a ZFS pool (<code>rpool</code>) with performance-optimized settings (like
<code>ashift=12</code> and <code>zstd</code> compression).</p>
</li>
<li>
<p><strong>Carve</strong> out the datasets required for an Impermanence setup.</p>
</li>
<li>
<p><strong>Mount</strong> the hierarchy into <code>/mnt</code> so <code>nixos-generate-config</code> can detect the
specialized ZFS layout.</p>
</li>
</ol>
<blockquote>
<p><strong>WARNING</strong>: This is a destructive operation. Running this script will wipe
the target drive completely. Ensure you have backed up any existing data
before proceeding.</p>
</blockquote>
<ul>
<li><a href="https://github.com/saylesss88/my-flake2/blob/main/install.sh">The Setup Script</a></li>
</ul>
<h2>Quick Start</h2>
<ol>
<li>Start with the minimal ISO:</li>
</ol>
<ul>
<li>
<p><a href="https://nixos.org/download/">NixOS Downloads</a></p>
</li>
<li>
<p><a href="https://nixos.org/manual/nixos/stable/index.html#sec-installation-manual">NixOS Manual Installation</a></p>
</li>
<li>
<p>The script handles the partitioning, formatting, mounting, and lastly, runs
<code>nixos-generate-config --root /mnt</code>. After running the script, edit the files
in the repo matching your user and device. Finally, after you’re sure you
haven’t missed anything, run <code>nixos-install</code>.</p>
</li>
</ul>
<pre><code class="language-bash">export NIX_CONFIG='experimental-features = nix-command flakes'
</code></pre>
<ol start="2">
<li>Clone the <a href="https://github.com/saylesss88/my-flake2#">starter repo</a>:</li>
</ol>
<pre><code class="language-bash">git clone https://github.com/saylesss88/my-flake2.git
</code></pre>
<ol start="3">
<li>Inspect & Run the script provided with the repo & follow prompts.:</li>
</ol>
<blockquote>
<p><strong>WARNING</strong>: This is a destructive operation. Running this script will wipe
the target drive completely. Ensure you have backed up any existing data
before proceeding.</p>
</blockquote>
<pre><code class="language-bash">sudo chmod +x ./install.sh
sudo bash ./install.sh
</code></pre>
<ul>
<li>I tested the script on an <code>nvme0n1</code> drive with no issues.</li>
</ul>
<ol start="4">
<li>Run the following commands:</li>
</ol>
<pre><code class="language-bash"># Get your UUID#
sudo blkid /dev/YOUR_DISK > /tmp/blk.txt
# Generate a hashed password
mkpasswd -m yescrypt > /tmp/pass.txt
# Generate a rand # for `networking.hostId`
head -c4 /dev/urandom | xxd -p > /tmp/rand.txt
</code></pre>
<ol start="5">
<li>
<p>Edit <code>flake.nix</code>, <code>configuration.nix</code>, and replace the repos
<code>hardware-configuration.nix</code> with your own.</p>
</li>
<li>
<p>Add <code>neededForBoot</code> to the <code>home</code> and <code>persist</code> datasets in the generated
<code>hardware-configuration.nix</code>.</p>
</li>
</ol>
<p>Example:</p>
<pre><code class="language-nix"> fileSystems."/home" = {
device = "rpool/safe/home";
fsType = "zfs";
neededForBoot = true;
};
fileSystems."/persist" = {
device = "rpool/safe/persist";
fsType = "zfs";
neededForBoot = true;
};
</code></pre>
<ol start="7">
<li>Move the flake to <code>/mnt/etc/nixos/</code></li>
</ol>
<pre><code class="language-bash">sudo mv ~/my-flake2 /mnt/etc/nixos/
</code></pre>
<ol start="8">
<li>Do a final check and install (change <code>host</code> to your host name)</li>
</ol>
<pre><code class="language-bash">sudo nixos-install --flake /mnt/etc/nixos/myflake2#host
</code></pre>
<ul>
<li>Read the comments, they let you know of requirements.</li>
</ul>
<ol start="9">
<li>
<p>Reboot. I typically run <code>nixos-install</code> with the minimal requirements,
reboot, and then configure my window manager/DE.</p>
</li>
<li>
<p>After reboot, adjust permissions for your <code>$USER</code>:</p>
</li>
</ol>
<pre><code class="language-bash">sudo mkdir -p /persist/home/$USER
# Set ownership for the persistent home directory
sudo chown -R 1000:100 /persist/home/$USER
# Ensure the home dataset itself is accessible
sudo chmod 755 /home
sudo chmod 755 /persist/home
# Test file, should be gone after reboot
sudo touch /etc/rollback-canary
</code></pre>
<ol start="10">
<li>
<p>Uncomment the import of the impermanence module in the <code>configuration.nix</code>.</p>
</li>
<li>
<p>Reboot, then check:</p>
</li>
</ol>
<pre><code class="language-bash">sudo ls /etc/rollback-canary
</code></pre>
<ul>
<li>You should get an error:
<code>"/etc/rollback-canary": No such file or directory (os error 2)</code></li>
</ul>
<hr />
<h2>What gets Wiped vs. What Stays</h2>
<p>What gets wiped?:</p>
<p>Since we roll back (<code>rpool/local/root</code>):</p>
<ul>
<li>
<p><code>/etc</code> (including system configs) -> WIPED</p>
</li>
<li>
<p><code>/var</code> (logs, databases, containers) -> WIPED</p>
</li>
<li>
<p><code>/root</code> (the root users home directory) -> WIPED</p>
</li>
<li>
<p><code>/usr</code> (though in NixOS this is mostly empty) -> WIPED</p>
</li>
</ul>
<p>What survives?:</p>
<ul>
<li>
<p><code>/nix</code> (mounted from <code>rpool/local/nix</code>) -> PERSISTS</p>
</li>
<li>
<p><code>/boot</code> (mounted from <code>rpool/local/boot</code>) -> PERSISTS</p>
</li>
<li>
<p><code>/home</code> (mounted from <code>rpool/safe/home</code>) -> PERSISTS</p>
</li>
<li>
<p><code>/persists</code> (mounted from <code>rpool/safe/persist</code>) -> PERSISTS</p>
</li>
</ul>
NixOS Containershttps://saylesss88.github.io/idiomatic_nix.html2026-01-30T00:00:00+00:00saylesss87@proton.me (saylesss88)<h1>Idiomatic Nix</h1>
<p>There are quite a few resources out there that share best practices, but no
single unified place to find them all. I’m going to try to build on
<a href="https://nix.dev/guides/best-practices">nix.dev’s Best practices</a>, by doing some
research as well as examining the code of some of the leaders in the NixOS
world. (Tweag, numtide, etc.)</p>
<details>
<summary> ✔️ mdbook-nix-repl for interactive code blocks </summary>
<p>I’ve added a <code>flake.nix</code> to the <code>mdbook-nix-repl</code> repo, you can add it as a
flake input:</p>
<ol>
<li><code>flake.nix</code>:</li>
</ol>
<pre><code class="language-nix"># flake.nix
{
inputs = {
nixpkgs.url = "github:nixos/nixpkgs/nixos-unstable";
mdbook-nix-repl.url = "github:saylesss88/mdbook-nix-repl?dir=server";
};
outputs = { self, nixpkgs, mdbook-nix-repl, ... }: {
nixosConfigurations.magic = nixpkgs.lib.nixosSystem {
system = "x86_64-linux";
modules = [
./configuration.nix
mdbook-nix-repl.nixosModules.default
];
};
};
}
</code></pre>
<ol start="2">
<li><code>configuration.nix</code>:</li>
</ol>
<pre><code class="language-nix">{ pkgs, ... }:
{
imports = [
];
# This option is now provided by the module you imported from the flake
custom.nix-repl-server = {
enable = true;
port = 8080;
tokenFile = "/etc/nix-repl-server.env";
};
}
</code></pre>
<ol start="3">
<li>Copy the value of <code>NIX_REPL_TOKEN</code> in <code>theme/index.hbs</code>, and add create file
<code>/etc/nix-repl-server.env</code>:</li>
</ol>
<pre><code class="language-bash"># Create the file with strict permissions (root read-only)
sudo touch /etc/nix-repl-server.env
sudo chmod 600 /etc/nix-repl-server.env
# Edit it to add: NIX_REPL_TOKEN=your_token_from_index_hbs
sudo vim /etc/nix-repl-server.env
</code></pre>
<p>Expected format:</p>
<pre><code class="language-text">NIX_REPL_TOKEN=9deb7efadb74b9e962e7911bb5caf3b3fef275a1b915b526
</code></pre>
<ol start="4">
<li>Rebuild, and the server will now be running at boot.</li>
</ol>
</details>
<p>All the following examples are interactive, press play to see the result.(The
following examples come directly from <code>nix.dev</code>)</p>
<pre><code class="language-nix">rec {
a = 1;
b = a + 2;
}
</code></pre>
<p>Use this instead:</p>
<pre><code class="language-nix">let
a = 1;
in {
a = a;
b = a + 2;
}
</code></pre>
<blockquote>
<p>💡 TIP Self-reference can be achieved by explicitly naming the attribute set:</p>
</blockquote>
<pre><code class="language-nix"> let
argset = {
a = 1;
b = argset.a + 2;
};
in
argset
</code></pre>
<h2>Updating nested attribute sets</h2>
<pre><code class="language-nix">{ a = 1; b = 2; } // { b = 3; c = 4; }
</code></pre>
<p>Updates are shallow, names on the right take precidence:</p>
<pre><code class="language-nix">{ a = { b = 1; }; } // { a = { c = 3; }; }
</code></pre>
<pre><code class="language-nix">let pkgs = import <nixpkgs> {}; in
pkgs.lib.recursiveUpdate { a = { b = 1; }; } { a = { c = 3;}; }
</code></pre>
Secure Boot on Libvirt stackhttps://saylesss88.github.io/nix/secureboot_libvirt.html2026-01-19T00:00:00+00:00saylesss87@proton.me (saylesss88)<h1>Secure Boot in a Libvirt (KVM) VM with ZFS on LUKS Impermanence</h1>
<h2>Initial VM Setup</h2>
<p>When creating the VM in virt-manager:</p>
<ol>
<li>
<p>Before clicking “Finish”, check the “Customize configuration before install”
box</p>
</li>
<li>
<p>In the Overview section, change Firmware from BIOS to UEFI x86_64:
<code>/usr/share/edk2/ovmf/OVMF_CODE_4M.secboot.qcow2</code></p>
</li>
<li>
<p>Proceed with the NixOS installation as normal. For lanzaboote to build
successfully, I had to pin it to nixpkgs <code>25.05</code>.</p>
</li>
</ol>
<p><strong>Known Issue</strong>: After running <code>nixos-install</code> and rebooting, the SATA CDROM
source path may be cleared. If the VM fails to boot, manually reselect the NixOS
ISO in the SATA settings and reboot. </p>
<hr />
<h2>Configure Firmware for Custom Secure Boot Keys</h2>
<p>The default configuration uses Microsoft’s pre-enrolled keys, which won’t trust
your custom-signed kernel. To enable custom key enrollment, you need to modify
the VM’s XML configuration. </p>
<p>On your host, find your VM name:</p>
<pre><code class="language-bash">virsh -c qemu:///system list --all
</code></pre>
<p>Example Output:</p>
<pre><code class="language-bash"> Id Name State
---------------------------------
- nixos-unstable shut off
- nixos shut off
</code></pre>
<p>Edit the VM configuration:</p>
<pre><code class="language-bash">virsh edit nixos-unstable
</code></pre>
<p>Make the following changes to the <code><os></code> section:</p>
<ol>
<li>Change the <code>enrolled-keys</code> feature from <code>yes</code> to <code>no</code>:</li>
</ol>
<pre><code class="language-xml"><feature enabled='no' name='enrolled-keys'/>
</code></pre>
<ol start="2">
<li>Delete the explicit <code><loader></code> and <code><nvram></code> lines. These conflict with
libvirt’s firmware autoselection when using <code>enrolled-keys='no'</code>:</li>
</ol>
<pre><code class="language-xml"><!-- DELETE THESE TWO LINES -->
<loader readonly='yes' secure='yes' type='pflash' format='qcow2'>/usr/share/edk2/ovmf/OVMF_CODE_4M.secboot.qcow2</loader>
<nvram template='/usr/share/edk2/ovmf/OVMF_VARS_4M.secboot.qcow2' templateFormat='qcow2' format='qcow2'>/var/lib/libvirt/qemu/nvram/nixos-unstable_VARS.qcow2</nvram>
</code></pre>
<p>Your final <code><os></code> section should look like this:</p>
<pre><code class="language-xml"><os firmware='efi'>
<type arch='x86_64' machine='pc-q35-10.1'>hvm</type>
<firmware>
<feature enabled='no' name='enrolled-keys'/>
<feature enabled='yes' name='secure-boot'/>
</firmware>
<boot dev='hd'/>
</os>
</code></pre>
<ol start="3">
<li>Add the <code><serial></code> tag as a best practice</li>
</ol>
<pre><code class="language-xml"> <disk type='file' device='disk'>
<driver name='qemu' type='qcow2' discard='unmap'/>
<source file='/var/lib/libvirt/images/nixos-unstable-1.qcow2'/>
<serial>disk01</serial>
<target dev='vda' bus='virtio'/>
<address type='pci' domain='0x0000' bus='0x04' slot='0x00' function='0x0'/>
</disk>
</code></pre>
<ul>
<li>This enables commands like: <code>zpool import -d /dev/disk/by-id rpool</code></li>
</ul>
<p>Save and exit the editor. Libvirt will now automatically create a new NVRAM file
in Setup Mode (no keys enrolled).</p>
<hr />
<h2>NixOS Installation with ZFS on root with LUKS</h2>
<ul>
<li><a href="https://saylesss88.github.io/nix/encrypted_zfs.html">ZFS on root with LUKS & Impermanence</a></li>
</ul>
<p>Add the impermanence flake input. I also had to pin lanzaboote to nixpkgs
<code>25.05</code> for lanzaboote to build successfully:</p>
<pre><code class="language-nix">inputs = {
impermanence.url = "github:nix-community/impermanence";
nixpkgs.url = "github:nixos/nixpkgs/nixos-unstable";
nixpkgs-stable.url = "github:nixos/nixpkgs/nixos-25.05";
};
</code></pre>
<p>Add lanzaboote, if you don’t use <code>unstable</code>, you can obviously avoid the
overlay:</p>
<pre><code class="language-nix">{ pkgs, lib, inputs, ... }: {
# configuration.nix
nixpkgs.overlays = [
(final: prev: {
lanzaboote = (inputs.nixpkgs-stable.legacyPackages.${pkgs.system}.lanzaboote or prev.lanzaboote)
})
];
environment.systemPackages = [ pkgs.sbctl ];
boot.loader.systemd-boot.enable = lib.mkForce false;
boot.lanzaboote = {
enable = true;
pkiBundle = "/var/lib/sbctl";
};
}
</code></pre>
<p>And <code>impermanence.nix</code>:</p>
<pre><code class="language-nix">{ inputs, lib, ... }: {
imports = [
inputs.impermanence.nixosModules.impermanence
];
boot.initrd.postMountCommands = lib.mkAfter ''
zfs rollback -r rpool/local/root@blank
'';
environment.persistence."/persist" = {
directories = [ "/var/lib/sbctl" "/var/lib/nixos" ];
};
fileSystems."/persist" = {
device = "rpool/safe/persist";
fsType = "zfs";
neededForBoot = true;
};
}
</code></pre>
<hr />
<h2>Lanzaboote Installation</h2>
<ul>
<li><a href="https://saylesss88.github.io/installation/enc/lanzaboote.html">Secure Boot with Lanzaboote</a></li>
</ul>
<hr />
<h2>Enroll the Secure Boot Keys</h2>
<p>After the XML changes, boot the VM and enter the firmware setup (press ESC
during boot).</p>
<ol>
<li>
<p>Navigate to Device Manager → Secure Boot Configuration</p>
</li>
<li>
<p>Switch to “Custom mode”, uncheck Attempt Secure Boot [ ], select “Reset
Secure Boot Keys”, save with F10, and reboot.</p>
</li>
<li>
<p>Enroll the keys: <code>sudo sbctl enroll-keys -m</code></p>
</li>
<li>
<p>Reboot: After enrolling the keys and rebooting, the system will automatically
be placed in “Standard mode”, and Attempt Secure Boot [x] selected. You do
not need to re-enter firmware setup mode.</p>
</li>
<li>
<p>Verify Secure Boot Status: <code>bootctl status</code></p>
</li>
</ol>
ZFS with LUKS and Impermanencehttps://saylesss88.github.io/installation/enc/encrypted_ZFS.html2026-01-17T00:00:00+00:00saylesss87@proton.me (saylesss88)<h1>ZFS with LUKS and Impermanence</h1>
<details>
<summary> ✔️ Table of Contents</summary>
<!-- toc -->
</details>
<p>I tested this on the libvirt stack with KVM, this should work on bare metal with
a few omissions.</p>
<details>
<summary> ✔️ SSH Method </summary>
<p>This saves a ton of typing…</p>
<ol>
<li>
<p>Boot the minimal ISO</p>
</li>
<li>
<p>Set a password for the <code>nixos</code> user: <code>sudo passwd nixos</code></p>
</li>
<li>
<p>Find the IP address: <code>ip a</code> (look for <code>etho</code> or <code>wlan0</code>)</p>
</li>
<li>
<p>SSH in from your host or another machine: <code>ssh nixos@192.168.1.x</code></p>
</li>
</ol>
<ul>
<li><a href="https://github.com/saylesss88/my-flake2">Starter Repo containing a flake and the configuration.nix from this chapter</a></li>
</ul>
<pre><code class="language-bash">git clone https://github.com/saylesss88/my-flake2.git
</code></pre>
<p>I included a personally tested script that handles all of the steps up until you
start configuring the <code>configuration.nix</code>.</p>
<pre><code class="language-bash">cd my-flake2
sudo chmod +x install.sh
sudo ./install.sh
</code></pre>
<p>You will be prompted to enter your disk, just enter the disk, not anything else,
like this:</p>
<pre><code class="language-bash">vda
# OR
nvme0n1
</code></pre>
<p>After the first script completes, there is a <code>test.sh</code> script that ensures
everything is in order.</p>
<pre><code class="language-bash">sudo chmod +x test.sh
sudo ./test.sh
</code></pre>
</details>
<h2>What is OpenZFS</h2>
<p>ZFS is an advanced filesystem, originally developed by Sun Microsystems in 05.</p>
<p>OpenZFS is a fork of the proprietary Oracle ZFS, it was forked over a decade
ago. Most of the code remains the same so you can check the
<a href="https://docs.oracle.com/en/storage/zfs-storage/index.html">Oracle website</a> for
docs and administration guides.</p>
<p>ZFS is licensed under the
<a href="https://en.wikipedia.org/wiki/CDDL">Common Development and Distribution License</a>
(CDDL). Because the CDDL is incompatible with the GPL,
<a href="https://sfconservancy.org/blog/2016/feb/25/zfs-and-linux/">it is not possible</a>
for ZFS to be included in the Linux Kernel. This requirement, however, does not
prevent a native Linux kernel module from being developed and distributed by a
third party, as is the case with <a href="https://openzfs.org/">OpenZFS</a> (previously
named ZFS on Linux). –arch wiki</p>
<h2>Comparison: OpenZFS Native Encryption vs. LUKS</h2>
<details>
<summary> ✔️ OpenZFS Native Encryption vs. LUKS </summary>
<blockquote>
<p>NOTE: This isn’t an attack on ZFS Native Encryption, I’m just presenting the
information, the choice is yours. Unless you have a high threat model, ZFS
native encryption has many benefits such improved flexibility and
authentication.</p>
</blockquote>
<ul>
<li>
<p><strong>LUKS (Device Layer)</strong>: LUKS operates on the block device (like
<code>/dev/nvme0n1</code>). It knows nothing about files, folders, or datasets. It just
sees a stream of bytes and scrambles them.</p>
<ul>
<li>Everything on the partition is encrypted. The filesystem sits inside the
encrypted container.</li>
<li>With standard LUKS, an adversary can see you are using encryption (the LUKS
header is visible), but they cannot determine what filesystem (ZFS, ext4,
etc.) is inside. If you go a step further and use a detached header, the
entire drive looks like random noise, providing plausible deniability that
any data exists at all.</li>
</ul>
</li>
<li>
<p><strong>ZFS Native (Filesystem Layer)</strong>: ZFS encryption operates at the Dataset
(Filesystem) level. It is aware of the structure of your data.</p>
<ul>
<li>Only the <strong>file blocks</strong> (the actual content of your files) and the <strong>file
attributes</strong> (ACLs, permissions) within a specific dataset are encrypted.</li>
</ul>
</li>
</ul>
<p>No matter how careful you are with ZFS Native encryption, these cannot be
hidden:</p>
<ul>
<li>
<p><strong>The Structure</strong>: The fact that <code>dataset A</code> is a child of <code>dataset B</code></p>
</li>
<li>
<p><strong>The Volume</strong>: The exact amount of disk space used by each dataset (in bytes)</p>
</li>
<li>
<p><strong>The Activity</strong>: The fact that <em>something</em> changed at a specific time (via
snapshot creation or <code>used</code> property changing)</p>
</li>
</ul>
<blockquote>
<p>By using generic dataset names (e.g., <code>data/vol1</code> instead of
<code>data/mistress_photos</code>) and automated snapshot schedules, you can strip the
semantic value from the exposed metadata. An attacker will see that you have
data and how much you have, but they won’t know what it is or which dataset is
the valuable one.</p>
</blockquote>
<p><strong>Sanitizing your ZFS usage (Mitigating risk)</strong>:</p>
<p>By following a few simple best practices you can mitigate most, if not all of
the risk depending on the situation.</p>
<ul>
<li>
<p>Use generic IDs for dataset names, instead of <code>tank/mistress_photos</code> use
<code>tank/vol-A</code></p>
</li>
<li>
<p>Automate your snapshots to prevent traffic analysis</p>
</li>
<li>
<p>Use padding to mitigate size analysis, add dummy files to obfuscate the size
(Can be tedious in ZFS). This is the hardest to mitigate, if this is a real
threat, use LUKS instead.</p>
</li>
</ul>
<p>OpenZFS native encryption allows you to transparently encrypt data at rest
within ZFS itself. It was initially released in May 2019, giving it much less
time to be scrutinized compared to LUKS (initial release in 2004).</p>
<p>OpenZFS Encryption operates at the dataset layer, not the disk layer, which
creates several critical security gaps that full-disk encryption (FDE) solutions
like LUKS completely avoid.</p>
<p>Unlike LUKS, which presents a “black box” of random noise to anyone without the
key, ZFS Native Encryption must leave certain structural elements visible to the
operating system. This is a deliberate design choice that allows ZFS to perform
maintenance tasks (like scrubbing) on locked datasets without requiring the user
to type in a password. (Depending on your threat model, this can be a deal
breaker).</p>
<hr />
<h2>Threat Example</h2>
<p><strong>Example: Threat Model where ZFS Native Encryption falls short compared to
LUKS</strong></p>
<ol>
<li>The “Pattern of Life” Attack (Timestamp Leaks)</li>
</ol>
<p><strong>The Leak</strong>: ZFS snapshot names and creation times are visible in plaintext
(<code>zfs list -t snapshot</code>)</p>
<p><strong>The Threat Model</strong>: An adversary monitoring your backups or seizing your drive
can build a profile of your behavior without decrypting a single byte.</p>
<ul>
<li>
<p>If you claim to be asleep at 3AM, but <code>zfs list</code> shows snapshots being created
or data changing size at 3:15 AM, your alibi is broken.</p>
</li>
<li>
<p>Or, say a whistleblower contacts a journalist. An adversary seizes the
journalist’s laptop. They can’t read the files, but they see a new dataset
grew by exactly 5GB at the exact time the leak occured. Correlation = Guilt.</p>
</li>
</ul>
<p><strong>Compress & Encrypt</strong>:</p>
<p>It’s actually a common misconception that LUKS prevents compression before
encryption, both methods are able to do this.</p>
<ul>
<li>
<p>ZFS Native: <code>Data -> Compress -> Encrypt -> Checksum -> Write to Disk</code></p>
</li>
<li>
<p>ZFS on LUKS: <code>Data -> Compress -> ZFS Write -> LUKS Encrypt -> Write to Disk</code></p>
</li>
</ul>
<p>Both methods save disk space.</p>
<p><strong>Integrety and Authentication</strong>:</p>
<p>This is the strongest architectural argument for ZFS Native.</p>
<ul>
<li>ZFS Native: Uses AES-GCM (default) which is an Authenticated Encryption with
Associated Data (AEAD) mode. If a single bit is flipped on disk (maliciously
or accidentally), ZFS refuses to return the bad data and reports a checksum
error.
<ul>
<li>NOTE: You can get integrity with LUKS2 with <code>dm-integrity</code>, but it incurs a
massive performance penalty and is considered experimental for production
use.</li>
</ul>
</li>
</ul>
<hr />
<h2>ZFS Native Encryption OR LUKS</h2>
<p><strong>Use LUKS if</strong>:</p>
<ul>
<li>
<p>You can’t afford to leak metadata like dataset names or snapshot timestamps.
LUKS makes the drive look like random noise.</p>
</li>
<li>
<p>You require rock-solid stability. The ZFS-on-LUKS stack is very
“battle-tested”.</p>
</li>
</ul>
<p><strong>Use ZFS Native Encryption if</strong>:</p>
<ul>
<li>
<p>You have “Untrusted” Offsite Backups: This is a really nice feature! You can
<code>zfs send -w</code> your data to a friend’s server or a cloud VM. The remote host
cannot mount or read your data because they never have the key, but they can
still scrub the pool and verify the data integrity.</p>
</li>
<li>
<p>You need granular control: ZFS Native Encryption allows you to for example,
keep your OS root unencrypted for fast booting/repair, but your <code>/home</code>
directory encrypted.</p>
</li>
<li>
<p>You run many VMs/Containers: You can create a new encrypted dataset for a
specific project/client without repartitioning or creating loopback files.</p>
</li>
<li>
<p>You want to verify data authenticity.</p>
</li>
<li>
<p><a href="https://arstechnica.com/gadgets/2021/06/a-quick-start-guide-to-openzfs-native-encryption/">arsTechnica quick start to openzfs-native-encryption</a></p>
</li>
<li>
<p><a href="https://discourse.practicalzfs.com/t/is-native-encryption-ready-for-production-use/532">Practical ZFS is native encryption ready for production use?</a></p>
</li>
</ul>
</details>
<h2>Getting Started</h2>
<p>When creating the VM, before clicking “Finish”, check the “Customize
configuration before install” box and choose EFI Firmware > BIOS. <strong>You will
waste a bunch of time if you forget to do this</strong>!</p>
<ul>
<li>I used <code>OVMF_CODE.fd</code> in my testing.</li>
</ul>
<p><strong>Format your disk</strong></p>
<ol>
<li>Partition & Format</li>
</ol>
<pre><code class="language-bash">sudo cfdisk /dev/vda
sudo mkfs.fat -F32 /dev/vda1
</code></pre>
<ol start="2">
<li>Setup LUKS</li>
</ol>
<pre><code class="language-bash">sudo cryptsetup luksFormat /dev/vda2
sudo cryptsetup open /dev/vda2 cryptroot
</code></pre>
<ol start="3">
<li>Create zpool (Edited 2026-01-18 normalization=none)</li>
</ol>
<pre><code class="language-bash">sudo zpool create \
-o ashift=12 \
-o autotrim=on \
-O acltype=posixacl \
-O canmount=off \
-O compression=zstd \
-O normalization=none \
-O relatime=on \
-O xattr=sa \
-O dnodesize=auto \
-O mountpoint=none \
rpool /dev/mapper/cryptroot
</code></pre>
<ol start="5">
<li>Dataset Creation</li>
</ol>
<pre><code class="language-bash"># root (ephemeral)
sudo zfs create -p -o canmount=noauto -o mountpoint=legacy rpool/local/root
sudo zfs snapshot rpool/local/root@blank
# nix store
sudo zfs create -p -o mountpoint=legacy rpool/local/nix
# persistent data
sudo zfs create -p -o mountpoint=legacy rpool/safe/home
sudo zfs create -p -o mountpoint=legacy rpool/safe/persist
</code></pre>
<ul>
<li><code>mountpoint=legacy</code> means that systemd will take care of the mounting</li>
</ul>
<ol start="6">
<li>Mounting</li>
</ol>
<pre><code class="language-bash"># 1. Mount root first
sudo mount -t zfs rpool/local/root /mnt
# 2. Create directories
sudo mkdir -p /mnt/{nix,home,persist,boot}
# 3. Mount ESP directly to /boot (simpler and safer for systemd-boot)
sudo mount -t vfat -o umask=0077 /dev/vda1 /mnt/boot
# 4. Mount other ZFS datasets
sudo mount -t zfs rpool/local/nix /mnt/nix
sudo mount -t zfs rpool/safe/home /mnt/home
sudo mount -t zfs rpool/safe/persist /mnt/persist
</code></pre>
<ol start="7">
<li>Configuration Prep</li>
</ol>
<pre><code class="language-bash">sudo nixos-generate-config --root /mnt
</code></pre>
<pre><code class="language-bash">export NIX_CONFIG='experimental-features = nix-command flakes'
nix-shell -p helix
</code></pre>
<pre><code class="language-bash">sudo blkid /dev/vda2
# Copy the uuid
</code></pre>
<pre><code class="language-nix"># configuration.nix
boot.initrd.luks.devices = {
cryptroot = {
device = "/dev/disk/by-uuid/uuid#";
allowDiscards = true;
preLVM = true;
};
};
</code></pre>
<pre><code class="language-nix">boot.initrd.luks.devices."cryptroot".device = "/dev/disk/by-uuid/<UUID-OF-PARTITION-2>";
</code></pre>
<hr />
<h2>Prep <code>configuration.nix</code></h2>
<pre><code class="language-bash">head -c4 /dev/urandom | xxd -p > /tmp/rand.txt
</code></pre>
<p><strong>Create password file in a persistent location</strong>:</p>
<pre><code class="language-bash">sudo mkdir -p /mnt/persist/etc/nixos-secrets/passwords
#1) This is for `initialHashedPassword`
# Read this in with `:r /tmp/pass.txt`
mkpasswd --method=yescrypt > /tmp/pass.txt
</code></pre>
<p>After first reboot, the above files will be placed directly under <code>/persist/</code></p>
<p>(Edited 2026-01-18 use <code>postMountCommands</code> > <code>postResumeCommands</code>)</p>
<pre><code class="language-nix">{ config, lib, pkgs, ... }:
{
# ------------------------------------------------------------------
# 1. Boot loader – systemd-boot (UEFI only)
# ------------------------------------------------------------------
boot.loader = {
systemd-boot = {
enable = true;
consoleMode = "max";
editor = false;
};
efi = {
canTouchEfiVariables = true;
efiSysMountPoint = "/boot";
};
};
# ------------------------------------------------------------------
# 2. ZFS support see: https://openzfs.github.io/openzfs-docs/Getting%20Started/NixOS/index.html
# ------------------------------------------------------------------
boot.supportedFilesystems = [ "zfs" ];
boot.zfs.devNodes = "/dev/"; # Critical for VMs
# Not needed with LUKS
boot.zfs.requestEncryptionCredentials = false;
# systemd handles mounting
systemd.services.zfs-mount.enable = false;
services.zfs = {
autoScrub.enable = true;
# periodically runs `zpool trim`
trim.enable = true;
# autoSnapshot = true;
};
# ------------------------------------------------------------------
# 3. LUKS
# ------------------------------------------------------------------
boot.initrd.luks.devices = {
cryptroot = {
# replace uuid# with output of UUID # from `sudo blkid /dev/vda2`
device = "/dev/disk/by-uuid/uuid#";
allowDiscards = true;
preLVM = true;
};
};
# ------------------------------------------------------------------
# 4. Roll-back root to blank snapshot on **every** boot
# ------------------------------------------------------------------
# Uncomment after first reboot
# boot.initrd.postMountCommands = lib.mkAfter ''
# zfs rollback -r rpool/local/root@blank
# '';
# ------------------------------------------------------------------
# 5. Basic system (root password, serial console for VM)
# ------------------------------------------------------------------
# Unique 8-hex hostId (run once in live ISO: head -c4 /dev/urandom | xxd -p)
networking.hostId = "a1b2c3d4"; # <<<--- replace with your own value
users.users.root.initialPassword = "changeme"; # change after first login
boot.kernelParams = [ "console=tty1" ];
# ------------------------------------------------------------------
# Users
# ------------------------------------------------------------------
users.mutableUsers = false;
# Change `your-user`
users.users.your-user = {
isNormalUser = true;
extraGroups = [ "wheel" ];
group = "your-user";
# :r /tmp/pass.txt:
initialHashedPassword = "";
};
# This enables `chown -R your-user:your-user`
users.groups.your-user = { };
# ------------------------------------------------------------------
# (Optional) Helpful for recovery situations
# ------------------------------------------------------------------
# users.users.admin = {
# isNormalUser = true;
# description = "admin account";
# extraGroups = [ "wheel" ];
# group = "admin";
# initialHashedPassword = "Output of `:r /tmp/pass.txt`";
# };
# users.groups.admin = { };
# ------------------------------------------------------------------
# ------------------------------------------------------------------
# 6. (Optional) Enable SSH for post-install configuration
# ------------------------------------------------------------------
# services.openssh = {
# enable = true;
# settings.PermitRootLogin = "yes";
#};
# ------------------------------------------------------------------
# 7. Mark /persist as needed for boot
# ------------------------------------------------------------------
fileSystems."/persist".neededForBoot = true;
}
</code></pre>
<p>After reboot, you can uncomment:</p>
<pre><code class="language-nix"> boot.initrd.postMountCommands = lib.mkAfter ''
zfs rollback -r rpool/local/root@blank
'';
</code></pre>
<p>Uncomment the above script and test: (Don’t forget that the <code>/etc</code> directory
will be wiped, including your <code>configuration.nix</code> and
<code>hardware-configuration.nix</code>!)</p>
<p><strong>Configuration backup</strong></p>
<pre><code class="language-bash">sudo mkdir -p /persist/etc
sudo cp /etc/nixos/hardware-configuration.nix /etc/nixos/configuration.nix /persist/etc/
</code></pre>
<p><strong>Rollback Test</strong></p>
<pre><code class="language-bash">sudo touch /etc/rollback-canary
sudo reboot
</code></pre>
<p>If the rollback is working, <code>/etc/rollback-canary</code> should be gone after reboot
(while things in <code>/persist</code> remain).</p>
<hr />
<h2>Adding a disk serial (libvirt XML)</h2>
<p>NixOS ZFS boot support is broken for virtio drives without serial numbers.
Virtio disks without serials don’t appear in /dev/disk/by-id, but ZFS boot logic
only tries to import pools from /dev/disk/by-id. The official OpenZFS NixOS
documentation explicitly states: “If virtio is used as disk bus, power off the
VM and set serial numbers for disk”</p>
<p>In the <code><disk ...></code> block of your root disk add:</p>
<p>Add to <code>.zshrc</code>:</p>
<pre><code class="language-bash">export LIBVIRT_DEFAULT_URI="qemu:///system"
</code></pre>
<pre><code class="language-bash">virsh list --all
virsh edit nixos-unstable
</code></pre>
<p>In the first <code><disk ... device='disk'></code> section (the one with target <code>dev='vda'</code>
<code>bus='virtio'</code>), add a <code><serial></code> line, e.g.:</p>
<pre><code class="language-xml"><disk type='file' device='disk'>
<driver name='qemu' type='qcow2' discard='unmap'/>
<source file='/var/lib/libvirt/images/nixos-unstable-1.qcow2' index='2'/>
<backingStore/>
<target dev='vda' bus='virtio'/>
<serial>disk01</serial>
<alias name='virtio-disk0'/>
...
</disk>
</code></pre>
<hr />
<h2>Issues I’ve Come Across</h2>
<p><strong>sops-nix README</strong>: Explicitly warns: “If you are using Impermanence, the key
used for secret decryption … must be in a persisted directory, loaded early
enough during boot.” It specifically cites activation timing as the reason this
fails.</p>
<p>Typically the solution was to add <code>neededForUsers = true;</code> in your
“password_hash” block but that isn’t working for this setup. (ZFS/LUKS/Imperm)</p>
<p>I’ve been using <code>initialHashedPassword</code>, which bypasses the race entirely by
baking the salted hash into the store. This is all that I’ve found that works so
far…</p>
<ul>
<li>
<p>Without adding the <code><serial>disk01</serial></code> to the XML when you reboot, your
system will hang before asking for your LUKS password.</p>
</li>
<li>
<p>Without clicking “Customize configuration before install” box and choosing EFI
Firmware instead of the default BIOS, <strong>you will not be able to boot at all</strong>.
This seems to be the case for all custom disk layouts with NixOS on the
libvirt stack.</p>
</li>
</ul>
<hr />
<h3>Resources</h3>
<details>
<summary> ✔️ Resources </summary>
<ul>
<li>
<p><a href="https://openzfs.github.io/openzfs-docs/">openzfs-docs</a></p>
</li>
<li>
<p><a href="https://openzfs.github.io/openzfs-docs/Getting%20Started/NixOS/Root%20on%20ZFS.html">openzfs-docs NixOS Root on ZFS</a></p>
</li>
<li>
<p><a href="https://wiki.nixos.org/wiki/ZFS">NixOS Wiki ZFS</a></p>
</li>
<li>
<p><a href="https://klarasystems.com/articles/keeping-data-safe-with-openzfs-security-encryption-delegation/">klarasystems OpenZFS: Security, Encryption, and Delegation Sept 2025</a></p>
</li>
<li>
<p><a href="https://klarasystems.com/articles/improving-replication-security-with-openzfs-delegation/">klarasystems Improving Replication Security with OpenZFS Delegation</a></p>
</li>
<li>
<p><a href="https://forum.level1techs.com/t/zfs-guide-for-starters-and-advanced-users-concepts-pool-config-tuning-troubleshooting/196035">ZFS Guide for starters & advanced users</a></p>
</li>
<li>
<p><a href="https://openzfs.org/wiki/System_Administration">OpenZFS Sysem Administration</a></p>
</li>
<li>
<p><a href="https://docs.oracle.com/cd/E19253-01/819-5461/">Oracle Solaris ZFS Admin Guide</a></p>
</li>
<li>
<p><a href="https://docs.freebsd.org/en/books/handbook/zfs/">FreeBSD Handbook Chapter 22 The Z File System (ZFS)</a></p>
</li>
<li>
<p><a href="https://github.com/ankek/awesome-zfs">awesome-zfs</a></p>
</li>
<li>
<p><a href="https://arstechnica.com/series/storage-fundamentals/">arsTechnica Storage Fundamentals</a></p>
</li>
<li>
<p><a href="https://github.com/jimsalterjrs/sanoid/">sanoid</a></p>
</li>
<li>
<p><a href="https://discourse.practicalzfs.com/">Practical ZFS</a></p>
</li>
<li>
<p><a href="https://github.com/openzfs/zfs">openzfs/zfs GH Repo</a></p>
</li>
<li>
<p><a href="https://github.com/openzfs/zfs/issues">openzfs Issues</a></p>
</li>
<li>
<p><a href="https://zfsonlinux.org/">zfsonlinux.org</a></p>
</li>
<li>
<p><a href="https://wiki.archlinux.org/title/ZFS">arch wiki ZFS</a></p>
</li>
<li>
<p><a href="https://tech-couch.com/post/btrfs-vs-zfs">tech-couch Btrfs Vs ZFS</a></p>
</li>
<li>
<p><a href="https://blog.purestorage.com/purely-educational/btrfs-vs-zfs/">PureStorage btrfs vs zfs</a></p>
</li>
<li>
<p><a href="https://www.cs.hmc.edu/~rhodes/cs134/readings/The%20Zettabyte%20File%20System.pdf">The Zettabyte File System design docs</a></p>
</li>
<li>
<p><a href="https://mrczntt.com/blog/understanding-zfs-the-zettabyte-file-system/">Understanding ZFS, the Zettabyte File System</a></p>
</li>
<li>
<p><a href="https://en.wikipedia.org/wiki/ZFS">ZFS - Wikipedia</a></p>
</li>
</ul>
</details>
ZFS Impermanence in a VMhttps://saylesss88.github.io/nix/zfs_impermanence.html2026-01-16T00:00:00+00:00saylesss87@proton.me (saylesss88)<h1>ZFS Impermanence in a VM</h1>
<details>
<summary> ✔️ Table of Contents</summary>
<!-- toc -->
</details>
<p>Yet another blog post inspired by
<a href="https://grahamc.com/blog/erase-your-darlings/">erase your darlings</a></p>
<p>I only tested this within a VM although with a few small tweaks it should work
on bare metal. I used the libvirtd stack with KVM for this.</p>
<blockquote>
<p>NOTE: This example doesn’t use encryption, it would be easy to add ZFS Native
Encryption by changing the first <code>zpool</code> command. It’s good enough for most
people but does leak some metadata. I’ll add a LUKS example eventually which
is more involved.</p>
</blockquote>
<ul>
<li><a href="https://github.com/saylesss88/my-flake2">Starter Repo containing a flake and the configuration.nix from this chapter</a></li>
</ul>
<pre><code class="language-bash">git clone https://github.com/saylesss88/my-flake2.git
</code></pre>
<details>
<summary> ✔️ SSH Method to enable copy-paste</summary>
<ol>
<li>
<p>Boot the minimal ISO</p>
</li>
<li>
<p>Set a password for the <code>nixos</code> user: <code>sudo passwd nixos</code></p>
</li>
<li>
<p>Find the IP address: <code>ip a</code> (look for <code>eth0</code> or <code>wlan0</code>)</p>
</li>
<li>
<p>SSH in from another machine: <code>ssh nixos@192.168.1.x</code></p>
</li>
<li>
<p>Clone the repo and copy-paste commands from your browser to the terminal.</p>
</li>
</ol>
</details>
<details>
<summary> ✔️ Multi-TTY Method (No extra Devices) </summary>
<ol>
<li>
<p>Log in on the default TTY (usually Alt+F1).</p>
</li>
<li>
<p>Switch to a second TTY by pressing Alt+F2.</p>
</li>
<li>
<p>Log in again (user nixos, no password default).</p>
</li>
<li>
<p>Clone your repo in TTY2: git clone https://github.com/your/repo.</p>
</li>
<li>
<p>Open the README with a pager: less repo/README.md.</p>
</li>
<li>
<p>Switch back to TTY1 (Alt+F1) to execute commands.</p>
</li>
<li>
<p>Toggle back and forth (Alt+F2 / Alt+F1) to read and type.</p>
</li>
</ol>
</details>
<details>
<summary> ✔️ tmux Method (Split Screen) </summary>
<p>The minimal ISO includes <code>tmux</code> in the package set, but it’s not installed in
the environment by default.</p>
<ol>
<li>
<p>Run: <code>nix run nixpkgs#tmux</code></p>
</li>
<li>
<p>Once inside tmux, split the screen vertically: Press <strong>Ctrl+b</strong> then <strong>%</strong></p>
</li>
<li>
<p>In the right pane, open the README: <code>less repo/README.md</code></p>
</li>
<li>
<p>In the left pane, type the commands</p>
</li>
<li>
<p>Switch panes with <strong>Ctrl+b</strong> then <strong>Left/Right Arrow</strong></p>
</li>
</ol>
</details>
<p>Start with a minimal ISO.</p>
<p><a href="https://channels.nixos.org/nixos-25.11/latest-nixos-minimal-x86_64-linux.iso">Download Minimal (64-bit Intel-AMD)</a></p>
<p>Choose the LTS image, it comes with the <code>zfs</code> module enabled.</p>
<p>I’ve also found that for my system it works best to switch the Video Model to
Virtio, with 3D accelleration disabled (causes mouse inversion).</p>
<p>When creating the VM, before clicking “Finish”, check the “Customize
configuration before install” box and choose EFI Firmware > BIOS. <strong>You will
waste a bunch of time if you forget to do this</strong>!</p>
<ul>
<li>I used <code>OVMF_CODE.fd</code> in my testing.</li>
</ul>
<p>Check out your layout:</p>
<pre><code class="language-bash">sudo fdisk -l
</code></pre>
<p>Format your disk:</p>
<pre><code class="language-bash">sudo cfdisk /dev/vda
</code></pre>
<p>Create a 1G <strong>EFI System</strong> first, then a <strong>Linux Filesystem</strong> with the remaining
space. I used (100G)</p>
<p>For the following guide, you want <code>/dev/vda1</code> to be your <strong>EFI System</strong>
partition, and <code>/dev/vda2</code> to be the <strong>Linux Filesystem</strong> partition.</p>
<pre><code class="language-bash">sudo fdisk -l
</code></pre>
<pre><code class="language-bash">sudo mkfs.vfat -n EFI /dev/vda1
</code></pre>
<h2>Create Your ZFS Partitions</h2>
<ol>
<li>Create a zpool: (Edited 2026-01-18 normalization=none)</li>
</ol>
<pre><code class="language-bash">zpool create \
-o ashift=12 \
-o autotrim=on \
-O acltype=posixacl \
-O canmount=off \
-O dnodesize=auto \
-O normalization=none \
-O relatime=on \
-O xattr=sa \
-O mountpoint=none \
rpool /dev/vda2
</code></pre>
<details>
<summary> ZFS Native Encryption (Work in Progress) </summary>
<pre><code class="language-bash">zpool create -f \
-o ashift=12 \
-O encryption=aes-256-gcm \
-O keyformat=passphrase \
-O keylocation=prompt \
-O mountpoint=none \
-O acltype=posixacl \
-O compression=lz4 \
-O xattr=sa \
rpool /dev/vda2
</code></pre>
<p>I just got impermanence working without encryption, I haven’t been able to test
and iron out any quirks of this encryption method..</p>
</details>
<ol start="2">
<li>Create all datasets with parents (<code>-p</code>):</li>
</ol>
<pre><code class="language-bash"># root (ephemeral – will be rolled back)
zfs create -p -o canmount=noauto -o mountpoint=legacy rpool/local/root
# blank snapshot (the “erase” target)
zfs snapshot rpool/local/root@blank
zfs create -p -o mountpoint=legacy rpool/local/boot
# /nix – read-only store, must survive rollbacks
zfs create -p -o mountpoint=legacy rpool/local/nix
# persisted areas
zfs create -p -o mountpoint=legacy rpool/safe/home
zfs create -p -o mountpoint=legacy rpool/safe/persist
</code></pre>
<ol start="3">
<li>Mount everything under <code>/mnt</code>:</li>
</ol>
<pre><code class="language-bash">mount -t zfs rpool/local/root /mnt
mkdir -p /mnt/{boot,boot/efi,nix,home,persist}
mount -t vfat -o umask=0077 /dev/vda1 /mnt/boot/efi
mount -t zfs rpool/local/nix /mnt/nix
mount -t zfs rpool/safe/home /mnt/home
mount -t zfs rpool/safe/persist /mnt/persist
</code></pre>
<blockquote>
<p>Note: By placing your Nix flake in <code>/home/user/nixos-config</code> (which lives on
<code>rpool/safe/home</code>), it persists naturally. You don’t need to add your
configuration files to the <code>environment.persistence</code> module lists because the
underlying storage isn’t being wiped.</p>
</blockquote>
<ol start="4">
<li>Continue with the rest of the install</li>
</ol>
<pre><code class="language-bash">nixos-generate-config --root /mnt
# edit /mnt/etc/nixos/configuration.nix (add ZFS + rollback + impermanence)
</code></pre>
<details>
<summary> ✔️ Quick checklist: </summary>
<p>Quick checklist to confirm that you’ve taken all of the necessary steps.</p>
<pre><code class="language-bash"># 1. pool
zpool create -o ashift=12 -o autotrim=on -O acltype=posixacl -O canmount=off \
-O dnodesize=auto -O normalization=formD -O relatime=on -O xattr=sa \
-O mountpoint=none rpool /dev/vda2
# 2. datasets + snapshot
zfs create -p -o canmount=noauto -o mountpoint=legacy rpool/local/root
zfs snapshot rpool/local/root@blank
zfs create -p -o mountpoint=legacy rpool/local/nix
zfs create -p -o mountpoint=legacy rpool/safe/home
zfs create -p -o mountpoint=legacy rpool/safe/persist
# add a /boot dataset
zfs create -p -o mountpoint=legacy rpool/local/boot
# 3. mounts
mount -t zfs rpool/local/root /mnt
mkdir -p /mnt/{boot,boot/efi,nix,home,persist}
# /boot on ZFS
mount -t zfs rpool/local/boot /mnt/boot
# ESP on /boot/efi
mount -t vfat -o umask=0077 /dev/vda1 /mnt/boot/efi
mount -t zfs rpool/local/nix /mnt/nix
mount -t zfs rpool/safe/home /mnt/home
mount -t zfs rpool/safe/persist /mnt/persist
</code></pre>
</details>
<h2>Prep <code>configuration.nix</code></h2>
<pre><code class="language-bash">head -c4 /dev/urandom | xxd -p > /tmp/rand.txt
</code></pre>
<p><strong>Create password file in a persistent location</strong>:</p>
<pre><code class="language-bash">sudo mkdir -p /mnt/persist/etc/nixos-secrets/passwords
# 2) Create the password hash and write it to the persistent file
# Replace "your-password" and "your-user"
sudo sh -c 'mkpasswd -m yescrypt "your-password" > /mnt/persist/etc/nixos-secrets/passwords/your-user'
# 3) Lock down permissions
sudo chown root:root /mnt/persist/etc/nixos-secrets/passwords/your-user
sudo chmod 600 /mnt/persist/etc/nixos-secrets/passwords/your-user
</code></pre>
<ul>
<li>After first reboot, the above files will be placed directly under <code>/persist/</code></li>
</ul>
<p>You will read <code>rand.txt</code> into the <code>configuration.nix</code> with <code>:r /tmp/rand.txt</code>.</p>
<p>Edit the <code>/mnt/etc/nixos/configuration.nix</code> (Edited 2026-01-18 use
<code>postMountCommands</code> instead of <code>postResumeCommands</code>) :</p>
<pre><code class="language-nix">{ config, lib, pkgs, ... }:
{
# ------------------------------------------------------------------
# 1. Boot loader – systemd-boot (UEFI only)
# ------------------------------------------------------------------
boot.loader = {
systemd-boot = {
enable = true;
consoleMode = "max"; # Full 80×25 console in VM
editor = false; # Security – no edit at boot
};
efi = {
canTouchEfiVariables = true; # libvirt provides /sys/firmware/efi
efiSysMountPoint = "/boot/efi"; # Our 1 GiB FAT32 partition
};
};
# ------------------------------------------------------------------
# 2. ZFS support
# ------------------------------------------------------------------
boot.supportedFilesystems = [ "zfs" ];
boot.zfs.devNodes = "/dev/"; # Critical for VMs
# Unique 8-hex hostId (run once in live ISO: head -c4 /dev/urandom | xxd -p)
networking.hostId = "a1b2c3d4"; # <<<--- replace with your own value
# ------------------------------------------------------------------
# 3. Roll-back root to blank snapshot on **every** boot
# ------------------------------------------------------------------
# Uncomment after first reboot
# boot.initrd.postMountCommands = lib.mkAfter ''
# zfs rollback -r rpool/local/root@blank
# '';
# ------------------------------------------------------------------
# 4. Basic system (root password, serial console for VM)
# ------------------------------------------------------------------
users.users.root.initialPassword = "changeme"; # change after first login
boot.kernelParams = [ "console=ttyS0,115200n8" ];
users.mutableUsers = false;
users.users.your-user = {
isNormalUser = true;
extraGroups = [ "wheel" ];
group = "your-user";
# The location of `hashedPasswordFile` after first reboot
hashedPasswordFile = "/persist/etc/nixos-secrets/passwords/your-user";
};
# This enables `chown -R your-user:your-user`
users.groups.your-user = { };
# ------------------------------------------------------------------
# 5. (Optional) Enable SSH for post-install configuration
# ------------------------------------------------------------------
# services.openssh = {
# enable = true;
# settings.PermitRootLogin = "yes";
#};
# ------------------------------------------------------------------
# 6. Mark /persist as needed for boot
# ------------------------------------------------------------------
fileSystems."/persist".neededForBoot = true;
}
</code></pre>
<pre><code class="language-bash">sudo nixos-install --root /mnt
</code></pre>
<pre><code class="language-bash">reboot
</code></pre>
<p>Copy your system files to a persistent location before uncommenting the
impermanence script.</p>
<pre><code class="language-bash">sudo mkdir -p /persist/etc
sudo cp /etc/nixos/configuration.nix /etc/nixos/hardware-configuration.nix /persist/etc/
</code></pre>
<p>Now, you can uncomment this block:</p>
<pre><code class="language-nix"> boot.initrd.postMountCommands = lib.mkAfter ''
zfs rollback -r rpool/local/root@blank
'';
</code></pre>
<pre><code class="language-bash">sudo touch /etc/rollback-canary
sudo reboot
</code></pre>
<p>If the rollback is working, <code>/etc/rollback-canary</code> should be gone after reboot
(while things in <code>/persist</code> remain).</p>
<hr />
<h2>What gets Wiped vs. What Stays</h2>
<p><strong>What gets wiped?</strong>:</p>
<p>Since we roll back <code>/</code>(<code>rpool/local/root</code>):</p>
<ul>
<li>
<p><code>/etc</code> (including system configs) -> WIPED</p>
</li>
<li>
<p><code>/var</code> (logs, databases, containers) -> WIPED</p>
</li>
<li>
<p><code>/root</code> (the root users home directory) -> WIPED</p>
</li>
<li>
<p><code>/usr</code> (though in NixOS this is mostly empty) -> WIPED</p>
</li>
</ul>
<p><strong>What survives?</strong>:</p>
<ul>
<li>
<p><code>/nix</code> (mounted from <code>rpool/local/nix</code>) -> PERSISTS</p>
</li>
<li>
<p><code>/boot</code> (mounted from <code>rpool/local/boot</code>) -> PERSISTS</p>
</li>
<li>
<p><code>/home</code> (mounted from <code>rpool/safe/home</code>) -> PERSISTS</p>
</li>
<li>
<p><code>/persists</code> (mounted from <code>rpool/safe/persist</code>) -> PERSISTS</p>
</li>
</ul>
<p><strong>Why this matters for secrets?</strong></p>
<p><strong>SSH Host keys</strong> typically live in <code>/etc/ssh</code>. Since <code>/etc</code> is wiped, they
disappear. Store them in <code>/persist/etc/ssh</code> and tell NixOS to look there. (or
symlink them)</p>
<p><strong>User Secrets</strong> (<code>~/.config/sops</code>): They live in <code>/home</code> so they’re safe.</p>
<hr />
<h2>Integrating into a Flake</h2>
<p>After first reboot, I recommend setting up a flake in a persistent location such
as <code>/home/your-user/flake</code>. Because subsequent reboots will wipe the <code>/etc</code>
directory.</p>
<ul>
<li><a href="https://github.com/saylesss88/flakey">Example Flake</a>, this is a WIP
adaptation from another flake I had.</li>
</ul>
<pre><code class="language-bash">sudo mkdir /imperm_test
echo "This should be Gone after Reboot" | sudo tee /imperm_test/testfile
sudo ls -l /imperm_test/testfile # Verify the file exists
sudo cat /imperm_test/testfile # Verify content
</code></pre>
<p>Reboot and check again:</p>
<pre><code class="language-bash">sudo ls -l /imperm_test/testfile # Verify the file no longer exists
sudo cat /imperm_test/testfile # Verify content is missing
</code></pre>
<hr />
<h2>Persisting SSH Keys</h2>
<pre><code class="language-bash">sudo mkdir -p /persist/etc/ssh
sudo ssh-keygen -t ed25519 -f /persist/etc/ssh/ssh_host_ed25519_key -N ""
</code></pre>
<p>OR if you still have keys in <code>/etc/ssh</code> you want to keep just copy them to the
persistent location:</p>
<pre><code class="language-bash">sudo cp /etc/ssh/ssh_host_ed25519_key* /persist/etc/ssh/
</code></pre>
<p><strong>Tell NixOS where to find them</strong></p>
<pre><code class="language-nix">services.openssh = {
hostKeys = [
{
path = "/persist/etc/ssh/ssh_host_ed25519_key";
type = ed25519;
}
];
}
</code></pre>
<p>After I initially get things working, I switch to <code>sops-nix</code>, the following
guide works for this setup:
<a href="https://saylesss88.github.io/installation/enc/sops-nix.html">sops-nix Guide</a></p>
<hr />
<h3>Resources</h3>
<ul>
<li>
<p><a href="https://grahamc.com/blog/erase-your-darlings/">erase-your-darlings</a></p>
</li>
<li>
<p><a href="https://wiki.nixos.org/wiki/ZFS">NixOS Wiki ZFS</a></p>
</li>
</ul>
GnuPG gpg-agenthttps://saylesss88.github.io/nix/gpg-agent.html2026-01-15T00:00:00+00:00saylesss87@proton.me (saylesss88)<h1>GnuPG & <code>gpg-agent</code> on NixOS</h1>
<details>
<summary> ✔️ Table of Contents</summary>
<!-- toc -->
</details>
<blockquote>
<p>⚠️ <strong>SECURITY WARNING</strong>: This guide involves sensitive cryptographic material.
<strong>Never share your private key or passphrase</strong>. Backup your keys and handle
them with extreme care.</p>
</blockquote>
<p><img src="https://saylesss88.github.io/../images/gnupg.png" alt="GnuPG" /></p>
<h2>⚠️ gpg.fail (practical OpenPGP vulnerabilities) (Added on 2026-01-15)</h2>
<p>The <a href="https://gpg.fail">gpg.fail</a> is a write-up of real-world weaknesses in
GPG/OpenPGP implementations and edge cases in the OpenPGP ecosystem—not the
underlying math of modern cryptography. The core idea is that signature
verification needs two things: correct cryptography and confidence that the data
you think was verified is actually the same data the verifier processed, which
can break down when formats are complex and tooling is permissive or ambiguous.</p>
<h3>Why this matters even with good key hygiene</h3>
<p>Most of the hardening in this guide (offline primary key, subkeys, strict
permissions, agent separation) is still worth doing because it protects your
private key material and reduces the blast radius if a workstation is
compromised.</p>
<p>But that kind of key hygiene doesn’t automatically protect you from OpenPGP
“sharp edges” like ambiguous parsing rules, weird message constructions, or
implementation bugs because those problems happen at the message/format/tooling
layer, not the key-storage layer.</p>
<h3>How to avoid the sharp edges (actionable)</h3>
<ul>
<li>
<p>Don’t treat “Good signature” as the end of the story. Treat verification as
“verify + inspect what was verified,” especially if the output will be
consumed by other tools or humans who may misinterpret it. </p>
</li>
<li>
<p>Prefer OpenPGP for narrow, well-understood tasks (verifying release artifacts,
encrypting files) and be extra cautious when dealing with untrusted,
attacker-controlled OpenPGP inputs that flow through multiple tools (mail
clients, import pipelines, automation). </p>
</li>
<li>
<p>Keep GnuPG and related tooling updated; gpg.fail covers vulnerabilities that
include classic implementation issues and not just “protocol design” pitfalls.</p>
</li>
</ul>
<h3>If you automate verification (important)</h3>
<p>If you’re writing automation around signature verification, ensure your pipeline
clearly distinguishes:</p>
<ol>
<li>
<p>“signature cryptographically valid” from</p>
</li>
<li>
<p>“the extracted/displayed message is exactly what was verified”. Some gpg.fail
items specifically call out cases where output does not make this distinction
obvious enough to prevent misuse.</p>
</li>
</ol>
<h3>NixOS/Home-Manager hardening can break GPG (common failure mode)</h3>
<p>Some “hardening” choices can cause GPG to fail in ways that look mysterious but
are just UI/agent integration problems (for example, <strong>No pinentry</strong> / “gpg
failed to sign the data” when the agent can’t prompt). If GPG signing/encryption
suddenly stops working, first confirm pinentry is configured correctly (via your
<code>services.gpg-agent.pinentryPackage</code> or <code>gpg-agent.conf</code>) and restart the agent
with <code>gpgconf --kill gpg-agent</code> then <code>gpgconf --launch gpg-agent</code>.</p>
<h2>🔑 Key Concepts</h2>
<p><strong>GnuPG</strong> is a complete and free implementation of the OpenPGP standard. It
allows you to encrypt and sign your data and communications, has a versatile key
management system, and access modules for many kinds of public key directories.
GnuPG (GPG), is a command line tool for secure communication.</p>
<p><strong>PGP (Pretty Good Privacy)</strong> and <strong>GPG (GNU Privacy Guard)</strong>. While distinct,
they are deeply interconnected and, for the rest of this section, I’ll use the
terms interchangeably.</p>
<p><strong>PGP</strong> was the original, groundbreaking software that brought robust public-key
cryptography to the masses. It set the standard for secure email communication.
However, PGP later became a commercial product.</p>
<p>To provide a free and open-source alternative that anyone could use and inspect,
<strong>GPG</strong> was created. Crucially, <strong>GPG</strong> is a complete implementation of the
OpenPGP standard. This open standard acts as a universal language for encryption
and digital signatures.</p>
<p>GnuPG uses a more complex scheme in which a user has a primary keypair and then
zero or more additional subordinate keypairs.</p>
<p>Signing public keys with the corresponding private key is called <em>self-signing</em>,
and a public key that has self-signed user IDs bound to it is called a
<em>certificate</em>.</p>
<p><strong>Web of Trust</strong>: Rather than validate every single key individually, you can
rely on other factors such as if it has been signed by a key that you fully
trust or if it has been signed by three marginally trusted keys to validate
keys.</p>
<p><code>gpg-agent</code> is a daemon to manage secret (private) keys independently from any
protocol. It is used as a backed for <code>gpg</code> and <code>gpgsm</code> as well as for a couple
of other utilities. –<a href="https://man.cx/gpg-agent">man gpg-agent</a></p>
<p>There are numerous front-ends for gpg as well, i.e., GUI apps that simplify many
of the commands and processes. Two that I touch on in this overview are
<code>seahorse</code> and <code>kleopatra</code>.</p>
<h3>Asymmetric Encryption (Public-Key cryptography)</h3>
<p>E2ee requires that every sender and recipient does a one time preparation, which
involves the generation of personal random numbers. Two such random numbers are
necessary, one will be called your secret key and another one will be called
your public key (together your <em>personal key</em>). These numbers are very big, they
consist of hundreds or thousands of digits.</p>
<p>A message can be encrypted using the recipients public key and can only be
decrypted with the matching private key. In other words, if you exchange
<strong>public keys</strong> with someone you both can encrypt messages that only the other
can decrypt with their own <strong>private key</strong>. <strong>You must never share the private
key or the private keys passphrase with anyone else</strong>.</p>
<p><strong>What’s safe to share?</strong></p>
<ul>
<li>
<p>Your public key (used to encrypt files and verify signatures)</p>
</li>
<li>
<p>Your key ID (identifies your key, useful for sharing public keys or configs)</p>
</li>
<li>
<p>Your keys fingerprint <code>gpg --fingerprint</code></p>
</li>
</ul>
<p><strong>What must never be shared?</strong></p>
<ul>
<li>
<p>Your private (secret) key, usually in your <code>~/.gnupg/private-keys-v1.d/</code>
directory. Usually called your <em>private keyring</em>. <strong>Your main goal should be
the protection of your private key</strong>.</p>
</li>
<li>
<p><strong>Your passphrase for your private key</strong>. Even if someone is able to somehow
get your private key, they need to break the passphrase to access it
unencrypted. <strong>Protect this passphrase</strong>!</p>
</li>
</ul>
<p><strong>Best Practices</strong></p>
<p>Don’t rely on the short KeyID, at least use long OpenPGP Key IDs (for example
0xA1E6148633874A3D), they are 64 bits long and harder to spoof. Even better, use
the fingerprint.This is accomplished in the configuration with
<code>keyid-format = "0xlong";</code>, and <code>with-fingerprint</code>.</p>
<p>Always sign your public keys before you publish them to prevent man in the
middle attacks and other modifications. When a subkey or userID is generated it
is self-signed automatically, which is why you need to enter your password.</p>
<p>Don’t blindly trust keys from keyservers. You should verify the full key
fingerprint with the owner over the phone if possible.</p>
<ul>
<li><a href="https://www.kicksecure.com/wiki/Verifying_Software_Signatures">Verifying software signatures</a></li>
</ul>
<p>Use a strong primary key, don’t use 1024-bit DSA, 1024-bit RSA, or SHA-1 for
signing they are no longer recommended.</p>
<p>Choose an expiration date less than 2 years, you can add time if needed.
Remember this date.</p>
<p>Rotate your subkeys.</p>
<p>Keep your primary key offline, this ensures that it can’t be stolen by an
attacker allowing him to create new identities. We accomplish this by creating
subkeys and only adding the subkeys keygrip and the subkeys <code>default-key</code> to our
configuration keeping the primary key out of it.</p>
<p>Since we will be removing our primary key, even we won’t be able to create
additional keys so it’s important to think ahead and make all the keys you’ll
need. However, it is as easy as reimporting it to give yourself access again.</p>
<p>Many of these best practices come from the following guide:</p>
<ul>
<li><a href="https://riseup.net/ru/security/message-security/openpgp/gpg-best-practices">RiseUp gpg-best-practices</a></li>
</ul>
<hr />
<p>Home Manager module with <code>gpg-agent</code>, <code>gnupg</code>, and <code>pinentry-gnome3</code>:</p>
<pre><code class="language-nix"># gpg-agent.nix
{
config,
lib,
pkgs,
...
}: {
options = {
custom.pgp = {
enable = lib.mkEnableOption {
description = "Enable PGP Gnupgp";
default = false;
};
};
};
config = lib.mkIf config.custom.pgp.enable {
services = {
## Enable gpg-agent with ssh support
gpg-agent = {
enable = true;
enableSshSupport = true;
enableZshIntegration = true;
# pinentry is a collection of simple PIN or passphrase dialogs used for
# password entry
pinentryPackage = pkgs.pinentry-qt;
};
## We will put our keygrip here
gpg-agent.sshKeys = [];
};
home.packages = [pkgs.gnupg];
programs = {
gpg = {
## Enable GnuPG
enable = true;
# homedir = "/home/userName/.config/gnupg";
settings = {
# Default/trusted key ID (helpful with throw-keyids)
# Example, you will put your own keyid here
# Use `gpg --list-keys`
# default-key = "0x37ACBCDA569C5C44788";
# trusted-key = "0x37ACBCDA569C5C44788";
# https://github.com/drduh/config/blob/master/gpg.conf
# https://www.gnupg.org/documentation/manuals/gnupg/GPG-Configuration-Options.html
# https://www.gnupg.org/documentation/manuals/gnupg/GPG-Esoteric-Options.html
# Some Best Practices, stronger algos etc
# Use AES256, 192, or 128 as cipher
personal-cipher-preferences = "AES256 AES192 AES";
# Use SHA512, 384, or 256 as digest
personal-digest-preferences = "SHA512 SHA384 SHA256";
# Use ZLIB, BZIP2, ZIP, or no compression
personal-compress-preferences = "ZLIB BZIP2 ZIP Uncompressed";
# Default preferences for new keys
default-preference-list = "SHA512 SHA384 SHA256 AES256 AES192 AES ZLIB BZIP2 ZIP Uncompressed";
# SHA512 as digest to sign keys
cert-digest-algo = "SHA512";
# SHA512 as digest for symmetric ops
s2k-digest-algo = "SHA512";
# AES256 as cipher for symmetric ops
s2k-cipher-algo = "AES256";
# UTF-8 support for compatibility
charset = "utf-8";
# Show Unix timestamps
fixed-list-mode = "";
# No comments in signature
no-comments = "";
# No version in signature
no-emit-version = "";
# Disable banner
no-greeting = "";
# Long hexidecimal key format
keyid-format = "0xlong";
# Display UID validity
list-options = "show-uid-validity";
verify-options = "show-uid-validity";
# Display all keys and their fingerprints
with-fingerprint = "";
# Cross-certify subkeys are present and valid
require-cross-certification = "";
# Disable caching of passphrase for symmetrical ops
no-symkey-cache = "";
# Enable smartcard
# use-agent = "";
};
};
};
};
}
</code></pre>
<blockquote>
<p>🤔 Fun Fact: Elliot Alderson mentions encrypting Evil Corps files with 256 bit
AES encryption ensuring that it’s impossible to break in <code>eps1.9_zer0.daY.avi</code>
of Mr. Robot.</p>
</blockquote>
<ul>
<li>
<p>The default path is <code>~/.gnupg</code>, if you prefer placing it in the <code>~/.config</code>
directory or elsewhere, uncomment the <code>homedir</code> line and change <code>userName</code> to
your username.</p>
</li>
<li>
<p>I use sway so <code>pinentry-qt</code> works for me, there is also the following options
for this attribute:</p>
</li>
<li>
<p><code>pinentry-tty</code></p>
</li>
<li>
<p><code>pinentry-gnome3</code></p>
</li>
<li>
<p><code>pinentry-gtk2</code></p>
</li>
</ul>
<p>And more, research what you need and use the correct one.</p>
<p><a href="https://search.nixos.org/packages?channel=unstable&query=pinentry">search.nixos.org pinentry</a></p>
<p>Enable in your <code>home.nix</code> or equivalent:</p>
<pre><code class="language-nix"># home.nix
# ... snip ...
imports = [
./gpg-agent.nix
];
custom.pgp.enable = true;
# ... snip ...
</code></pre>
<p><code>gpg --full-generate-key</code> can be used to generate a basic keypair.</p>
<p><code>gpg --expert --full-generate-key</code> can be used for keys that require more
capabilities.</p>
<blockquote>
<p>❗ NOTE: We will first generate our GPG primary key that is required to
atleast have sign capabilities, we will then derive subkeys from said primary
key and use them for signing and encrypting. It is recommended to generate a
revoke certificate right after creating your primary key.</p>
</blockquote>
<p>To generate your gpg primary key you can do the following:</p>
<pre><code class="language-bash">gpg --full-generate-key
</code></pre>
<ul>
<li>
<p>Choose <code>(10) (sign only)</code></p>
</li>
<li>
<p>Give it a name and description</p>
</li>
<li>
<p>Give it an expiration date, 1y is common</p>
</li>
<li>
<p>Use a strong passphrase or password</p>
</li>
<li>
<p>Give it a comment, I typically add the date</p>
</li>
</ul>
<p>If you see a warning about incorrect permissions, you can run the following:</p>
<pre><code class="language-bash">chmod 700 ~/.gnupg
chmod 600 ~/.gnupg/*
</code></pre>
<p>Verify:</p>
<pre><code class="language-bash">ls -ld ~/.gnupg
# Should show: drwx------
ls -l ~/.gnupg
# Files should show: -rw-------
</code></pre>
<h3>Generate a Revocation Certificate</h3>
<p><code>mykey</code> must be a key specifier, either the keyID of the primary keypair or any
part of the user ID that identifies the keypair:</p>
<p>Replace <code>mykeyID</code> with the keyID of your primary key and store the cert in a
safe place:</p>
<pre><code class="language-bash">gpg --output revoke.asc --gen-revoke mykeyID
Create a revocation certificate for this key? (y/N)
Please select the reason for the revocation:
0 = No reason specified
1 = Key has been compromised
2 = Key is superseded
3 = Key is no longer used
Q = Cancel
(Probably you want to select 1 here)
Your decision?
</code></pre>
<p>The certificate will be output to a file <code>revoke.asc</code>. If the <code>--output</code> is
ommitted, the result will be placed on stdout.</p>
<p>Since it’s a short certificate, you can print a hardcopy and store it somewhere
safe. The cert shouldn’t be somewhere that others can access it since anyone
could publish the revoke cert and render the corresponding public key useless.</p>
<p>To apply the revoke cert, import it:</p>
<blockquote>
<p>NOTE: Only import the <code>revoce.asc</code> if you want to revoke (i.e., make it not
work anymore)</p>
</blockquote>
<pre><code class="language-bash">gpg --import revoke.asc
# And optionally push the revoked key to public keyservers to notify others:
gpg --keyserver keyserver.ubuntu.com --send-keys YOUR_KEYID
</code></pre>
<hr />
<p>After fixing, run <code>gpg --list-keys --with-fingerprint</code>, which lists your public
keys:</p>
<pre><code class="language-bash"># Take note of your public key
gpg --list-keys --with-fingerprint
/home/jr/.gnupg/pubring.kbx
---------------------------
pub ed25519/0x095782A1B124AF15 2025-08-23 [SCA] [expires: 2026-08-23]
Key fingerprint = 5908 9C5B FEC8 0D75 FCB0 E206 0958 82C1 A124 CF15
uid [ultimate] Jr (08-23-25) <sayls8@proton.me>
</code></pre>
<ul>
<li>Copy the KeyID, in this example it would be <code>0x095722B2A123CF15</code>. We will use
it for the command below.</li>
</ul>
<p>The warning should be gone.</p>
<p>Now we will generate 2 subkeys, 1 for encryption and 1 for authentication.</p>
<pre><code class="language-bash">gpg --expert --edit-key 0x095722B2A123CF15
</code></pre>
<p>When the screen opens, type <code>addkey</code></p>
<p>Choose 11 (set your own capabilities) and add A (Authenticate) and type <code>save</code>
to save and exit. Repeat this again and choose 12 ECC (encrypt only).</p>
<blockquote>
<p>❗ <code>gpg --edit-key</code> has many more capabilities, after launching type <code>help</code>.</p>
</blockquote>
<p><strong>Add Keygrip of Authenticate Subkey to <code>sshcontrol</code> for gpg-agent</strong></p>
<pre><code class="language-bash">gpg --list-secret-keys --with-keygrip --keyid-format LONG
</code></pre>
<p>Copy the keygrip of the subkey with Authenticate capabilities</p>
<p>Add the keygrip number to your <code>gpg-agent.sshKeys</code> and rebuild, this adds an SSH
key to <code>gpg-agent</code>. This is for the SSH key functionality of <code>gpg-agent</code>, while
the key ID (<code>default-key</code>) is for GPG-specific operations like signing commits:</p>
<pre><code class="language-nix"># gpg-agent.nix
gpg-agent.sshKeys = ["6BD11826F3845BC222127FE3D22C92C91BB3FB32"];
</code></pre>
<ul>
<li>By itself, a keygrip cannot be used to reconstruct your private key. It’s
derived from the public key material, not from the secret key itself so it’s
safe to version control. Don’t put your keygrip in a public repo if you don’t
want people to know you use that key for signing/authentication. It’s not a
security risk, but it leaks a tiny bit of metadata.</li>
</ul>
<p>The following article mentions the keygrip being computed from public elements
of the key:</p>
<ul>
<li><a href="https://gnupg-users.gnupg.narkive.com/q5JtahdV/gpg-agent-what-is-a-keygrip">gnupg-users what-is-a-keygrip</a></li>
</ul>
<p>Add the KeyId to your <code>gpg-agent.nix</code>, this declares your default-key to persist
through rebuilds:</p>
<p>Copy the public key of the same subkey with Authenticate capabilities you will
see something like <code>[SA]</code> next to it for Sign and Authenticate:</p>
<pre><code class="language-nix"># gpg-agent.nix
gpg.settings = {
# Replace with your own Subkeys KeyID `gpg --list-keys --keyid-format LONG`
default-key = "Ox37ACA569C5C44787";
trusted-key = "Ox37ACA569C5C44787";
};
</code></pre>
<p>This key should be signed automatically, ensure that it is:</p>
<pre><code class="language-bash">gpg --sign-key Ox37ACA569C5C44787
</code></pre>
<p>Rebuild, and check that everything is correct with:</p>
<pre><code class="language-bash">ssh-add -L
# you should see something like:
ssh-ed25519 AABCC3NzaC1lZDI1NTE5ABBAIHyujgyCjjBTqIuFM3EMUSo6RGklmOXQW3uWRhWdJ1Mm (none)
</code></pre>
<ul>
<li>Never version-control your private key files or <code>.gnupg</code> contents.</li>
</ul>
<p>Add the following to your shell config:</p>
<pre><code class="language-bash"># zsh.nix
# ... snip ...
initContent = ''
export GPG_TTY=$(tty)
export SSH_AUTH_SOCK=$(gpgconf --list-dirs agent-ssh-socket)
gpgconf --launch gpg-agent
'';
# ... snip ...
</code></pre>
<p>Rebuild and then restart <code>gpg-agent</code> if necessary:</p>
<pre><code class="language-bash">gpgconf --kill gpg-agent
gpgconf --launch gpg-agent
</code></pre>
<p>Test, these should match:</p>
<pre><code class="language-bash">echo "$SSH_AUTH_SOCK"
# output
/run/user/1000/gnupg/d.wft5hcsny4qqq3g31c76534j/S.gpg-agent.ssh
gpgconf --list-dirs agent-ssh-socket
# output
/run/user/1000/gnupg/d.wft5hcsny4qqq3g31c76834j/S.gpg-agent.ssh
</code></pre>
<pre><code class="language-bash">ssh-add -L
# Copy the entire following line:
ssh-ed25519 AABBC3NzaC1lZDI1NTE5AAAAIGXwhVokJ6cKgodYT+0+0ZrU0sBqMPPRDPJqFxqRtM+I (none)
</code></pre>
<ul>
<li>Mine shows <code>(none)</code> because I left the comment field blank when creating the
key and doesn’t affect functionality.</li>
</ul>
<p>Then, in your server’s NixOS configuration (e.g., <code>configuration.nix</code>): Change
<code>yourUser</code> to your username. This is how you grant access to a remote machine,
and the public key from the GPG subkey is what’s added here, the output of
<code>ssh-add -L</code>:</p>
<pre><code class="language-nix">users.users.yourUser = {
openssh = {
authorizedKeys.keys = [
# Replace with the output of `ssh-add -L`
"ssh-ed25519 AAAAC3NzaC1lZDI1NTE5AAAAIGXwhVokJ6cKgodYT+0+0ZrU0sBqMPPRDPJqFxqRtM+I (none)"
];
};
};
</code></pre>
<blockquote>
<p>❗ NOTE: Only the <strong>public</strong> key goes here, it’s safe to commit to version
control. If you prefer not to hardcode it in the config, you can reference it
from a <code>.pub</code> file in your repo and read it with
<code>builtins.readFile ./mykey.pub</code></p>
</blockquote>
<p>Rebuild your system and test an SSH connection into the server:</p>
<pre><code class="language-bash">ssh -p <your-port> user@hostname
</code></pre>
<ul>
<li><code><your-port></code> is often <code>22</code> so it would be something like:</li>
</ul>
<pre><code class="language-bash">ssh -p 22 bill@xps
</code></pre>
<p>Once you successfully sign in to SSH, it will ask you if you’re sure you trust
the remote server’s SSH host key. Once you type <code>yes</code>, it will automatically be
used for tasks such as file decryption.</p>
<h3>Remove and Store your Primary Key offline</h3>
<blockquote>
<p>❗ NOTE: After you remove your primary key, you will no longer be able to
derive subkeys from it or sign keys unless you re-import it.</p>
</blockquote>
<pre><code class="language-bash"># extract the primary key
gpg -a --export-secret-key sayls8@proton.me > secret_key
# extract the subkeys, which we will reimport later
gpg -a --export-secret-subkeys sayls8@proton.me > secret_subkeys.gpg
# delete the secret keys from the keyring, so only subkeys are left
gpg --delete-secret-keys sayls8@proton.me
Delete this key from the keyring? (y/N) y
This is a secret key! - really delete? (y/N) y
# reimport the subkeys
gpg --import secret_subkeys.gpg
# verify everything is in order
gpg --list-secret-keys
# remove the subkeys from disk
rm secret_subkeys.gpg
</code></pre>
<p>I recommend also keeping a <code>.gpg</code> version to make it easy to re-import your
primary key: <code>gpg --export-secret-keys --armor --output private-key-bak.gpg</code></p>
<p>Then store <code>secret_key</code> on an encrypted USB drive or somewhere offline. If you
want to protect it for now, you can just use the encryption subkey that we
created to encrypt <code>secret_key</code> with a passphrase:</p>
<pre><code class="language-bash">gpg --list-keys --keyid-format LONG
</code></pre>
<p>Copy the KeyID of the subkey with encrypt capabilities for the following
command:</p>
<pre><code class="language-bash"># Encrypting your secret key for yourself
gpg --encrypt --recipient Ox37ACA569C5C44787 secret_key
</code></pre>
<p>You can check that the secret key material is missing with
<code>gpg --list-secret-keys</code>, you should see <code>sec#</code> instead of <code>sec</code>.</p>
<pre><code class="language-bash">gpg --list-secret-keys
# Output:
sec# ed25519/0x
# ...snip...
</code></pre>
<p>The above set of commands are from the
<a href="https://riseup.net/ru/security/message-security/openpgp/gpg-best-practices#keep-your-primary-key-entirely-offline">RiseUp Keep your primary key offline</a></p>
<h2>Add your GPG Key to GitHub</h2>
<p>Plug your own public key from <code>gpg --list-keys</code> in the following command:</p>
<pre><code class="language-bash">gpg --armor --export <Public-Key>
</code></pre>
<p>Copy the entire block from <code>-----BEGIN PGP PUBLIC KEY BLOCK-----</code> to
<code>-----END PGP PUBLIC KEY BLOCK-----</code></p>
<blockquote>
<p>❗ You can also paste the above block into a public keyserver such as
<code>keys.openpgp.org</code>. This allows others to find and use your key to encrypt
messages or verify your signatures. Many tools and users rely on public key
servers to fetch keys automatically. You can also publish your revocation
certificates, which help others know if your key is compromised or revoked.
This can be a privacy concern as key servers publish (and keep) associated
user IDs and metadata linked to your key, such as your email.</p>
</blockquote>
<p>It’s the same process as adding an SSH key, Go to Settings, SSH and GPG keys,
<code>New GPG key</code> and your all set.</p>
<h3>Sign your Commits for Git</h3>
<pre><code class="language-nix"># git.nix
{...}: {
programs.git = {
enable = true;
extraConfig = {
commit.gpgsign = true;
user.signingkey = "0x0666C1A265F156"
};
};
}
</code></pre>
<p>After this, you will be prompted for your Private Keys password on every commit.</p>
<p>If you look at your commits on GitHub, after adding the GPG key and the above
settings to your git setup it will show your commits are <code>Verified</code>.</p>
<h3>Backing up Your Keys</h3>
<pre><code class="language-bash">gpg --export-secret-keys --armor --output my-private-key-backup.gpg
</code></pre>
<p>Your private keys will be encrypted with a passphrase into a .gpg file. Store
this backup in a secure location line an encrypted USB drive. This can prevent
you from losing access to your keys in the case of disk failure or accidents.</p>
<p>You can export your public keys and publish them publicly if you choose:</p>
<pre><code class="language-bash">gpg --export --armor --output my-public-keys.gpg
</code></pre>
<p>Now if your keys ever get lost or corrupted, you can import these backups.</p>
<h2>Encrypt a File with PGP</h2>
<p>The easy way to do this is with an app like Kleopatra, available as
<code>pkgs.kdePackages.kleopatra</code>. Kleopatra will automatically recognize your gpg
keys and enable you to easily encrypt messages by clicking the Notepad, typing
your message and clicking <code>Sign/Encrypt Notepad</code>. You can also choose to encrypt
the message with a password, where anyone that has the password can read the
message.</p>
<p>Using the above and below methods enable you to encrypt any message for
basically any service and just copy past the encrypted text into the service for
added privacy.</p>
<p>Encrypting a whole directory is a bit more involved and requires using
compression.</p>
<h3>List your keys and get the key ID</h3>
<pre><code class="language-bash">gpg --list-keys --keyid-format LONG
</code></pre>
<p>Example output, don’t use RSA keys:</p>
<pre><code class="language-bash">pub rsa4096/ABCDEF1234567890 2024-01-01 [SC]
uid [ultimate] Your Name <you@example.com>
sub rsa4096/1234567890ABCDEF 2024-01-01 [E]
</code></pre>
<ul>
<li>
<p>Notice the <code>sub</code> and the <code>[E]</code> for the subkey with encrypt capabilities.</p>
</li>
<li>
<p>The part after the slash on the <code>pub</code> line is your key ID (<code>ABCDEF1234567890</code>
in the example)</p>
</li>
<li>
<p>You can also use your email or name to refer to the key in most commands.</p>
</li>
</ul>
<h3>Encrypt a file</h3>
<p>In order to encrypt a document you must have the public keys of the intended
recipients.</p>
<pre><code class="language-bash">echo "This file will be encrypted" > file.txt
</code></pre>
<p>Encrypting for yourself (using a key ID as recipient):</p>
<pre><code class="language-bash">gpg --encrypt --recipient ABCDEF1234567890 file.txt
</code></pre>
<pre><code class="language-bash">ls
│ 7 │ file.txt │ file │ 28 B │ now │
│ 8 │ file.txt.gpg │ file │ 191 B │ now │
</code></pre>
<p>Encrypting for someone else with their email (public key identifier):</p>
<pre><code class="language-bash">gpg --output file.gpg --encrypt --recipient jake@proton.me file.txt
</code></pre>
<pre><code class="language-bash">ls
file.txt
file.gpg
</code></pre>
<p><code>gpg --encrypt</code> doesn’t modify the original file. It creates a new encrypted
file by default with <code>gpg</code> amended to the filename.</p>
<pre><code class="language-bash">gpg --decrypt file.txt.gpg
gpg: encrypted with cv25519 key, ID 0x4AC131B80CEC833E, created 2025-07-31
"GPG Key <sayls8@proton.me>"
This file will be encrypted
</code></pre>
<p>Or, to save the decrypted text to a file:</p>
<pre><code class="language-bash">gpg --output decrypted_file.txt --decrypt file.txt.gpg
cat decrypted_file.txt
# Output
File: decrypted.txt
This file will be encrypted
</code></pre>
<ul>
<li>You will be asked for the passphrase you used when creating the key in order
to decrypt the file.</li>
</ul>
<h3>Sign and Verify Signatures</h3>
<p>When you sign a document it is certified and timestamped. If after the doc is
signed, if the doc is further modified in any way the verification of the
signature will fail.</p>
<p>A signature is created using the private key of the signer, and verified with
the corresponding public key. For example, to verify Jakes signature you would
use Jake’s public key to see that the work indeed came from him and hasn’t been
modified since.</p>
<p>To sign the above <code>file.txt</code>:</p>
<pre><code class="language-bash">gpg output doc.sig --sign file.txt
# To clearsign use:
gpg --clearsign file.txt
# For a detached signature use:
gpg --output doc.sig --detach-sig file.txt
</code></pre>
<p>You will be prompted for your passphrase.</p>
<p>You can either check the signature or check the signature and recover the
original document.</p>
<pre><code class="language-bash"># To only check:
gpg --output doc --verify doc.sig
# To verify and extract the document
gpg --output doc --decrypt doc.sig
</code></pre>
<h2>Email Encryption</h2>
<p>Email is inherently insecure, and email-based attacks remain one of the top
vectors for data breaches. Encrypting your email protects your privacy by
ensuring that only the intended recipient can read it. Encrypting your emails
with PGP provides valuable security benefits but also has inherent limitations
that prevent it from being considered truly “secure communication” by modern
standards.</p>
<ul>
<li><a href="https://emailselfdefense.fsf.org/en/">Email Self-Defense</a></li>
</ul>
<p>What its Good for:</p>
<ul>
<li>
<p>Confidentiality, it prevents unauthorized third parties (like email providers
or network eavesdroppers) from reading your email content.</p>
</li>
<li>
<p>Integrity and authenticity: Digital signatures verify that the email genuinely
came from the claimed sender and hasn’t been altered in transit.</p>
</li>
<li>
<p>Long-term confidentiality: Encrypted emails stored on servers or devices
remain protected even if the storage is later compromised. With companies like
Gmail giving you a “free” account, that usually means that you are the product
and you should tread lightly.</p>
</li>
</ul>
<p><strong>To securely communicate with someone never use email, use a dedicated service
such as Threema, Signal or Brair.</strong> It’s hard to recommend any messaging service
at the moment, always do your own research and stay informed on the companies
policies. Signal has taken some heat for the way it has implemented it’s
MobileCoin. The biggest issue I’ve faced is getting other people to care or use
the same e2ee app.</p>
<p>With Thunderbird you can go to settings, Privacy and Security, and scroll to the
bottom where it says “End to End Encryption”, Click the Settings tab there,
finally click End-To-End Encryption on the left.</p>
<p>From there, you can click <code>+ Add Key</code> next to your email address and either
generate a new key through Thunderbird. If you use this, choose the Curve
protocol or whatever isn’t RSA.</p>
<p>Or import your own key which is definitely more secure since you’re not trusting
someone else with your private key:</p>
<pre><code class="language-bash">gpg --export --armor sayls8@gmail.com > publickey.asc
</code></pre>
<p>Then select <code>+ Add Key</code> and choose import your own, this didn’t work for me.
What did work was to start composing an email and click on the <code>OpenPGP</code> button,
Go to <code>Key Manager</code>, <code>File</code>, <code>Import Public Key from a File</code> and choose your
<code>publickey.asc</code>. This way, only you have access to your private key.</p>
<ul>
<li><a href="https://support.mozilla.org/en-US/kb/introduction-to-e2e-encryption#w_how-e2ee-with-openpgp-works-in-general">How e2ee with OpenPGP works in general</a></li>
</ul>
<p><strong>Import your recipient’s public key</strong></p>
<p>When you start composing an email, you’ll see that you need to resolve key
issues if you don’t already have the recipients public key. Click <code>Resolve</code>, and
either Discover Public Keys Online… or Import Public Keys From File…</p>
<p>Thunderbird has the option to use the OpenPGP Key Manager to view or manage
public keys of your correspondents.</p>
<p>If you’re sending encrypted emails to someone you’ll need their public key,
there are a few methods of doing this just ensure you verify the Fingerprint
with the person your talking to.</p>
<p>Exporting your public key means creating a copy of the public part of your
cryptographic key pair that you can share with others.</p>
<p>For example, say that Jake wants to send you his public key. First he has to
export his key:</p>
<pre><code class="language-bash">gpg --output jake.gpg --export jake@proton.me
</code></pre>
<p>The key is exported in binary format, to export in ASCII-armored format use:</p>
<pre><code class="language-bash">gpg --armor --export jake@proton.me
</code></pre>
<p>Now, once he sends this to you, you’ll need to import and validate it:</p>
<pre><code class="language-bash">gpg --import jake.gpg
</code></pre>
<p>Once the key is imported it should be validated. If you need to validate a key
manually, it is done by verifying the key’s fingerprint and then signing the key
to certify it as a valid key.</p>
<p>Check that it exists in your keychain:</p>
<pre><code class="language-bash">gpg --list-keys
</code></pre>
<p>You should see Jakes key in the above list.</p>
<p>To certify the key you need to edit it:</p>
<pre><code class="language-bash">gpg --edit-key jake@proton.me
# List the fingerprint
gpg> fpr
# once the fingerprint is verified with the owner, sign it
gpg> sign
# once signed, you can check the key to list signatures on it
gpg> check
</code></pre>
<blockquote>
<p>❗ NOTE: You can use PGP to encrypt any message and paste it into <strong>any</strong>
software and send it. As long as only you and your recipient are the only
people to have the private keys, you will be the only people able to decrypt
the messages. Implementing this correctly is a good way to stop government
mass surveillance.</p>
</blockquote>
<h2>Make your Public Key Highly Available</h2>
<p>You should always make sure that you sign your public key before you publish it.
When you distribute your public key, you’re distributing the public components
of your master and subkeys as well as the user IDs. If unsigned, this is a
security risk because it’s possible for an attacker to tamper with it. The
public key can be modified by adding or substituting keys, or changing user IDs.</p>
<p>Signing the keys provides a web of trust, only the corresponding public key can
be used to verify the signature and ensure it hasn’t been modified. Since we are
already only using subkeys for public keys, they are automatically self-signed.</p>
<pre><code class="language-bash">gpg --output ~/mygpg.key --armor --export your_email@address.com
</code></pre>
<p>You can then send this file to the other party.</p>
<p>You can also use the GPG interface to upload your key to a key server:</p>
<pre><code class="language-bash">gpg --list-keys your_email@address.com
</code></pre>
<p>Copy the key ID for the following command, remember its on the <code>pub</code> line after
the <code>/</code>.</p>
<pre><code class="language-bash">gpg --send-keys --keyserver pgp.mit.edu key_id
</code></pre>
<p>The key will be uploaded to the server and likely be distributed to other key
servers around the world. This is why expiration dates are important, if your
key is lost or stolen, the damage window is limited to the expiration period.
Also remember, you can add more time even after the key has expired.</p>
<h3>Example: Verifying Arch Linux Download</h3>
<details>
<summary>
<p>✔️ Click to Expand Example of verifying and signing the archlinux public key</p>
</summary>
<p>First, download both the arch <code>.iso</code> and <code>.sig</code> files.</p>
<p>I tried a few different methods from <a href="https://archlinux.org/download/#checksums">https://archlinux.org/download/#checksums</a>
and the easiest by far was using Sequoia available in Nixpkgs as
<code>pkgs.sequoia-sq</code>:</p>
<p>Download the archlinux public key:</p>
<pre><code class="language-bash">sq network wkd search pierre@archlinux.org --output release-key.pgp
Found 2 certificates related to the query:
- 3E80CA1A8B89F69CBA57D98A76A5EF9054449A5C
- Pierre Schmitz <pierre@archlinux.org> (UNAUTHENTICATED)
- created 2022-10-31 09:11:51 UTC
- found via: WKD
- 4AA4767BBC9C4B1D18AE28B77F2D434B9741E8AC
- Pierre Schmitz <pierre@archlinux.de> (UNAUTHENTICATED)
- created 2011-04-10 09:35:33 UTC
- found via: WKD
Hint: To extract a particular certificate from release-key.pgp, use any of:
$ sq cert export --keyring=release-key.pgp --cert=3E80CA1A8B89F69CBA57D98A76A5EF9054449A5C
$ sq cert export --keyring=release-key.pgp --cert=4AA4767BBC9C4B1D18AE28B77F2D434B9741E8AC
</code></pre>
<p>Export the chosen key to a <code>.pgp</code> file:</p>
<pre><code class="language-bash">sq cert export --keyring=release-key.pgp --cert=3E80CA1A8B89F69CBA57D98A76A5EF9054449A5C > pierre-archlinux.pgp
</code></pre>
<p>Import into your keychain:</p>
<pre><code class="language-bash"> gpg --import pierre-archlinux.pgp
gpg: key 0x76A5EF9054449A5C: 9 signatures not checked due to missing keys
gpg: key 0x76A5EF9054449A5C: public key "Pierre Schmitz <pierre@archlinux.org>" imported
gpg: Total number processed: 1
gpg: imported: 1
gpg: marginals needed: 3 completes needed: 1 trust model: pgp
gpg: depth: 0 valid: 3 signed: 0 trust: 0-, 0q, 0n, 0m, 0f, 3u
gpg: next trustdb check due at 2026-08-23
</code></pre>
<p>Now, you should see <code><pierre@archlinux.org></code> and his keys when you run
<code>gpg --list-keys</code></p>
<p>Finally, verify the signature:</p>
<pre><code class="language-bash">sq verify --signer-file release-key.pgp --signature-file archlinux-2025.08.01-x86_64.iso.sig archlinux-2025.08.01-x86_64.iso
Authenticated signature made by 3E80CA1A8B89F69CBA57D98A76A5EF9054449A5C (Pierre Schmitz <pierre@archlinux.org>)
1 authenticated signature.
</code></pre>
<p>This shows that the signature was made by the key with the ID
<code>3E80CA1A8B89F69CBA57D98A76A5EF9054449A5C</code> (Pierre Schmitz).</p>
<p>GPG authenticated that the signature is valid and that the key used to sign is
trusted in our keyring.</p>
<p>1 authenticated signature confirms the files integrity and authenticity.</p>
<p>We have successfully verified that the file was signed by Pierr’s official Arch
Linux key and has not been tampered with.</p>
<p>Since the key has been verified we can now sign it. We will have to import our
primary key to do so since we are keeping it offline for safety.</p>
<pre><code class="language-bash">gpg --import backup.gpg
</code></pre>
<p>List your keys to get the arch keyID:</p>
<pre><code class="language-bash">gpg --list-keys
# ... snip ...
pub ed25519/0x76A5EF9054449A5C 2022-10-31 [SC] [expires: 2037-10-27]
Key fingerprint = 3E80 CA1A 8B89 F69C BA57 D98A 76A5 EF90 5444 9A5C
uid [ full ] Pierre Schmitz <pierre@archlinux.org>
uid [ full ] Pierre Schmitz <pierre@archlinux.de>
sub ed25519/0xD6D13C45BFCFBAFD 2022-10-31 [A] [expires: 2037-10-27]
sub cv25519/0x7F56ADE50CA3D899 2022-10-31 [E] [expires: 2037-10-27]
</code></pre>
<p>Sign the key:</p>
<pre><code class="language-bash">gpg --sign-key 0x76A5EF9054449A5C
</code></pre>
<p>Now you can Export and publish the new public key and send it to a keyserver:</p>
<pre><code class="language-bash">gpg --export --armor 0x76A5EF9054449A5C > archlinux-signed.asc
gpg --send-keys 0x76A5EF9054449A5C
</code></pre>
<p>The more people that verify, sign, and re-export and publish their keys the
better for the web of trust that gpg uses making the network more secure for
everyone.</p>
<h3>Edit your trust level of the key</h3>
<pre><code class="language-bash">gpg --edit-key pierre@archlinux.org
gpg> trust
Please decide how far you trust this user to correctly verify other users' keys
(by looking at passports, checking fingerprints from different sources, etc.)
1 = I don't know or won't say
2 = I do NOT trust
3 = I trust marginally
4 = I trust fully
5 = I trust ultimately
m = back to the main menu
Your decision? 3
# Output:
pub ed25519/0x76A5EF9054449A5C
created: 2022-10-31 expires: 2037-10-27 usage: SC
trust: marginal validity: full
</code></pre>
<p>You can see that the trust is <code>marginal</code> and validity is <code>full</code>.</p>
</details>
NixOS Containershttps://saylesss88.github.io/nixos_containers.html2026-01-11T00:00:00+00:00saylesss87@proton.me (saylesss88)<h1>NixOS Containers</h1>
<details>
<summary> ✔️ Click to Expand Table of Contents</summary>
<!-- toc -->
</details>
<p><img src="https://saylesss88.github.io/images/boxes.cleaned.png" alt="boxes" /></p>
<p>NixOS containers are lightweight <code>systemd-nspawn</code> containers managed
declaratively through your NixOS configuration. They allow you to run separate,
minimal NixOS instances on the same machine, each with its own services,
packages, and (optionally) network stack.</p>
<ul>
<li><a href="https://www.freedesktop.org/software/systemd/man/latest/systemd-nspawn.html?__goaway_challenge=meta-refresh&__goaway_id=5497ebb54af7da76c7cff2e5210fe9ab&__goaway_referer=https%3A%2F%2Fsearch.brave.com%2F">freedesktop systemd-nspawn</a></li>
</ul>
<blockquote>
<p>❗ NixOS’ containers do not provide full security out of the box (just like
docker). They do give you a separate chroot, but a privileged user (root) in a
container can escape the container and become root on the host system.
–<a href="https://blog.beardhatcode.be/2020/12/Declarative-Nixos-Containers.html">beardhatcode Declarative-Nixos-Containers</a></p>
</blockquote>
<p><strong>Common Use Cases</strong></p>
<ul>
<li>
<p><strong>Isolating services</strong>: Run a web server, database, or any service in its own
container, so it can’t interfere with the main system or other services</p>
</li>
<li>
<p><strong>Testing and development</strong>: Try out new configurations, packages, or services
in a sandboxed environment.</p>
</li>
<li>
<p><strong>Reproducible deployments</strong>: Because containers are defined declaratively,
you can reproduce the exact same environment anywhere.</p>
</li>
<li>
<p><strong>Running multiple versions of a service</strong>: For example, testing different
versions of Git or HTTP servers side by side.</p>
</li>
</ul>
<hr />
<h2>Hosting mdBook</h2>
<p>Let’s say you want to host your mdBook. You can define a NixOS container that
runs only the necessary service, isolated from your main system:</p>
<pre><code class="language-nix">{
config,
lib,
...
}: {
containers.mdbook-host = {
autoStart = true;
ephemeral = true;
privateNetwork = false; # Use the hosts network
bindMounts."/var/www/mdbook" = {
hostPath = "/home/jr/nix-book/book";
isReadOnly = true;
};
config = {containerPkgs, ...}: {
networking.useDHCP = lib.mkDefault true;
services.httpd = {
enable = true;
adminAddr = "yourEmail.com";
virtualHosts."localhost" = {
documentRoot = "/var/www/mdbook";
serverAliases = [];
};
};
networking.firewall.allowedTCPPorts = [80];
environment.systemPackages = with containerPkgs; [];
system.stateVersion = "25.05";
};
};
}
</code></pre>
<ul>
<li>
<p><code>ephemeral</code>: if true, the container resets on each restart.</p>
</li>
<li>
<p><code>autoStart</code>: Ensures the container starts automatically at boot.</p>
</li>
<li>
<p><code>config</code>: Defines the containers NixOS configuration, just like a regular
NixOS system.</p>
</li>
</ul>
<p><strong>Mounts</strong></p>
<pre><code class="language-nix"> bindMounts."/var/www/mdbook" = {
hostPath = "/home/jr/nix-book/book";
isReadOnly = true;
};
</code></pre>
<p>The <code>bindMount</code> settings above specify that <code>/var/www/mdbook</code> in the container
should be linked to <code>/home/jr/nix-book/book</code> on the host.</p>
<p><code>hostPath</code> must exist, and <code>/var/www/mdbook</code> must not exist for this to work.</p>
<p>The above container is fairly simple because its <code>ReadOnly</code>, things get more
complicated when you need HTTPD to have write privileges.</p>
<p>When you create and run a NixOS container like <code>mdbook-host</code>. NixOS stores the
container’s root filesystem and related container state data under:</p>
<pre><code class="language-bash">ls /var/lib/nixos-containers/
╭────────────╮
│ empty list │ # It's empty because we set ephemeral to true
╰────────────╯
</code></pre>
<p>This directory holds the container’s own filesystem image, including system
files, installed packages, configuration, and any data internal to the
container.</p>
<hr />
<h2>Check Container Status</h2>
<pre><code class="language-bash">nixos-container list
mdbook-host
</code></pre>
<pre><code class="language-bash">sudo systemctl status container@mdbook-host
Main PID: 32938 (systemd-nspawn)
Status: "Container running: Ready."
</code></pre>
<p><strong>Test HTTP server inside the container</strong></p>
<p>We configured Apache (<code>httpd</code>) to serve <code>/var/www/mdbook</code> at <code>localhost</code></p>
<p>Let’s check if Apache is running:</p>
<pre><code class="language-bash">sudo nixos-container run mdbook-host -- systemctl status httpd
● httpd.service - Apache HTTPD
Loaded: loaded (/etc/systemd/system/httpd.service; enabled; preset: ignored)
Active: active (running) since Fri 2025-08-15 10:14:39 EDT; 2min 18s ago
</code></pre>
<p>Check the Bind Mount:</p>
<pre><code class="language-bash">sudo nixos-container run mdbook-host -- ls -l /var/www/mdbook
</code></pre>
<ul>
<li>You should see an <code>index.html</code> and any other files from <code>~/nix-book/book</code></li>
</ul>
<p>Test the Web Server:</p>
<pre><code class="language-bash">curl http://localhost
</code></pre>
<ul>
<li>You should see your book in HTTP format as raw HTML.</li>
</ul>
<p>Test on the web, in your browser visit:</p>
<pre><code class="language-text">http://localhost/
</code></pre>
<ul>
<li>You should see your book fully served</li>
</ul>
<hr />
<h3>Troubleshooting</h3>
<p>Make sure your book has the correct permissions to allow <code>hostPath</code> to read it:</p>
<pre><code class="language-bash">sudo chmod -R o+rX ~/nix-book/book
</code></pre>
<p>If needed restart the container:</p>
<pre><code class="language-bash">sudo nixos-container stop mdbook-host
sudo nixos-container start mdbook-host
</code></pre>
<p>Ensure that <code>/var/www/mdbook</code> is being populated:</p>
<pre><code class="language-bash">sudo nixos-container run mdbook-host -- ls -l /var/www/mdbook
</code></pre>
<p>You should see an <code>index.html</code> and more</p>
<pre><code class="language-bash">sudo nixos-container run mdbook-host -- systemctl status httpd
</code></pre>
<ul>
<li>You should see <code>enabled</code> & <code>active (running)</code></li>
</ul>
<p>Check the containers status:</p>
<pre><code class="language-bash">sudo nixos-container status mdbook-host
up
</code></pre>
<hr />
<h2>Why Bother Serving your book to localhost?</h2>
<ol>
<li>Real-time updates without rebuilding the container</li>
</ol>
<ul>
<li>Files added, changed, or removed from <code>~/nix-book/book</code> on the host are
immediately reflected inside the container. This allows for:
<ul>
<li>
<p>Rapid iteration and testing of your books content without rebuilding</p>
</li>
<li>
<p>Easier debugging and fixing content or config issues on the fly.</p>
</li>
</ul>
</li>
</ul>
<ol start="2">
<li>Keeps container images small and immutable</li>
</ol>
<ul>
<li>Instead of baking book files into the container image (which requires
rebuilding every change), the container image remains clean and generic.</li>
</ul>
<ol start="3">
<li>Separation of concerns</li>
</ol>
<ul>
<li>The container focuses on running the service, while the content is managed
independently on the host. This separation improves maintainability and more.</li>
</ul>
<ol start="4">
<li>Data persistence</li>
</ol>
<ul>
<li>Since the files live on the host, they persist independently of the containers
lifecycle: restarting, recreating, or destroying the container won’t lose your
content.</li>
</ul>
<ol start="5">
<li>Security Control</li>
</ol>
<ul>
<li>You can carefully set permissions on the host directory, control read/write
access, and isolate the container runtime from sensitive data.</li>
</ul>
<hr />
<h2>Removing the State</h2>
<p>To remove <code>/var/lib/nixos-containers/mdbook-host</code>, you need to remove the
container configuration, rebuild, and then run the following commands to remove
the immutable sticky bits that prevent deletion.</p>
<pre><code class="language-bash"># Forcibly remove all attributes
sudo chattr -R -i mdbook-host/
sudo rm -rf mdbook-host/
</code></pre>
<h2>OCI deployment pipeline building a Rust App</h2>
<blockquote>
<p>If you want to use <code>mdbook-nix-repl</code> check out the README, the following shows
how I tested locally before eventually adding a <code>flake.nix</code> to the repo
streamlining this for users of the project.</p>
</blockquote>
<ul>
<li><a href="https://github.com/saylesss88/mdbook-nix-repl">mdbook-nix-repl README</a></li>
</ul>
<p>This documents how to work with a local Rust crate repository without a
<code>flake.nix</code> for testing. The README above explains how to generate a token and
use the project, this is just for educational purposes if you wanted to
implement something similar:</p>
<ol>
<li><code>nix-repl-server.nix</code>, place this in the same dir as your
<code>configuration.nix</code>:</li>
</ol>
<pre><code class="language-nix">{
config,
lib,
pkgs,
inputs,
...
}:
let
cfg = config.custom.nix-repl-server;
serverSource = inputs.mdbook-nix-repl + "/server";
# 1. Build the binary using your package definition
# serverPkg = pkgs.callPackage ./server-pkg.nix { };
serverPkg = pkgs.callPackage ./server-pkg.nix {
src = serverSource;
};
# 2. Build a minimal container image containing just the server + nix + deps
nixReplImage = pkgs.dockerTools.buildLayeredImage {
name = "nix-repl-server";
tag = "latest";
# dependencies needed at runtime inside the container
contents = [
serverPkg
pkgs.nix
pkgs.bashInteractive
pkgs.cacert
pkgs.tini
pkgs.coreutils
];
config = {
Entrypoint = [
"${pkgs.tini}/bin/tini"
"--"
];
Cmd = [ "${serverPkg}/bin/nix-repl-server" ];
ExposedPorts = {
"8080/tcp" = { };
};
# Important: Container must see 0.0.0.0 to receive traffic from host port mapping
Env = [
"NIX_REPL_BIND=0.0.0.0"
"NIX_CONFIG=experimental-features = nix-command flakes"
"SSL_CERT_FILE=${pkgs.cacert}/etc/ssl/certs/ca-bundle.crt"
];
};
};
in
{
options.custom.nix-repl-server = {
enable = lib.mkEnableOption "nix-repl-server container";
port = lib.mkOption {
type = lib.types.port;
default = 8080;
description = "Host port to map to the container";
};
tokenFile = lib.mkOption {
type = lib.types.path;
default = "/etc/nix-repl-server.env";
description = "Path to file containing NIX_REPL_TOKEN=...";
};
};
config = lib.mkIf cfg.enable {
# Enable Podman backend
virtualisation.podman.enable = true;
virtualisation.oci-containers.backend = "podman";
# The OCI container definition
virtualisation.oci-containers.containers.nix-repl-server = {
image = "nix-repl-server:latest";
# This effectively "loads" the image into Podman on boot
imageFile = nixReplImage;
ports = [ "127.0.0.1:${toString cfg.port}:8080" ];
# Inject the token safely at runtime (not in Nix store)
environmentFiles = [ cfg.tokenFile ];
extraOptions = [
"--cap-drop=ALL"
"--security-opt=no-new-privileges"
"--pull=never" # Use the local loaded image
];
};
};
}
</code></pre>
<ol start="2">
<li><code>server-pkg.nix</code>, place this in the same dir as <code>nix-repl-server.nix</code>:</li>
</ol>
<pre><code class="language-nix">{
lib,
rustPlatform,
nix,
pkg-config,
openssl,
makeWrapper,
inputs,
src,
}:
rustPlatform.buildRustPackage {
pname = "nix-repl-server";
version = "0.1.0";
# Point this to your actual source root (where Cargo.toml is)
# src = ./.;
inherit src;
# You must commit Cargo.lock for this to work
# cargoLock.lockFile = ../../../mdbook-nix-repl/server/Cargo.lock;
cargoLock.lockFile = "${src}/Cargo.lock";
postPatch = ''
cp Cargo.toml.inc Cargo.toml
'';
# Runtime dependencies (nix for evaluation)
nativeBuildInputs = [
pkg-config
makeWrapper
];
buildInputs = [ openssl ];
doCheck = false;
# Ensure 'nix' is available in the path if your binary calls Command::new("nix")
postInstall = ''
wrapProgram $out/bin/nix-repl-server --prefix PATH : ${lib.makeBinPath [ nix ]}
'';
meta = with lib; {
description = "Secure Nix REPL server for mdbook-nix-repl";
platforms = platforms.linux;
};
}
</code></pre>
<ol start="3">
<li><code>flake.nix</code>, this URL leads to a Rust crate repo:</li>
</ol>
<pre><code class="language-nix">inputs = {
mdbook-nix-repl = {
url = "path:/home/jr/mdbook-nix-repl";
flake = false;
};
}
</code></pre>
<ol start="4">
<li><code>configuration.nix</code>:</li>
</ol>
<pre><code class="language-nix">{ pkgs, inputs, ... }:
{
imports = [
# Include the results of the hardware scan.
./hardware-configuration.nix
./users.nix
./nix-repl-server.nix
];
custom.nix-repl-server = {
enable = true;
port = 8080; # Optional, defaults to 8080
tokenFile = "/etc/nix-repl-server.env";
};
# --snip--
</code></pre>
<hr />
<h3>Resources</h3>
<ul>
<li><a href="https://developers.redhat.com/blog/2018/02/22/container-terminology-practical-introduction#">RedHat A Practical Intro to Container Technology</a></li>
</ul>
Packaging a Rust crate for Nixpkgshttps://saylesss88.github.io/nixpkgs/rust_crate_to_nixpkgs.html2025-12-31T00:00:00+00:00saylesss87@proton.me (saylesss88)<details>
<summary> ✔️ Table of Contents</summary>
<!-- toc -->
</details>
<h1>Packaging a Rust crate for Nixpkgs</h1>
<blockquote>
<p>NOTE: This example assumes you’re packaging a crate that’s already on
crates.io, or you’re packaging an existing Rust project for nixpkgs.</p>
</blockquote>
<p>Nixpkgs is a big repository, so it helps to start with a focused workflow:
create a branch, add a package under <code>pkgs/by-name/</code>, build it, then open a PR.</p>
<hr />
<h2>Clone nixpkgs</h2>
<ol>
<li>Fork and clone <code>NixOS/nixpkgs</code>:</li>
</ol>
<pre><code class="language-bash">git clone git@github.com:your-user/nixpkgs.git
cd nixpkgs
git remote add upstream git@github.com:NixOS/nixpkgs.git
</code></pre>
<p>(SSH avoids HTTPS helper issues)</p>
<ol start="2">
<li>If your clone is shallow, convert it to full history (doesn’t lose work):</li>
</ol>
<pre><code class="language-bash">git fetch --unshallow --tags
</code></pre>
<hr />
<h2>Create a branch and add package:</h2>
<ol>
<li>Create a branch before changes preferably:</li>
</ol>
<pre><code class="language-bash">git switch -c mdbook-rss-feed
</code></pre>
<hr />
<h2>Add the package under pkgs/by-name</h2>
<p>New top-level packages should generally go under
<code>pkgs/by-name/<2 letters>/<name>/package.nix</code> (e.g.
<code>pkgs/by-name/md/mdbook-rss-feed/package.nix</code>). Packages in <code>pkgs/by-name</code> are
picked up automatically and usually don’t require edits to <code>all-packages.nix</code>.</p>
<hr />
<h2>Write package.nix (Rust crate example)</h2>
<p>Start with <code>rustPlatform.buildRustPackage</code> and <code>fetchCrate</code>:</p>
<pre><code class="language-nix">{
lib,
rustPlatform,
fetchCrate,
versionCheckHook,
}:
rustPlatform.buildRustPackage rec {
pname = "mdbook-rss-feed";
version = "1.3.0";
src = fetchCrate {
inherit pname version;
hash = "output of `nix hash convert` shown below";
};
cargoHash = lib.fakeHash;
nativeInstallCheckInuts = [
versionCheckHook
];
doInstallCheck = true;
meta = {
description = "mdBook preprocessor that generates RSS, Atom, and JSON feeds";
mainProgram = "mdbook-rss-feed";
homePage = "https://crates.io/crates/mdbook-rss-feed";
license = lib.licenses.asl20;
maintainers = [ lib.maintainers.sayls88 ];
};
}
</code></pre>
<hr />
<h2>Prefetch the crate hash:</h2>
<p>Use <code>fetchCrate</code> / <code>crate2nix</code> style workflow, or just prefetch the <code>crates.io</code>
tarball:</p>
<pre><code class="language-bash">nix-prefetch-url \
--unpack \
https://crates.io/api/v1/crates/mdbook-rss-feed/1.3.0/download
</code></pre>
<p>That prints a base32 hash: <code>0932843lknasdlfkm2lkdnflaknldvdsvser</code></p>
<p>Convert it to sri format:</p>
<pre><code class="language-bash">nix hash convert --hash-algo sha256 --from nix32 --to sri 0932843lknasdlfkm2lkdnflaknldvdsvser
</code></pre>
<p>The above commands output looks like: <code>sha256-...=</code></p>
<p>Put the resulting <code>sha256-...</code> into <code>src.hash</code>:</p>
<pre><code class="language-nix"> src = fetchCrate {
inherit pname version;
hash = "sha256-...";
};
</code></pre>
<hr />
<h2>Get cargoHash via a failing build</h2>
<p>In the <code>nixpkgs</code> root (i.e., the <code>nixpkgs</code> directory), run:</p>
<pre><code class="language-bash">nix-build -A mdbook-rss-feed
# OR nix3 format
nix build .#mdbook-rss-feed
</code></pre>
<p>Nix will fail with a message like:</p>
<pre><code class="language-text">hash mismatch
specified: sha256-....
got: sha256-1...
</code></pre>
<p>Copy the <code>got</code> value into <code>cargoHash</code>, rebuild, and it should succeed.</p>
<p>Sanity check: from <code>nixpkgs</code> root :</p>
<pre><code class="language-bash">./result/bin/mdbook-rss-feed --version
</code></pre>
<hr />
<h2>Adding yourself as maintainer</h2>
<p>Edit <code>nixpkgs/maintainers/maintainer-list.nix</code> add your user in alphabetical
order:</p>
<pre><code class="language-nix">your-handle = {
email = "you@example.com";
name = "Your Name";
github = "your-gh-handle";
githubId = 12345678;
};
</code></pre>
<p>If you specify <code>github</code>, nixpkgs expects <code>githubId</code> too. You can get it from:
<code>https://api.github.com/users/<user></code>.</p>
<p>The nixpkgs maintainers prefer if you add the <code>maintainer-list.nix</code> as a
separate commit.</p>
<pre><code class="language-bash">git commit -m "maintainers: add <user>"
</code></pre>
<hr />
<h2>Treefmt</h2>
<p>Run treefmt the nixpkgs way, from the repo root. Run this right before you push,
my editors formatter does something different with single entry lists than what
Nixpkgs wants:</p>
<pre><code class="language-bash">nix develop --command treefmt
nix fmt
</code></pre>
<hr />
<h2>Rebase and push safely</h2>
<p>From the <code>mdbook-rss-feed</code> branch:</p>
<pre><code class="language-bash">git fetch upstream --tags
git rebase upstream/master
</code></pre>
<p>Commit and push your PR branch:</p>
<p><strong>Then commit and push</strong></p>
<pre><code class="language-bash">git commit -m "mdbook-rss-feed: init at 1.3.0"
# First push
git push origin mdbook-rss-feed
# Use `--force-with-lease` only if you rebased/amended and need to rewrite the PR branch.
# git push --force-with-lease origin mdbook-rss-feed
</code></pre>
<p><code>--force-with-lease</code> is the recommended safe force-push for PR branches.</p>
<p>If <code>--force-with-lease</code> says “stale info”, fetch the remote branch ref first,
then retry.</p>
<p><strong>Then commit and push</strong></p>
<pre><code class="language-bash">git commit -m "mdbook-rss-feed: init at 1.3.0"
git push -u origin mdbook-rss-feed
</code></pre>
<p>Then:</p>
<ol>
<li>
<p>Go to GitHub -> your fork</p>
</li>
<li>
<p>Click “Compare & pull request” on the <code>mdbook-rss-feed</code> branch</p>
</li>
<li>
<p>Fill out the PR template (why useful, tested on x86_64-linux, etc.)</p>
</li>
<li>
<p>Submit!</p>
</li>
</ol>
<p>The package will go through CI checks, and once green + approved by a
maintainer, it’ll land in nixpkgs.</p>
<hr />
<h2>Recovering from Mistakes</h2>
<p>You’re bound to make mistakes, if you learn some Git basics it will help you
quite a bit.</p>
<p>You should avoid adding new commits for small fixes like typos, formatting, or
minor adjustments requested in review. For substantial changes that add
functionality, a new commit may be more appropriate.</p>
<p>Say that we pushed our PR and one of the maintainers gave us a suggested change,
(they want us to follow conventions and remove a trailing period from our
packages description for this example).</p>
<ol>
<li>
<p>Make the edit locally (remove the trailing period in the file)</p>
</li>
<li>
<p>Stage the change: <code>git add pkgs/by-name/xx/your-package/package.nix</code> (avoid
<code>git add -A</code> as it stages everything, which can accidentally include
unrelated files)</p>
</li>
<li>
<p>Amend the commit: <code>git commit --amend --no-edit</code>(this preserves your original
commit message, if you want to change the commit message use
<code>git commit --amend</code>)</p>
</li>
<li>
<p>Force push: <code>git push --force-with-lease</code> (This is safer than just using
<code>--force</code> because it will fail if someone else has pushed commits to your
branch that you don’t have locally)</p>
</li>
</ol>
<p><strong>Alternative for Multiple Commits</strong></p>
<p>Interactive rebase is useful when your PR has several “WIP” commits (or you
added a small review fix as a separate commit) and you want to present a cleaner
history before merge.</p>
<p>You can use interactive rebase to squash all your would be small fix commits
into a single commit they belong to.</p>
<p>Avoid squashing if the commits represent distinct, reviewable changes that stand
on their own.</p>
<p><strong>Basic Workflow (squash/fixup)</strong></p>
<ol>
<li>Decide how many commits back you want to edit (example: last 3 commits):</li>
</ol>
<pre><code class="language-bash">git rebase -i HEAD~3
</code></pre>
<ol start="2">
<li>Your editor opens with a “todo” list (oldest at top). Change later commits
from <code>pick</code> to <code>fixup</code> or <code>squash</code>:</li>
</ol>
<ul>
<li>
<p><code>fixup</code> = combine into the previous commit, discard this commit message.</p>
</li>
<li>
<p><code>squash</code> = combine, but keep/edit commit messages.</p>
</li>
</ul>
<p>Example todo:</p>
<pre><code class="language-text">pick 1111111 mdbook-rss-feed: init at 0.1.0
pick 2222222 mdbook-rss-feed: fix trailing period
pick 3333333 mdbook-rss-feed: formatting
</code></pre>
<p>Change to:</p>
<pre><code class="language-text">pick 1111111 mdbook-rss-feed: init at 0.1.0
fixup 2222222 mdbook-rss-feed: fix trailing period
fixup 3333333 mdbook-rss-feed: formatting
</code></pre>
<ol start="3">
<li>Save/close: if you squashed, Git will prompt you to edit the final combined
message.</li>
</ol>
<p><strong>Push updated history</strong></p>
<p>You have to force-push because <code>rebase</code> rewrites commit SHAs:</p>
<pre><code class="language-bash">git push --force-with-lease
# If something goes wrong
# git rebase --abort
# If you hit conflicts, fix the files, then:
# git add <files>
# git rebase --continue
</code></pre>
<p>If you have an unrelated change accidentally included (for example: you staged
an extra file), it’s usually better to fix it via rebase/splitting before
reviewers spend time re-reviewing noise.</p>
<blockquote>
<p>As of 01-13-26 I have been waiting for 2 weeks for the darwin checks to complete,
I guess this <a href="https://discourse.nixos.org/t/ofborg-aarch64-darwin-builds-causing-bottleneck/55290">bottleneck</a>
has gotten worse. I guess most PRs take about 6 weeks to resolve FYI.</p>
</blockquote>
Hardening Networkinghttps://saylesss88.github.io/nix/hardening_networking.html2025-12-25T00:00:00+00:00saylesss87@proton.me (saylesss88)<h1>Hardening Networking</h1>
<details>
<summary> ✔️ Table of Contents</summary>
<!-- toc -->
</details>
<blockquote>
<p>Since networks and systems vary, some adjustments may cause unexpected issues,
especially around critical components like DNS or firewalls. Always review and
test changes in a controlled environment before applying them broadly.</p>
</blockquote>
<blockquote>
<p>Understand the trade-offs and tailor the settings to your threat model and
workflow. Take what’s useful, adapt as needed, and seek expert guidance for
more advanced scenarios.</p>
</blockquote>
<h2>Introduction</h2>
<p>Every setup is unique, feel free to adapt or skip sections based on your needs.
Start with the basics and build up as you gain confidence. The goal is
practical, tested hardening tailored to you.</p>
<h3>Safe Browsing / Privacy Enhancing Habits</h3>
<p>I recently broke this chapter down and added another chapter:
<a href="https://saylesss88.github.io/nix/browsing_security.html">Browser/Browsing Security</a></p>
<p><strong>Adopt Encrypted DNS and HTTPS Everywhere</strong></p>
<ul>
<li>
<p>Configure your system and browsers to use DNS over HTTPS (DoH), DNS over TLS
(DoT), or DNSCrypt to prevent DNS leakage. Use HTTPS-Only mode in browsers to
encrypt all web traffic. Prefer browsers with strong privacy defaults or add
recommended extensions.</p>
</li>
<li>
<p><a href="https://www.privacyguides.org/en/dns/#dnscrypt-proxy">Privacy Guides dnscrypt-proxy recommendation</a></p>
</li>
<li>
<p>Disable browser “remember password” and autofill features, clear cookies and
site data upon exit, and carefully vet suspicious URLs with tools like
<a href="https://www.virustotal.com/gui/home/url">VirusTotal</a>.</p>
</li>
</ul>
<p><strong>Limit Account Linking and Use Unique Credentials</strong></p>
<ul>
<li>Create separate accounts with unique passwords instead of signing in with
Google, Facebook, or similar services to limit broad data exposure from
compromises.</li>
</ul>
<p><strong>Use Metadata Cleaning Tools</strong></p>
<ul>
<li>
<p>Many files like images, PDFs, and office documents contain hidden metadata
information such as location data, device details, and more that can reveal
your identity or other sensitive information when you share files publicly.</p>
</li>
<li>
<p>To protect your privacy, always sanitize files by removing this metadata
before sharing. Tools like <a href="https://0xacab.org/jvoisin/mat2">mat2</a> are
designed to strip metadata from a wide range of media files efficiently.
(<code>pkgs.mat2</code>). You just type <code>mat2 swappy-2025.png</code> for example and there will
then be a new <code>mat2 swappy-2025.cleaned.png</code> that can safely be shared.</p>
</li>
</ul>
<p><strong>Use Anonymous File-Sharing Tools</strong></p>
<ul>
<li>For sensitive transfers, consiter tools like
<a href="https://github.com/onionshare/onionshare">OnionShare</a> that provide anonymity
and security.(<code>pkgs.onionshare</code>)</li>
</ul>
<p><strong>Avoid Scanning Random QR Codes Without Verification</strong></p>
<ul>
<li>Use QR code scanner apps that check for malicious content before loading
links.</li>
</ul>
<p><strong>Understand Your Threat Model</strong></p>
<ul>
<li>Apply these basics universally, but tailor advanced hardening according to
your unique environment, connectivity needs, and risk profile.</li>
</ul>
<p><strong>Delete cookies and site data when the browser is closed</strong>. (security not
usability).</p>
<p><strong>Use Strong, Unique Passwords and a Password Manager</strong></p>
<ul>
<li>
<p>Avoid reused passwords by using reliable password managers like KeePassXC or
Bitwarden, both available on NixOS. Pair this with enabling two-factor
authentication <strong>(2FA) wherever possible</strong>.</p>
</li>
<li>
<p>It’s advisable to only use the desktop version and not the browser extension
for a number of reasons. One is that you can store your passwords completely
offline and have complete ownership of them.</p>
</li>
</ul>
<pre><code class="language-nix">environment.systemPackages = [
pkgs.keepassxc
pkgs.kpcli # KeePass CLI
# OR
pkgs.bitwarden-desktop
pkgs.bitwarden-cli
];
</code></pre>
<p>With KeePassXC, you can require 3 different authentication methods at the same
time. You can choose a password, a keyfile, and a security key where it won’t
open unless all 3 are present giving you additional security. All 3 might not be
necessary but it’s possible. It’s also easy to migrate to KeePassXC, you can
import your vault from many different managers.</p>
<p>KeepassXC also makes it easy to keep your complete password database offline
which can significantly reduce the risk of a breach.</p>
<p>With Bitwarden, to enable 2 factor authentication, you need to log in with your
master password through the web interface.</p>
<ul>
<li><a href="https://www.privacyguides.org/en/basics/passwords-overview/">PrivacyGuides Intro to Passwords</a></li>
</ul>
<hr />
<h3>Why Follow These Basics?</h3>
<p>These recommended steps help protect your privacy and security while maintaining
usability and minimizing system interruptions. They catch common threats like
network eavesdropping, password reuse, fingerprinting, and data leakage,
providing a solid foundation to build on.</p>
<p>A vast majority of secure and privacy-focused browsers available for NixOS are
based on Firefox.</p>
<blockquote>
<p>❗ NOTE: Firefox does lack some security features available in Chrome and
sandbox escapes in Linux are relatively easy. People such as madaidan say to
never use Linux or Firefox period when you’re worried about security and
privacy. I’m not personally going to jump to proprietary software with known
backdoors in a misguided attempt at increasing security/privacy.</p>
</blockquote>
<ul>
<li><a href="https://techstory.in/eu-hits-google-with-3-5-billion-antitrust-fine-over-adtech-practices/">EU Hits Google with 3.5 Billion Antitrust</a></li>
</ul>
<p>This <a href="https://grapheneos.org/usage#web-browsing">GrapheneOS article</a>, breaks
down why they use Chromium-based browsers and specifically mentions that it’s
not recommended to use Firefox, especially on Linux because of the weak
sandboxing.</p>
<p>As a Chromium-based browser, Brave has been growing on me. Brave uses
randomization rather than standardization for fingerprinting protection. If you
run Cover Your Tracks with Brave, it will show a randomized fingerprint.</p>
<details>
<summary> ✔️ Click To Expand United States Patriot Act Overview </summary>
<p><a href="https://www.csis.org/analysis/fact-sheet-section-215-usa-patriot-act">Section 215 USA Patriot Act</a>
permits the collection of “Tangible Things” or “Business Records”, e.g., your
phone records, medical records, etc. for an investigation to obtain foreign
intelligence information. If it does relate to a US person it must be relevant
to preventing terrorism or espionage, and not be based solely on activities
protected by the first amendment. “Relevant” is the key word here and it is at
the governments discretion meaning they sweep everything and sift it later.
Criticized for violating American citizens Fourth Amendment protections against
warrantless search and seizure and proven to be ineffective.</p>
</details>
<p>What is “normal” and allowed today might be suppressed tomorrow, look at the UK
<a href="https://en.wikipedia.org/wiki/Online_Safety_Act_2023">Online Safety Act</a>
purported to protect children, accused of banning privacy. This is because the
only way to verify age is to make everyone submit KYC with their drivers license
or ID, completely taking away any anonymity of adults and children alike.</p>
<p>Also see
<a href="https://www.bbc.com/news/articles/cq68j5g2nr1o">BBC 4chan refuses to pay fine</a></p>
<p>The mere existence of a surveillance state breeds fear and conformity and
stifles free
expression.–<a href="https://theintercept.com/2016/04/28/new-study-shows-mass-surveillance-breeds-meekness-fear-and-self-censorship/">The Intercept</a></p>
<p>There are much more scary examples in
<a href="https://thenewoil.org/en/guides/prologue/why/">Privacy, The new Oil</a></p>
<h2>Protections from Surveillance in the U.S.</h2>
<details>
<summary> ✔️ Click to Expand U.S. Surveillance protections </summary>
<blockquote>
<p>⚠️ A crucial caveat to keep in mind regarding surveillance protections in the
U.S., whether grounded in the Fourth Amendment, the First Amendment, or
statutory laws is that <strong>these protections are not foolproof and have
repeatedly failed or been circumvented in practice</strong>.</p>
</blockquote>
<ul>
<li>
<p><strong>Fourth Amendment Basics</strong>: It demands reasonableness in searches and usually
requires a warrant. This means government agents cannot arbitrarily listen to
your private communications or search your digital data without judicial
approval</p>
</li>
<li>
<p><strong>Electronic Surveillance Challenges</strong>: Courts have wrestled with how the
Fourth Amendment applies to modern communications. The Supreme Court has ruled
in some cases that pervasive or non-consensual electronic surveillance
violates reasonable expectations of privacy, but other rulings have allowed
broader state actions in national security contexts.</p>
</li>
<li>
<p><strong>The Third-Party Doctrine</strong>: A major limitation arises from the “third-party
doctrine,” which holds that information voluntarily shared with third parties
(like phone companies or internet providers) has reduced Fourth Amendment
protections. This means data held by third parties may be subject to
government access without a warrant in some cases</p>
</li>
<li>
<p><strong>The First Amendment</strong> guarantees free speech and the freedom to receive
information without government censorship or intimidation. Excessive or
secretive government surveillance can chill free speech by making people
afraid their communications are monitored, discouraging open expression and
participation in public discourse.</p>
<ul>
<li>Advocates argue that courts should recognize government surveillance not
only as a Fourth Amendment search issue but also as a First Amendment
violation where surveillance suppresses or chills constitutionally protected
expression.</li>
</ul>
</li>
</ul>
<p>While the Fourth Amendment traditionally governs searches and surveillance
legality, the First Amendment frames the broader impact on free speech and
democratic engagement. Invoking both provides a more comprehensive
constitutional shield against intrusive surveillance practices.</p>
</details>
<hr />
<h2>Encrypted DNS</h2>
<p>DNS (Domain Name System) resolution is the process of translating a website’s
domain name into its corresponding IP address. By default, this traffic isn’t
encrypted, which means anyone on the network, from your ISP to potential
hackers, can see the websites you’re trying to visit. <strong>Encrypted DNS</strong> uses
protocols to scramble this information, protecting your queries and responses
from being intercepted and viewed by others.</p>
<blockquote>
<p>❗ NOTE: There are many other ways for someone monitoring your traffic to see
what domain you looked up via DNS that it’s effectiveness is questionable
without also using Tor or a VPN. Encrypted DNS will not help you hide any of
your browsing activity.</p>
</blockquote>
<p>There are 3 main types of DNS protection:</p>
<ul>
<li>
<p><strong>DNS over HTTPS (DoH)</strong>: Uses the HTTPS protocol to encrypt data between the
client and the resolver.</p>
</li>
<li>
<p><strong>DNS over TLS (DoT)</strong>: Similar to (DoH), differs in the methods used for
encryption and delivery using a separate port from HTTPS.</p>
</li>
<li>
<p><strong>DNSCrypt</strong>: Uses end-to-end encryption with the added benefit of being able
to prevent DNS spoofing attacks.</p>
</li>
</ul>
<p>Useful resources:</p>
<details>
<summary> ✔️ Click to Expand DNS Resources </summary>
<ul>
<li>
<p><a href="https://wiki.nixos.org/wiki/Encrypted_DNS">NixOS Wiki Encrypted DNS</a></p>
</li>
<li>
<p><a href="https://www.cloudflare.com/learning/dns/what-is-dns/">Domain Name System (DNS)</a></p>
</li>
<li>
<p><a href="https://en.wikipedia.org/wiki/DNS_over_HTTPS">Wikipedia DNS over HTTPS (DoH)</a></p>
</li>
<li>
<p><a href="https://en.wikipedia.org/wiki/DNS_over_TLS">Wikipedia DNS over TLS (DoT)</a></p>
</li>
<li>
<p><a href="https://blog.cloudflare.com/dns-encryption-explained/">Cloudflare Dns Encryption Explained</a></p>
</li>
<li>
<p><a href="https://nordvpn.com/blog/encrypted-dns-traffic/">NordVPN Encrypted Dns Traffic</a></p>
</li>
</ul>
<p><strong>Hot Take</strong>:</p>
<ul>
<li><a href="https://madaidans-insecurities.github.io/encrypted-dns.html">Encrypted DNS is ineffective without a VPN or Tor by madaidan</a></li>
</ul>
</details>
<p>The following sets up dnscrypt-proxy using ODoH (Oblivious DNS over HTTPS) with
an oisd blocklist:</p>
<p>Add <code>oisd</code> to your flake inputs:</p>
<pre><code class="language-nix"># flake.nix
inputs = {
oisd = {
url = "https://big.oisd.nl/domainswild";
flake = false;
};
};
</code></pre>
<details>
<summary> ✔️ Add more blocklists: HaGeZi Multi PRO </summary>
<p>To use the Hagezi Multi PRO Blocklist either with oisd or alone you could do the
following:</p>
<pre><code class="language-nix"># flake.nix
inputs = {
oisd = {
url = "https://big.oisd.nl/domainswild";
flake = false;
};
hagezi = {
url = "https://raw.githubusercontent.com/hagezi/dns-blocklists/main/wildcard/pro-onlydomains.txt";
flake = false;
};
};
</code></pre>
<p>add it to the <code>extraBlocklist</code> variable in the following <code>dnscrypt-proxy.nix</code>:</p>
<pre><code class="language-nix"># dnscrypt-proxy.nix
extraBlocklist = builtins.readFile inputs.hagezi;
</code></pre>
<p>More blocklist url’s:</p>
<pre><code class="language-text"># NextDNS CNAME cloaking list
https://raw.githubusercontent.com/nextdns/cname-cloaking-blocklist/master/domains
# AdGuard Simplified Domain Names filter
https://adguardteam.github.io/AdGuardSDNSFilter/Filters/filter.txt
# OISD Big list
https://big.oisd.nl/domainswild
# HaGeZi Multi PRO
https://raw.githubusercontent.com/hagezi/dns-blocklists/main/wildcard/pro-onlydomains.txt
# HaGeZi Threat Intelligence Feeds
https://raw.githubusercontent.com/hagezi/dns-blocklists/main/wildcard/tif-onlydomains.txt
</code></pre>
</details>
<blockquote>
<p>❗ NOTE: The <code>oisd</code> blocklist is a plain text file that updates frequently.
This can cause <code>nh os switch</code> to fail with a <code>NarHash</code> mismatch error. To fix
this, you need to run <code>nix flake update</code> to refresh the blocklist and its hash
in your <code>flake.lock</code> file. After that, you can run your <code>nh</code> command again.</p>
</blockquote>
<p>And the import the following into your <code>configuration.nix</code>:</p>
<pre><code class="language-nix"># dnscrypt-proxy.nix
{
pkgs,
lib,
inputs,
...
}: let
blocklist_base = builtins.readFile inputs.oisd;
extraBlocklist = "";
blocklist_txt = pkgs.writeText "blocklist.txt" ''
${extraBlocklist}
${blocklist_base}
'';
hasIPv6Internet = true;
StateDirName = "dnscrypt-proxy"; # Used for systemd StateDirectory
StatePath = "/var/lib/${StateDirName}";
in {
networking = {
nameservers = ["127.0.0.1" "::1"];
networkmanager.dns = "none";
};
services.resolved.enable = lib.mkForce false;
services.dnscrypt-proxy = {
enable = true;
settings = {
sources.public-resolvers = {
urls = [
"https://raw.githubusercontent.com/DNSCrypt/dnscrypt-resolvers/master/v3/public-resolvers.md"
"https://download.dnscrypt.info/resolvers-list/v3/public-resolvers.md"
];
minisign_key = "RWQf6LRCGA9i53mlYecO4IzT51TGPpvWucNSCh1CBM0QTaLn73Y7GFO3";
cache_file = "${StatePath}/public-resolvers.md";
};
sources.relays = {
urls = [
"https://raw.githubusercontent.com/DNSCrypt/dnscrypt-resolvers/master/v3/relays.md"
"https://download.dnscrypt.info/resolvers-list/v3/relays.md"
];
cache_file = "${StatePath}/relays.md";
minisign_key = "RWQf6LRCGA9i53mlYecO4IzT51TGPpvWucNSCh1CBM0QTaLn73Y7GFO3";
};
sources.odoh-servers = {
urls = [
"https://raw.githubusercontent.com/DNSCrypt/dnscrypt-resolvers/master/v3/odoh-servers.md"
"https://download.dnscrypt.info/resolvers-list/v3/odoh-servers.md"
];
cache_file = "${StatePath}/odoh-servers.md";
minisign_key = "RWQf6LRCGA9i53mlYecO4IzT51TGPpvWucNSCh1CBM0QTaLn73Y7GFO3";
};
sources.odoh-relays = {
urls = [
"https://raw.githubusercontent.com/DNSCrypt/dnscrypt-resolvers/master/v3/odoh-relays.md"
"https://download.dnscrypt.info/resolvers-list/v3/odoh-relays.md"
];
cache_file = "${StatePath}/odoh-relays.md";
minisign_key = "RWQf6LRCGA9i53mlYecO4IzT51TGPpvWucNSCh1CBM0QTaLn73Y7GFO3";
};
server_names = ["odoh-cloudflare" "odoh-snowstorm"];
# This creates the [anonymized_dns] section in dnscrypt-proxy.toml
anonymized_dns = {
skip_incompatible = true;
routes = [
{
server_name = "odoh-snowstorm";
via = ["odohrelay-crypto-sx"];
}
{
server_name = "odoh-cloudflare";
via = ["odohrelay-crypto-sx"];
}
];
};
ipv6_servers = hasIPv6Internet;
block_ipv6 = !hasIPv6Internet;
blocked_names.blocked_names_file = "${blocklist_txt}";
require_dnssec = true;
require_nolog = false;
require_nofilter = false;
odoh_servers = true;
dnscrypt_servers = true;
};
};
# This creates /var/lib/dnscrypt-proxy with correct permissions
systemd.services.dnscrypt-proxy2.serviceConfig.StateDirectory = StateDirName;
}
</code></pre>
<p>This module follows a “Zero Trust” model for your internet traffic, ensuring no
single entity can see both <strong>who you are</strong> and <strong>where you are going</strong>.</p>
<pre><code class="language-bash"># You should see that dnscrypt-proxy chooses the Server with the lowest initial latency
sudo systemctl status dnscrypt-proxy2
# verify that dnscrypt-proxy is listening
sudo ss -lnp | grep 53
# Test a DNS query, if you get valid responses it's working
dig @127.0.0.1 example.com +short
# check the logs
sudo journalctl -u dnscrypt-proxy2
</code></pre>
<p><code>dnscrypt-proxy2</code> acts as your local DNS resolver listening on your machine
(<code>127.0.0.1</code>) for IPv4 and <code>::1</code> for iPv6.</p>
<p>The system’s DNS settings (<code>networking.nameservers</code>) point to localhost, so
<strong>all DNS queries</strong> go to dnscrypt-proxy accept for your browser. Your browser
has to be configured separately with a local resolver in which I haven’t figured
out yet. I recommend setting your browsers DNS over HTTPS to strict with a
respected custom DNS resolver such as <code>https://dns.quad9.net/dns-query</code>.</p>
<p><code>inputs.oisd</code> refers to the flake input oisd blocklist, it prevents your device
from connecting to unwanted or harmful domains.</p>
<p><code>dnscrypt-proxy2</code> then encrypts and forwards our DNS requests to third-party
public DNSCrypt or DoH servers.</p>
<ul>
<li>ODoH Relays: This is the “Oblivious” part. It breaks the link between your IP
address and your browsing history.</li>
</ul>
<h3>Setting up Tailscale</h3>
<p>I was surprised at how easy this actually was to set up. Either go to
<a href="https://www.tailscale.com">https://www.tailscale.com</a> and/or download the app for either Android or IOS,
sign up with your identity provider, and click <code>Start connecting devices -></code></p>
<ul>
<li><a href="https://tailscale.com/kb/1017/install">Tailscale quickstart</a></li>
</ul>
<p>To add tailscale to NixOS:</p>
<pre><code class="language-nix"># tailscale.nix
{...}: {
services.tailscale.enable = true;
# Tell the firewall to implicitly trust packets routed over Tailscale:
networking.firewall.trustedInterfaces = ["tailscale0"];
}
</code></pre>
<p>Tailscale will automatically use the hostname of your device as the name of the
network. If you want to change it to something else:</p>
<pre><code class="language-bash">sudo tailscale set --hostname=<name>
# You can also give your account a nickname
sudo tailscale set --nickname=<name>
</code></pre>
<p>This allows you to refer to your network by <code>name</code> rather than IP address.</p>
<p>Tailscale uses <a href="https://tailscale.com/kb/1081/magicdns">MagicDNS</a> which is
enabled by default, and they recommend you keep it enabled.</p>
<p>The docs say that by default, devices in your tailnet prefer their local DNS
settings and only use the tailnet’s DNS servers when needed. I had to completely
disable my Androids DNS settings for tailscale to access the internet through
MagicDNS.</p>
<pre><code class="language-bash">sudo tailscale set --accept-dns=false
</code></pre>
<p>To connect to tailscale after rebuilding you can run:</p>
<pre><code class="language-bash">sudo tailscale up
</code></pre>
<p>Use <code>nslookup</code> to review and debug DNS responses:</p>
<pre><code class="language-bash">nslookup google.com
Server: 127.0.0.1
Address: 127.0.0.1#53
Non-authoritative answer:
Name: google.com
Address: 142.251.40.206
Name: google.com
Address: 2a00:1450:4001:827::200e
</code></pre>
<ul>
<li>The <code>127.0.0.1#53</code> indicate that instead of using the DNS server pushed by
your ISP, router, or Tailscale’s MagicDNS, the system is sending all DNS
requests through the loopback device to <code>dnscrypt-proxy</code> in my case.</li>
</ul>
<p>Get the status of your connections to other Tailscale devices:</p>
<pre><code class="language-bash">tailscale status
1 2 3 4 5
100.1.2.3 device-a apenwarr@ linux active; direct <ip-port>, tx 1116 rx 1124
100.4.5.6 device-b crawshaw@ macOS active; relay <relay-server>, tx 1351 rx 4262
100.7.8.9 device-c danderson@ windows idle; tx 1214 rx 50
100.0.1.2 device-d ross@ iOS —
</code></pre>
<ul>
<li>
<p><a href="https://tailscale.com/kb/1196/security-hardening">Tailscale Best Practices</a></p>
</li>
<li>
<p><a href="https://tailscale.com/kb/1080/cli">Tailscale CLI</a></p>
</li>
<li>
<p>There is much more you can do with Tailscale, including integrating
Mullvad-VPN and using Exit Nodes.</p>
</li>
</ul>
<h2>MAC Randomization</h2>
<p>All network cards have a unique identifier called a MAC address. They’re stored
in hardware and are used to assign an address to computers on the local network.</p>
<p>The MAC address is typically only traceable on the local network, it’s not
passively sent out beyond the local router making it more critical on untrusted,
public networks.</p>
<p>Leak-proof MAC randomization is very difficult to implement:</p>
<ul>
<li><a href="https://www.kicksecure.com/wiki/Dev/MAC#Leak-proof_MAC_Randomization_-_Technical_Implementation_Challenges">Leak-proof MAC Randomization Implementation Challenges</a></li>
</ul>
<p>Android and iPhone already implement MAC Randomization by default.</p>
<p>MAC Randomization enhances privacy by making it harder for third parties to
track users across different networks.</p>
<p>Randomizing MAC adresses obscures a device’s unique hardware identity when
scanning for or connecting to Wi-Fi, blocking passive tracking as well as
location tracking across networks.</p>
<p>If you use NetworkManager you can set MAC randomization with:</p>
<pre><code class="language-nix"> networking = {
networkmanager = {
enable = true;
wifi.scanRandMacAddress = true;
wifi.macAddress = "random";
plugins = [];
};
</code></pre>
<p>Right when I rebuilt, I got an alert from my router saying that a new device
just connected to the network.</p>
<p>There is also a utility for viewing/manipulating the MAC address of network
interfaces, <code>pkgs.macchanger</code>. This is less reliable than the NetworkManager
setting.</p>
<h2>Firewalls</h2>
<p>NixOS includes an integrated firewall based on iptables/nftables.</p>
<details>
<summary> ✔️ Click to Expand Firewall Resources </summary>
<p><a href="https://www.cloudflare.com/learning/security/what-is-a-firewall/">Cloudflare What is a Firewall</a></p>
<p><a href="https://linux-audit.com/networking/nftables/nftables-beginners-guide-to-traffic-filtering/">Beginners guide to nftables</a></p>
<p><a href="https://wiki.archlinux.org/title/Nftables">Arch Wiki nftables</a></p>
</details>
<p>The following firewall setup is based on the dnscrypt setup above utilizing
nftables.</p>
<p>This nftables firewall configuration is a strong recommended practice for
enforcing encrypted DNS on your system by restricting all outbound DNS traffic
to a local dnscrypt-proxy process. It greatly reduces DNS leak risks and
enforces privacy by limiting DNS queries to trusted, encrypted upstream
servers.(This was edited on 08-08-25) replace <code><DNSCRYPT-UID></code> with the UID
given from the command <code>ps -o uid,user,pid,cmd -C dnscrypt-proxy</code>:</p>
<pre><code class="language-nix">{ ... }: {
networking.nftables = {
enable = true;
ruleset = ''
table inet filter {
chain output {
type filter hook output priority 0; policy accept;
# Allow localhost DNS for dnscrypt-proxy2
ip daddr 127.0.0.1 udp dport 53 accept
ip6 daddr ::1 udp dport 53 accept
ip daddr 127.0.0.1 tcp dport 53 accept
ip6 daddr ::1 tcp dport 53 accept
# Allow dnscrypt-proxy2 to talk to upstream servers
# Replace <DNSCRYPT-UID> with:
# ps -o uid,user,pid,cmd -C dnscrypt-proxy
meta skuid <DNSCRYPT-UID> udp dport { 443, 853 } accept
meta skuid <DNSCRYPT-UID> tcp dport { 443, 853 } accept
# Block all other outbound DNS
udp dport { 53, 853 } drop
tcp dport { 53, 853 } drop
}
}
'';
};
networking.firewall = {
enable = true;
allowedTCPPorts = [
# Ports open for inbound connections.
# Limit these to reduce the attack surface.
22 # SSH – Keep open only if you need remote access.
# To change the SSH port in NixOS:
# services.openssh.ports = [ 2222 ];
# Update this list to match the new port.
# 53 # DNS – Only if running a public DNS server.
# 80 # HTTP – Only if hosting a website.
# 443 # HTTPS – Only if hosting a secure website.
];
allowedUDPPorts = [
# Ports open for inbound UDP traffic.
# Most NixOS workstations won't need any here.
# 53 # DNS – Only if running a public DNS server.
];
};
}
</code></pre>
<details>
<summary> ✔️ Click to Expand Tip on changing the default SSH Port </summary>
<blockquote>
<p>❗ TIP: Reduce SSH noise by changing the default port On most systems, SSH
listens on TCP port 22 — which means automated bots and scanners will hit it
constantly. While this doesn’t replace real security measures, moving SSH to a
different port drastically cuts down on drive-by brute-force attempts you’ll
see in your logs.</p>
<p>In NixOS, change both the SSH daemon port and your firewall rule:</p>
<pre><code class="language-nix"> # Example: Move SSH to port 2222
networking.firewall.allowedTCPPorts = [ 2222 ];
services.openssh.ports = [ 2222 ];
</code></pre>
<ul>
<li>After rebuilding, test from another terminal/session before closing your
existing one:</li>
</ul>
<pre><code class="language-bash">ssh -p 2222 user@host
</code></pre>
</blockquote>
</details>
<p><code>nft</code> is a cli tool used to set up, maintain and inspect packet filtering and
classification rules in the Linux kernel, in the nftables framework. The Linux
kernel subsystem is known as nftables, and ‘nf’ stands for Netfilter.–<code>man nft</code></p>
<pre><code class="language-bash">sudo nft list ruleset
</code></pre>
<ul>
<li>Since we declare our firewall, we’ll only use <code>nft</code> to inspect our ruleset.</li>
</ul>
<h2>NixOS Firewall vs <code>nftables</code> Ruleset</h2>
<p><code>networking.nftables</code>: This section provides a raw <code>nftables</code> ruleset that gives
you granular, low-level control. The rules here are more specific and are meant
to handle the intricate logic of the DNS proxy setup. They will be applied
directly to the kernel’s <code>nftables</code> subsystem and prevent DNS leaks.</p>
<p><code>networking.firewall</code>: This is a higher-level, simpler NixOS option that uses
<code>iptables</code> rules to open ports for inbound traffic. The rules defined here
(allowing port 22) is for incoming SSH connections to the machine, not for
outbound traffic, so they do not interfere with the <code>nftables</code> rules that filter
the outgoing traffic. (Make sure to comment out or remove this if you don’t SSH
into your machine).</p>
<p>The firewall ensures only authorized, local encrypted DNS proxy process can
speak DNS with the outside world, and that all other DNS requests from any other
process are blocked unless they’re to <code>127.0.0.1</code> (our local proxy). This is a
robust policy against both DNS leaks and local compromise.</p>
<h2>Testing</h2>
<p>Review listening ports: After each rebuild, use <code>ss -tlpn</code>, <code>nmap</code> or <code>netstat</code>
to see which services are accepting connections. Close or firewall anything
unnecessary.</p>
<p>You can also test firewall DNS restrictions using <code>dig</code>:</p>
<pre><code class="language-bash">dig @127.0.0.1 example.com # Should work
dig @8.8.8.8 example.com # Should fail/time out for normal users
</code></pre>
<ul>
<li>This test is actually what alerted me of an improper configuration in the
above firewalls nftables rules allowing me to fix it. Initially the second
<code>dig</code> command gave results letting me know that the restrictions weren’t being
applied correctly.</li>
</ul>
<p>Since we defined an <code>output</code> chain inside <code>table inet filter</code> with the line:</p>
<pre><code class="language-bash">type filter hook output priority 0; policy accept;
</code></pre>
<p>This attaches the chain to the kernel’s OUTPUT hook, so all locally generated
packets, including DNS queries are filtered by this chain.</p>
<p>Within this chain, the rules:</p>
<ul>
<li>
<p>Explicitly allow DNS queries to localhost addresses (<code>127.0.0.1</code> and <code>::1</code>).</p>
</li>
<li>
<p>Allow the <code>dnscrypt-proxy</code> process (running with UID <code>62396</code>) to send DNS
queries on ports 443 and 853 (for DNS-over-HTTPS and DNS-over-TLS).</p>
</li>
<li>
<p>Drop all other outbound DNS traffic on ports <code>53</code> and <code>853</code>.</p>
</li>
</ul>
<p>Because of this setup, dig queries to your local resolver at <code>127.0.0.1</code> pass,
but queries directly to public DNS servers like <code>8.8.8.8</code> are blocked for
users/processes other than the allowed DNS proxy.</p>
<h2>OpenSnitch</h2>
<ul>
<li><a href="https://wiki.nixos.org/wiki/OpenSnitch">NixOS Wiki OpenSnitch</a></li>
</ul>
<p><a href="https://github.com/evilsocket/opensnitch">Opensnitch</a> is an open-source
application firewall that focuses on monitoring and controlling outgoing network
connections on a per-application basis.</p>
<p>This can be used to block apps from accessing the internet that shouldn’t need
to (i.e., block telemetry and more). Opensnitch will report that the app has
attempted to make an outbound internet connection and block it or allow it based
on the rules you set.</p>
<h3>Resources</h3>
<details>
<summary> ✔️ Click to Expand Resources </summary>
<ul>
<li>
<p><a href="https://cloudflare.com/learning/ssl/what-is-https">Cloudflare What is HTTPS</a></p>
</li>
<li>
<p><a href="https://ssd.eff.org/">Surveillance Self-Defence</a> has a lot of helpful info to
protect your privacy.</p>
</li>
<li>
<p><a href="https://ssd.eff.org/module/what-fingerprinting">What is Fingerprinting</a>, more
than you realize is being tracked constantly.</p>
</li>
<li>
<p><a href="https://oisd.nl/">oisd.nl</a> the oisd website</p>
</li>
<li>
<p>For potentially dangerous file types like PDFs, office documents, or images,
especially those downloaded from untrusted sources such as torrents, consider
converting them to a safe PDF format with
<a href="https://github.com/freedomofpress/dangerzone">dangerzone</a>. Dangerzone not
only removes metadata but also applies robust sanitization to neutralize
malicious content.</p>
</li>
<li>
<p><a href="https://wiki.nixos.org/wiki/Librewolf">NixOS Wiki LibreWolf</a>, the options in
the wiki make it less secure and aren’t recommended settings to use. They
explicitly disable several of LibreWolf’s default privacy-enhancing features,
such as fingerprinting resistance and clearing session data on shutdown.</p>
</li>
<li>
<p><a href="https://librewolf.net/docs/features/">LibreWolf Features</a> You still need to
enable DNS over HTTPS through privacy settings.</p>
</li>
<li>
<p><a href="https://wiki.nixos.org/wiki/SearXNG">SearXNG on NixOS</a></p>
<ul>
<li><a href="https://docs.searxng.org/">Welcome to SearXNG</a></li>
</ul>
</li>
<li>
<p><a href="https://brainfucksec.github.io/firefox-hardening-guide">Firefox Hardening Guide</a></p>
</li>
<li>
<p><a href="https://www.ghacks.net/2015/08/18/a-comprehensive-list-of-firefox-privacy-and-security-settings/">Firefox ghacks</a></p>
</li>
<li>
<p><a href="https://github.com/arkenfox/user.js">Arkenfox</a></p>
</li>
<li>
<p><a href="https://www.privacytools.io/private-browser">PrivacyTools.io</a></p>
</li>
<li>
<p><a href="https://github.com/simeononsecurity/FireFox-Privacy-Script">simeononsecurity Firefox-Privacy-Script</a></p>
</li>
<li>
<p><a href="https://brainfucksec.github.io/firefox-hardening-guide">brianfucksec firefox-hardening-Guide 2023</a></p>
</li>
<li>
<p><a href="https://simeononsecurity.com/guides/enhance-firefox-security-configuring-guide/">STIG Firefox Hardening</a></p>
</li>
</ul>
<blockquote>
<p>If you should trust the U.S. Governments recommendations is another story but
it can be good to compare and contrast with other trusted resources. You’ll
have to think whether the CISA recommending that everyone uses Signal is solid
advice or guiding you towards a honeypot, I can’t say for sure.</p>
</blockquote>
<ul>
<li>
<p><a href="https://stigviewer.com/stigs/mozilla_firefox">Mozilla Firefox Security Technical Implementation Guide</a>
The STIG for Mozilla Firefox (Security Technical Implementation Guide) is a
set of security configuration standards developed by the U.S. Department of
Defense. They are created by the Defense Information Systems Agency (DISA) to
secure and harden DoD information systems and software.</p>
</li>
<li>
<p><a href="https://thenewoil.org/en/guides/prologue/why/">Privacy, The New Oil (Why Privacy & Security Matter)</a></p>
</li>
<li>
<p><a href="https://www.privacyguides.org/en/">PrivacyGuides</a></p>
</li>
<li>
<p><a href="https://relay.firefox.com/accounts/profile/">Firefox Relay</a> can be used to
create email aliases that forward to your real email address. The paid plan
also lets you create phone number aliases that forward to your phone number.</p>
</li>
<li>
<p><a href="https://zebracrossing.narwhalacademy.org/">Zebra Crossing digital safety checklist</a></p>
</li>
<li>
<p><a href="https://datadetoxkit.org/en/privacy/essentials#step-1">DataDetoxKit</a></p>
</li>
<li>
<p><a href="https://datadetoxkit.org/en/privacy/degooglise/">DataDetox Degooglise</a></p>
</li>
<li>
<p><a href="https://tb-manual.torproject.org/">Tor Browser User Manual</a></p>
</li>
<li>
<p><a href="https://gitlab.torproject.org/tpo/team/-/wikis/home">Tor Wiki</a></p>
</li>
<li>
<p><a href="https://tldp.org/LDP/nag2/x-087-2-intro.html">Linux Network Administrators Guide</a></p>
</li>
<li>
<p><a href="https://www.ibm.com/think/topics/networking">IBM Networking</a></p>
</li>
</ul>
</details>
Browsing Securityhttps://saylesss88.github.io/nix/browsing_security.html2025-12-21T00:00:00+00:00saylesss87@proton.me (saylesss88)<details>
<summary> ✔️ Table of Contents</summary>
<!-- toc -->
</details>
<h1>Browser/Browsing Security: Defense in Depth</h1>
<blockquote>
<p>“The major problem with current systems is their inability to provide
effective isolation between various programs running on one machine. E.g. if
the user’s Web browser gets compromised (due to a bug exploited by a malicious
web site), the OS is usually unable to protect other user’s applications and
data from also being compromised.” –Qubes arch-spec</p>
</blockquote>
<p>The web browser is the most complex, most exposed, and most vulnerable
application on a hardened Linux system. It is your primary interface with the
internet and, consequently, the primary vector for exploitation and tracking.</p>
<p>The <strong>Three Pillars of Web Defense</strong> To secure your browsing, you must balance
three often-conflicting goals:</p>
<ol>
<li>
<p><strong>Security (Exploit Mitigation)</strong>: Preventing malicious sites from escaping
the browser sandbox to access your local files or execute code.</p>
</li>
<li>
<p><strong>Privacy (Tracking Protection)</strong>: Preventing advertisers and sites from
linking your current session to your real-world identity or browsing history.</p>
</li>
<li>
<p><strong>Anonymity (Identity Obfuscation)</strong>: Making your traffic indistinguishable
from thousands of other users to hide your physical location and legal
identity.</p>
</li>
</ol>
<h2>Methods of Protection</h2>
<ul>
<li>
<p><strong>Browser hardening</strong> focuses on reducing attack surface and blocking tracking
by disabling or restricting features like JavaScript, cookies, telemetry, and
third-party scripts.</p>
</li>
<li>
<p><strong>Fingerprint protection</strong>, on the other hand, aims to make your browser
indistinguishable from others. Instead of just blocking data collection, it
ensures that your browser’s configuration; screen size, fonts, user agent,
etc. matches a large group of users, so you blend in.</p>
</li>
<li>
<p><strong>Anonymity</strong>: Maximizing anonymity often means restricting or masking
features (setting a generic fingerprint, disabling browser APIs, blocking
trackers) so the browser blends in with many others. This reduces uniqueness
but can break website functionality, cause CAPTCHAs, and limit usability.</p>
</li>
<li>
<p><strong>Browser compartmentalization</strong> is a technique where different browsers are
dedicated to distinct online activities to isolate cookies, trackers, and
browsing data. For example, Mullvad Browser can be used solely for activities
where fingerprinting resistance is critical, such as anonymous browsing or
visiting privacy-sensitive sites. Meanwhile, a hardened LibreWolf or Firefox
can be used for general browsing, email, or banking where you want solid
security and feature flexibility but aren’t as concerned about fingerprint
uniqueness.</p>
</li>
</ul>
<p>On a hardened Linux system, the browser is most often the weakest link exposed
to the internet, and so security, privacy, and anti-tracking features of
browsers are now as important, or even more important than platform-level
protections.</p>
<hr />
<p>Browsers leak identity in two main ways: <strong>network identifiers</strong> (IP address,
DNS, TLS metadata) and <strong>browser identifiers</strong> (fingerprinting + tracking). This
chapter focuses on the browser side first, then covers when a VPN or Tor changes
the network side. Before tweaking anything, pick the browsing goal (anonymity vs
privacy vs convenience), because the “best” settings differ.</p>
<p>If the goal is blending in, prefer a browser that ships with a shared,
consistent fingerprint (Tor Browser / Mullvad Browser). If the goal is mainly
reducing cross-site tracking for normal browsing, a hardened Firefox/LibreWolf
profile with minimal extensions is usually easier to live with.</p>
<h3>Fingerprinting</h3>
<p>Modern web APIs make rich, customized experiences possible, but they also reveal
enough low‑level details about your device and browser to build a unique
fingerprint. This fingerprint can be used for hidden, persistent tracking, even
when cookies are blocked.</p>
<p>Browser fingerprinting is a tracking technique, often done by third-party
companies that specialize in it. They provide code (usually JavaScript) that a
website owner can embed on their site. When you visit the site, the script runs
in the background, silently collecting data about your device and browser.</p>
<ul>
<li><a href="https://en.wikipedia.org/wiki/Entropy_(computing)">Entropy</a>: in this
context, is a measure of how much unique information a specific browser
feature contributes to your fingerprint. It’s often quantified in <strong>bits of
entropy</strong>, where higher bits mean more uniqueness (i.e., easier to identify
you).
<ul>
<li>A “bit” is a basic unit of information for computers. Entropy measuring
sites results are measured in “bits of identifying information”.</li>
</ul>
</li>
</ul>
<p>There are two main approaches to obfuscating your fingerprint:</p>
<ul>
<li>
<p><strong>Standardization</strong>: Make browsers standardized and therefore have the same
fingerprint to blend into a crowd. This is what Tor and Mullvad Browser do.
Best for anonymity; increases the crowd you blend into, but may decrease
usability (site breakage, CAPTCHAs); adversaries may still find subtle
differences.</p>
</li>
<li>
<p><strong>Randomization</strong>: Randomize fingerprint metrics so it’s not directly linkable
to you. Brave has this feature, if you run coveryourtracks with Brave you will
get a result of “your browser has a randomized fingerprint”. This is good for
privacy but may be detectable by advanced scripts.</p>
</li>
</ul>
<h3>Fingerprint Testing</h3>
<p>You can test your browser to see how well you are protected from tracking and
fingerprinting at <a href="https://coveryourtracks.eff.org/">Cover Your Tracks</a>.</p>
<p>Also check out, <a href="https://amiunique.org/fingerprint">Am I Unique</a></p>
<blockquote>
<p>⚠️ WARNING: Don’t put too much weight into the results as people often check
their fingerprint, change one metric and check it again over and over skewing
the results. It is helpful for knowing the fingerprint values that trackers
track.</p>
</blockquote>
<ul>
<li>
<p><a href="https://forum.torproject.org/t/browser-fingerprinting/1228/25">Browser Fingerprinting Tor Forum</a></p>
</li>
<li>
<p><a href="https://madaidans-insecurities.github.io/browser-tracking.html">Madaidans Hot Take on Browser Tracking</a></p>
</li>
</ul>
<hr />
<h3>Browsers</h3>
<p>I currently run NixOS in a VM with a secureblue host,
<a href="https://github.com/secureblue/Trivalent">Trivalent</a> is my default browser, a
security-focused, Chromium-based browser.</p>
<p>In this section, the goal is to outline several browser options on NixOS and
show concrete configurations (with a focus on LibreWolf that can be adapted to
Firefox). Browsers are complicated and people have different security, privacy,
and usability needs, so this is not an endorsement of a single “best” choice.
Instead, the following subsections describe trade-offs and example setups so you
can decide which browser and configuration best match your own threat model and
workflow.</p>
<p>IMO there aren’t many Chromium-based browsers on NixOS that hit the sweet spot
of being both security-forward and privacy-respecting. Many of the “privacy
browser” options you’ll see on NixOS are Firefox forks; with the right tweaks
they can be made pretty private, but they generally don’t match Chromium-family
browsers on exploit mitigations and sandbox depth. </p>
<h4>Brave</h4>
<p>Brave is basically “Chromium, but with privacy features turned on by default,”
and the big win is that most of the protection comes from the browser itself
(Shields + anti-fingerprinting) instead of from a pile of extensions. Brave’s
fingerprinting story is also unusually practical: instead of trying to make
every Brave user look identical, it mixes API blocking with per-site/per-session
randomization (“farbling”) so the fingerprint is harder to reuse across
contexts.</p>
<p>On NixOS, IMO the best available Chromium-based browser is Brave. Brave strips
out Google’s tracking code and includes a native add/tracker blocker (Brave
Shields). It also ships a best‑effort anti‑fingerprinting system that combines
(1) blocking/removing/modifying certain high-signal APIs and (2) “privacy
through randomization” (farbling), where it returns slightly altered values so
fingerprints don’t stay stable across sites/sessions. </p>
<p><strong>Things to Note about Brave</strong>:</p>
<ul>
<li>
<p>Shields is a bundle of controls (trackers/ads, cookies, fingerprinting
defenses, HTTPS upgrades, referrer/query stripping, storage cleanup), so
turning Shields off for a broken site is a big privacy downgrade for that
site—not just “adblock off.” </p>
</li>
<li>
<p>Brave explicitly recommends validating fingerprinting defenses with realistic
tests (new private window, restart browser, different profile, clear site
storage) and expects the fingerprint to change across those boundaries. </p>
</li>
<li>
<p>Extension bloat will break Brave’s privacy and security story: each extension
increases attack surface and usually has broad privileges, while Brave’s core
pitch is that you can get most of the privacy wins without third-party code in
your browser process</p>
</li>
</ul>
<p><strong>Drawbacks worth mentioning</strong>:</p>
<ul>
<li>
<p>Brave is still Chromium/Blink, so using it doesn’t help with engine diversity;
if Gecko dies, the web becomes even more “whatever Chromium implements,” which
is a long-term ecosystem risk.</p>
</li>
<li>
<p>Brave ships a lot (Rewards, Wallet, VPN upsells, Leo/AI features depending on
build/channel), and every extra subsystem is more UI complexity and
potentially more bugs/attack surface than some browsers.</p>
</li>
<li>
<p>Brave’s model assumes the browser does most privacy work; piling on extensions
increases privileged code, fingerprint uniqueness, and the chance of a
malicious/compromised extension.</p>
</li>
<li>
<p>Farbling and API defenses reduce stability/linkability, but sophisticated
trackers can still correlate behavior, logins, IP ranges, and high-level
patterns—so “I enabled anti-fingerprinting” shouldn’t be read as “I can’t be
tracked.”</p>
</li>
<li>
<p>Brave’s built-in ad system (Rewards) is opt-in, but Brave also promotes
features like Rewards and can show sponsored content (e.g., sponsored new-tab
images) unless you disable/hide it</p>
</li>
</ul>
<h4>Firefox</h4>
<p>Firefox is kind of its own thing: it runs on Gecko, not on Chromium or WebKit,
so it’s one of the only mainstream browsers that isn’t just another Chrome fork.
That uniqueness matters if you care about engine diversity and not having the
entire web effectively dictated by a single vendor. It’s also very tweakable, so
if you’re willing to flip some prefs and add a couple of key extensions, you can
turn it into a solid privacy‑focused daily driver without giving up a
non‑Chromium stack.</p>
<p>Firefox will usually get security fixes sooner than any fork, and some forks lag
behind on patching, which can leave known vulnerabilities exploitable for
longer. If you use Firefox’s built‑in Enhanced Tracking Protection (ETP), Resist
Fingerprinting (RFP), and hardening templates like ghacks or Arkenfox together
with uBlock Origin configured for dynamic filtering, you can replicate what used
to require a pile of separate extensions.</p>
<h4>Site Isolation & Firefox Links</h4>
<p>Firefox does implement Site Isolation via
<a href="https://wiki.mozilla.org/Project_Fission">Project Fission</a>, but it’s newer and
historically less mature than Chromium’s site‑per‑process model, and it may not
be enabled everywhere by default. To check that it is active, go to
<code>about:config</code> and ensure both <code>fission.autostart</code> and <code>gfx.webrender.all</code> are
set to <code>true</code>.</p>
<p>With uBlock Origin you can disable JavaScript per‑site (similar to NoScript),
enable a bunch of high‑quality blocklists, and selectively relax rules when a
trusted site breaks. To turn on Enhanced Tracking Protection and fingerprinting
protections in the UI, go to <code>Settings -> Privacy & Security</code> ->
<code>Enhanced Tracking Protection -> Custom</code>; if that causes breakage on a
particular website, click the shield icon in the URL bar and disable protections
just for that site.</p>
<ul>
<li><a href="https://github.com/gorhill/uBlock/wiki">uBlock Wiki</a></li>
</ul>
<p>Once you select <code>Custom</code>, you’ll see that among the options is to block
<code>Known fingerprinters</code> as well as <code>Suspected fingerprinters</code>. The “Known
Fingerprinters” protection works by blocking scripts listed in
<a href="https://disconnect.me/trackerprotection#categories_of_trackers">Disconnect’s fingerprinting list</a>
For most users they suggest using the above FPP to avoid breakage. To go further
and enable RFP, go to <code>about:config</code> and set <code>privacy.resistFingerprinting</code> to
<code>true</code>.</p>
<details>
<summary> ✔️ Further Reading on Firefox Defenses </summary>
<ul>
<li>
<p><a href="https://support.mozilla.org/en-US/kb/resist-fingerprinting">Mozilla Resist Fingerprinting</a></p>
<ul>
<li>To ensure Site Isolation is enabled, in <code>about:config</code>, set
<code>fission.autostart</code>, and <code>gfx.webrender.all</code> prefs to <code>true</code>.(It’s disabled
by default on android).</li>
</ul>
</li>
<li>
<p><a href="https://en.wikipedia.org/wiki/Entropy_(computing)">Entropy</a>: in this
context, is a measure of how much unique information a specific browser
feature contributes to your fingerprint. It’s often quantified in <strong>bits of
entropy</strong>, where higher bits mean more uniqueness (i.e., easier to identify
you).</p>
<ul>
<li>A “bit” is a basic unit of information for computers. Entropy measuring
sites results are measured in “bits of identifying information”.</li>
</ul>
</li>
<li>
<p><a href="https://developer.mozilla.org/en-US/docs/Glossary/Origin">Origin</a>: Web
content’s <em>origin</em> is defined by the <em>scheme</em> (protocol), <em>hostname</em> (domain),
and port of the URL used to access it. Two objects have the same origin only
when the scheme, hostname, and port all match.</p>
</li>
<li>
<p><a href="https://developer.mozilla.org/en-US/docs/Web/Security/Same-origin_policy">Same-origin policy</a>:
is a critical security mechanism that restricts how a document or script
loaded by one origin can interact with a resource from another origin. It
helps isolate potentially malicious documents, reducing possible attack
vectors.</p>
</li>
<li>
<p><a href="https://blog.mozilla.org/security/2021/05/18/introducing-site-isolation-in-firefox/">Firefox Site-Isolation</a>.
Firefox does provide site-isolation as well.</p>
</li>
<li>
<p><a href="https://www.mozilla.org/en-US/security/advisories/mfsa2018-01/">Protection from side-channel attacks</a></p>
</li>
<li>
<p><a href="https://developer.mozilla.org/en-US/docs/Web/Security/Insecure_passwords">MDN Insecure passwords</a></p>
<ul>
<li><a href="https://blog.mozilla.org/tanvi/2016/01/28/no-more-passwords-over-http-please/">Risks of reused passwords</a></li>
</ul>
</li>
</ul>
</details>
<hr />
<h2>LibreWolf</h2>
<p><strong>LibreWolf</strong> is an open-source fork of Firefox with a strong focus on privacy,
security, and user freedom. LibreWolf enables always HTTPS, includes
uBlockOrigin, and only includes privacy focused search engines by default.</p>
<p>Example LibreWolf config implementing many of the STIG recommendations:</p>
<details>
<summary> ✔️ Click to expand LibreWolf Example </summary>
<pre><code class="language-nix"># librewolf.nix
{pkgs, lib, config, ...}: let
cfg = config.custom.librewolf;
in {
options.custom.librewolf = {
enable = lib.mkOption {
type = lib.types.bool;
default = true;
description = "Enable the LibreWolf Module";
};
};
config = lib.mkIf cfg.enable {
programs.librewolf = {
enable = true;
policies = {
# A bit annoying
DontCheckDefaultBrowser = true;
# Pocket is insecure according to DoD
DisablePocket = true;
# No imperative updates
DisableAppUpdate = true;
};
settings = {
# // SV-16925 - DTBF030
"security.enable_tls" = true;
# // SV-16925 - DTBF030
"security.tls.version.min" = 2;
# // SV-16925 - DTBF030
"security.tls.version.max" = 4;
# // SV-111841 - DTBF210
"privacy.trackingprotection.fingerprinting.enabled" = true;
# // V-252881 - Retaining Data Upon Shutdown
"browser.sessionstore.privacy_level" = 0;
# // SV-251573 - Customizing the New Tab Page
"browser.newtabpage.activity-stream.enabled" = false;
"browser.newtabpage.activity-stream.feeds.section.topstories" = false;
"browser.newtabpage.activity-stream.showSponsored" = false;
"browser.newtabpage.activity-stream.feeds.snippets" = false;
# // V-251580 - Disabling Feedback Reporting
"browser.chrome.toolbar_tips" = false;
"browser.selfsupport.url" = "";
"extensions.abuseReport.enabled" = false;
"extensions.abuseReport.url" = "";
# // V-251558 - Controlling Data Submission
"datareporting.policy.dataSubmissionEnabled" = false;
"datareporting.healthreport.uploadEnabled" = false;
"datareporting.policy.firstRunURL" = "";
"datareporting.policy.notifications.firstRunURL" = "";
"datareporting.policy.requiredURL" = "";
# // V-252909 - Disabling Firefox Studies
"app.shield.optoutstudies.enabled" = false;
"app.normandy.enabled" = false;
"app.normandy.api_url" = "";
# // V-252908 - Disabling Pocket
"extensions.pocket.enabled" = false;
# // V-251555 - Preventing Improper Script Execution
"dom.disable_window_flip" = true;
# // V-251554 - Restricting Window Movement and Resizing
"dom.disable_window_move_resize" = true;
# // V-251551 - Disabling Form Fill Assistance
"browser.formfill.enable" = false;
# // V-251550 - Blocking Unauthorized MIME Types
"plugin.disable_full_page_plugin_for_types" = "application/pdf,application/fdf,application/xfdf,application/lso,application/lss,application/iqy,application/rqy,application/lsl,application/xlk,application/xls,application/xlt,application/pot,application/pps,application/ppt,application/dos,application/dot,application/wks,application/bat,application/ps,application/eps,application/wch,application/wcm,application/wb1,application/wb3,application/rtf,application/doc,application/mdb,application/mde,application/wbk,application/ad,application/adp";
};
};
xdg.desktopEntries.librewolf = {
name = "LibreWolf";
exec = "${pkgs.librewolf}/bin/librewolf";
};
xdg.mimeApps = {
enable = true;
defaultApplications = {
"text/html" = "librewolf.desktop";
"x-scheme-handler/http" = "librewolf.desktop";
"x-scheme-handler/https" = "librewolf.desktop";
"x-scheme-handler/about" = "librewolf.desktop";
"x-scheme-handler/unknown" = "librewolf.desktop";
};
};
};
}
</code></pre>
<p>And enable it in your <code>home.nix</code> or equivalent with:</p>
<pre><code class="language-nix"># home.nix
custom.librewolf.enable = true;
</code></pre>
<p>The <code>xdg</code> settings at the end make LibreWolf the defaults for what is listed.</p>
<p>Thanks to <code>JosefKatic</code> for putting the above STIG settings in NixOS format.</p>
<p>Also, go to
<a href="https://accounts.firefox.com/settings#data-collection">accounts.firefox</a> and
turn off “Allow Mozilla accounts to send technical and interaction data to
Mozilla”. Also set 2-fa in
<a href="https://accounts.firefox.com/settings#security">Security Settings</a></p>
<p>I always set <code>Max Protection</code> for DNS over HTTPS and personally set a custom
resolver to <code>https://dns.quad9.net/dns-query</code></p>
<ul>
<li>Mullvad is also a good option:
<a href="https://mullvad.net/en/help/no-logging-data-policy">Mullvad no-logging-data-policy</a></li>
</ul>
<details>
<summary> ✔️ Alternative LibreWolf Configuration utilizing Arkenfox </summary>
<pre><code class="language-nix">{
pkgs,
lib,
config,
...
}: let
cfg = config.custom.librewolf;
in {
options.custom.librewolf = {
enable = lib.mkOption {
type = lib.types.bool;
default = true;
description = "Enable the LibreWolf Module";
};
};
config = lib.mkIf cfg.enable {
programs.librewolf = {
enable = true;
policies = {
DontCheckDefaultBrowser = true;
DisablePocket = true;
DisableAppUpdate = true;
};
profiles.my-default = {
isDefault = true;
name = "Default Profile";
extraConfig = ''
${builtins.readFile ./user.js}
"general.autoScroll" = true;
"sidebar.verticalTabs" = true;
'';
settings = {
};
};
};
xdg.desktopEntries.librewolf = {
name = "LibreWolf";
exec = "${pkgs.librewolf}/bin/librewolf";
};
xdg.mimeApps = {
enable = true;
defaultApplications = {
"text/html" = "librewolf.desktop";
"x-scheme-handler/http" = "librewolf.desktop";
"x-scheme-handler/https" = "librewolf.desktop";
"x-scheme-handler/about" = "librewolf.desktop";
"x-scheme-handler/unknown" = "librewolf.desktop";
};
};
};
}
</code></pre>
<p>Download the
<a href="https://github.com/arkenfox/user.js/blob/master/user.js">Arkenfox user.js</a> and
review it making sure that you agree with the settings. If you do, place it in
the same directory as your <code>librewolf.nix</code>.</p>
<p>Read the <a href="https://github.com/arkenfox/user.js/wiki">Arkenfox Wiki</a></p>
<p>The <code>user.js</code> is full of comments and information, read it and adjust it for
your needs. The following enables RFP fingerprint protection:</p>
<pre><code class="language-js">***/ user.js ***/
user_pref("privacy.resistFingerprinting", true); // [FF41+]
user_pref("privacy.resistFingerprinting.pbmode", true); // [FF114+]
</code></pre>
<p>As you learn more, you can get more strict if you so choose.</p>
<p>Rebuild, launch LibreWolf, and check your <code>~/.librewolf/my-default/user.js</code>. It
should match the Arkenfox settings. Initially, only the <code>user.js</code> will be
listed, as you run LibreWolf other profile files and folders are created
dynamically.</p>
<p>In LibreWolf type <code>Ctrl + Shift + J</code> and look for any errors.</p>
<p>Type <code>about:config</code> into the address bar and search a few of the settings that
Arkenfox changes, do they match?</p>
<p>The <code>user.js</code> is read <strong>in order</strong>, if there are 2 of the same setting, the last
one will be applied. Adding overrides to the settings attribute above places the
changes at the <strong>beginning</strong> of the <code>user.js</code> which isn’t what we want. Placing
them after the <code>${builtins.readFile ./user.js}</code> in <code>extraConfig</code> amends them to
the <strong>end</strong> of the <code>user.js</code> allowing us to override the defaults.</p>
<p>The process is the same with Firefox but since Arkenfox strongly recommends
Ublock Origin and it is built into LibreWolf it makes sense to use the browser
with the stronger defaults.</p>
<blockquote>
<p>❗ NOTE: There is a home-manager module called <code>arkenfox-nixos</code> that is
supposed to make updates easier but IMO the documentation leaves you guessing
how to use it. As updates come in to Firefox/LibreWolf some of the settings
become unnecessary so it’s important to keep an eye on both Firefox and
Arkenfox updates. Which both have RSS feeds that will alert you upon changes.</p>
</blockquote>
<p>I personally use <a href="https://feeder.co/">Feeder</a> as my open-source RSS feed reader,
available in most app stores including F-Droid. It is listed on
<a href="https://www.privacytools.io/privacy-rss-feed-readers">PrivacyTools</a>.</p>
<ul>
<li>
<p><a href="https://github.com/arkenfox/user.js/commits/master.atom">Arkenfox Recent Commits RSS feed</a></p>
</li>
<li>
<p><a href="https://github.com/arkenfox/user.js/releases.atom">Arkenfox Release Notes RSS</a></p>
</li>
<li>
<p><a href="https://www.mozilla.org/en-US/firefox/nightly/notes/feed/">Firefox Nightly release notes</a></p>
</li>
</ul>
</details>
<h4>Search Defaults</h4>
<p><strong>Startpage</strong>: Advertised as the world’s most private search engine. “Startpage
delivers Google search results via their proprietary personal data protection
technology.”</p>
<ul>
<li>
<p><a href="https://www.startpage.com/">Startpage</a></p>
</li>
<li>
<p>To add Startpage as a search engine, add
<code>https://www.startpage.com/sp/search?query=%s</code>.</p>
</li>
</ul>
<p><strong>SearXNG</strong> an open-source, privacy-respecting metasearch engine that aggregates
results from various search services, such as Google, DuckDuckGo, etc. without
tracking you or profiling your searches. You can add SearXNG to firefox by going
to <code>about:preferences#search</code> and at the bottom click <code>Add</code>, URL will be
<code>https://searx.be/search?q=%s</code>.</p>
<blockquote>
<p>❗️ NOTE: SearXNGs google results are not working as of 11-17-25 and haven’t
for a while now leading to bad results being returned for most instances. It’s
my understanding this is because Google is actively blocking automated
requests from SearXNG. Devs sometimes publish patches or workarounds, but
these are quickly blocked when Google changes their back-end.</p>
</blockquote>
<blockquote>
<p>❗️ NOTE: The above searx is the default and doesn’t give many relevant
results. To get relevant results find a
<a href="https://searx.space/">public instance</a> with a good rating from your area and
add the <code>search?q=%s</code> to the end of it. For example, I’m using
<code>https://priv.au/search?q=%s</code>.</p>
</blockquote>
<p>Searx is a bit different, you can choose which search engine you want for your
current search with <code>!ddg search term</code> to use duckduckgo for example.</p>
</details>
<h4>Tor Browser</h4>
<blockquote>
<p>❗ NOTE: Tor is <strong>not</strong> the most secure browser, anonymity and security can
often be at odds with each other. Having the exact same browser as many other
people isn’t the best security practice, but it is great for anonymity. Tor is
also based on Firefox Esr, which only receives patches for vulnerabilities
considered Critical or High which can be taken advantage of.</p>
</blockquote>
<p>Tor is a modified version of Firefox specifically designed for use with Tor.</p>
<p>Tor routes your internet traffic through a global volunteer-operated network,
masking your IP address and activities from local observers, ISPs, websites, and
surveillance systems. This helps you protect personal information and maintain
anonymity when browsing, communicating, or using online services.</p>
<p>Adding browser plugins to Tor can de-anonymize you, don’t do it. Tor is already
built with the necessary plugins and privacy protecting rules, so adding more is
unnecessary and actually dangerous for your anonymity.</p>
<p>A Tor exit node can easily see your traffic, and if you’re not using HTTPS then
it may be able to modify that traffic. Only use HTTPS when browsing the clear
net with Tor, this doesn’t apply to onion services (<code>.onion</code>) as the traffic
stays inside the Tor network all the way to the destination.</p>
<p>You can visit both the clear web and <code>.onion</code> sites on Tor. Whenever possible
you should utilize Onion Services (<code>.onion</code> addresses) so communications and web
browsing stay within the Tor network. <code>.onion</code> URLS form a tunnel that is
end-to-end encrypted using a random rendezvous point and incorporating
<a href="https://en.wikipedia.org/wiki/Forward_secrecy">perfect forward secrecy (PFS)</a>.</p>
<p>Bridges are only necessary in countries that don’t allow people to use Tor.
Using Bridges when they aren’t needed takes resources away from people in
oppressive regimes that need, only use them if necessary. Read the guides, and
use Tails OS, or Whonix when it really matters.</p>
<ul>
<li><a href="https://saylesss88.github.io/nix/whonix_kvm.html">Whonix KVM on NixOS</a></li>
</ul>
<p>You will see a lot of conflicting information about using Tor with a VPN. If you
are in an area that blocks access to Tor or it is dangerous to use Tor, by all
means use a trusted VPN.</p>
<h3>TorPlusVPN</h3>
<ul>
<li>
<p><a href="https://gitlab.torproject.org/legacy/trac/-/wikis/doc/TorPlusVPN">Tor Project Wiki TorPlusVPN</a></p>
</li>
<li>
<p><a href="https://www.privacyguides.org/en/advanced/tor-overview/#safely-connecting-to-tor">Safely Connecting to Tor</a></p>
</li>
</ul>
<p><strong>Learn about Tor</strong></p>
<p>I recommend starting with
<a href="https://www.privacyguides.org/articles/2025/04/30/in-praise-of-tor/#onion-sites-you-can-visit-using-the-tor-browser">Privacy Guides In Praise of Tor</a>
and then reading their
<a href="https://www.privacyguides.org/en/advanced/tor-overview/">Tor Overview</a> they
have been the most informative resources I’ve come across yet.</p>
<p>The Electronic Frontier Foundation sponsors and helps fund Tor and so does the
United States Government.</p>
<p>If you are fortunate to live outside of oppressive regimes with extreme
censorship, using Tor for every day, mundane activities is likely safe and won’t
put you on any harmful “list.” Even if it did, you’d be in good company—these
lists mostly contain great people working tirelessly to defend human rights and
online privacy worldwide.</p>
<p>By using Tor regularly for ordinary browsing, you help strengthen the network,
making it more robust and anonymous for everyone. This collective support makes
staying private easier for activists, journalists, and anyone facing online
surveillance or censorship. The writer of the PrivacyGuides article mentions
using Tor when he needs to access Google Maps to protect his privacy</p>
<p>So, consider embracing Tor not only for sensitive browsing but also for daily
routine tasks. Every user adds valuable noise to the network, helping protect
privacy and freedom for all.</p>
<p><strong>Tor is at risk, and needs our help</strong>. Despite its strength and history, Tor
isn’t safe from the same attacks oppressive regimes and misinformed legislators
direct at encryption and many other privacy-enhancing
technologies.–<a href="https://www.privacyguides.org/articles/2025/04/30/in-praise-of-tor/#how-to-support-tor">How to Support Tor</a></p>
<ul>
<li><a href="https://wiki.nixos.org/wiki/Tor">Tor on NixOS</a>
<ul>
<li>
<p><a href="https://tb-manual.torproject.org/">Tor Browser User Manual</a></p>
</li>
<li>
<p><a href="https://support.torproject.org/faq/staying-anonymous/">Tor staying-anonymous</a></p>
</li>
<li>
<p><a href="https://ssd.eff.org/module/how-to-use-tor">How to Use Tor</a></p>
</li>
<li>
<p><a href="https://torproject.github.io/manual/secure-connections/">Cool Graphic Showing Secure Connections with Tor</a></p>
</li>
</ul>
</li>
</ul>
<hr />
<h4>Mullvad-Browser</h4>
<p>Rather than try to tweak a browser into fingerprinting submission, I recommend
using either Tor or Mullvad-Browser when fingerprintability is the highest
issue. Both Tor and Mullvad-Browser were designed specifically for this purpose
and you likely won’t get as much out of tweaking another browser.</p>
<p>Mullvad-Browser is free and open-source and was developed by the Tor Project in
collaboration with Mullvad VPN.(Another Firefox Derivative). It is also the top
recommended browser from PrivacyGuides.</p>
<p>It is the Tor Browser without the Tor Network, allowing you to use the privacy
features Tor created along with a VPN if you so choose.</p>
<ul>
<li><a href="https://mullvad.net/en/browser">Mullvad-Browser</a>, is in Nixpkgs as:
<code>pkgs.mullvad-browser</code></li>
</ul>
<hr />
<h2>Making Your Browser Amnesic, the Nix Way</h2>
<p><strong>Problem</strong>: Browsers leak data via <code>.cache</code> and <code>.config</code>.</p>
<p><strong>Pro Tip</strong>: Even if you use a persistent home directory, you should mount your
<code>~/.cache</code> folder to <code>tmpfs</code>.</p>
<ul>
<li>
<p><strong>Performance</strong>: Browsers perform thousands of small read/writes to the cache.
In-memory storage is significantly faster.</p>
</li>
<li>
<p><strong>Disk Health</strong>: It prevents “SSD wear” from constant caching of temporary web
assets.</p>
</li>
<li>
<p><strong>Forensic Hygiene</strong>: It ensures that volatile “junk” like images, scripts,
and stylesheets never touches your physical platter.</p>
</li>
</ul>
<blockquote>
<p><strong>Note</strong>: This will <strong>not</strong> wipe your browser session (tabs, cookies,
history), as those are stored in <code>~/.config</code>. If you want a truly “amnesic”
browsing session that wipes everything on reboot, you must also mount your
browser’s profile directory (e.g., <code>~/.mozilla</code> or <code>~/.config/BraveSoftware</code>)
to <code>tmpfs</code>.</p>
</blockquote>
<pre><code class="language-nix">fileSystems."/home/youruser/.cache" = {
device = "none";
fsType = "tmpfs";
options = [ "size=4G" "mode=777" ];
};
</code></pre>
<p>Ensure it was applied with:</p>
<pre><code class="language-bash">findmnt /home/youruser/.cache
</code></pre>
<p>You can apply the same <code>tmpfs</code> logic to your config folder. <strong>Warning</strong>: This
will wipe your settings, extensions, and history every reboot.</p>
<p>Manual <code>tmpfs</code> mounts in <code>configuration.nix</code> are powerful because they happen at
the system level, but they require explicit ownership (<code>uid</code>/<code>gid</code>) to work with
user-level applications.</p>
<pre><code class="language-nix">fileSystems."/home/youruser/.config/BraveSoftware" = {
device = "none";
fsType = "tmpfs";
options = [
"size=4G"
"mode=700" # Use 700 for privacy
"noatime"
# Replace `1000` with the output of `id -u`
"uid=1000"
# Replace `100` with output of `id -g`
"gid=100"
];
};
</code></pre>
<p><strong>How to find your UID/GID</strong></p>
<pre><code class="language-bash">id -u && id -g
</code></pre>
<p>Replace the above <code>uid=</code>, and <code>gid=</code> values with the output of the above
command.</p>
<hr />
<details>
<summary> ✔️ Example Script to wipe cache and generate new `machine-id` </summary>
<p>If you followed the above “Nix way” of Amnesic cache, the following script is
unnecessary, I’m leaving it here for now for those that are interested in
changing their machine-id imperatively.</p>
<ul>
<li>
<p><a href="https://www.man7.org/linux/man-pages/man5/machine-id.5.html">man page machine-id(5)</a></p>
</li>
<li>
<p>The following example is adapted from
<a href="https://firejail.wordpress.com/all-about-tor/">Firejail All About Tor</a>
section, adapted for NixOS.</p>
</li>
</ul>
<p>Save the following script as <code>cleanup.sh</code>, change <code>Your-User</code> to your username:</p>
<pre><code class="language-bash">#!/bin/sh -e
USER="Your-User"
HOME_DIR="/home/$USER"
# clear user cache directly as root
sudo -u "$USER" rm -fr "$HOME_DIR/.cache"
# generate a new machine-id
rm -f /var/lib/machine-id
dbus-uuidgen > /var/lib/machine-id
cp /var/lib/machine-id /etc/machine-id
chmod 444 /etc/machine-id
exit 0
</code></pre>
<p>The <code>~/.cache</code> directory is where most programs store runtime information:
webpages you visited, torrent trackers you connected to, and deleted emails.
It’s a good idea to remove them at shutdown. –Firejail all-about-tor</p>
<p>Check <code>/etc/machine-id</code> & <code>~/.cache</code> before running the script:</p>
<pre><code class="language-bash">cat /etc/machine-id
# Output
0b46feb27a20469da0ee62baaeb51c5c
ls ~/.cache
</code></pre>
<pre><code class="language-bash">chmod +x cleanup.sh
sudo ./cleanup.sh
</code></pre>
<p>Recheck your <code>machine-id</code> and <code>~/.cache</code> directories, you should have a newly
generated <code>machine-id</code> and minimal files in the <code>~/.cache</code> directory. The
Firejail example shows a systemd unit that runs the above script at every
shutdown but that may be overkill, I suggest running it occasionally to make it
harder for sites to link your <code>machine-id</code> to you.</p>
</details>
<p>Privacy protection doesn’t need to be perfect to make a difference. The best
protection against tracking and fingerprinting available is to use Tor. Many
add-ons are redundant, do some research and avoid using an add-on for something
that can be accomplished with built-in settings.</p>
<ul>
<li><a href="https://ssd.eff.org/module/how-to-use-tor">Surveillance Self-Defense How to: Use Tor</a></li>
</ul>
<p>There are more hardening parameters that can be set but this should be a good
starting point for a hardened version of LibreWolf. When testing with Cover your
tracks, customized LibreWolf tested as having stronger tracking protection than
default Mullvad-Browser and NoScript significantly cuts down the data available
for fingerprinting by disabling JavaScript.</p>
<ul>
<li>The <a href="https://wiki.garudalinux.org/en/privacy-guide">Garuda Privacy-Guide</a> has
good tips and recommendations for browser add-ons.</li>
</ul>
<hr />
<h3>Virtual Private Networks (VPNs)</h3>
<p>A <strong>VPN</strong> (Virtual Private Network) encrypts your Internet connection and routes
your traffic through a VPN provider’s servers, masking your IP address from
local network observers, ISPs, and websites. Using a VPN can prevent your ISP or
local Wi-Fi owner from tracking what sites you visit (they only see a connection
to the VPN), and can help circumvent some regional restrictions or filtering.</p>
<p>However, VPNs simply shift your trust: Instead of your ISP seeing your activity,
your VPN provider can, so you must trust their privacy policies and
infrastructure. Quality and privacy protections vary widely from one VPN company
to another.</p>
<p>I see over and over again that Mullvad VPN is the best, I am in no way
affiliated with them this is just what I hear. They allow you to pay with cash
completely anonymously and keep very minimal metadata. Metadata is a big deal,
the US gov has admitted to killing people based solely on their metadata.</p>
<p>Your ISP almost certainly does sketchy stuff with your data, personally I would
rather trust a company like Mullvad whose whole reputation is based on their
trustworthiness, transparency, and data protection.</p>
<p>You can use a VPN with Tor, but it’s not recommended by the Tor Project unless
you’re an advanced user who knows how to configure both in a way that doesn’t
compromise your privacy.</p>
<p><strong>Popular VPNs on NixOS</strong></p>
<ul>
<li>
<p><a href="https://wiki.nixos.org/wiki/Mullvad_VPN">Mullvad VPN</a> Mullvad VPN uses
WireGuard under the hood and only works if <code>systemd-resolvd</code> is enabled.</p>
</li>
<li>
<p><a href="https://wiki.nixos.org/wiki/WireGuard">WireGuard VPN</a>, WireGuard is a
protocol, but also a VPN provider on NixOS.</p>
</li>
<li>
<p><a href="https://wiki.nixos.org/wiki/Tailscale">Tailscale</a></p>
</li>
<li>
<p><a href="https://wiki.nixos.org/wiki/OpenVPN">OpenVPN</a>, OpenVPN is both a protocol and
full-featured VPN provider on NixOS.</p>
</li>
</ul>
JJ VCShttps://saylesss88.github.io/vcs/jujutsu.html2025-12-08T00:00:00+00:00saylesss87@proton.me (saylesss88)<h1>Version Control with JJ</h1>
<details>
<summary> ✔️ Click to Expand Table of Contents</summary>
<!-- toc -->
</details>
<p><img src="https://saylesss88.github.io/../images/jujutsu.png" alt="JJ Logo" /></p>
<div style="font-size: 0.8em; margin-top: 10px;">
**Image Source:** This image is from the [Jujutsu VCS repository](https://github.com/jj-vcs/jj) and is licensed under the Apache 2.0 License.
</div>
<p>⚠️ <strong>Security Reminder</strong>: Never commit secrets (passwords, API keys, tokens,
etc.) in plain text to your Git repository. If you plan to publish your NixOS
configuration, always use a secrets management tool like <code>sops-nix</code> or <code>agenix</code>
to keep sensitive data safe. See the
<a href="https://saylesss88.github.io/installation/enc/sops-nix.html">Sops-Nix Guide</a>
for details.</p>
<h2>Getting Started</h2>
<p>Jujutsu (jj) is a modern, Git-compatible version control system designed to
simplify and improve the developer experience. It offers a new approach to
distributed version control, focusing on a more intuitive workflow, powerful
undo capabilities, and a branchless model that reduces common pitfalls of Git.</p>
<p><strong>Recommended resources</strong>:</p>
<ul>
<li>
<p><a href="https://steveklabnik.github.io/jujutsu-tutorial/">Steve’s Jujutsu Tutorial</a>
(most up to date). Steve does an excellent job explaining the ins and outs of
Jujutsu.</p>
</li>
<li>
<p><a href="https://zerowidth.com/2025/jj-tips-and-tricks/">zerowidth jj-tips-and-tricks</a></p>
</li>
<li>
<p>Official:</p>
</li>
</ul>
<pre><code class="language-bash">jj help -k tutorial
</code></pre>
<ul>
<li>
<p>Every time you run a <code>jj</code> command, it examines the working copy and takes a
snapshot.</p>
</li>
<li>
<p>Command help:</p>
</li>
</ul>
<pre><code class="language-bash">jj <command> --help
jj git init --help
jj git push --help
</code></pre>
<h2>🔑 Key Concepts</h2>
<details>
<summary> ✔️ Click to Expand Key Concepts </summary>
<ol>
<li><strong>Working Copy as Commit</strong></li>
</ol>
<ul>
<li>
<p>In JJ your working copy is always a real commit. Any changes you make are
automatically recorded in this working commit. The working copy is always
(<code>@</code>) and the Parent commit is always <code>(@-)</code> keep this in mind.</p>
</li>
<li>
<p>There is <strong>no staging area</strong> (index) as in Git. You do not need to run
<code>git add</code> or <code>git commit</code> for every change. Modifications are always tracked
in the current commit.</p>
</li>
</ul>
<ol start="2">
<li><strong>Branchless Workflow and Bookmarks</strong></li>
</ol>
<ul>
<li>
<p>JJ does not have the concept of a “current branch.” Instead, use bookmarks,
which are named pointers to specific commits.</p>
</li>
<li>
<p>Bookmarks do not move automatically. Commands like <code>jj new</code> and <code>jj commit</code>
move the working copy, but the bookmark stays were it was. Use
<code>jj bookmark move</code> to move bookmarks. (e.g., <code>jj bookmark move main</code>). You can
also use <code>jj bookmark set main -r @</code> to explicitly set the main bookmark to
point at the working copy commit.</p>
</li>
<li>
<p>Only commits referenced by bookmarks are pushed to remotes, preventing
accidental sharing of unfinished work.</p>
</li>
</ul>
<ol start="3">
<li><strong>Automatic Tracking and Simpler Workflow</strong></li>
</ol>
<p>To stop tracking a specific file, first add it to your <code>.gitignore</code>, then run
<code>jj untrack <file></code></p>
<ul>
<li>The working copy acts as a live snapshot of your workspace. Commands first
sync filesystem changes into this commit, then perform the requested
operation, and finally update the working copy if needed.</li>
</ul>
<ol start="4">
<li>Operation Log and Undo</li>
</ol>
<ul>
<li>
<p>JJ records every operation (commits, merges, rebases, etc.) in an <strong>operation
log</strong>. Inspect it with: <code>jj op log</code></p>
</li>
<li>
<p>You can view and undo any previous operation, not just the most recent one,
making it easy to recover from mistakes, a feature not present in Git’s core
CLI.</p>
</li>
</ul>
<ol start="5">
<li>First-Class Conflict Handling</li>
</ol>
<p>Conflicts happen when JJ can’t figure out how to merge different changes made to
the same file.</p>
<ul>
<li>
<p>Conflicts are stored inside commits, not just in the working directory. You
can resolve them at any time, not just during a merge or rebase.</p>
</li>
<li>
<p>Conflict markers are inserted directly into files, and JJ can reconstruct the
conflict state from these markers. You can resolve conflicts by editing the
files or using <code>jj resolve</code>.</p>
</li>
</ul>
<ol start="6">
<li>Revsets and Filesets</li>
</ol>
<ul>
<li>
<p><strong>Revsets</strong>: JJ’s powerful query language for selecting sets of commits,
inspired by Mercurial. For example, <code>jj log -r "author(alice) & file(*.py)"</code>
lists all commits by Alice that touch Python files.</p>
</li>
<li>
<p><strong>Filesets</strong>:JJ supports a functional language for selecting sets of files,
allowing advanced file-based queries and operations.</p>
</li>
</ul>
<table><thead><tr><th style="text-align: left">Feature</th><th style="text-align: left">Git</th><th style="text-align: left">Jujutsu (jj)</th></tr></thead><tbody>
<tr><td style="text-align: left">Staging Area</td><td style="text-align: left">Yes (git add/index)</td><td style="text-align: left">No, working copy is always a commit</td></tr>
<tr><td style="text-align: left">Commit Workflow</td><td style="text-align: left">Stage → Commit</td><td style="text-align: left">All changes auto-recorded in working commit</td></tr>
<tr><td style="text-align: left">Branches</td><td style="text-align: left">Central to workflow</td><td style="text-align: left">Optional, bookmarks used for sharing</td></tr>
<tr><td style="text-align: left">Undo/Redo</td><td style="text-align: left">Limited, complex</td><td style="text-align: left">Easy, operation log for undo</td></tr>
<tr><td style="text-align: left">Conflict Handling</td><td style="text-align: left">Manual, can be confusing</td><td style="text-align: left">Conflicts tracked in commits, easier to fix</td></tr>
<tr><td style="text-align: left">Integration with Git</td><td style="text-align: left">Native</td><td style="text-align: left">Fully compatible, can switch back anytime</td></tr>
</tbody></table>
<ol start="7">
<li>Anonymous branches: In Git a branch is a pointer to a commit that needs a
name.</li>
</ol>
<p>If you haven’t taken the time to deep dive Git, it may be a good time to learn
about a new way of doing Version Control that is actually less complex and
easier to mentally map out in my opinion.</p>
<p>Jujutsu is a new front-end to Git, and it’s a new design for distributed version
control. –jj init</p>
<p>You can use jujutsu (jj) with existing Git repositories with one command.
<code>jj git init --colocate</code> or <code>jj git init --git-repo /path/to/git_repository</code>.
The native repository format for jj is still a work in progress so people
typically use a <code>git</code> repository for backend.</p>
<p>Unlike <code>git</code>, <code>jj</code> has no index “staging area”. It treats the working copy as an
actual commit. When you make changes to files, these changes are automatically
recorded to the working commit. There’s no need to explicitly stage changes
because they are already part of the commit that represents your current working
state.</p>
</details>
<p><strong>Simplified Workflow</strong></p>
<p>Check where you’re at, JJ doesn’t care about commits without descriptions but
Git and GitHub do:</p>
<pre><code class="language-bash">❯ jj st
The working copy has no changes.
Working copy (@) : n a8b19ca2 (empty) (no description set)
Parent commit (@-): k 8c487558 edit(jj): ui.color = always diff.format color-words
</code></pre>
<p>We can see that the Working copy is <code>(empty)</code> and has <code>(no description set)</code>,
lets give it a description:</p>
<pre><code class="language-bash">❯ jj desc -m "chore: nix flake update"
Working copy (@) now at: n 5c36a33d (empty) chore: nix flake update
Parent commit (@-) : k 8c487558 edit(jj): ui.color = always diff.format color-words
</code></pre>
<p>I ran <code>nix flake update</code>, let’s check our status:</p>
<pre><code class="language-bash">❯ jj st
Working copy changes:
M flake.lock
Working copy (@) : n d54ab019 chore: nix flake update
Parent commit (@-): k 8c487558 edit(jj): ui.color = always diff.format color-words
</code></pre>
<ul>
<li>We can see that running <code>nix flake update</code> modified <code>M</code> our <code>flake.lock</code>. To
finalize this change we can run <code>jj new</code>.</li>
</ul>
<pre><code class="language-bash">❯ jj new
Working copy (@) now at: v cad9d50b (empty) (no description set)
Parent commit (@-) : n d54ab019 chore: nix flake update
</code></pre>
<p>Now, looking at the output of <code>jj new</code> above, we can see that the Working copy
is empty and has no description set. If we want to push these changes to GitHub,
we have to point the <code>main</code> bookmark where the changes exist, the Parent commit
in this case:</p>
<pre><code class="language-bash">❯ jj bookmark set main -r @-
Moved 1 bookmarks to n d54ab019 main* | chore: nix flake update
</code></pre>
<ul>
<li>Notice the <code>main*</code>, the <code>*</code> indicates that our local <code>main</code> has changes that
<code>main@origin</code> does not have.</li>
</ul>
<p>Ok, our <code>main</code> bookmark is now pointing at our latest changes. We can now run
<code>jj git push</code> to push them to the remote and make them a part of the permanent
record:</p>
<pre><code class="language-bash">❯ jj git push
Changes to push to origin:
Move forward bookmark main from 3956b1386d0a to d54ab0197bef
git: Enumerating objects: 14, done.
git: Counting objects: 100% (14/14), done.
git: Delta compression using up to 16 threads
git: Compressing objects: 100% (10/10), done.
git: Writing objects: 100% (10/10), 1.52 KiB | 520.00 KiB/s, done.
git: Total 10 (delta 7), reused 0 (delta 0), pack-reused 0 (from 0)
remote: Resolving deltas: 100% (7/7), completed with 4 local objects.
</code></pre>
<p>Success! Let’s check out our status again:</p>
<pre><code class="language-bash">❯ jj st
The working copy has no changes.
Working copy (@) : v cad9d50b (empty) (no description set)
Parent commit (@-): n d54ab019 main | chore: nix flake update
</code></pre>
<ul>
<li>Notice that <code>main*</code> is now just <code>main</code>, indicating our local and remotes are
in sync!</li>
</ul>
<p>Let’s check out the log:</p>
<pre><code class="language-bash">❯ jj log
@ v sayls8@proton.me 2026-03-22 12:35:34 5835b760
│ (no description set)
◆ n sayls8@proton.me 2026-03-22 12:26:20 main d54ab019
│ chore: nix flake update
~
</code></pre>
<ul>
<li>The <code>◆</code> indicates that change <code>n</code> is now immutable after the push. Since it is
now immutable, <code>jj</code> automatically creates a new change on top of <code>main</code> and
moves the working copy to it.</li>
</ul>
<p>This is the hardest part for most people to grasp so let’s try another example
where this time we push changes from the working copy.</p>
<p>I’ll add a simple <code>README.md</code> to our flake root:</p>
<pre><code class="language-bash">❯ touch README.md
❯ jj st
Working copy changes:
A README.md
Working copy (@) : v 5835b760 (no description set)
Parent commit (@-): n d54ab019 main | chore: nix flake update
</code></pre>
<p>Let’s give the change a description. Remember that <code>jj</code> commands default to the
working copy, so <code>jj desc</code> is the same is <code>jj desc -r @</code></p>
<pre><code class="language-bash">❯ jj desc -m "chore: add README"
Working copy (@) now at: v cdbb489f chore: add README
Parent commit (@-) : n d54ab019 main | chore: nix flake update
</code></pre>
<p>Now rather than finalizing the current change with <code>jj new</code>, we will just point
the <code>main</code> bookmark at the working copy <code>@</code> and then push.</p>
<pre><code class="language-bash">❯ jj bookmark set main -r @
Moved 1 bookmarks to v cdbb489f main* | chore: add README
flake HEAD [!]
❯ jj git push
Changes to push to origin:
Move forward bookmark main from d54ab0197bef to cdbb489fecc0
git: Enumerating objects: 4, done.
git: Counting objects: 100% (4/4), done.
git: Delta compression using up to 16 threads
git: Compressing objects: 100% (2/2), done.
git: Writing objects: 100% (3/3), 332 bytes | 332.00 KiB/s, done.
git: Total 3 (delta 1), reused 0 (delta 0), pack-reused 0 (from 0)
remote: Resolving deltas: 100% (1/1), completed with 1 local object.
Warning: The working-copy commit in workspace 'default' became immutable, so a new commit has been created on top of it.
Working copy (@) now at: s 51306e16 (empty) (no description set)
Parent commit (@-) : v cdbb489f main | chore: add README
</code></pre>
<p>With jujutsu, most commands allow you to pass <code>-r</code>/<code>--revision</code></p>
<h2>What is the Jujutsu Working Copy</h2>
<details>
<summary> ✔️ Click To Expand Working Copy Description </summary>
<p><code>@</code> is a revset for “whichever commit the working copy reflects”. Think of <code>@</code>
as where you are currently making changes.</p>
<p>Every time you run a <code>jj</code> command, it examines the working copy (the files on
disk) and takes a snapshot. –Steves JJ Tutorial</p>
<p>Let’s version control an existing nix development environment.</p>
<pre><code class="language-bash">cd projects/rust
❯ ls
flake.lock flake.nix
jj git init --colocate
Initialized repo in "."
Hint: Running `git clean -xdf` will remove `.jj/`!
</code></pre>
<pre><code class="language-bash">❯ jj log
@ t sayls8@proton.me 2026-03-15 08:49:21 e8fd7ee0
│ (no description set)
◆ z root() 00000000
</code></pre>
<p>Let’s give this change a description:</p>
<pre><code class="language-bash"> jj desc -m "Initial commit of dev environment"
Working copy (@) now at: t d671f27c Initial commit of dev environment
Parent commit (@-) : z 00000000 (empty) (no description set)
❯ jj log
# The change ID stays the same, but the commit ID changes
@ t sayls8@proton.me 2026-03-15 09:04:17 d671f27c
│ Initial commit of dev environment
◆ z root() 00000000
</code></pre>
<p>Ok, I’m done with that change. Let’s start a new one, based off of <code>t</code>:</p>
<pre><code class="language-bash">jj new
Working copy (@) now at: q a3f5afe8 (empty) (no description set)
Parent commit (@-) : t d671f27c Initial commit of dev environment
jj log
@ q sayls8@proton.me 2026-03-15 09:10:46 a3f5afe8
│ (empty) (no description set)
○ t sayls8@proton.me 2026-03-15 09:04:17 d671f27c
│ Initial commit of dev environment
◆ z root() 00000000
</code></pre>
<p>Since the repo wasn’t an existing git repo there are no existing branches
(bookmarks). To share our work we’ll want to create a branch:</p>
<p>Above is a repo that was just created with <code>jj git init --colocate</code>. Notice that
there is already 2 changes with change IDs <code>t</code> & <code>z</code> and 2 commits with
identifiers <code>e8fd7ee0</code> & <code>00000000</code>.</p>
<p>Every <code>jj</code> repo has a root commit with <code>zzzzzzzz</code> <code>00000000 </code> identifiers.
<code>The diamond </code>◆` represents an immutable, protected revision. This is the
foundation of the repo. Jujutsu created a second change based on top of the
empty root commit.</p>
<p>The <strong>working copy</strong> in Jujutsu is an actual <strong>commit</strong> that represents the
current state of the files you’re working on. Unlike Git, where the working copy
is separate from commits and changes must be explicitly staged and committed, in
JJ the working copy is a live commit that automatically records changes as you
modify files.</p>
<p>Adding or removing files in the working copy implicitly tracks or untracks them
without needing explicit commands like <code>git add</code></p>
<p>The working copy commit acts as a snapshot of your current workspace. When you
run commands, Jujutsu first syncs the filesystem changes into this commit, then
performs the requested operation, and finally updates the working copy if needed</p>
<p>To finalize your current changes and start a new set of changes, you use the
<code>jj new</code> command, which creates a new working-copy commit on top of the current
one. This replaces the traditional Git workflow of staging and committing
changes separately.</p>
<p>Conflicts in the working copy are represented by inserting conflict markers
directly into the files. Jujutsu tracks the conflicting parts and can
reconstruct the conflict state from these markers. You resolve conflicts by
editing these markers and then committing the resolution in the working copy</p>
<ul>
<li>This means that you don’t need to worry about making a change, running
<code>git add .</code>, running <code>git commit -m "commit message"</code> because it’s already
done for you. This is handy with flakes by preventing a “dirty working tree”
and can instantly be rebuilt after making a change.</li>
</ul>
</details>
<h2>Example JJ Module</h2>
<details>
<summary> ✔️ Click to Expand JJ home-manager module example </summary>
<ul>
<li>
<p>For <code>lazygit</code> fans, Nixpkgs has <code>lazyjj</code>. I’ve seen that it’s recommended to
use jj with <code>meld</code>. I’ll share my <code>jj.nix</code> here for an example:</p>
</li>
<li>
<p>I got a lot of the aliases and such from the
<a href="https://zerowidth.com/2025/jj-tips-and-tricks/">zerowidth</a> post, this has
been a game changer:</p>
</li>
</ul>
<pre><code class="language-nix">{
lib,
config,
pkgs,
# userVars ? {},
#
#
#
...
}: let
cfg = config.custom.jj;
in {
options.custom.jj = {
enable = lib.mkOption {
type = lib.types.bool;
default = true;
description = "Enable the Jujutsu (jj) module";
};
userName = lib.mkOption {
type = lib.types.nullOr lib.types.str;
default = "sayls8";
description = "Jujutsu user name";
};
userEmail = lib.mkOption {
type = lib.types.nullOr lib.types.str;
default = "sayls8@proton.me";
description = "Jujutsu user email";
};
packages = lib.mkOption {
type = lib.types.listOf lib.types.package;
default = with pkgs; [lazyjj meld];
description = "Additional Jujutsu-related packages to install";
};
settings = lib.mkOption {
type = lib.types.attrs;
default = {
ui = {
# default-command = "log-recent";
default-command = ["status" "--no-pager"];
diff-editor = "gitpatch";
# diff-editor = ["nvim" "-c" "DiffEditor" "$left" "$right" "$output"];
# diff-formatter = ["meld" "$left" "$right"];
merge-editor = ":builtin";
conflict-marker-style = "diff";
};
git = {
# remove the need for `--allow-new` when pushing new bookmarks
auto-local-bookmark = true;
push-new-bookmarks = true;
};
revset-aliases = {
"closest_bookmark(to)" = "heads(::to & bookmarks())";
"immutable_heads()" = "builtin_immutable_heads() | remote_bookmarks()";
# The following command is incorrect, TODO
# "default()" = "coalesce(trunk(),root())::present(@) | ancestors(visible_heads() & recent(), 2)";
"recent()" = "committer_date(after:'1 month ago')";
trunk = "main@origin";
};
template-aliases = {
"format_short_change_id(id)" = "id.shortest()";
};
merge-tools.gitpatch = {
program = "sh";
edit-args = [
"-c"
''
set -eu
rm -f "$right/JJ-INSTRUCTIONS"
git -C "$left" init -q
git -C "$left" add -A
git -C "$left" commit -q -m baseline --allow-empty
mv "$left/.git" "$right"
git -C "$right" add --intent-to-add -A
git -C "$right" add -p
git -C "$right" diff-index --quiet --cached HEAD && { echo "No changes done, aborting split."; exit 1; }
git -C "$right" commit -q -m split
git -C "$right" restore . # undo changes in modified files
git -C "$right" reset . # undo --intent-to-add
git -C "$right" clean -q -df # remove untracked files
''
];
};
aliases = {
c = ["commit"];
ci = ["commit" "--interactive"];
e = ["edit"];
i = ["git" "init" "--colocate"];
tug = ["bookmark" "move" "--from" "closest_bookmark(@-)" "--to" "@-"];
log-recent = ["log" "-r" "default() & recent()"];
nb = ["bookmark" "create" "-r" "@-"]; # new bookmark
upmain = ["bookmark" "set" "main"];
squash-desc = ["squash" "::@" "-d" "@"];
rebase-main = ["rebase" "-d" "main"];
amend = ["describe" "-m"];
pushall = ["git" "push" "--all"];
push = ["git" "push" "--allow-new"];
pull = ["git" "fetch"];
dmain = ["diff" "-r" "main"];
l = ["log" "-T" "builtin_log_compact"];
lf = ["log" "-r" "all()"];
r = ["rebase"];
s = ["squash"];
si = ["squash" "--interactive"];
};
revsets = {
# log = "main@origin";
# log = "master@origin";
};
};
description = "Jujutsu configuration settings";
};
};
config = lib.mkIf cfg.enable {
home.packages = cfg.packages;
programs.jujutsu = {
enable = true;
settings = lib.mergeAttrs cfg.settings {
user = {
name = cfg.userName;
email = cfg.userEmail;
};
};
};
};
}
</code></pre>
<p>In my <code>home.nix</code> I have this to enable it:</p>
<pre><code class="language-nix">custom = {
jj = {
enable = true;
userName = "sayls8";
userEmail = "sayls8@proton.me";
packages = "";
};
};
</code></pre>
</details>
<p>The <code>custom.jj</code> module allows me to override the username, email, packages, and
whether jj is enabled from a single, centralized place within my Nix
configuration. So only if jj is enabled, <code>lazyjj</code> and <code>meld</code> will be installed.</p>
<p>With the above <code>gitpatch</code> setup, say you did more work than you want to commit
which is common with jj since it automatically tracks everything. I can now run:</p>
<pre><code class="language-bash">jj commit -i
</code></pre>
<p>And an interactive diff will come up allowing you to choose what to include in
the current commit. This also works for <code>jj split -i</code> and <code>jj squash -i</code>.</p>
<p>Example, using <code>jj commit -i</code>:</p>
<p><img src="https://saylesss88.github.io/../images/jj-gitpatch.png" alt="jj commit -i" /></p>
<p>You can also use the <code>jj tug</code> command to make pushing to a remote more
straightforward. Since JJ’s bookmarks don’t automatically move as they do with
Git, you can use <code>jj tug</code> after you’ve made a few commits to move the bookmark
that is closest to the parent commit of your current position to your current
commit:</p>
<pre><code class="language-bash">jj tug
jj git push
</code></pre>
<p>The <code>tug</code> alias works for both the squash and edit workflows. After running
<code>jj tug</code>, <code>jj git push</code> should work. If you get an error saying no bookmarks to
move, you can run <code>jj new</code> and then run <code>jj tug</code>, this happens when the bookmark
is already at the parent commit.</p>
<pre><code class="language-nix"># jj.nix
mb = ["bookmark" "set" "-r" "@"];
</code></pre>
<p>Another option would be to run <code>jj mb main</code> before running <code>jj git push</code> in this
situation, but you will have to describe the commit first.</p>
<h2>Issues I’ve Noticed</h2>
<p><img src="https://saylesss88.github.io/../images/jj2.png" alt="jj tree" /></p>
<p>I have run into a few issues, such as every flake command reloading every single
input every time. <strong>What I mean by this is what you see when you run a flake
command for the first time, it adds all of your flakes inputs.</strong> I believe the
fix for this is deleting and regenerating your <code>flake.lock</code>. The same thing can
happen when you move your flake from one location to another.</p>
<p>JJ doesn’t seem to automatically track completely new files, running
<code>git add /file/path.nix</code> enables JJ to start tracking the new file.</p>
<p>That said, I recommend doing just that after running something like
<code>jj git init --colocate</code>. Delete your <code>flake.lock</code> and run <code>nix flake update</code>,
<code>nix flake lock --recreate-lock-file</code> still works but is being depreciated.</p>
<p>Sometimes the auto staging doesn’t pick up the changes in your configuration so
rebuilding changes nothing, this has been more rare but happens occasionally.</p>
<p>One of the most fundamental differences between Jujutsu and Git is how pushing
works. If you’re coming from Git, it’s important to understand this shift so you
don’t get tripped up by “nothing happened” warnings or missing changes on your
remote.</p>
<ul>
<li>
<p>In Git, you’re always “on” a branch (e.g., <code>main</code>).</p>
</li>
<li>
<p>When you make a commit, the branch pointer automatically moves forward.</p>
</li>
<li>
<p><code>git push</code> pushes the current branch’s new commits to the remote.</p>
</li>
<li>
<p>If you forget to switch branches, you might accidentally push to the wrong
place, but you rarely have to think about “moving” the branch pointer
yourself.</p>
</li>
</ul>
<p><strong>The JJ Push Model</strong></p>
<ul>
<li>
<p>JJ has no concept of a “currrent branch”</p>
</li>
<li>
<p>Bookmarks <strong>do not</strong> move automatically. When you make a new commit, the
bookmark (e.g., <code>main</code>) stays where it was. You must explicitly move it to
your new commit with <code>jj bookmark set main</code> (or create a new one).</p>
</li>
<li>
<p>JJ only pushes commits that are referenced by bookmarks. If your latest work
isn’t pointed to by a bookmark, <code>jj git push</code> will do nothing and warn you.
This is to prevent accidental pushes and gives you more control over what gets
shared.</p>
</li>
</ul>
<p><strong>Typical JJ Push Workflow</strong></p>
<ol>
<li>Check out where your working copy and Parent commit are, you will notice that
jj highlights the minimal amount of characters needed to reference this
change:</li>
</ol>
<pre><code class="language-bash">jj st
Working copy changes:
M README.md
Working copy (@) : mnkrokmt 7f0558f8 say hello and goodbye
Parent commit (@-): ywyvxrts 986d16f5 main | test3
</code></pre>
<pre><code class="language-bash">
</code></pre>
<p>Being more explicit about your commands ensures both you and jj know where
everything should go. (i.e. <code>jj desc @ -m</code> explicitly describes <code>@</code>, the working
copy.) This will save you some headaches.</p>
<p>Our new change, the Working copy is now built off of <code>main</code>. The working copy
will always be (<code>@</code>).</p>
<p>Make some changes</p>
<pre><code class="language-bash">jj st
Working copy changes:
A dev/flake.lock
A dev/flake.nix
Working copy (@) : kxwrsmmu 42b011cd Add a devShell
Parent commit (@-): ywyvxrts 986d16f5 main | test3
</code></pre>
<p>Now I’m done, and since we built this change on top of <code>main</code> the following
command will tell jj we know what we want to push:</p>
<pre><code class="language-bash">jj bookmark set main
jj git push
</code></pre>
<p>If you forget to move a bookmark, JJ will warn you and nothing will be pushed.
This is a safety feature, not a bug. That’s what the <code>mb</code> alias does, moves the
bookmark to the working copy.</p>
<pre><code class="language-nix"># home-manager alias (move bookmark)
mb = ["bookmark" "set" "-r" "@"];
</code></pre>
<p>If you really have problems, <code>jj git push --change @</code> explicitly pushes the
working copy.</p>
<p>This is a bit different than Git and takes some getting used to but you don’t
need to move the bookmark after every commit, just when you want to push. I know
I’ve made the mistake of pushing to the wrong branch before this should prevent
that.</p>
<h2>Here’s an example of using JJ in an existing Git repo</h2>
<p>Say I have my configuration flake in the <code>~/flakes/</code> directory that is an
existing Git repository. To use JJ as the front-end I could do something like:</p>
<pre><code class="language-bash">cd ~/flakes
jj git init --colocate
Done importing changes from the underlying Git repo.
Setting the revset alias `trunk()` to `main@origin`
Initialized repo in "."
</code></pre>
<ul>
<li>By default, JJ defines <code>trunk()</code> as the main development branch of your remote
repository. This is usually set to <code>main@origin</code>, but could be named something
else. This means that whenever you use <code>trunk()</code> in JJ commands, it will
resolve to the latest commit on <code>main@origin</code>. This makes it easier to refer
to the main branch in scripts and commands without hardcoding the branch name.</li>
</ul>
<p><strong>Bookmarks</strong> in jj are named pointers to specific revisions, similar to
branches in Git. When you first run <code>jj git init --colocate</code> in a git repo, you
will likely get a Hint saying “Run the following command to keep local bookmarks
updated on future pulls”.:</p>
<pre><code class="language-bash">jj bookmark list
track main@origin
jj st
The working copy has no changes.
Working copy (@) : qzxomtxq 925eca75 (empty) (no description set)
Parent commit (@-): qnpnrklz bf291074 main | notes
</code></pre>
<p>This shows that running <code>jj git init --colocate</code> automatically started tracking
<code>main</code> in this case. If it doesn’t, use <code>jj bookmark track main@origin</code>.</p>
<p>I’ll create a simple change in the <code>README.md</code>:</p>
<pre><code class="language-bash">jj st
Working copy changes:
M README.md
Working copy (@) : qzxomtxq b963dff0 (no description set)
Parent commit (@-): qnpnrklz bf291074 main | notes
</code></pre>
<p>We can see that the working copy now contains a modified file <code>M README.md</code> and
has no description set. Lets give it a description before pushing to github.</p>
<pre><code class="language-bash">jj desc @ -m "Added to README"
jj bookmark set main -r @
Moved 1 bookmarks to pxwnopqo 1e6e08a2 main* | Added to README
</code></pre>
<p><code>jj bookmark set main -r @</code> moves the <code>main</code> bookmark to the current revision
(the working copy), which is the explicit, recommended way to update bookmarks
in JJ. Without this step, your bookmark will continue to point at the old
commit, not your latest work. This is a major difference from Git.</p>
<p>And finally push to GitHub:</p>
<pre><code class="language-bash">jj git push
Changes to push to origin:
Move forward bookmark main from bf291074125e to e2a75e45237b
remote: Resolving deltas: 100% (1/1), completed with 1 local object.
Warning: The working-copy commit in workspace 'default' became immutable, so a new commit has been created on top of it.
Working copy (@) now at: pxwnopqo 8311444b (empty) (no description set)
Parent commit (@-) : qzxomtxq e2a75e45 main | Added to README
</code></pre>
<hr />
<h2>Create a Repo without an existing Git Repo</h2>
<p><strong>Or</strong> to do this in a directory that isn’t already a git repo you can do
something like:</p>
<pre><code class="language-bash">cargo new hello-world --vcs=none
cd hello-world
jj git init
Initialized repo in "."
</code></pre>
<hr />
<h3>JJ and Git Side by Side</h3>
<p>Or for example, with Git if you wanted to move to a different branch before
running <code>nix flake update</code> to see if it introduced errors before merging with
your main branch, you could do something like:</p>
<pre><code class="language-bash">git checkout -b update-test
nix flake update
sudo nixos-rebuild test --flake .
</code></pre>
<p>If you’re satisfied you can merge:</p>
<pre><code class="language-bash">git checkout main
git add . # Stage the change
git commit -m "update"
git merge update-test
git branch -D update-test
sudo nixos-rebuild switch --flake .
</code></pre>
<p>With JJ a similar workflow could be:</p>
<ol>
<li>Run <code>jj st</code> to see what you have:</li>
</ol>
<pre><code class="language-bash">jj st
The working copy has no changes.
Working copy (@) : ttkstzzn 3f55c42c (empty) (no description set)
Parent commit (@-): wppknozq e3558ef5 main@origin | jj diff
</code></pre>
<p>If you don’t have a description set for the working copy set it now.</p>
<pre><code class="language-bash">jj desc @ -m "enable vim"
jj st
The working copy has no changes.
Working copy (@) : ttkstzzn 63fda123 (empty) enable vim
Parent commit (@-): wppknozq e3558ef5 main@origin | jj diff
</code></pre>
<ol start="2">
<li>Start from the working copy (which is mutable). The working copy in JJ is
itself a commit that you can edit and squash changes into. Since <code>main</code> is
immutable, you can create your new change by working on top of the working
copy commit.</li>
</ol>
<p>Create a new change off of the working copy:</p>
<pre><code class="language-bash">jj new @
</code></pre>
<ol start="3">
<li>Make your edits:</li>
</ol>
<pre><code class="language-bash">jj st
Working copy changes:
M home/editors/vim.nix
Working copy (@) : qrsxltmt 494b5f18 (no description set)
Parent commit (@-): wytnnnto a07e775c (empty) enable vim
</code></pre>
<ol start="4">
<li>Squash your changes into the new change:</li>
</ol>
<pre><code class="language-bash">jj squash
The working copy has no changes.
Working copy (@) : tmlwppnu ba06bb99 (empty) (no description set)
Parent commit (@-): wytnnnto 52928ed9 enable vim
</code></pre>
<p>This moves your working copy changes into the new commit you just created.</p>
<ol start="5">
<li>Describe the new change, this might feel weird but the <code>jj squash</code> command
created a new commit that you have to describe again:</li>
</ol>
<pre><code class="language-bash">jj desc @ -m "Enabled Vim"
Working copy (@) : tmlwppnu 5c1569c3 (empty) Enabled Vim
Parent commit (@-): wytnnnto 52928ed9 enable vim
</code></pre>
<ol start="6">
<li>Set the bookmark to the Parent commit that was squashed into:</li>
</ol>
<pre><code class="language-bash">jj bookmark set wyt
</code></pre>
<ol start="7">
<li>Finally Push to the remote repository:</li>
</ol>
<pre><code class="language-bash">jj git push --allow-new
Changes to push to origin:
Add bookmark wyt to 5c1569c35b22
remote: Resolving deltas: 100% (4/4), completed with 4 local objects.
remote:
remote: Create a pull request for 'wyt' on GitHub by visiting:
remote: https://github.com/sayls8/flake/pull/new/wyt
remote:
</code></pre>
<p>This command does the following:</p>
<ul>
<li>
<p>Uploads your bookmark and the associated commit to the remote repository
(e.g., GitHub).</p>
</li>
<li>
<p>If the bookmark is new (not present on the remote), <code>--allow-new</code> tells JJ
it’s okay to create it remotely.</p>
</li>
<li>
<p>After pushing, GitHub (or your code host) will usually suggest creating a pull
request for your new branch/bookmark, allowing you or your collaborators to
review and merge the change into main.</p>
</li>
</ul>
<p><strong>Merging your Change into <code>main</code></strong></p>
<p>Option 1. Go to the URL suggested in the output, visit in this case:</p>
<pre><code class="language-bash">https://github.com/sayls8/flake/pull/new/wyt
</code></pre>
<ul>
<li>
<p>Click Create PR</p>
</li>
<li>
<p>Click Merge PR if it shows it can merge cleanly.</p>
</li>
</ul>
<p>Option 2.</p>
<ol>
<li>Switch to <code>main</code> (if not already there):</li>
</ol>
<pre><code class="language-bash">jj bookmark set main
</code></pre>
<ol start="2">
<li>Create a new change that combines the new change with <code>main</code>:</li>
</ol>
<pre><code class="language-bash">jj new tml wyt -m "Merge: enable vim"
</code></pre>
<p>This creates a new commit with both <code>tml</code> and <code>wyt</code> as parents, which is how JJ
handles merges (since <code>jj merge</code> depreciated). JJ merges are additive and
history-preserving by design especially for folks used to Git’s fast-forward and
squash options.</p>
<hr />
<h3>Summary</h3>
<ul>
<li>
<p>With <code>jj</code> you’re creating a new commit rather than a new branch.</p>
</li>
<li>
<p>Amending vs. Squashing: Git’s <code>git commit --amend</code> updates the last commit.
<code>jj squash</code> combines the current commit with its parent, effectively doing the
same thing in terms of history.</p>
</li>
<li>
<p>Merging: Git’s merge command is explicit. In <code>jj</code>, the concept is similar, but
since there’s no branch, you’re “merging” by moving your working commit to
include these changes.</p>
</li>
<li>
<p>No need to delete branches: Since there are no branches in <code>jj</code>, there’s no
equivalent to <code>git branch -D</code> to clean up. Instead commits that are no longer
needed can be “abandoned” with <code>jj abandon</code> if you want to clean up your
commit graph.</p>
</li>
<li>
<p><code>jj describe</code> without a flag just opens <code>$EDITOR</code> where you can write your
commit message save and exit.</p>
</li>
<li>
<p>In <code>git</code>, we finish a set of changes to our code by committing, but in <code>jj</code> we
start new work by creating a change, and <em>then</em> make changes to our code. It’s
more useful to write an initial description of your intended changes, and then
refine it as you work, than it is creating a commit message after the fact.</p>
</li>
<li>
<p>I have heard that jj can struggle with big repositories such as Nixpkgs and
have noticed some issues here and there when using with NixOS. I’m hoping that
as the project matures, it gets better on this front.</p>
</li>
</ul>
<hr />
<h2>The 2 main JJ Workflows</h2>
<h3>The Squash Workflow</h3>
<p>This workflow is the most similar to Git and Git’s index.</p>
<p>The workflow:</p>
<ol>
<li>
<p>Describe the work we want to do with <code>jj desc -m "message"</code></p>
</li>
<li>
<p>We create a new empty change on top of that one with <code>jj new</code></p>
</li>
<li>
<p>When we are done with a feature, we run <code>jj squash</code> to move the changes from
<code>@</code> into the change we described in step 1. <code>@</code> is where your working copy is
positioned currently.</p>
</li>
</ol>
<p>For example, let’s say we just ran <code>jj git init --colocate</code> in our configuration
Flake directory making it a <code>jj</code> repo as well using git for backend.</p>
<pre><code class="language-bash">cd flake
jj git init --colocate
jj log
@ lnmmxwko sayls8@proton.me 2025-06-27 10:14:57 1eac6aa0
│ (empty) (no description set)
○ qnknltto sayls8@proton.me 2025-06-27 09:04:08 git_head() 5358483a
│ (empty) jj
</code></pre>
<p>The above log output shows that running <code>jj git init</code> creates an empty working
commit (<code>@</code>) on top of the <code>git_head()</code></p>
<pre><code class="language-bash">jj desc -m "Switch from nixVim to NVF"
jj new # Create a new empty change
jj log
@ nmnmznmm sayls8@proton.me 2025-06-27 10:16:30 52dd7ee0
│ (empty) (no description set)
○ lnmmxwko sayls8@proton.me 2025-06-27 10:16:24 git_head() 3e8f9f3a
│ (empty) Switch from nixVim to NVF
○ qnknltto sayls8@proton.me 2025-06-27 09:04:08 5358483a
│ (empty) jj
</code></pre>
<p>The above log shows that running <code>jj desc</code> changes the current (<code>@</code>) commits
description, and then <code>jj new</code> creates a new empty commit on top of it, moving
(<code>@</code>) to this new empty commit.</p>
<p>The “Switch from nixVim to NVF” commit is now the parent of (<code>@</code>).</p>
<p>Now, we’d make the necessary changes and to add them to the commit we just
described in the previous steps.</p>
<p>The changes are automatically “staged” so theres no need to <code>git add</code> them, so
we just make the changes and squash them.</p>
<pre><code class="language-bash">jj squash # Squash the commit into its parent commit (i.e., our named commit)
jj log
@ zsxsolsq sayls8@proton.me 2025-06-27 10:18:01 2c35d83f
│ (empty) (no description set)
○ lnmmxwko sayls8@proton.me 2025-06-27 10:18:01 git_head() 485eaee9
│ (empty) Switch from nixVim to NVF
</code></pre>
<p>This shows <code>jj squashes</code> effect, it merges the changes from the current (<code>@</code>)
commit into its parent. The (<code>@</code>) then moves to this modified parent, and a new
empty commit is created on top, ready for the next set of changes.</p>
<pre><code class="language-bash">sudo nixos-rebuild switch --flake .
</code></pre>
<p>We’re still in the nameless commit and can either continue working or run
<code>jj desc -m ""</code> again describing our new change, then <code>jj new</code> and <code>jj squash</code>
it’s pretty simple. The nameless commit is used as an adhoc staging area.</p>
<p>When you are ready to push, it’s important to know where your working copy
currently is and if it’s attached to a bookmark. It’s common for <code>jj new</code> to
detach the head, all you have to do is tell JJ which branch to attach to, then
push:</p>
<pre><code class="language-bash">jj st
Working copy changes:
M hosts/magic/configuration.nix
M hosts/magic/container.nix
Working copy (@) : youptvvn 988e6fc9 (no description set)
Parent commit (@-): qlwqromx 4bb754fa mdbook container
</code></pre>
<p>The above output means that the working copy has modifications (<code>M</code>) in two
files. And these changes are not yet committed.</p>
<pre><code class="language-bash">jj bookmark set main
jj git push
</code></pre>
<hr />
<h3>The Edit Workflow</h3>
<p>This workflow adds a few new commands <code>jj edit</code>, and <code>jj next</code>.</p>
<p>Here’s the workflow:</p>
<ol>
<li>
<p>Create a new change to work on the new feature with <code>jj new</code></p>
</li>
<li>
<p>If everything works exactly as planned, we’re done.</p>
</li>
<li>
<p>If we realize we want to break this big change up into multiple smaller ones,
we do it by making a new change before the current one, swapping to it, and
making the necessary change.</p>
</li>
<li>
<p>Lastly, we go back to the main change.</p>
</li>
</ol>
<p>The squash workflow leaves <code>@</code> at an empty undescribed change, with this
workflow, <code>@</code> will often be on the existing change.</p>
<p>If <code>@</code> wasn’t at an empty change, we would start this workflow with:</p>
<pre><code class="language-bash">jj new -m "Switch from NVF to nixVim"
</code></pre>
<p>since our <code>@</code> is already at an empty change, we’ll just describe it and get
started:</p>
<p>For this example, lets say we want to revert back to nixVim:</p>
<pre><code class="language-bash">jj desc -m "Switch from NVF to nixVim"
jj log
@ zsxsolsq sayls8@proton.me 2025-06-27 10:18:47 606abaa7
│ (empty) Switch from NVF to nixVim
○ lnmmxwko sayls8@proton.me 2025-06-27 10:18:01 git_head() 485eaee9
│ (empty) Switch from nixVim to NVF
○ qnknltto sayls8@proton.me 2025-06-27 09:04:08 5358483a
│ (empty) jj
</code></pre>
<p>Again, this shows <code>jj desc</code> renaming the current empty <code>@</code> commit.</p>
<p>We make the changes, and it’s pretty straightforward so we’re done, every change
is automatically staged so we can just run <code>sudo nixos-rebuild switch --flake .</code>
now to apply the changes.</p>
<p>If we wanted to make more changes that aren’t described we can use <code>jj new -B</code>
which is similar to <code>git add -a</code>.</p>
<pre><code class="language-bash">jj new -B @ -m "Adding LSP to nixVim"
Rebased 1 descendant commits
Working copy (@) now at: lpnxxxpo bf929946 (empty) Adding LSP to nixVim
Parent commit (@-) : lnmmxwko 485eaee9 (empty) Switch from nixVim to NVF
</code></pre>
<p>The <code>-B</code> tells jj to create the new change <em>before</em> the current one and it
creates a rebase. We created a change before the one we’re on, it automatically
rebased our original change. This operation will <em>always</em> succeed with jj, we
will have our working copy at the commit we’ve just inserted.</p>
<p>You can see below that <code>@</code> moved down one commit:</p>
<pre><code class="language-bash">jj log
○ zsxsolsq sayls8@proton.me 2025-06-27 10:22:03 ad0713b6
│ (empty) Switch from NVF to nixVim
@ lpnxxxpo sayls8@proton.me 2025-06-27 10:22:03 bf929946
│ (empty) Adding LSP to nixVim
○ lnmmxwko sayls8@proton.me 2025-06-27 10:18:01 git_head() 485eaee9
│ (empty) Switch from nixVim to NVF
○ qnknltto sayls8@proton.me 2025-06-27 09:04:08 5358483a
│ (empty) jj
○ qnknltto sayls8@proton.me 2025-06-27 09:04:08 git_head()
</code></pre>
<p>The “Adding LSP to nixVim” commit is directly above “Switch from nixVim to NVF”
(the old <code>git_head()</code>)</p>
<p>The “Switch from NVF to nixVim” commit (which was your <code>@</code> before <code>jj new -B</code>)
is now above “Adding LSP to nixVim” in the log output, meaning “Adding LSP to
nixVim” is its new parent.</p>
<p><code>@</code> has moved to “Adding LSP to nixVim”</p>
<p><code>jj log</code> example output</p>
<hr />
<h2>Operation Log and Undo</h2>
<p>JJ records every operation (commits, merges, rebases, etc.) in an operation log.
You can view and undo previous operations, making it easy to recover from
mistakes, a feature not present in Git’s core CLI</p>
<pre><code class="language-bash">jj op log
@ fbf6e626df22 jr@magic 15 minutes ago, lasted 9 milliseconds
│ new empty commit
│ args: jj new -B @ -m 'Adding LSP to nixVim'
○ bde40b7c17cf jr@magic 19 minutes ago, lasted 8 milliseconds
│ describe commit 2c35d83f75031dc582bf28b64d4af1c218177f90
│ args: jj desc -m 'Switch from NVF to nixVim'
○ 3a2bfe1c0b0a jr@magic 19 minutes ago, lasted 8 milliseconds
│ squash commits into 3e8f9f3a6a58fef86906e16e9b4375afb43e73e3
│ args: jj squash
○ 80abcb58dcb6 jr@magic 21 minutes ago, lasted 8 milliseconds
│ new empty commit
│ args: jj new
○ 8c80314cbcd7 jr@magic 21 minutes ago, lasted 8 milliseconds
│ describe commit 1eac6aa0b88ba014785ee9c1c2ad6e2abc6206e9
│ args: jj desc -m 'Switch from nixVim to NVF'
○ 44b5789cb4d1 jr@magic 22 minutes ago, lasted 6 milliseconds
│ track remote bookmark main@origin
│ args: jj bookmark track main@origin
○ dbefee04aa85 jr@magic 23 minutes ago, lasted 4 milliseconds
│ import git head
│ args: jj git init --git-repo .
</code></pre>
<pre><code class="language-bash">jj op undo <operation-id>
# or
jj op restore <operation-id>
</code></pre>
<hr />
<h2>Conflict Resolution</h2>
<p>In JJ, conflicts live inside commits and can be resolved at any time, not just
during a merge. This makes rebasing and history editing safer and more flexible</p>
<p>JJ treats conflicts as first-class citizens: conflicts can exist inside commits,
not just in the working directory. This means if a merge or rebase introduces a
conflict, the conflicted state is saved in the commit itself, and you can
resolve it at any time there’s no need to resolve conflicts immediately or use
“<code>--continue</code>” commands as in Git</p>
<p>Here’s how it works:</p>
<p>When you check out or create a commit with conflicts, JJ materializes the
conflicts as markers in your files (similar to Git’s conflict markers)</p>
<p>You can resolve conflicts by editing the files to remove the markers, or by
using:</p>
<pre><code class="language-bash">jj resolve
</code></pre>
<hr />
<h2>Revsets</h2>
<p><a href="https://jj-vcs.github.io/jj/latest/revsets/">Jujutsu Revsets</a></p>
<p>JJ includes a powerful query language for selecting commits. For example:</p>
<pre><code class="language-bash">jj log -r "author(alice) & file(*.py)"
</code></pre>
<p>This command lists all commits by Alice that touch Python files.</p>
<h2>Filesets</h2>
<p><a href="https://jj-vcs.github.io/jj/latest/filesets/">Jujutsu Filesets</a></p>
<p>Jujutsu supports a functional language for selecting a set of files. Expressions
in this language are called “filesets” (the idea comes from Mercurial). The
language consists of file patterns, operators, and functions. –JJ Docs</p>
<h2>Summary</h2>
<p>Jujutsu (jj) offers a streamlined, branchless, and undo-friendly approach to
version control, fully compatible with Git but designed to be easier to use and
reason about. Its workflows, operation log, and conflict handling provide a
safer and more flexible environment for managing code changes, making it a
compelling alternative for both new and experienced developers.</p>
<hr />
<h3>Resources</h3>
<ul>
<li>
<p><a href="https://steveklabnik.github.io/jujutsu-tutorial/">steves_jj_tutorial</a></p>
</li>
<li>
<p><a href="https://github.com/jj-vcs/jj">jj_github</a></p>
</li>
<li>
<p><a href="https://jj-vcs.github.io/jj/latest/tutorial/">official_tutorial</a></p>
</li>
<li>
<p><a href="https://v5.chriskrycho.com/essays/jj-init/">jj_init</a></p>
</li>
</ul>
KVMhttps://saylesss88.github.io/nix/kvm.html2025-12-06T00:00:00+00:00saylesss87@proton.me (saylesss88)<h1>Running NixOS in a VM with Maximum Isolation (Beginner Guide)</h1>
<details>
<summary> Click to Expand Table of Contents</summary>
<!-- toc -->
</details>
<p><img src="https://saylesss88.github.io/images/steampunk5.cleaned.png" alt="sp5" /></p>
<h2>Why This Setup?</h2>
<ul>
<li>
<p><strong>Host</strong> <code>secureblue</code> = Fedora Atomic with <strong>SELinux enforcing</strong>, <strong>sVirt</strong>,
<strong>Secure Boot</strong>, and hardened defaults.</p>
</li>
<li>
<p><strong>Guest</strong>: NixOS in a VM → full declarative power, near zero risk to host.</p>
</li>
<li>
<p><strong>Isolation</strong>: Mandatory Access Control (MAC) via SELinux + KVM + no direct
hardware access.</p>
</li>
</ul>
<blockquote>
<p>NOTE: Secureblue enables the <code>hardened_malloc</code> by default which causes
problems for many browsers and will cause screen flashing with Firefox and
others within the VM. See:</p>
</blockquote>
<ul>
<li><a href="https://secureblue.dev/faq#standard-malloc">secureblue standard_malloc</a></li>
</ul>
<h2>Step 1: Install secureblue (Hardened Host)</h2>
<ol>
<li>
<p>Download a <a href="https://secureblue.dev/install">secureblue image</a></p>
</li>
<li>
<p>Use <strong>Fedora Media Writer</strong> (Flatpak):</p>
</li>
</ol>
<pre><code class="language-bash">flatpak install flathub org.fedoraproject.MediaWriter
</code></pre>
<ol start="3">
<li>
<p>Flash the secureblue image & enable Secure Boot in UEFI <strong>before</strong> install.
This is now possible with Fedora, when you boot into Fedora Media Writer (not
Ventoy or Rufus), you will be allowed to enroll the secure boot key with
secure boot pre-enabled.</p>
</li>
<li>
<p>On first boot:</p>
</li>
</ol>
<pre><code class="language-bash">ujust enroll-secureblue-secure-boot-key
</code></pre>
<ul>
<li>Reboot -> Enroll key in MOK manager with password: <code>secureblue</code></li>
</ul>
<ol start="5">
<li>
<p>Post-install hardening See:
<a href="https://secureblue.dev/post-install">post-install</a></p>
</li>
<li>
<p>Install virtualization stack:</p>
</li>
</ol>
<pre><code class="language-bash">ujust install-libvirt-packages
</code></pre>
<ul>
<li>
<p>The above command enables <code>qemu</code>, <code>libvirt</code>, & <code>virt-manager</code> with SELinux
labels.</p>
</li>
<li>
<p>Read the <a href="https://secureblue.dev/faq">secureblue FAQ</a> to learn the quirks of
an atomic fedora image.</p>
</li>
</ul>
<p>Secureblue recommends installing GUI apps with Flatpak, CLI apps with homebrew,
and apps that require more system access to be layered with <code>rpm-ostree</code>. It
takes some getting used to but is very stable.</p>
<ul>
<li><a href="https://secureblue.dev/faq#software">secureblue how to install software</a></li>
</ul>
<hr />
<h2>Create NixOS VM (via virt-manager)</h2>
<p>Easiest way to get a working configuration IMO:</p>
<ol>
<li>
<p>Download: <a href="https://nixos.org/download/">NixOS Graphical ISO</a></p>
</li>
<li>
<p>Open <code>virt-manager</code> -> File -> New Virtual Machine</p>
</li>
</ol>
<ul>
<li>
<p>Select ISO</p>
</li>
<li>
<p>CPU: <code>host-passthrough</code> (optional, for performance)</p>
</li>
<li>
<p>Do some research to find the ideal Memory and Storage for your system.</p>
</li>
</ul>
<ol start="3">
<li>
<p>Ensure SELinux is enabled (the default for secureblue) with: <code>getenforce</code></p>
</li>
<li>
<p>Ensure sVirt is enabled (the default) with <code>run0 ps -eZ | grep qemu</code>.</p>
</li>
</ol>
<pre><code class="language-bash">run0 ps -eZ | grep qemu
# Output
system_u:system_r:svirt_t:s0:c383,c416 14793 ? 00:01:37 qemu-system-x86
</code></pre>
<ol start="5">
<li>Boot -> Follow graphical installer:</li>
</ol>
<ul>
<li>
<p>Enable LUKS</p>
</li>
<li>
<p>Create an admin user</p>
</li>
<li>
<p>Optionally skip desktop -> install your own after first boot.</p>
</li>
</ul>
<p>The attack surface is reduced significantly when running NixOS within a hardened
hosts VM. The VM operates on virtualized hardware, which is a powerful form of
attack surface reduction.</p>
<p>Devices like your host’s Bluetooth adapter, Wi-Fi card, microphone, webcam, and
USB ports are not directly exposed to the guest operating system. The VM only
sees virtual versions of these devices. If an exploit targets a vulnerability in
the Bluetooth stack within the VM, it compromises the VM environment, but it
cannot typically reach and exploit the physical Bluetooth hardware on the host.</p>
<p>You can also choose not to pass through certain devices, like Bluetooth or
webcam to the VM at all, effectively disabling that attack vector. Since your
host likely already has these hardened features you may not need the additional
functionality within the VM.</p>
<p>If something breaks, you have an option to rollback to the previous generation
with <code>rpm-ostree rollback</code>. The previous generation will be applied on next
reboot. You can also just reboot and choose the previous generation through the
grub menu, this way it is temporary and will revert back on next reboot.</p>
<hr />
<h2>🔒 How Host MAC Secures the NixOS VM</h2>
<p>The host uses a classic defense-in-depth model: the hardened outer layer (the
host) is treated as the real security boundary, and it is designed to remain
safe even if the inner layer (the NixOS guest) is fully compromised.</p>
<ol>
<li><strong>MAC confinement with SELinux and sVirt</strong></li>
</ol>
<p>On the secureblue host, sVirt automatically applies SELinux labels to all
VM-related processes and resources.</p>
<ul>
<li>
<p><strong>QEMU process confinement</strong>: The QEMU process that runs the NixOS VM runs
under a dedicated SELinux type, typically <code>svirt_t</code>. The host’s MAC policy
tightly restricts what this process can access, so even a successful VM escape
is still trapped inside a very limited sandbox rather than gaining normal host
privileges.</p>
</li>
<li>
<p><strong>Disk image protection</strong>: VM disk images are labeled (for example,
<code>virt_image_t</code>), which prevents unrelated host processes from reading or
modifying them and keeps the VM’s storage isolated from the rest of the
system.</p>
</li>
</ul>
<ol start="2">
<li><strong>KVM and host hardening</strong></li>
</ol>
<p>KVM provides the hardware-assisted virtualization layer and forms a strong
barrier between the guest and the host kernel. On top of that, the secureblue
host is hardened with SELinux in enforcing mode, Secure Boot, a hardened kernel,
and hardened_malloc by default. Together, these measures reduce the attack
surface and help ensure the integrity of the platform that is actually running
the VM.</p>
<ol start="3">
<li><strong>Isolation and “zero host compromise”</strong></li>
</ol>
<p>The host and guest are deliberately decoupled from a security perspective. The
assumption is that the NixOS VM can be misconfigured, vulnerable, or even fully
compromised. If that happens, KVM plus the host MAC policy (SELinux + sVirt) are
responsible for containing the damage. In other words, the security boundary is
not the NixOS configuration inside the VM, but the hypervisor and the host’s
mandatory access control rules that enforce strict isolation of the guest from
the host.</p>
<h2>Hardening the NixOS Guest is Still Worth It</h2>
<p>Even with a hardened host and MAC confinement, treating the NixOS VM as
“untrusted but hardened” adds another independent safety layer. The goal is to
minimize what an attacker can do inside the guest, even if they never manage a
breakout.</p>
<p><strong>Minimize VM device exposure</strong></p>
<ul>
<li>
<p><strong>Use snapshots aggressively</strong>: Take a snapshot right after a fresh install
and initial configuration. That snapshot becomes your “known-good” state for
testing risky software or malware, so you can revert and wipe out any changes
afterward.</p>
</li>
<li>
<p><strong>Avoid unnecessary passthrough</strong>: Only pass through hardware (USB, GPU,
network interfaces, etc.) if the VM genuinely needs it. Every extra device is
another potential attack surface.</p>
</li>
<li>
<p><strong>Prefer simple virtual devices</strong>: Use virtio and other paravirtualized
devices where possible, and avoid legacy or fully emulated devices unless
there is a specific need.</p>
</li>
</ul>
<p><strong>Network isolation for guests</strong></p>
<ul>
<li>
<p><strong>Keep networks virtual and segmented</strong>: Favor isolated virtual networks,
VLANs, or internal-only networks over bridged physical interfaces, so VMs
cannot talk to the host or each other unless you explicitly design for it.</p>
</li>
<li>
<p><strong>Filter traffic tightly</strong>: Use libvirt nwfilter, firewall rules
(nftables/iptables/firewalld), and similar tools to restrict VM-to-VM and
VM-to-external traffic, especially for services exposed on multiple guests.</p>
</li>
<li>
<p><strong>Be cautious with IPv6</strong>: Full IPv6 inside the VM usually implies bridged
networking, which connects the VM more directly to the host’s LAN. That
improves connectivity but reduces isolation, so enable it only if you truly
need it.</p>
</li>
</ul>
<p><strong>Guest-side hardening measures</strong></p>
<ul>
<li><strong>Harden the allocator</strong>: Enabling <code>graphene-hardened</code> or
<code>graphene-hardened-light</code> inside the guest improves memory safety for many
applications:</li>
</ul>
<pre><code class="language-nix"># configuration.nix
environment.memoryAllocator.provider = "graphene-hardened";
# OR for a more permissive and better performing allocator:
# environment.memoryAllocator.provider = "graphene-hardened-light";
</code></pre>
<p>Some software (notably certain browsers) can be finicky with hardened mallocs
and may require rebuilding or alternatives; be prepared to switch to another
browser or allocator profile when you hit incompatibilities.</p>
<ul>
<li><strong>Disable nonessential features</strong>: Turn off USB redirection/debugging, audio
devices, and other “extras” you do not need in the VM. These often pull in
complex subsystems that are rarely worth the extra attack surface for a
security-focused guest.</li>
</ul>
<p>For deeper NixOS-specific hardening, see:
<a href="https://saylesss88.github.io/nix/hardening_NixOS.html">hardening NixOS</a></p>
<hr />
<h3>Nix Toolbox</h3>
<blockquote>
<p>⚠️ Warning: toolbx containers are integrated with the host system, don’t do
things you wouldn’t do on your host. Toolbx containers are not fully isolated
environments like VMs.</p>
</blockquote>
<p>That said, they are a fast and convenient way to spin up a Nix development
environment. Know the limitations and benefits, and when you need more
isolation, just spin up a VM instead.</p>
<p>Secureblue enforces restrictive container image policies by default, blocking
unsigned or unverified images from registries like GitHub Container Registry.
This requires explicit trust configuration for each container source.</p>
<pre><code class="language-bash">ujust set-container-userns on
</code></pre>
<p>Without this setting, containers will fail with <code>OCI permission denied</code> errors.</p>
<p><strong>Allow the Nix-Toolbox Image</strong></p>
<pre><code class="language-bash"># For system-wide configuration (affects all users)
run0 podman image trust set -t accept ghcr.io/thrix/nix-toolbox
# For user-specific configuration (recommended for development)
podman image trust set -t accept ghcr.io/thrix/nix-toolbox
</code></pre>
<p>The <code>-t accept</code> flag allows images from this registry without requiring
signature verification.</p>
<pre><code class="language-bash"># Check that the policy has been updated correctly:
podman image trust show
</code></pre>
<p>Create the <code>nix-toolbox</code> container:</p>
<pre><code class="language-bash">toolbox create --image ghcr.io/thrix/nix-toolbox:42
</code></pre>
<p>You will be prompted whether you want Home Manager installed or not as well.</p>
<p>Enter the toolbox:</p>
<pre><code class="language-bash">toolbox enter nix-toolbox-42
</code></pre>
<p>You can then use nix and home-manager to setup a fully declarative
dev-environment.</p>
<hr />
<h3>Real-world recovery example</h3>
<p>Secureblue’s design and the underlying firmware safeguards also make certain
failures recoverable. On a mini PC, running a firmware update command resulted
in a boot error (“Something went seriously wrong, MOK is full”) and a forced
shutdown. Resetting NVRAM by moving the jumper on the motherboard briefly, then
restoring it to the original position, allowed the system to retrain and boot
again, after which the Secure Boot key could be re-enrolled and the system
returned to a known-good, secure state.</p>
<details>
<summary> ✔️ My Experience with Secureblue </summary>
<p>Using secureblue as the host OS with NixOS in a VM has been surprisingly smooth
for day‑to‑day work. Performance has been more than adequate for editing,
development, and browsing, and every issue so far has been fixable with
rollbacks or small config changes—no “nuke and reinstall” moments required.</p>
<p><strong>Software installation and workflows</strong></p>
<p>Flatpak takes a bit of relearning if you are used to installing everything with
full root on a mutable distro. Tools like Flatseal help a lot: you can see
exactly which permissions an app has, then selectively tighten them instead of
blindly trusting defaults. On secureblue, running the
<code>ujust flatpak-permissions-lockdown</code> helper gives you a very strict baseline,
then you add back only what each app truly needs.</p>
<p>In practice, a hybrid approach has worked best. One editor runs as a Flatpak,
and another is installed via <code>rpm-ostree</code> for tighter system integration and the
“traditional” root behavior when needed. The same thing happened with <code>yazi</code>: to
get the exact workflow wanted, it was easier to install it via <code>rpm-ostree</code>
rather than poking so many holes in the Flatpak sandbox that most isolation
benefits disappeared.</p>
<p>Toolbx also fits into this nicely. Putting Homebrew and Flatpak inside a toolbox
lets more config be shared while keeping the host image clean. The general
pattern on Silverblue/secureblue is: Flatpak for most GUI apps, toolbox (plus
brew or distro packages) for CLI tooling, and only a small number of host‑layer
<code>rpm-ostree</code> installs when deep integration is really warranted.</p>
<p>One quirk worth knowing about: on secureblue, <code>/home</code> is a symlink to
<code>/var/home</code>. Most tools don’t care, but a few development workflows get confused
by the indirection. In those cases, pointing the tool directly at
<code>/var/home/username</code> instead of <code>/home/username</code> usually clears things up.</p>
<p><strong>Graphics and drivers in the NixOS VM</strong></p>
<p>For GPU and display, the safest approach has been to let secureblue own the
hardware stack and keep the NixOS guest as simple as possible. Extra GPU drivers
or compositor tweaks inside the VM tended to make things less stable, showing up
as flicker, random freezes, or generally janky graphics because the guest was
effectively fighting the host’s configuration. Sticking close to the defaults in
the VM has consistently produced smoother and more predictable graphics
behavior.</p>
<p>The main issue I’ve had is with the dns-selector occasionally causing networking
problems. I configure global DNS with their <code>ujust</code> command and I’m assuming
that updates were incompatible with my DNS setup. Running <code>ujust dns-selector</code>
and pressing <code>1</code> (Reset to defaults), and a reboot typically fix the connection
and within a few days the global DNS will work again.</p>
</details>
<hr />
<h3>Resources</h3>
<ul>
<li>
<p><a href="https://www.redhat.com/en/topics/virtualization/what-is-virtualization">RedHat What is virtualization?</a></p>
</li>
<li>
<p><a href="https://sumit-ghosh.com/posts/virtualization-hypervisors-explaining-qemu-kvm-libvirt/">virtualization & hypervisors</a></p>
</li>
<li>
<p><a href="https://bitgrounds.tech/posts/kvm-qemu-libvirt-virtualization/">Virtualization on Linux using the KVM/QEMU/Libvirt stack</a></p>
</li>
</ul>
Understanding the Helix Flakehttps://saylesss88.github.io/flakes/helix_flake_4.4.html2025-12-05T00:00:00+00:00saylesss87@proton.me (saylesss88)<h1>Chapter 4.4</h1>
<details>
<summary> ✔️ Click to Expand Table of Contents</summary>
<!-- toc -->
</details>
<p><img src="https://saylesss88.github.io/../images/helix.png" alt="Helix Logo" />–<a href="https://helix-editor.com/">helix-editor.com</a></p>
<h1>Understanding the Helix Flake and Modifying its Behavior</h1>
<p>As we’ve seen from previous examples, the helix editor repository includes a few
<code>.nix</code> files including a <code>flake.nix</code>. Their flake uses a lot of idiomatic Nix
code and advanced features. First I will break down their <code>flake.nix</code> and
<code>default.nix</code> to understand why they do certain things. And finally, we will
change the build to “debug” mode demonstrating how easily you can modify the
behavior of a package defined within a Nix flake without changing the original
source code or the upstream flake directly.</p>
<ol>
<li>Let’s clone the Helix repository:</li>
</ol>
<pre><code class="language-bash">git clone https://github.com/helix-editor/helix.git
cd helix
</code></pre>
<p>When you enter the <code>helix</code> directory, <code>direnv</code> is setup for you already. All you
would have to do is <code>direnv allow</code> and it will ask you a few questions then you
are good to go. Looking at their <code>.envrc</code> it mentions “try to use flakes, if it
fails use normal nix (i.e., shell.nix)”. If it’s successful you’ll see a long
list of environment variables displayed.</p>
<ol start="2">
<li>Enter the Development Shell:</li>
</ol>
<p>The Helix project’s <code>flake.nix</code> includes a <code>devShells.default</code> output,
specifically designed for development.</p>
<pre><code class="language-bash">nix develop
</code></pre>
<ol start="3">
<li>You’re now in a fully configured development environment:</li>
</ol>
<ul>
<li>When you run <code>nix develop</code>, Nix builds and drops you into a shell environment
with all the dependencies specified in <code>devShells.default</code>. This means you
don’t have to manually install or manage tools like Rust, Cargo, or Clang,
it’s all handled declaratively through Nix.</li>
</ul>
<p>You can now build and run the project using its standard tooling:</p>
<pre><code class="language-bash">cargo check
cargo build
cargo run
</code></pre>
<ol start="4">
<li>Making Changes and Testing Them</li>
</ol>
<p>Since you’re in a reproducible environment, you can confidently hack on the
project without worrying about your system setup. Try modifying some code in
<code>helix</code> and rebuilding with Cargo. The Nix shell ensures consistency for every
contributor or device you work on.</p>
<ol start="5">
<li>Run Just the Binary</li>
</ol>
<p>If you only want to run the compiled program without entering the shell, use the
nix run command:</p>
<pre><code class="language-bash">nix run
</code></pre>
<p>This builds and runs the default package defined by the flake. In the case of
Helix, this launches the <code>hx</code> editor directly.</p>
<ol start="6">
<li>Build Without Running</li>
</ol>
<p>To just build the project and get the path to the output binary:</p>
<pre><code class="language-bash">nix build
</code></pre>
<p>You’ll find the compiled binary under <code>./result/bin</code>.</p>
<ol start="7">
<li>Pinning and Reproducing</li>
</ol>
<p>Because the project uses a flake, you can ensure full reproducibility by pinning
the inputs. For example, you can clone with <code>--recurse-submodules</code> and copy the
<code>flake.lock</code> to ensure you’re using the same dependency versions as upstream.
This is great for debugging or sharing exact builds.</p>
<p>✅ Recap:</p>
<p>With flakes, projects like Helix provide everything you need for development and
running in a single <code>flake.nix</code>. You can nix develop to get started hacking, nix
run to quickly try it out, and nix build to produce binaries all without
installing or polluting your system.</p>
<h2>Understanding the Helix flake.nix</h2>
<p>The helix flake is full of idiomatic Nix code and displays some of the more
advanced things a flake can provide:</p>
<pre><code class="language-nix">{
description = "A post-modern text editor.";
inputs = {
nixpkgs.url = "github:nixos/nixpkgs/nixos-unstable";
rust-overlay = {
url = "github:oxalica/rust-overlay";
inputs.nixpkgs.follows = "nixpkgs";
};
};
outputs = {
self,
nixpkgs,
rust-overlay,
...
}: let
inherit (nixpkgs) lib;
systems = [
"x86_64-linux"
"aarch64-linux"
"x86_64-darwin"
"aarch64-darwin"
];
eachSystem = lib.genAttrs systems;
pkgsFor = eachSystem (system:
import nixpkgs {
localSystem.system = system;
overlays = [(import rust-overlay) self.overlays.helix];
});
gitRev = self.rev or self.dirtyRev or null;
in {
packages = eachSystem (system: {
inherit (pkgsFor.${system}) helix;
/*
The default Helix build. Uses the latest stable Rust toolchain, and unstable
nixpkgs.
The build inputs can be overridden with the following:
packages.${system}.default.override { rustPlatform = newPlatform; };
Overriding a derivation attribute can be done as well:
packages.${system}.default.overrideAttrs { buildType = "debug"; };
*/
default = self.packages.${system}.helix;
});
checks =
lib.mapAttrs (system: pkgs: let
# Get Helix's MSRV toolchain to build with by default.
msrvToolchain = pkgs.pkgsBuildHost.rust-bin.fromRustupToolchainFile ./rust-toolchain.toml;
msrvPlatform = pkgs.makeRustPlatform {
cargo = msrvToolchain;
rustc = msrvToolchain;
};
in {
helix = self.packages.${system}.helix.override {
rustPlatform = msrvPlatform;
};
})
pkgsFor;
# Devshell behavior is preserved.
devShells =
lib.mapAttrs (system: pkgs: {
default = let
commonRustFlagsEnv = "-C link-arg=-fuse-ld=lld -C target-cpu=native --cfg tokio_unstable";
platformRustFlagsEnv = lib.optionalString pkgs.stdenv.isLinux "-Clink-arg=-Wl,--no-rosegment";
in
pkgs.mkShell {
inputsFrom = [self.checks.${system}.helix];
nativeBuildInputs = with pkgs;
[
lld
cargo-flamegraph
rust-bin.nightly.latest.rust-analyzer
]
++ (lib.optional (stdenv.isx86_64 && stdenv.isLinux) cargo-tarpaulin)
++ (lib.optional stdenv.isLinux lldb)
++ (lib.optional stdenv.isDarwin darwin.apple_sdk.frameworks.CoreFoundation);
shellHook = ''
export RUST_BACKTRACE="1"
export RUSTFLAGS="''${RUSTFLAGS:-""} ${commonRustFlagsEnv} ${platformRustFlagsEnv}"
'';
};
})
pkgsFor;
overlays = {
helix = final: prev: {
helix = final.callPackage ./default.nix {inherit gitRev;};
};
default = self.overlays.helix;
};
};
nixConfig = {
extra-substituters = ["https://helix.cachix.org"];
extra-trusted-public-keys = ["helix.cachix.org-1:ejp9KQpR1FBI2onstMQ34yogDm4OgU2ru6lIwPvuCVs="];
};
}
</code></pre>
<p><strong>Top-Level Metadata</strong>:</p>
<pre><code class="language-nix">{
description = "A post-modern text editor.";
}
</code></pre>
<ul>
<li>This sets a human-readable description for the flake.</li>
</ul>
<h2>Inputs</h2>
<pre><code class="language-nix">inputs = {
nixpkgs.url = "github:nixos/nixpkgs/nixos-unstable";
rust-overlay = {
url = "github:oxalica/rust-overlay";
inputs.nixpkgs.follows = "nixpkgs";
};
};
</code></pre>
<ul>
<li>
<p><code>nixpkgs</code>: Uses the <code>nixos-unstable</code> branch of the Nixpkgs repository.</p>
</li>
<li>
<p><code>rust-overlay</code>: follows the same <code>nixpkgs</code>, ensuring compatibility between
inputs.</p>
</li>
</ul>
<p><strong>Outputs Function</strong>:</p>
<pre><code class="language-nix">outputs = { self, nixpkgs, rust-overlay, ... }:
</code></pre>
<ul>
<li>This defines what this flake exports, including <code>packages</code>, <code>devShells</code>, etc.</li>
</ul>
<p><strong>Common Setup</strong>:</p>
<pre><code class="language-nix">let
inherit (nixpkgs) lib;
systems = [ ... ];
eachSystem = lib.genAttrs systems;
</code></pre>
<ul>
<li>
<p><code>systems</code>: A list of the supported systems</p>
</li>
<li>
<p><code>eachSystem</code>: A Helper to map over all platforms.</p>
</li>
</ul>
<pre><code class="language-nix">pkgsFor = eachSystem (system:
import nixpkgs {
localSystem.system = system;
overlays = [(import rust-overlay) self.overlays.helix];
});
</code></pre>
<ul>
<li>This imports <code>nixpkgs</code> for each system and applies overlays</li>
</ul>
<p>📦 <code>packages</code></p>
<pre><code class="language-nix">packages = eachSystem (system: {
inherit (pkgsFor.${system}) helix;
default = self.packages.${system}.helix;
});
</code></pre>
<ul>
<li>For each platform:
<ul>
<li>
<p>Includes a <code>helix</code> package (defined in <code>./default.nix</code>)</p>
</li>
<li>
<p>Sets <code>default</code> to <code>helix</code> (used by <code>nix build</code>, <code>nix run</code>)</p>
</li>
</ul>
</li>
</ul>
<p>Let’s look at the helix <code>default.nix</code>:</p>
<pre><code class="language-nix">{
lib,
rustPlatform,
callPackage,
runCommand,
installShellFiles,
git,
gitRev ? null,
grammarOverlays ? [],
includeGrammarIf ? _: true,
}: let
fs = lib.fileset;
src = fs.difference (fs.gitTracked ./.) (fs.unions [
./.envrc
./rustfmt.toml
./screenshot.png
./book
./docs
./runtime
./flake.lock
(fs.fileFilter (file: lib.strings.hasInfix ".git" file.name) ./.)
(fs.fileFilter (file: file.hasExt "svg") ./.)
(fs.fileFilter (file: file.hasExt "md") ./.)
(fs.fileFilter (file: file.hasExt "nix") ./.)
]);
# Next we actually need to build the grammars and the runtime directory
# that they reside in. It is built by calling the derivation in the
# grammars.nix file, then taking the runtime directory in the git repo
# and hooking symlinks up to it.
grammars = callPackage ./grammars.nix {inherit grammarOverlays includeGrammarIf;};
runtimeDir = runCommand "helix-runtime" {} ''
mkdir -p $out
ln -s ${./runtime}/* $out
rm -r $out/grammars
ln -s ${grammars} $out/grammars
'';
in
rustPlatform.buildRustPackage (self: {
cargoLock = {
lockFile = ./Cargo.lock;
# This is not allowed in nixpkgs but is very convenient here: it allows us to
# avoid specifying `outputHashes` here for any git dependencies we might take
# on temporarily.
allowBuiltinFetchGit = true;
};
nativeBuildInputs = [
installShellFiles
git
];
buildType = "release";
name = with builtins; (fromTOML (readFile ./helix-term/Cargo.toml)).package.name;
src = fs.toSource {
root = ./.;
fileset = src;
};
# Helix attempts to reach out to the network and get the grammars. Nix doesn't allow this.
HELIX_DISABLE_AUTO_GRAMMAR_BUILD = "1";
# So Helix knows what rev it is.
HELIX_NIX_BUILD_REV = gitRev;
doCheck = false;
strictDeps = true;
# Sets the Helix runtime dir to the grammars
env.HELIX_DEFAULT_RUNTIME = "${runtimeDir}";
# Get all the application stuff in the output directory.
postInstall = ''
mkdir -p $out/lib
installShellCompletion ${./contrib/completion}/hx.{bash,fish,zsh}
mkdir -p $out/share/{applications,icons/hicolor/{256x256,scalable}/apps}
cp ${./contrib/Helix.desktop} $out/share/applications/Helix.desktop
cp ${./logo.svg} $out/share/icons/hicolor/scalable/apps/helix.svg
cp ${./contrib/helix.png} $out/share/icons/hicolor/256x256/apps/helix.png
'';
meta.mainProgram = "hx";
})
</code></pre>
<h3>Breaking Down <code>helix/default.nix</code></h3>
<details>
<summary> ✔️ Click to Expand `helix/default.nix` breakdown </summary>
<p>This <code>default.nix</code> file is a Nix derivation that defines how to build the Helix
editor itself. It’s designed to be called by the main <code>flake.nix</code> as part of its
<code>packages</code> output.</p>
<p>Here’s a breakdown of its components:</p>
<ol>
<li><strong>Function Arguments</strong>:</li>
</ol>
<pre><code class="language-nix">{
lib,
rustPlatform,
callPackage,
runCommand,
installShellFiles,
git,
gitRev ? null,
grammarOverlays ? [],
includeGrammarIf ? _: true,
}:
</code></pre>
<p><code>lib</code>: The Nixpkgs <code>lib</code> (library) functions, essential for common operations
like <code>fileset</code> and <code>strings</code>.</p>
<p><code>rustPlatform</code>: A helper function from Nixpkgs specifically for building Rust
projects. It provides a <code>buildRustPackage</code> function, which simplifies the
process significantly.</p>
<p><code>callPackage</code>: A Nixpkgs function used to instantiate a Nix expression (like
<code>grammars.nix</code>) with its dependencies automatically supplied from the current
Nix environment.</p>
<p><code>runCommand</code>: A Nixpkgs primitive that creates a derivation by running a shell
command. It’s used here to construct the <code>runtimeDir</code>.</p>
<p><code>installShellFiles</code>: A utility from Nixpkgs for installing shell completion
files.</p>
<p><code>git</code>: The Git package, needed for determining the <code>gitRev</code>.</p>
<p><code>gitRev ? null</code>: The Git revision of the Helix repository. It’s an optional
argument, defaulting to null. This is passed in from the main <code>flake.nix</code>.</p>
<p><code>grammarOverlays ? []</code>: An optional list of overlays for grammars, allowing
customization.</p>
<p><code>includeGrammarIf ? _: true</code>: An optional function to control which grammars are
included.</p>
<ol start="2">
<li><strong>Local Variables</strong> (<code>let ... in</code>)</li>
</ol>
<pre><code class="language-nix">let
fs = lib.fileset;
src = fs.difference (fs.gitTracked ./.) (fs.unions [
./.envrc
./rustfmt.toml
./screenshot.png
./book
./docs
./runtime
./flake.lock
(fs.fileFilter (file: lib.strings.hasInfix ".git" file.name) ./.)
(fs.fileFilter (file: file.hasExt "svg") ./.)
(fs.fileFilter (file: file.hasExt "md") ./.)
(fs.fileFilter (file: file.hasExt "nix") ./.)
]);
grammars = callPackage ./grammars.nix { inherit grammarOverlays includeGrammarIf; };
runtimeDir = runCommand "helix-runtime" {} ''
mkdir -p $out
ln -s ${./runtime}/* $out
rm -r $out/grammars
ln -s ${grammars} $out/grammars
'';
in
</code></pre>
<p><code>fs = lib.fileset;</code>: Aliases <code>lib.fileset</code> for convenient file set operations.</p>
<p><code>src</code>: This is a crucial part. It defines the source files that will be used to
build Helix by:</p>
<ul>
<li>
<p>Taking all Git-tracked files in the current directory (<code>fs.gitTracked ./.</code>).</p>
</li>
<li>
<p>Excluding configuration files (e.g., <code>.envrc</code>, <code>flake.lock</code>), documentation
(<code>.md</code>), images (<code>.svg</code>), and Nix files (<code>.nix</code>) using <code>fs.difference</code> and
<code>fs.unions</code>. This ensures a clean build input, reducing Nix store size and
avoiding unnecessary rebuilds.</p>
</li>
<li>
<p><code>grammars</code>: Builds syntax grammars by calling <code>grammars.nix</code>, passing
<code>grammarOverlays</code> (for customizing grammar builds) and <code>includeGrammarIf</code> (a
filter for selecting grammars).</p>
</li>
<li>
<p><code>runtimeDir</code>: Creates a runtime directory for Helix by:</p>
<ul>
<li>
<p>Symlinking the <code>runtime</code> directory from the source.</p>
</li>
<li>
<p>Replacing the <code>grammars</code> subdirectory with a symlink to the <code>grammars</code>
derivation, ensuring Helix uses Nix-managed grammars.</p>
</li>
</ul>
</li>
</ul>
<ol start="3">
<li><strong>The Build Derivation</strong> (<code>rustPlatform.buildRustPackage</code>)</li>
</ol>
<p>The core of this <code>default.nix</code> is the <code>rustPlatform.buildRustPackage</code> call,
which is a specialized builder for Rust projects:</p>
<pre><code class="language-nix">in
rustPlatform.buildRustPackage (self: {
cargoLock = {
lockFile = ./Cargo.lock;
# ... comments ...
allowBuiltinFetchGit = true;
};
</code></pre>
<p><code>cargoLock</code>: Specifies how Cargo dependencies are handled.</p>
<p><code>lockFile = ./Cargo.lock;</code> Points to the <code>Cargo.lock</code> file for reproducible
builds.</p>
<p><code>allowBuiltinFetchGit = true</code>: Allows Cargo to fetch Git dependencies directly
from repositories specified in <code>Cargo.lock</code>. This is discouraged in Nixpkgs
because it can break build reproducibility, but it’s used here for convenience
during development, eliminating the need to manually specify <code>outputHashes</code> for
Git dependencies.</p>
<pre><code class="language-nix">nativeBuildInputs = [
installShellFiles
git
];
</code></pre>
<p><code>nativeBuildInputs</code>: Are tools needed during the build process but not
necessarily at runtime.</p>
<pre><code class="language-nix">buildType = "release";
</code></pre>
<p><code>buildType</code>: Specifies that Helix should be built in “release” mode (optimized).</p>
<pre><code class="language-nix">name = with builtins; (fromTOML (readFile ./helix-term/Cargo.toml)).package.name;
src = fs.toSource {
root = ./.;
fileset = src;
};
</code></pre>
<p><code>name</code>: Dynamically sets the package name by reading it from the <code>Cargo.toml</code>
file.</p>
<p><code>src</code>: Uses the <code>src</code> file set defined earlier as the source for the build.</p>
<pre><code class="language-nix"># Helix attempts to reach out to the network and get the grammars. Nix doesn't allow this.
HELIX_DISABLE_AUTO_GRAMMAR_BUILD = "1";
# So Helix knows what rev it is.
HELIX_NIX_BUILD_REV = gitRev;
</code></pre>
<p><strong>Environment Variables</strong>: Sets environment variables that Helix uses.</p>
<p><code>HELIX_DISABLE_AUTO_GRAMMAR_BUILD = "1"</code>: Prevents Helix from downloading
grammars during the build, as Nix’s sandboxed environment disallows network
access. Instead, grammars are provided via the <code>runtimeDir</code> derivation.</p>
<p><code>HELIX_NIX_BUILD_REV = gitRev</code>: Embeds the specified Git revision (or <code>null</code> if
unspecified) into the Helix binary, allowing Helix to display its version or
commit hash.</p>
<pre><code class="language-nix">doCheck = false;
strictDeps = true;
</code></pre>
<p><code>doCheck = false;</code>: Skips running tests during the build. This is common for
faster builds, especially in CI/CD, but tests are often run in a separate
<code>checks</code> output (as seen in the <code>flake.nix</code>).</p>
<p><code>strictDeps = true;</code>: Ensures that all dependencies are explicitly declared.</p>
<pre><code class="language-nix"># Sets the Helix runtime dir to the grammars
env.HELIX_DEFAULT_RUNTIME = "${runtimeDir}";
</code></pre>
<pre><code class="language-nix"># Sets the Helix runtime dir to the grammars
env.HELIX_DEFAULT_RUNTIME = "${runtimeDir}";
</code></pre>
<p><code>env.HELIX_DEFAULT_RUNTIME</code>: Tells Helix where to find its runtime files
(including the Nix-managed grammars).</p>
<pre><code class="language-nix"># Get all the application stuff in the output directory.
postInstall = ''
mkdir -p $out/lib
installShellCompletion ${./contrib/completion}/hx.{bash,fish,zsh}
mkdir -p $out/share/{applications,icons/hicolor/{256x256,scalable}/apps}
cp ${./contrib/Helix.desktop} $out/share/applications/Helix.desktop
cp ${./logo.svg} $out/share/icons/hicolor/scalable/apps/helix.svg
cp ${./contrib/helix.png} $out/share/icons/hicolor/256x256/apps/helix.png
'';
</code></pre>
<p><code>postInstall</code>: A shell script that runs after the main build is complete. This
is used for installing additional files that are part of the Helix distribution
but not directly built by Cargo.</p>
<p>Installs shell completion files (<code>hx.bash</code>, <code>hx.fish</code>, <code>hx.zsh</code>). This enables
tab completion.</p>
<p>Installs desktop entry files (<code>Helix.desktop</code>) and icons (<code>logo.svg</code>,
<code>helix.png</code>) for desktop integration for GUI environments.</p>
<pre><code class="language-nix"> meta.mainProgram = "hx";
})
</code></pre>
<p><code>meta.mainProgram</code>: Specifies the primary executable provided by this package,
allowing <code>nix run</code> to automatically execute <code>hx</code>.</p>
<p>A lot going on in this derivation!</p>
</details>
<h3>Making Actual Changes</h3>
<ol>
<li>Locate the <code>packages</code> output section. It looks like this:</li>
</ol>
<pre><code class="language-nix">packages = eachSystem (system: {
inherit (pkgsFor.${system}) helix;
/*
The default Helix build. Uses the latest stable Rust toolchain, and unstable
nixpkgs.
The build inputs can be overridden with the following:
packages.${system}.default.override { rustPlatform = newPlatform; };
Overriding a derivation attribute can be done as well:
packages.${system}.default.overrideAttrs { buildType = "debug"; };
*/
default = self.packages.${system}.helix;
});
</code></pre>
<ol start="2">
<li>Modify the <code>default</code> package. The comments actually tell us exactly how to do
this. We want to use <code>overrideAttrs</code> to change the <code>buildType</code></li>
</ol>
<p>Change this line:</p>
<pre><code class="language-nix">default = self.packages.${system}.helix;
</code></pre>
<p>To this:</p>
<pre><code class="language-nix">default = self.packages.${system}.helix.overrideAttrs { buildType = "debug"; };
</code></pre>
<ul>
<li>This tells Nix to take the standard Helix package definition and override one
of its internal attributes (<code>buildType</code>) to “debug” instead of “release”.</li>
</ul>
<ol start="3">
<li>Build the “Hacked” Helix:</li>
</ol>
<pre><code class="language-bash">nix build
</code></pre>
<ul>
<li>Nix will now rebuild Helix, but this time, it will compile it in debug mode.
You’ll likely notice the build takes a bit longer, and the resulting binary
will be larger due to the included debugging symbols.</li>
</ul>
<ol start="4">
<li>Run the Debug Binary:</li>
</ol>
<pre><code class="language-bash">./result/bin/hx
</code></pre>
<ul>
<li>You’re now running your custom-built debug version of Helix! This is useful if
you were, for example, attatching a debugger.</li>
</ul>
<p>This is a simple yet powerful “hack” that demonstrates how easily you can modify
the behavior of a package defined within a Nix flake without changing the
original source code or the upstream flake directly. You’re simply telling Nix
how you’d like your version of the package to be built.</p>
<h3>Another way to Modify Behavior</h3>
<p>Since we are already familiar with the structure and behavior of Helix’s
<code>flake.nix</code>, we can leverage that understanding to create our own Nix flake. By
analyzing how Helix organizes its <code>inputs</code>, <code>outputs</code>, and package definitions,
we gain the confidence to modify and extend a flake’s functionality to suit our
specific needs—whether that’s customizing builds, adding overlays, or
integrating with home-manager.</p>
<ol>
<li>Create a <code>flake.nix</code> in your own directory (outside the helix repo):</li>
</ol>
<pre><code class="language-nix">{
description = "Customized Helix build with debug features";
inputs = {
helix.url = "github:helix-editor/helix";
nixpkgs.url = "github:nixos/nixpkgs/nixos-unstable";
rust-overlay = {
url = "github:oxalica/rust-overlay";
inputs.nixpkgs.follows = "nixpkgs";
};
};
outputs = {
self,
helix,
nixpkgs,
rust-overlay,
}: let
system = "x86_64-linux";
pkgs = import nixpkgs {
system = system;
overlays = [rust-overlay.overlay.overlays.default];
};
in {
packages.${system}.default = helix.packages.${system}.helix.overrideAttrs (old: {
buildType = "debug";
# Add additional cargo features
cargoBuildFlags =
(old.cargoBuildFlags or [])
++ [
"--features"
"tokio-console"
];
# Inject custom RUSTFLAGS
RUSTFLAGS = (old.RUSTFLAGS or "") + " -C debuginfo=2 -C opt-level=1";
});
};
}
</code></pre>
<p>Check it:</p>
<pre><code class="language-bash">nix flake check
warning: creating lock file '"/home/jr/world/flake.lock"':
• Added input 'helix':
'github:helix-editor/helix/8961ae1dc66633ea6c9f761896cb0d885ae078ed?narHash=sha256-f14perPUk%2BH15GyGRbg0Akqhn3rxFnc6Ez5onqpzu6A%3D' (2025-05-29)
• Added input 'helix/nixpkgs':
'github:nixos/nixpkgs/5135c59491985879812717f4c9fea69604e7f26f?narHash=sha256-Vr3Qi346M%2B8CjedtbyUevIGDZW8LcA1fTG0ugPY/Hic%3D' (2025-02-26)
• Added input 'helix/rust-overlay':
'github:oxalica/rust-overlay/d342e8b5fd88421ff982f383c853f0fc78a847ab?narHash=sha256-3SdPQrZoa4odlScFDUHd4CUPQ/R1gtH4Mq9u8CBiK8M%3D' (2025-02-27)
• Added input 'helix/rust-overlay/nixpkgs':
follows 'helix/nixpkgs'
• Added input 'nixpkgs':
'github:nixos/nixpkgs/96ec055edbe5ee227f28cdbc3f1ddf1df5965102?narHash=sha256-7doLyJBzCllvqX4gszYtmZUToxKvMUrg45EUWaUYmBg%3D' (2025-05-28)
• Added input 'rust-overlay':
'github:oxalica/rust-overlay/405ef13a5b80a0a4d4fc87c83554423d80e5f929?narHash=sha256-k0nhPtkVDQkVJckRw6fGIeeDBktJf1BH0i8T48o7zkk%3D' (2025-05-30)
• Added input 'rust-overlay/nixpkgs':
follows 'nixpkgs'
</code></pre>
<ul>
<li>The <code>nix flake check</code> command will generate a <code>flake.lock</code> file if one doesn’t
exist, and the warnings you see indicate that new inputs are being added and
locked to specific versions for reproducibility. This is expected behavior for
a new or modified flake.</li>
</ul>
<p>Inspect the outputs:</p>
<pre><code class="language-bash">nix flake show
path:/home/jr/world?lastModified=1748612128&narHash=sha256-WEYtptarRrrm0Jb/0PJ/b5VPqLkCk5iEenjbKYU4Xm8%3D
└───packages
└───x86_64-linux
└───default: package 'helix-term'
</code></pre>
<ul>
<li>
<p>The <code>└───packages</code> line indicates that our flake exposes a top-level
<code>packages</code> attribute.</p>
</li>
<li>
<p><code>└───x86_64-linux</code>: System architecture specificity</p>
</li>
<li>
<p><code>└───default: package 'helix-term'</code> Signifies that within the <code>x86_64-linux</code>
packages, there’s a package named <code>default</code>. This is a special name that
allows you to omit the package name when using commands like <code>nix build</code>.</p>
</li>
<li>
<p><code>package 'helix-term'</code> This is the most direct confirmation of our “hack”. It
tells us that our <code>default</code> package is <code>helix-term</code>. This confirms that our
<code>overrideAttrs</code> in the <code>packages.${system}.default</code> section successfully
targeted and modified the Helix editor package, which is internally named
<code>helix-term</code> by the Helix flake.</p>
</li>
</ul>
<p><strong>What This Does</strong>:</p>
<ul>
<li>
<p><code>overrideAttrs</code> lets you change <em>only</em> parts of the derivation without
rewriting everything.</p>
</li>
<li>
<p><code>buildType = "debug"</code> enables debug builds.</p>
</li>
<li>
<p><code>cargoBuildFlags</code> adds extra features passed to Cargo, e.g.,
<code>--features tokio-console</code></p>
</li>
<li>
<p><code>RUSTFLAGS</code> gives you even more control over compiler behavior, optimization
levels, etc.</p>
</li>
</ul>
<p><strong>Run It</strong>:</p>
<pre><code class="language-bash">nix run
</code></pre>
<p>Or drop into the dev shell:</p>
<pre><code class="language-bash">nix develop
</code></pre>
<ul>
<li>(assuming you also wire in a <code>devShells</code> output)</li>
</ul>
<p><strong>Adding the <code>devShells</code> output</strong>:</p>
<p>Since we already have the helix flake as an input to our own <code>flake.nix</code> we can
now forward or extend Helix’s <code>devShells</code> like this:</p>
<pre><code class="language-nix">outputs = { self, nixpkgs, helix, rust-overlay, ... }: {
devShells = helix.devShells;
};
</code></pre>
<p>Or if you want to pick a specific system:</p>
<pre><code class="language-nix">outputs = { self, nixpkgs, helix, rust-overlay ... }:
let
system = "x86_64-linux";
in {
devShells.${system} = helix.devShells.${system};
};
</code></pre>
<p><strong>Optional: Combine with your own</strong> <code>devShell</code></p>
<p>You can also extend or merge it with your own shell like so:</p>
<pre><code class="language-nix">outputs = { self, nixpkgs, helix, rust-overlay, ... }:
let
system = "x86_64-linux";
pkgs = import nixpkgs { inherit system; };
in {
devShells.${system} = {
default = pkgs.mkShell {
name = "my-shell";
inputsFrom = [ helix.devShells.${system}.default ];
buildInputs = [ pkgs.git ];
};
};
};
</code></pre>
Cachix devour-flakehttps://saylesss88.github.io/nix/cachix_devour.html2025-12-05T00:00:00+00:00saylesss87@proton.me (saylesss88)<h1>Cachix and the devour-flake</h1>
<details>
<summary> ✔️ Table of Contents</summary>
<!-- toc -->
</details>
<p>Using devour-flake to Cache All Your Flake Outputs to Cachix</p>
<p>When working with Nix flakes, it’s common to have many outputs: packages, apps,
dev shells, NixOS or Darwin configurations, and more. Efficiently building and
caching all these outputs can be challenging, especially in CI or when
collaborating. This is where devour-flake and Cachix shine.</p>
<p><strong>Why Use the devour-flake?</strong></p>
<p>By default, building all outputs of a flake with <code>nix build .#a .#b ... .#z</code> can
be slow and inefficient, as Nix will evaluate the flake multiple times, once for
each output. devour-flake solves this by generating a “consumer” flake that
depends on all outputs, allowing you to build everything in one go with a single
evaluation</p>
<h2>Installation</h2>
<p>There quite a few ways to do this, choose a method of installation from the
<a href="https://github.com/srid/devour-flake">devour-flake</a> repository and then
continue with step 1.</p>
<p>Nix will only download binaries from binary caches if they are cryptographically
signed with any of the keys listed in <code>nix.settings.trusted-public-keys</code>.</p>
<pre><code class="language-nix"># This is the default
nix.settings.require-sigs = true;
</code></pre>
<p>Example:</p>
<pre><code class="language-nix">nix.settings = {
builders-use-substitutes = true;
substituters = [
"https://cache.nixos.org"
];
trusted-public-keys = [
"cache.nixos.org-1:6NCHdD59X431o0gWypbMrAURkbJ16ZPMQFGspcDShjY="
];
};
</code></pre>
<p>You can even build it without installing with the following command:</p>
<pre><code class="language-bash">nix build github:srid/devour-flake \
-L --no-link --print-out-paths \
--override-input flake path/to/flake | cachix push <name>
</code></pre>
<pre><code class="language-bash">nix-shell -p cachix
</code></pre>
<p>This will push all flake outputs to cachix if you have a valid authentication
token and have created a cache already.</p>
<p>How to Use devour-flake with Cachix</p>
<ol>
<li>Prerequisites</li>
</ol>
<ul>
<li><strong>A Cachix cache</strong>: Create one on <a href="https://www.cachix.org/">Cachix</a> and
generate a “Write + Read” auth token. You’ll click the cache you just created
and select Settings, in the settings you’ll find Auth Tokens. When in the Auth
Tokens section give your token a Description, Expiration date, and finally
click Generate.</li>
</ul>
<p>(Optional) Configure your token locally, copy your auth token for the following
command:</p>
<pre><code class="language-bash">cachix authtoken <YOUR_TOKEN>
# Use cachix cli for the following
cachix use your-cache-name
</code></pre>
<ul>
<li><code>cachix use</code> adds your substitutors and trusted-public-keys to your
<code>~/.config/nix/nix.conf</code> and creates one if it doesn’t exist.</li>
</ul>
<p><strong>Push All Flake Inputs to Cachix</strong></p>
<p>Replace <code><mycache></code> with the name of the cache you just created.</p>
<pre><code class="language-bash">nix flake archive --json \
| jq -r '.path,(.inputs|to_entries[].value.path)' \
| cachix push <mycache>
</code></pre>
<p>You should see output similar to the following:</p>
<pre><code class="language-bash">Pushing 637 paths (2702 are already present) using zstd to cache sayls8 ⏳
✓ /nix/store/0aqvmjvhkar3j2f7zag2wjl4073apnvk-vimplugin-crates.nvim-2025-05-30 (734.65 KiB)
✓ /nix/store/02wm10zck7rb836kr0h3afjxl80866dp-X-Restart-Triggers-keyd (184.00 B)
✓ /nix/store/0asdaaax0lf1wa6m6lqqdvc8kp6qn3f6-dconf-cleanup (1008.00 B)
✓ /nix/store/09ki2jlh6sqbn01yw6n15h8d55ihxygf-helix-tree-sitter-mojo-3d7c53b8038f9ebbb57cd2e61296180aa5c1cf64 (601.37 KiB)
✓ /nix/store/0i2c29nldqvb9pnypvp3ika4i7fhc0ck-devour-output (312.00 B)
✓ /nix/store/0c0mwfb78xm862a7g4h9fhgzn55zppj6-helix-term (29.88 MiB)
✓ /nix/store/0fhdpb2qck1kbngq1dlc8lyqqadj2pb1-hyprcursor-0.1.12+date=2025-06-05_45fcc10-lib (487.30 KiB)
✓ /nix/store/0mfpi51bswgd91l8clqcz6mxy5k5zcd4-vimplugin-auto-pairs-2019-02-27 (40.60 KiB)
✓ /nix/store/0k2zq8y78vrhhkf658j6i45vz3y89v11-helix-tree-sitter-tcl-56ad1fa6a34ba800e5495d1025a9b0fda338d5b8 (110.25 KiB)
✓ /nix/store/0qxmahrw935136dbxkmvrg14fgnzi6bb-vimplugin-obsidian.nvim-2025-07-01 (493.02 KiB)
✓ /nix/store/0wjppqzcbnlf9srhr6k27pz403j3mg2j-hm-session-vars.sh (1.86 KiB)
✓ /nix/store/0z41071z33zg1zqyasccc3cfhxj389k0-helix-tree-sitter-swift-57c1c6d6ffa1c44b330182d41717e6fe37430704 (2.77 MiB)
✓ /nix/store/0n5f1x8lpc93zm81bxrfh6yccyngvrdl-unit-plymouth-read-write.service (1.19 KiB)
✓ /nix/store/0z8ac35n89lv2knzaj6kkp0cfxr6pmgc-hm_face.png (300.60 KiB)
✓ /nix/store/0zp5846pry5rknnvzz81zlvj4ghnkxp5-hyprutils-0.8.1+date=2025-07-07_a822973 (421.64 KiB)
✓ /nix/store/118ihgwjw6kp0528igns3pnvzbszljmg-unit-dbus.service (1.34 KiB)
✓ /nix/store/0pajdq9mfgkcdwbqp38j7d4clc9h9iik-hm_.mozillafirefoxdefault.keep (112.00 B)
✓ /nix/store/0nlvffvpx6s8mpd2rpnqb1bl5idd16yk-hm-dconf.ini (224.00 B)
✓ /nix/store/1fiqgqvi574rdckav0ikdh8brwdhvh69-vimplugin-alpha-nvim-2025-05-26 (69.38 KiB)
✓ /nix/store/1fqxw31p1llag0g7wg7izq22x5msz47r-vimplugin-persistence.nvim-2025-02-25 (37.74
</code></pre>
<blockquote>
<p>❗ NOTE: The effectiveness of pushing the rest to cachix depend on your
network speed. I actually noticed a slow down after pushing the <code>nix/store</code>.
Pushing the <code>nix/store</code> is rarely necessary and can be very slow and
bandwidth-intensive. Most users will only need to push relevant outputs.</p>
</blockquote>
<p><strong>Push the Entire /nix/store</strong></p>
<pre><code class="language-bash">nix path-info --all | cachix push <mycache>
</code></pre>
<p><strong>Pushing shell environment</strong></p>
<pre><code class="language-bash">nix develop --profile dev-profile -c true
# then run
cachix push <mycache> dev-profile
</code></pre>
<ul>
<li>For the Flake way of doing things you would create something like the
following:</li>
</ul>
<pre><code class="language-nix">{
config,
lib,
pkgs,
...
}: let
cfg = config.custom.cachix;
in {
options = {
custom.cachix.enable = lib.mkEnableOption "Enable custom cachix configuration";
};
config = lib.mkIf cfg.enable {
environment.systemPackages = with pkgs; [cachix];
# to prevent garbage collection of outputs immediately after building
nix.extraOptions = "gc-keep-outputs = true";
nix.settings = {
substituters = [
"https://nix-community.cachix.org"
"https://hyprland.cachix.org"
"https://ghostty.cachix.org"
"https://neovim-nightly.cachix.org"
"https://yazi.cachix.org"
"https://helix.cachix.org"
"https://nushell-nightly.cachix.org"
"https://wezterm.cachix.org"
"https://sayls88.cachix.org"
# "https://nixpkgs-wayland.cachix.org"
];
trusted-public-keys = [
"nix-community.cachix.org-1:mB9FSh9qf2dCimDSUo8Zy7bkq5CX+/rkCWyvRCYg3Fs="
"hyprland.cachix.org-1:a7pgxzMz7+chwVL3/pzj6jIBMioiJM7ypFP8PwtkuGc="
"ghostty.cachix.org-1:QB389yTa6gTyneehvqG58y0WnHjQOqgnA+wBnpWWxns="
"neovim-nightly.cachix.org-1:feIoInHRevVEplgdZvQDjhp11kYASYCE2NGY9hNrwxY="
"yazi.cachix.org-1:Dcdz63NZKfvUCbDGngQDAZq6kOroIrFoyO064uvLh8k="
"helix.cachix.org-1:ejp9KQpR1FBI2onstMQ34yogDm4OgU2ru6lIwPvuCVs="
"nushell-nightly.cachix.org-1:nLwXJzwwVmQ+fLKD6aH6rWDoTC73ry1ahMX9lU87nrc="
"wezterm.cachix.org-1:kAbhjYUC9qvblTE+s7S+kl5XM1zVa4skO+E/1IDWdH0="
"sayls88.cachix.org-1:LT8JnboX8mKhabC3Mj/ONHb5tyrjlnsdauQkD8Lu0us="
# "nixpkgs-wayland.cachix.org-1:3lwxaILxMRkVhehr5StQprHdEo4IrE8sRho9R9HOLYA="
];
};
};
}
</code></pre>
<ul>
<li>
<p>The sayls8 entries are my custom cache. To find your trusted key go to the
cachix website, click on your cache and it is listed near the top.</p>
</li>
<li>
<p>I enable this with <code>custom.cachix.enable = true;</code> in my <code>configuration.nix</code> or
equivalent.</p>
</li>
<li>
<p>Another option is to use the top-level <code>nixConfig</code> attribute for adding your
substitutors and trusted-public-keys. You only need to choose 1 method FYI:</p>
</li>
</ul>
<pre><code class="language-nix">{
description = "NixOS & Flake Config";
# the nixConfig here only affects the flake itself, not the system configuration!
nixConfig = {
experimental-features = [ "nix-command" "flakes" ];
trusted-users = [ "ryan" ];
substituters = [
# replace official cache with a mirror located in China
"https://mirrors.ustc.edu.cn/nix-channels/store"
"https://cache.nixos.org"
];
# nix community's cache server
extra-substituters = [
"https://nix-community.cachix.org"
"https://nixpkgs-wayland.cachix.org"
];
extra-trusted-public-keys = [
"cache.nixos.org-1:6NCHdD59X431o0gWypbMrAURkbJ16ZPMQFGspcDShjY="
"nix-community.cachix.org-1:mB9FSh9qf2dCimDSUo8Zy7bkq5CX+/rkCWyvRCYg3Fs="
"nixpkgs-wayland.cachix.org-1:3lwxaILxMRkVhehr5StQprHdEo4IrE8sRho9R9HOLYA="
];
};
# ... snip
</code></pre>
<blockquote>
<p>❗️ WARNING: <code>trusted-users</code> is a list of users who are allowed to bypass many
of Nix’s normal safety restrictions and change daemon-level settings. Keep
<code>trusted-users</code> as small as possible (often just <code>root</code> and maybe your own
user on a single-user box)</p>
</blockquote>
<ol start="2">
<li>Building and Caching All Outputs</li>
</ol>
<p>You can build and push all outputs of your flake to Cachix using the following
command when in your flake directory:</p>
<pre><code class="language-bash">nix build github:srid/devour-flake \
-L --no-link --print-out-paths \
--override-input flake . \
| cachix push <your-cache-name>
</code></pre>
<ul>
<li>
<p>Replace <code>your-cache-name</code> with your actual Cachix cache name.</p>
<p>This command will:</p>
</li>
<li>
<p>Use devour-flake to enumerate and build all outputs of your flake (including
packages, devShells, NixOS configs, etc.)</p>
</li>
<li>
<p>Pipe the resulting store paths to cachix push, uploading them to your binary
cache.</p>
</li>
</ul>
<ol start="3">
<li>Example</li>
</ol>
<p>Suppose your cache is named my-flake-cache:</p>
<pre><code class="language-bash">nix build github:srid/devour-flake \
-L --no-link --print-out-paths \
--override-input flake . \
| cachix push my-flake-cache
</code></pre>
<ol start="4">
<li>Integration in CI</li>
</ol>
<p>This approach is particularly useful in CI pipelines, where you want to ensure
all outputs are built and cached for collaborators and future builds. You can
add the above command to your CI workflow, ensuring the Cachix auth token is
provided as a secret</p>
<ol start="5">
<li>Advanced: Using as a Nix App</li>
</ol>
<p>You can add devour-flake as an input to your flake for local development:</p>
<pre><code class="language-nix">{
inputs = {
devour-flake.url = "github:srid/devour-flake";
devour-flake.flake = false;
};
}
</code></pre>
<p>And in your flake’s <code>outputs</code>, add an overlay that makes <code>devour-flake</code>
available in your package set:</p>
<pre><code class="language-nix">outputs = { self, nixpkgs, devour-flake, ... }@inputs: {
overlays.default = final: prev: {
devour-flake = import devour-flake { inherit (prev) pkgs; };
};
# Example: Add devour-flake to your devShell
devShells.x86_64-linux.default = let
pkgs = import nixpkgs {
system = "x86_64-linux";
overlays = [ self.overlays.default ];
};
in pkgs.mkShell {
buildInputs = [ pkgs.devour-flake ];
};
};
</code></pre>
<p>Use devour-flake in your devShell:</p>
<pre><code class="language-bash">nix develop
</code></pre>
<p>You’ll have the <code>devour-flake</code> command available for local use, so you can
quickly build and push all outputs as needed.</p>
<blockquote>
<p>TIP: Alternatively, use <code>devour-flake</code> as an app:</p>
<pre><code class="language-nix">apps.x86_64-linux.devour-flake = {
type = "app";
program = "${self.packages.x86_64-linux.devour-flake}/bin/devour-flake";
};
</code></pre>
</blockquote>
<p>What Gets Built and Cached?</p>
<p><code>devour-flake</code> detects and builds all standard outputs of a flake, including:</p>
<ul>
<li>
<p>packages</p>
</li>
<li>
<p>apps</p>
</li>
<li>
<p>checks</p>
</li>
<li>
<p>devShells</p>
</li>
<li>
<p>nixosConfigurations.*</p>
</li>
<li>
<p>darwinConfigurations.*</p>
</li>
<li>
<p>home-manager configurations</p>
</li>
</ul>
<p>This ensures that everything your flake produces is available in your Cachix
cache for fast, reproducible builds.</p>
<hr />
<h2>References:</h2>
<p><a href="https://github.com/srid/devour-flake">devour-flake documentation</a></p>
<p><a href="https://discourse.nixos.org/t/how-to-set-up-cachix-in-flake-based-nixos-config/31781">Discourse Cachix for Flakes</a></p>
<p><a href="https://docs.cachix.org/installation#flakes">Cachix docs: Flakes</a></p>
<p><a href="https://www.tweag.io/blog/2020-06-25-eval-cache/#:~:text=The%20overhead%20for%20creating%20the,nixpkgs%20blender%20takes%204.9%20seconds.">Tweag Evaluation Caching</a></p>
<p><a href="https://scrive.github.io/nix-workshop/06-infrastructure/01-caching-nix.html">Scrive Caching</a></p>
Whonix KVM on NixOShttps://saylesss88.github.io/nix/whonix_kvm.html2025-12-04T00:00:00+00:00saylesss87@proton.me (saylesss88)<h1>Whonix KVM on NixOS</h1>
<details>
<summary> ✔️ Table of Contents</summary>
<!-- toc -->
</details>
<p><img src="https://saylesss88.github.io/../images/swappy-20250901-101339.cleaned.png" alt="Whonix Logo" /></p>
<blockquote>
<p>⚠️ WARNING: There is no general software that can guarantee absolute anonymity
or security; perfect security is a myth. Security is a continuous process, not
a one-time product. It also depends on time and resources: if an adversary has
enough of either, eventual compromise is probable. However, by layering
defenses and following best practices, we can make attacks costly and
time-consuming, deterring all but highly targeted adversaries.</p>
</blockquote>
<p>It is highly recommended to harden your Host Machine as Type 2 hypervisors are
only as secure as their host. KVM is actually a type 1 hypervisor but relies on
QEMU for emulation which is a Type 2 hypervisor. This actually makes it a sort
of hybrid in between Type 1 and Type 2 but is in theory less secure than running
a Xen hypervisor (Type 1) on bare-metal.</p>
<p>Whonix offers many benefits, including the convenience of running within your
current operating system without needing to reboot or use a separate Tails USB.
It provides similar strong anonymity protections by routing all traffic through
Tor in isolated virtual machines. The Whonix documentation is transparent about
its limitations, which helps build trust and confidence in its security model.</p>
<ul>
<li>
<p><a href="https://www.whonix.org/wiki/Comparison_with_Others">Whonix Compared to Tails</a></p>
</li>
<li>
<p>Tails is great but they add an add blocker to Tor that makes every Tails user
unique from the rest of Tor Browser users reducing anonymity.</p>
</li>
</ul>
<blockquote>
<p>⚠️ Never rely solely on the Virtual Machine to protect you, if your host OS
isn’t secure a Virtual Machine won’t protect you. If you have high threat
model, you may want to choose a Host with better support for AppArmor and
Selinux as they are highly limited on NixOS.</p>
</blockquote>
<p>That being said, there is a lot you can do to harden NixOS…</p>
<h3>Harden NixOS and set up GnuPG</h3>
<ul>
<li>
<p><a href="https://saylesss88.github.io/nix/hardening_NixOS.html">Hardening NixOS</a></p>
</li>
<li>
<p><a href="https://saylesss88.github.io/nix/hardening_networking.html">Hardening Networking</a></p>
</li>
<li>
<p><a href="https://saylesss88.github.io/nix/gpg-agent.html">GnuPG and gpg-agent on NixOS</a></p>
</li>
</ul>
<h3>A Few Things to Consider when using Whonix</h3>
<ul>
<li>
<p>No activity conducted inside <code>Whonix-Workstation</code> can cause IP/DNS leaks so
long as <code>Whonix-Gateway</code> is left unchanged or only documented changes are made
like configuring bridges, establishing onion services and running updates.</p>
</li>
<li>
<p>Whonix does not and does not claim to protect users against advanced
adversaries such as nation state actors, if they target you, you will be
infected! If used correctly, Whonix can provide partial protection against
passive surveillance programs, it all depends on whether Tor can provide
adequate protection or not, which is not clear at this time.</p>
</li>
<li>
<p>You shouldn’t use a VPN with Whonix and it is obvious that you’re using Tor
because connections are made to known Tor Relays, which are publicly listed
and identifiable.</p>
</li>
</ul>
<blockquote>
<p>⚠️It is impossible to Hide Tor use from the internet service provider (ISP).
It has been concluded this goal is difficult beyond practicality.
–<a href="https://www.whonix.org/wiki/Hide_Tor_from_your_Internet_Service_Provider">Whonix Hide Tor from your ISP</a></p>
</blockquote>
<ul>
<li>
<p>Millions of people use Tor daily for wholly legitimate reasons, particularly
to assert their privacy rights when faced with countless corporate /
government network observers and censors.</p>
</li>
<li>
<p>True anonymity is very difficult to successfully pull off and not something
that you can maintain for a long time.</p>
<ul>
<li><a href="https://www.whonix.org/wiki/Tips_on_Remaining_Anonymous">Whonix Tips for remaining Anonymous</a></li>
</ul>
</li>
</ul>
<h2>🔑 Key Terms</h2>
<p>Whonix is an operating system based on Debian base (Kicksecure Hardened) and the
Tor network, which is designed for maximum anonymity and security. Whonix
consists of two Debian based VMs, the <code>Whonix-Gateway</code> and <code>Whonix-Workstation</code>.</p>
<p>In this case NixOS is the <strong>Host Operating System</strong>, NixOS runs the KVM kernel
module, libvirtd service, and QEMU virtualization service which together enable
hosting VMs. It is recommended to harden the host before moving on.</p>
<p><strong>Guests</strong> are the virtualized operating systems running inside the host’s
virtual machines. In this case the Whonix VMs are the <strong>Guest Machines</strong>.</p>
<p><code>Whonix-Gateway</code> the first of 2 VMs runs Tor processes and forces all traffic
through the Tor network using iptables.</p>
<p><code>Whonix-Workstation</code> the second VM, is responsible for running user applications
such as the Tor Browser. The Whonix-Workstation is isolated from both the
Whonix-Gateway and the Host OS, if an app misbehaves, it is contained within the
isolated Whonix-Workstation. It is largely unaware of sensitive info and won’t
leak unless an advanced adversary is able to break out of the VM.</p>
<p>The primary goal of Whonix is to be safer than Tor alone and that no one can
find out the user’s IP, location, or de-anonymize the user. It offers full
spectrum anti-tracking protection that is much safer than VPNs. Whonix provides
this through security by isolation, no app is trusted.</p>
<p><code>Whonix Concept</code>: Whonix is an Isolating Proxy with an additional Transparent
Proxy, which can be optionally disabled. –Whonix Docs</p>
<p>Since Whonix is based on Kicksecure which is based on Debian stable, you can
typically look up solutions in a Kicksecure, Debian, or Ubuntu forum.</p>
<ul>
<li>The Whonix Team recommends KVM over VirtualBox for a number of
reasons:<a href="https://www.whonix.org/wiki/KVM#Why_Use_KVM_Over_VirtualBox?">Why choose KVM over VirtualBox</a></li>
</ul>
<p>If you really want to use VirtualBox, I got it working off of this config:</p>
<p>VirtualBox = Type 2 hypervisor</p>
<details>
<summary> ✔️ Click to Expand VirtualBox Example </summary>
<p>Change <code>your-user</code> to your username</p>
<pre><code class="language-nix"># vbox.nix
{
config,
lib,
...
}: let
cfg = config.custom.virtualbox;
in {
options.custom.virtualbox = {
enable = lib.mkEnableOption "Enable VirtualBox";
};
config = lib.mkIf cfg.enable {
virtualisation.virtualbox.host = {
enable = false;
# enableExtensionPack = true;
};
user.user.your-user.extraGroups = ["vboxusers"];
boot.kernelModules =
if config.hardware.cpu.amd.updateMicrocode
then ["kvm-amd"]
else ["kvm-intel"];
};
}
</code></pre>
<p>Enable it with <code>custom.virtualbox.enable = true;</code>.</p>
<ul>
<li><a href="https://www.whonix.org/wiki/VirtualBox">Whonix VBox Download</a></li>
</ul>
<p>After rebuilding with virtualbox enabled and downloading the virtualbox whonix,
open VirtualBox and import the Whonix file.</p>
<p>Fix the error:: VirtualBox can’t enable the AMD-V extension. Please disable the
KVM kernel extension:</p>
<p>If both of these are active, they compete with each other:</p>
<pre><code class="language-bash">sudo lsmod | grep -E 'kvm|vbox'
</code></pre>
<p>Check the currently in use modules:</p>
<pre><code class="language-bash">modprobe -r kvm
</code></pre>
<p>Disable kvm and kvm_amd:</p>
<pre><code class="language-bash">sudo rmmod kvm_amd
sudo rmmod kvm
# To re-enable them when necessary
# sudo modprobe kvm
# sudo modprobe kvm_amd
</code></pre>
<ul>
<li><a href="https://atetux.com/quick-fix-virtualbox-cant-enable-the-amd-v-extension">Quick fix</a></li>
</ul>
<p>There is an opposite viewpoint,
<a href="https://www.whonix.org/wiki/Dev/VirtualBox#Why_use_VirtualBox_over_KVM?">Why choose VirtualBox over KVM</a></p>
</details>
<h2>Whonix-Gateway</h2>
<p>The whonix-gateway is software designed to run Tor.</p>
<p>The Gateway acts as a firewall and is what is routing all your traffic through
Tor.</p>
<p>You will spend minimal time in the Gateway, it’s mainly used for Tor
configuration which is reserved for advanced users.</p>
<h3>Whonix-Workstation</h3>
<p>All user applications should only be launched from Whonix-Workstation to ensure
they utilize the Tor network. (Never launch the Tor browser or any other user
app from Whonix-Gateway.)</p>
<p>Leaky applications can’t breakout of the Workstation, all network connections
are forced to go through the Whonix-Gateway where they are torrified and routed
to the internet.</p>
<h2>Whonix KVM (Kernel Virtual Machine) on NixOS</h2>
<p><strong>KVM</strong> (Kernel-based Virtual Machine) is a Linux kernel module that provides
hardware-assisted virtualization.</p>
<p>It allows the Linux kernel to act as a hypervisor, enabling virtual machines
(VMs) to run with near-native speeds by using CPU virtualization extensions
(Intel VT-x or AMD-V).</p>
<p>KVM itself doesn’t handle the entire VM lifecycle; it provides the core
virtualization infrastructure.</p>
<p><strong>QEMU</strong> (Quick Emulator) is an open-source user-space program that emulates
hardware for virtual machines.</p>
<p>When combined with KVM, QEMU uses hardware acceleration to run VMs much faster
by offloading CPU virtualization to KVM.</p>
<p>So, QEMU provides the device emulation and VM management interface, while KVM
provides the fast virtualization engine within the kernel.</p>
<p><strong>Install Qemu-KVM</strong>:</p>
<pre><code class="language-nix">{
config,
pkgs,
...
}: {
## QEMU-KVM
environment.systemPackages = with pkgs; [
qemu
# Optional
virt-viewer
];
# Virt-Manager GUI
programs.virt-manager.enable = true;
virtualisation = {
# libvirtd daemon
libvirtd = {
enable = true;
qemu = {
# enables a TPM emulator
swtpm.enable = true;
};
};
# allow USB device to be forwarded
spiceUSBRedirection.enable = true;
};
# Spice protocol improves VM display and input responsiveness
services.spice-vdagentd.enable = true;
}
</code></pre>
<hr />
<p>The <strong>libvirtd</strong> is the primary daemon (service) in the libvirt virtualization
management system. It runs on your host machine and acts as the core management
component for virtual machines (VMs).</p>
<p>Add <code>libvirtd</code> & <code>kvm</code> to your users <code>extraGroups</code>:</p>
<pre><code class="language-nix">users.users = {
your-user = {
extraGroups = [
"libvirtd"
"kvm"
];
};
};
</code></pre>
<p>Restart <code>libvirtd</code>:</p>
<pre><code class="language-bash">sudo systemctl restart libvirtd
</code></pre>
<hr />
<h2>Network Start</h2>
<p>Ensure KVM’s / QEMU’s default network is enabled and has started:</p>
<pre><code class="language-bash">sudo virsh -c qemu:///system net-autostart default
</code></pre>
<pre><code class="language-bash">sudo virsh -c qemu:///system net-start default
</code></pre>
<hr />
<h3>Download Whonix (KVM) (stable)</h3>
<ol>
<li>
<p><a href="https://www.whonix.org/download/libvirt/17.4.4.6/Whonix-Xfce-17.4.4.6.Intel_AMD64.qcow2.libvirt.xz">Whonix (KVM) (stable) Download</a></p>
</li>
<li>
<p>Go to <a href="https://www.whonix.org/wiki/KVM">whoniix.org</a> to verify the signature.
Download the <code>OpenPGP Signature</code>, and the <code>Download Whonix OpenPGP Key</code>. Your
Downloads directory will look like this:</p>
</li>
</ol>
<pre><code class="language-bash">~/Downloads ls
╭───┬───────────────────────────────────────────────────────┬──────┬─────────┬───────────────╮
│ # │ name │ type │ size │ modified │
├───┼───────────────────────────────────────────────────────┼──────┼─────────┼───────────────┤
│ 0 │ Whonix-Xfce-17.4.4.6.Intel_AMD64.qcow2.libvirt.xz │ file │ 3.3 GB │ 2 minutes ago │
│ 1 │ Whonix-Xfce-17.4.4.6.Intel_AMD64.qcow2.libvirt.xz.asc │ file │ 1.0 kB │ a minute ago │
│ 2 │ derivative.asc │ file │ 77.3 kB │ 3 minutes ago │
╰───┴───────────────────────────────────────────────────────┴──────┴─────────┴───────────────╯
</code></pre>
<p>Import <code>derivative.asc</code>:</p>
<pre><code class="language-bash">gpg --import derivative.asc
</code></pre>
<p>Verify the Public Key:</p>
<pre><code class="language-bash">gpg --verify Whonix-Xfce-17.4.4.6.Intel_AMD64.qcow2.libvirt.xz.asc Whonix-Xfce-17.4.4.6.Intel_AMD64.qcow2.libvirt.xz
gpg: Signature made Sun 10 Aug 2025 09:04:13 AM EDT
gpg: using RSA key 6E979B28A6F37C43BE30AFA1CB8D50BB77BB3C48
gpg: Good signature from "Patrick Schleizer <adrelanos@kicksecure.com>" [unknown]
gpg: aka "Patrick Schleizer <adrelanos@riseup.net>" [unknown]
gpg: aka "Patrick Schleizer <adrelanos@whonix.org>" [unknown]
gpg: WARNING: This key is not certified with a trusted signature!
gpg: There is no indication that the signature belongs to the owner.
Primary key fingerprint: 916B 8D99 C38E AF5E 8ADC 7A2A 8D66 066A 2EEA CCDA
Subkey fingerprint: 6E97 9B28 A6F3 7C43 BE30 AFA1 CB8D 50BB 77BB 3C48
~/Downloads 09/04/2025 11:53:10 AM
</code></pre>
<p>Now <code>gpg --list-keys</code> will show Patrick Schleizer’s Key.</p>
<p>It is good practice to sign your verified key and then push it to the public
keyserver to contribute to the web of trust but optional.</p>
<ol start="3">
<li><a href="https://www.whonix.org/wiki/KVM#Decompress">Decompress the Image</a> and follow
the rest of the Whonix KVM install instructions from there.</li>
</ol>
<p>Nixpkgs doesn’t have the <code>xz-utils</code> package but it does have the <code>xz</code> package.</p>
<p>Nixpkgs also has <code>nixpkgs.safe-rm</code> if you wanted to follow the suggestions from
Whonix.</p>
<pre><code class="language-bash">nix-shell -p xz safe-rm
</code></pre>
<pre><code class="language-bash">tar -xvf Whonix*.libvirt.xz
</code></pre>
<hr />
<h3>Import the Whonix VM Templates</h3>
<p>The following commands come directly from the
<a href="https://www.whonix.org/wiki/KVM#Importing_Whonix_VM_Templates">Whonix KVM Docs Importing Whonix VM Templates</a></p>
<ol>
<li>Add the virtual networks. This step only needs to be done once and not with
every upgrade.</li>
</ol>
<pre><code class="language-bash">sudo virsh -c qemu:///system net-define Whonix_external*.xml
</code></pre>
<pre><code class="language-bash">sudo virsh -c qemu:///system net-define Whonix_internal*.xml
</code></pre>
<ol start="2">
<li>Activate the virtual networks:</li>
</ol>
<pre><code class="language-bash">sudo virsh -c qemu:///system net-autostart Whonix-External
</code></pre>
<pre><code class="language-bash">sudo virsh -c qemu:///system net-start Whonix-External
</code></pre>
<pre><code class="language-bash">sudo virsh -c qemu:///system net-autostart Whonix-Internal
</code></pre>
<pre><code class="language-bash">sudo virsh -c qemu:///system net-start Whonix-Internal
</code></pre>
<ol start="3">
<li>Import the Whonix Gateway and Workstation images:</li>
</ol>
<pre><code class="language-bash">sudo virsh -c qemu:///system define Whonix-Gateway*.xml
</code></pre>
<pre><code class="language-bash">sudo virsh -c qemu:///system define Whonix-Workstation*.xml
</code></pre>
<p>After the above steps, either copy or move the <code>qcow2</code> images to
<code>/var/lib/libvirt/images</code>:</p>
<blockquote>
<p>❗ It’s recommended to move the files into place, if you want to copy them you
need to use a special command FYI.</p>
</blockquote>
<pre><code class="language-bash">sudo mkdir -p /var/lib/libvirt/images
</code></pre>
<pre><code class="language-bash">sudo mv Whonix-Gateway*.qcow2 /var/lib/libvirt/images/Whonix-Gateway.qcow2
</code></pre>
<pre><code class="language-bash">sudo mv Whonix-Workstation*.qcow2 /var/lib/libvirt/images/Whonix-Workstation.qcow2
</code></pre>
<h3>Cleanup</h3>
<pre><code class="language-bash">safe-rm Whonix*
</code></pre>
<pre><code class="language-bash">safe-rm -r WHONIX*
</code></pre>
<h3>Launch virt-manager and start the VMs</h3>
<pre><code class="language-bash">virt-manager
</code></pre>
<p>From here it will take a bit to load both VMs, you can click on one and go to
<code>Edit</code>, <code>Virtual Machine Details</code> and from there you have some options to give
the VM more CPUs and memory.</p>
<p>Considering that the Whonix-Workstation is where all of the user applications
will be opened, it makes sense to give it more CPUs and memory.</p>
<p>I’ve seen recommendations for a minimum of 4G of RAM for the Workstation and 2GB
for the Gateway.</p>
<ul>
<li>
<p>Increase vCPU count for better performance</p>
</li>
<li>
<p>Enable XML editing in settings</p>
</li>
<li>
<p>Enable copy pasting by adding <code><clipboard copypaste="yes"/></code></p>
</li>
</ul>
<h2>Start Whonix-Gateway</h2>
<p><img src="https://saylesss88.github.io/../images/swappy-20250901-101351.cleaned.png" alt="Whonix Old Logo" /></p>
<p>Always start the Whonix-Gateway first.</p>
<p>Click on Whonix-Gateway, press Play, and choose the default Persistent VM.</p>
<p>To view the gateway press <code>Open</code>.</p>
<p>You can use the “System Maintenance Panel” to <code>Check for Updates</code> and then
<code>Install Updates</code>. This can also be used for user and password creation, the
default user is <code>user</code> with a passwordless login.</p>
<p>Change the password manually:</p>
<pre><code class="language-bash">sudo passwd
changeme
</code></pre>
<p>Change the passwords and disable auto-login.</p>
<p>Run a systemcheck if it wasn’t run automatically. Click the Xfce Logo and go to
<code>System</code>, <code>System Check</code>.</p>
<ul>
<li><a href="https://www.whonix.org/wiki/Common_CLI_Commands">Whonix Common CLI Commands</a></li>
</ul>
<h2>Whonix-Workstation</h2>
<p>Whonix-Workstation is another VM, designed to provide users with a secure and
anonymous environment for running applications and performing online tasks.</p>
<p>When you first launch <code>Whonix-Workstation</code>, choose the second option down or
reboot, and then choose “Persistent Mode Sysmaint Session”. From there, you can
go through the same steps as you did for the Gateway.</p>
<p>With the workstation, a security feature disables <code>sudo</code> for the default user.
Instead of the <code>user</code> account, a separate <code>sysmaint</code> (system maintenance)
account is used for administrative tasks that require root privileges, such as
updates and package installations.</p>
<ul>
<li>Change all user passwords and disable auto-login</li>
</ul>
<p>After you get your system updated and upgraded, you’ll want to reboot the
Workstation and start it in the first Persistent mode available rather than the
<code>sysmaint</code> mode.</p>
<p>Once Workstation is running and both VMs are updated and upgraded, check that
your IP address is a Tor IP:</p>
<pre><code class="language-bash">curl ip.me
#
curl ip.me
</code></pre>
<p>Each consecutive time that you run <code>curl ip.me</code>, Tor establishes a new circuit
and you will get a different IP returned each time for as many Tor nodes are
available. Not that you would want to but it’s cool functionality giving us a
visual of the new circuit.</p>
<p>Start Tor and check what you are fingerprinted as by typing <code>deviceinfo.me</code> into
the URL.</p>
<h4>Launching Tor Browser</h4>
<p>Click the Xfce logo and choose Tor Browser. On the first launch, you will need
to update Tor by clicking in the top right corner.</p>
<p>Or you can open the terminal and type:</p>
<pre><code class="language-bash">update-torbrowser
</code></pre>
<ul>
<li>Every time you run the above command, the old browser will be killed, along
with your old browser profile, including bookmarks and passwords. If the
update suggests a downgrade from your current version don’t do it, it is
likely a downgrade attack.</li>
</ul>
<p>Make sure you don’t forget to go to the Settings, Privacy and Security, and set
the <code>Security Level</code> to <code>Safest</code> to disable JavaScript and more before exploring
the dark web.</p>
<p>Visit <code>https://check.torproject.org</code>, you should see “Congratulations. This
browser is configured to use Tor.”</p>
<p>If you need a place to start, check out <code>https://tor.taxi</code> by plugging that into
the URL. Always include the <code>https</code> yourself!</p>
<blockquote>
<p>❗ NOTE: Use HTTPS and TLS wherever possible, since Tor only encrypts traffic
as it travels through the network of three nodes. Traffic at Exit nodes is
vulnerable if unencrypted, because when it reaches the Exit node it is plain
text. Prefer the use of <code>.onion</code> services because they form a tunnel that is
encrypted end-to-end, using a random rendezvous point within the Tor network;
HTTPS isn’t required within Onion services. Prefer the use of <code>.onion</code>
services because they form a tunnel that is encrypted end-to-end, using a
random rendezvous point within the Tor network; HTTPS isn’t required within
Onion services.
–<a href="https://www.whonix.org/wiki/Tor_Myths_and_Misconceptions#All_my_traffic_is_encrypted_by_default">All my traffic is encrypted by default?</a></p>
</blockquote>
<h2>Live Mode</h2>
<p>To get Whonix to perform more similarly to Tails you could run Whonix in Live
Mode. Live Mode is a privacy-focused mode where nothing is saved at shutdown,
making it great for handling sensitive data.</p>
<ul>
<li><a href="https://www.kicksecure.com/wiki/Live_Mode">Live Mode</a></li>
</ul>
<p>Same process, reboot the Workstation and Choose
<code>LIVE Mode | USER Session | disposable use</code></p>
<ul>
<li><a href="https://www.kicksecure.com/wiki/Anti-Forensics_Precautions">Anti Forensics Precautions</a></li>
</ul>
<h2>Download and Verify Kicksecure KVM</h2>
<ul>
<li><a href="https://www.kicksecure.com/wiki/KVM">Kicksecure KVM wiki</a></li>
</ul>
<ol>
<li>
<p><a href="https://www.kicksecure.com/download/libvirt/17.4.4.6/Kicksecure-Xfce-17.4.4.6.Intel_AMD64.qcow2.libvirt.xz">Download Kicksecure Xfce (KVM) (stable) (FREE!)</a></p>
</li>
<li>
<p><a href="https://www.kicksecure.com/download/libvirt/17.4.4.6/Kicksecure-Xfce-17.4.4.6.Intel_AMD64.qcow2.libvirt.xz.asc">Download OpenPGP Signature</a></p>
</li>
<li>
<p><a href="https://www.kicksecure.com/keys/derivative.asc">Download Kicksecure OpenPGP Key</a></p>
</li>
<li>
<p>Import the <code>derivative.asc</code> file:</p>
</li>
</ol>
<pre><code class="language-bash">gpg --import derivative.asc
</code></pre>
<ol start="5">
<li>Make sure both files are done downloading and run the following to verify,
your file names might be slightly different:</li>
</ol>
<pre><code class="language-bash">gpg --verify Kicksecure-Xfce-17.4.4.6.Intel_AMD64.qcow2.libvirt.xz.asc Kicksecure-Xfce-17.4.4.6.Intel_AMD64.qcow2.libvirt.xz
gpg: Signature made Sun 10 Aug 2025 07:32:52 AM EDT
gpg: using RSA key 6E979B28A6F37C43BE30AFA1CB8D50BB77BB3C48
gpg: Good signature from "Patrick Schleizer <adrelanos@kicksecure.com>" [unknown]
gpg: aka "Patrick Schleizer <adrelanos@riseup.net>" [unknown]
gpg: aka "Patrick Schleizer <adrelanos@whonix.org>" [unknown]
gpg: WARNING: This key is not certified with a trusted signature!
gpg: There is no indication that the signature belongs to the owner.
Primary key fingerprint: 916B 8D99 C38E AF5E 8ADC 7A2A 8D66 066A 2EEA CCDA
Subkey fingerprint: 6E97 9B28 A6F3 7C43 BE30 AFA1 CB8D 50BB 77BB 3C48
</code></pre>
<ol start="6">
<li><strong>Decompress</strong></li>
</ol>
<pre><code class="language-bash">tar -xvf Kicksecure*.libvirt.xz
</code></pre>
<p>Don’t use <code>unxz</code>!</p>
<h3>Resources</h3>
<ul>
<li>
<p><a href="https://www.whonix.org/wiki/Documentation">Whonix Docs</a></p>
</li>
<li>
<p><a href="https://www.whonix.org/wiki/About">Whonix Overview</a></p>
</li>
<li>
<p><a href="https://www.whonix.org/wiki/Dev/Technical_Introduction">Whonix Technical Intro</a></p>
</li>
<li>
<p><a href="https://www.kicksecure.com/wiki/Computer_Security_Introduction">Kicksecure Computer Security Intro</a></p>
</li>
<li>
<p><a href="https://www.kicksecure.com/wiki/Computer_Security_Introduction#Advanced_Security_Guide">Kicksecure Advanced Security Guide</a></p>
</li>
</ul>
<p>k
<a href="https://www.kicksecure.com/wiki/System_Hardening_Checklist">System Hardening Checklist</a></p>
Functions and NixOS Moduleshttps://saylesss88.github.io/functions/functions_and_modules_2.2.html2025-11-30T00:00:00+00:00saylesss87@proton.me (saylesss88)<h1>Functions and NixOS Modules</h1>
<details>
<summary> ✔️ Click to Expand Table of Contents</summary>
<!-- toc -->
</details>
<p>When you start exploring NixOS configurations or tools like Home Manager, you’ll
encounter a concept called Nix Modules. Modules are also functions, but they
behave differently regarding their arguments, which can be a source of
confusion.</p>
<p><strong>What are NixOS Modules</strong>?</p>
<p>Nix Modules are a powerful system built on top of basic Nix functions, primarily
used for declarative system configurations (like NixOS, Home Manager, NixOps,
etc.). They allow you to define parts of your system configuration in separate
files that are then composed together.</p>
<p>Each module is typically a Nix function that returns an attribute set with
specific keys like <code>options</code>, <code>config</code>, and <code>imports</code>.</p>
<p><strong>Automatic Arguments in Modules</strong></p>
<p>Unlike the functions we’ve been writing, Nix’s module system automatically
passes a standard set of arguments to every module function it evaluates. You
don’t explicitly pass these arguments when you <code>import</code> a module file; the
module system handles it for you.</p>
<p>The most common automatic arguments you’ll see are:</p>
<ul>
<li>
<p><code>config</code>: The aggregated configuration options of all modules combined. This
is what you use to read other configuration values.</p>
</li>
<li>
<p><code>options</code>: The definitions of all available configuration options across all
modules.</p>
</li>
<li>
<p><code>pkgs</code>: The standard Nixpkgs set, equivalent to <code>import <nixpkgs> {}</code>. This is
incredibly convenient as you don’t need to import it in every module.</p>
</li>
<li>
<p><code>lib</code>: The Nixpkgs utility library (<code>pkgs.lib</code>), providing helper functions
for common tasks.</p>
</li>
<li>
<p><code>specialArgs</code>: An attribute set of extra arguments to be passed to the module
functions.</p>
</li>
</ul>
<p>A typical module might start like this:</p>
<pre><code class="language-nix"># Example NixOS module
{ config, pkgs, lib, ... }: # These arguments are passed automatically by the module system
{
# ... module options and configuration
environment.systemPackages = [ pkgs.firefox pkgs.git ];
services.nginx.enable = true;
# ...
}
</code></pre>
<p>In the above module, the only required argument is <code>pkgs</code> because we explicitly
use it in the module (i.e. <code>pkgs.firefox</code>). Editors have pretty good support for
letting you know if you’re missing arguments or have unnecessary ones. <code>config</code>,
and <code>lib</code> and would be required if we were setting any options in this module.</p>
<p>This automatic passing of arguments is a core feature of the module system that
simplifies writing configurations, as you always have access to <code>pkgs</code>, <code>lib</code>,
and the evolving <code>config</code> and <code>options</code> without boilerplate.</p>
<h4><code>specialArgs</code>: Passing Custom Arguments to Modules</h4>
<p>While the module system passes a standard set of arguments automatically, what
if you need to pass additional, custom data to your modules that isn’t part of
the standard <code>config</code>, <code>pkgs</code>, <code>lib</code>, or <code>options</code>? This is where <code>specialArgs</code>
comes in.</p>
<p><code>specialArgs</code> is an attribute you can pass to the <code>import</code> function when you
load a module (or a set of modules). It’s typically used to provide data that
your modules need but isn’t something Nixpkgs would normally manage.</p>
<p>For example, in a <code>configuration.nix</code>:</p>
<pre><code class="language-nix"># From your configuration.nix
{ config, pkgs, lib, ... }: # Standard module arguments
let
myCustomValue = "helloWorld";
in
{
# ... imports all modules, including your custom ones
imports = [
./hardware-configuration.nix
./my-webserver-module.nix
];
# This is where specialArgs would be used (often in import statements)
# Example: passing a custom value to ALL modules:
# (in module context, this is more complex, but conceptually)
# let
# allModules = [ ./my-module.nix ];
# in
# lib.nixosSystem {
# modules = allModules;
# specialArgs = {
# username = "johndoe";
# mySecretKey = "/run/keys/ssh_key";
# };
# # ...
# };
}
</code></pre>
<p>And then, inside <code>my-webserver-module.nix</code>:</p>
<pre><code class="language-nix"># my-webserver-module.nix
{ config, pkgs, lib, username, mySecretKey, ... }: # username and mySecretKey come from specialArgs
{
# ... use username and mySecretKey in your module
users.users.${username} = {
isNormalUser = true;
extraGroups = [ "wheel" "networkmanager" ];
# ...
};
# ...
}
</code></pre>
<p>Any argument listed in a module’s function signature that is not one of the
standard <code>config</code>, <code>pkgs</code>, <code>lib</code>, <code>options</code> (or <code>pkgs.callPackage</code>, etc., which
are often implicit through <code>pkgs</code>) must be provided via <code>specialArgs</code> at the
point where the modules are composed.</p>
<p>Any values listed in a module that aren’t automatically passed via Nixpkgs must
be explicitly provided through <code>specialArgs</code>.</p>
<h3><code>specialArgs</code> and <code>extraSpecialArgs</code> with Flakes</h3>
<p>NixOS modules use <code>specialArgs</code> and Home-Manager uses <code>extraSpecialArgs</code> to
allow you to pass extra arguments.</p>
<p>Or with Flakes it would look like this:</p>
<pre><code class="language-nix">{
description = "My Flake";
inputs = {
nixpkgs.url = "github:nixos/nixpkgs/nixos-unstable";
home-manager.url = "github:nix-community/home-manager";
home-manager.inputs.nixpkgs.follows = "nixpkgs";
};
outputs = { self, nixpkgs, home-manager, ... }:
let
lib = nixpkgs.lib;
pkgs = nixpkgs.legacyPackages.${"x86_64-linux"};
system = "x86_64-linux";
host = "magic";
username = "jr";
userVars = {
timezone = "America/New_York";
locale = "en_US.UTF-8";
gitUsername = "TSawyer87";
dotfilesDir = "~/.dotfiles";
wm = "hyprland";
browser = "firefox";
term = "ghostty";
editor = "hx";
keyboardLayout = "us";
};
in {
nixosConfigurations = {
YOURHOSTNAME = lib.nixosSystem {
system = "x86_64-linux";
modules = [ ./configuration.nix ];
specialArgs = {
inherit userVars; # == userVars = userVars;
inherit host;
inherit username;
};
};
};
homeConfigurations = {
USERNAME = home-manager.lib.homeManagerConfiguration {
inherit pkgs;
modules = [ ./home.nix ];
extraSpecialArgs = {
inherit userVars;
inherit host;
inherit username;
# or it can be written like this:
# inherit userVars host username;
};
};
};
};
}
</code></pre>
<p>Now if I want to use any of these arguments in modules I can by any module file
referenced by my configuration.</p>
<p>For example, the following is a <code>git.nix</code> module that uses the variables from
the flake passed from <code>extraSpecialArgs</code> in this case because it’s a
home-manager module:</p>
<pre><code class="language-nix"># git.nix
{ userVars, ... }: {
programs = {
git = {
enable = true;
userName = userVars.gitUsername;
};
};
}
</code></pre>
<table><thead><tr><th style="text-align: left">Feature</th><th style="text-align: left">Regular Nix Function (e.g., <code>hello.nix</code>)</th><th style="text-align: left">Nix Module (e.g., <code>my-config-module.nix</code>)</th></tr></thead><tbody>
<tr><td style="text-align: left"><strong>Arguments</strong></td><td style="text-align: left"><strong>You must explicitly pass every single argument.</strong></td><td style="text-align: left"><strong>Automatically receives <code>config</code>, <code>pkgs</code>, <code>lib</code>, <code>options</code>, etc.</strong></td></tr>
<tr><td style="text-align: left"><strong>Custom Args</strong></td><td style="text-align: left">Passed directly in the function call.</td><td style="text-align: left">Passed via <code>specialArgs</code> when the modules are composed.</td></tr>
<tr><td style="text-align: left"><strong>Boilerplate</strong></td><td style="text-align: left">Often needs <code>pkgs = import <nixpkgs> {};</code> if not explicitly passed.</td><td style="text-align: left"><code>pkgs</code> and <code>lib</code> are always available automatically.</td></tr>
<tr><td style="text-align: left"><strong>Purpose</strong></td><td style="text-align: left">Defines a package, a utility, or a single value.</td><td style="text-align: left">Defines a reusable part of a declarative system configuration.</td></tr>
</tbody></table>
Githttps://saylesss88.github.io/vcs/git.html2025-11-30T00:00:00+00:00saylesss87@proton.me (saylesss88)<h1>Version Control with Git</h1>
<details>
<summary> ✔️ Click to Expand Table of Contents</summary>
<!-- toc -->
</details>
<!--  -->
<p>⚠️ <strong>Important</strong>: Never commit secrets (passwords, API keys, tokens, etc.) in
plain text to your Git repository. If you plan to publish your NixOS
configuration, always use a secrets management tool like sops-nix or agenix to
keep sensitive data safe. See the
<a href="https://saylesss88.github.io/installation/enc/sops-nix.html">Sops-Nix Guide</a>
for details.</p>
<p>It’s also important to understand that <strong>all files in the <code>/nix/store</code> are
world-readable by default</strong> This has important security implications for anyone
managing sensitive data on a NixOS system.</p>
<p>What Does “World-Readable” Mean?</p>
<ul>
<li>
<p>All files in /nix/store are readable by any user on the system.</p>
</li>
<li>
<p>This is by design, the nix store is intended to be shared, immutable store of
all packages and configuration files.</p>
</li>
<li>
<p>Permissions are typically set to <code>r-xr-xr-x</code>(read and execute for everyone)</p>
</li>
</ul>
<p><strong>Security Implications</strong></p>
<ul>
<li>
<p>Never store secrets or sensitive data in plane text in the Nix store.</p>
</li>
<li>
<p>If you include secrets directly in your configuration, they will end up in the
<code>/nix/store</code> and be accessible to any user or process on the system.</p>
</li>
<li>
<p>This applies to files, environment variables, and any data embedded in
derivations.</p>
</li>
</ul>
<p><strong>Best Practices</strong></p>
<ul>
<li>
<p>Always use a secrets management tool (like <code>sops-nix</code> or <code>agenix</code>) that
decrypts secrets at activation time and stores them outside the Nix store,
with restricted permissions.</p>
</li>
<li>
<p>Do not embed secrets directly in Nix expressions or configuration files that
will be build into the store.</p>
</li>
<li>
<p>Even hashed passwords can be vulnerable when stored in a public repository, be
conscious of what you store where.</p>
</li>
<li>
<p>If you’re unsure about what’s safe to share, start with a private repository.
This gives you time to learn about secrets management and review your
configuration before making anything public.</p>
</li>
</ul>
<p>First, I’ll briefly explain some of the limitations of NixOS Rollbacks and then
I’ll go into how Git compliments them.</p>
<h2>Limitations of NixOS Rollbacks</h2>
<p>NixOS is famous for its ability to roll back to previous system generations,
either from the boot menu or with commands like <code>nixos-rebuild --rollback</code>.</p>
<p>When you perform rollbacks in NixOS, whether from the boot menu or using
commands like <code>nixos-rebuild --rollback</code> only the contents and symlinks managed
by the Nix store are affected. The rollback works by switching which system
generation is active, atomically updating symlinks to point to the previous
version of all packages, <code>systemd</code> units and services stored in <code>/nix/store</code>.</p>
<p>However, it’s important to understand what these rollbacks actually do and what
they don’t do. What NixOS Rollbacks Cover</p>
<ul>
<li>
<p>System generations: When you rebuild your system, NixOS creates a new
“generation” that you can boot into or roll back to. This includes all
packages, services, and system configuration managed by Nix.</p>
</li>
<li>
<p>Quick recovery: If an upgrade breaks your system, you can easily select an
older generation at boot and get back to a working state</p>
</li>
</ul>
<p><strong>Key Limitations</strong>:</p>
<ul>
<li>
<p><strong>Configuration files are not reverted</strong>: Rolling back only changes which
system generation is active, it does not revert your actual configuration
files (like <code>configuration.nix</code> or your flake files)</p>
</li>
<li>
<p><strong>User data and service data are not rolled back</strong>: Only files managed by Nix
are affected. Databases, user files, and other persistent data remain
unchanged, which can cause problems if, for example, a service migrates its
database schema during an upgrade</p>
</li>
<li>
<p><strong>Manual changes persist</strong>: Any manual edits to configuration files or system
state outside of Nix are not reverted by a rollback</p>
</li>
</ul>
<h2>How Git Helps</h2>
<!--  -->
<ul>
<li>
<p>The <a href="https://docs.github.com/en/github-cli/github-cli/quickstart">gh-cli</a>,
simplifies quite a few things for working with GitHub from the command line.</p>
</li>
<li>
<p><strong>Tracks every configuration change</strong>: By version-controlling your NixOS
configs with Git, you can easily see what changed, when, and why.</p>
</li>
<li>
<p><strong>True config rollback</strong>: If a configuration change causes issues, you can use
<code>git checkout</code> or <code>git revert</code> to restore your config files to a previous good
state, then rebuild your system</p>
</li>
<li>
<p><strong>Safer experimentation</strong>: You can confidently try new settings or upgrades,
knowing you can roll back both your system state (with NixOS generations) and
your config files (with Git).</p>
</li>
<li>
<p><strong>Collaboration and backup</strong>: Git lets you share your setup, collaborate with
others, and restore your configuration if your machine is lost or damaged.</p>
</li>
</ul>
<p>In summary: NixOS rollbacks are powerful for system state, but they don’t manage
your configuration file history. Git fills this gap, giving you full control and
traceability over your NixOS configs making your system both robust and truly
reproducible. Version control is a fundamental tool for anyone working with
NixOS, whether you’re customizing your desktop, managing servers, or sharing
your configuration with others. Git is the most popular version control system
and is used by the NixOS community to track, share, and back up system
configurations.</p>
<p><strong>Why use Git with NixOS?</strong></p>
<ul>
<li>
<p><strong>Track every change</strong>: Git lets you record every modification to your
configuration files, so you can always see what changed, when, and why.</p>
</li>
<li>
<p><strong>Experiment safely</strong>: Try new settings or packages without fear—if something
breaks, you can easily roll back to a previous working state.</p>
</li>
<li>
<p><strong>Sync across machines</strong>: With Git, you can keep your NixOS setups in sync
between your laptop, desktop, or servers, and collaborate with others.</p>
</li>
<li>
<p><strong>Disaster recovery</strong>: Accidentally delete your config? With Git, you can
restore it from your repository in minutes.</p>
</li>
</ul>
<p>Installing Git on NixOS</p>
<p>You can install Git by adding it to your system packages in your
configuration.nix or via Home Manager:</p>
<h2>Git Tips</h2>
<!--  -->
<p>If you develop good git practices on your own repositories it will make it
easier to contribute with others as well as get help from others.</p>
<h2>Atomic Commits</h2>
<p><strong>Atomic commits</strong> are a best practice in Git where each commit represents a
single, focused, and complete change to the codebase. The main characteristics
of atomic commits are:</p>
<ul>
<li>
<p><strong>One purpose</strong>: Each commit should address only one logical change or task.</p>
</li>
<li>
<p><strong>Complete</strong>: The commit should leave the codebase in a working state.</p>
</li>
<li>
<p><strong>Descriptive</strong>: The commit message should be able to clearly summarize the
change in a single sentence.</p>
</li>
</ul>
<p><strong>Why Atomic Commits Matter</strong></p>
<ul>
<li>
<p><strong>Easier debugging</strong>: You can use tools like <code>git bisect</code> to quickly find
which commit introduced a bug, since each commit is isolated.</p>
</li>
<li>
<p><strong>Simpler reverts</strong>: You can revert without affecting unrelated changes.</p>
</li>
<li>
<p><strong>Better collaboration</strong>: Code reviews and merges are more manageable when
changes are small and focused.</p>
</li>
</ul>
<p>When you lump together a bunch of changes into a single commit it can lead to
quite a few undesirable consequences. They make it harder to track down bugs,
it’s more difficult to revert undesired changes without reverting desired ones,
make larger tickets harder to manage.</p>
<p><strong>Every time a logical component is completed, commit it</strong>. Smaller commits make
it easier for other devs and yourself to understand the changes and roll them
back if necessary. This also makes it easier to share your code with others to
get help when needed and makes merge conflicts less frequent and complex.</p>
<p><strong>Finish the component, then commit it</strong>: There’s really no reason to commit
unfinished work, use <code>git stash</code> for unfinished work and <code>git commit</code> for when
the logical component is complete. Use common sense and break complex components
into logical chunks that can be finished quickly to allow yourself to commit
more often.</p>
<p><strong>Write Good Commit Messages</strong>: Begin with a summary of your changes, add a line
of whitespace between the summary and the body of your message. Make it clear
why this change was necessary. Use consistent language with generated messages
from commands like <code>git merge</code> which is imperative and present tense
(<code><<change>></code>, not <code><<changed>></code> or <code><<changes>></code>).</p>
<h3>Tips for Keeping Commits Atomic with a Linear History</h3>
<p>Squashing limits the benefits of atomic commits as it combines them all into a
single commit as if you didn’t take the time to write them all out atomically.</p>
<p>🧠 Why Rebasing Wins for Linear History</p>
<ul>
<li>
<p>No Merge Bubbles: Rebasing avoids those extra merge commits that clutter
<code>git log --graph</code>. You get a clean, readable timeline.</p>
</li>
<li>
<p>Atomic Commit Integrity: Each commit stands alone and tells a story. Rebasing
preserves that narrative without diluting it with merge noise.</p>
</li>
<li>
<p>Better Blame & Bisect: Tools like git blame and git bisect work best when
history is linear and logical.</p>
</li>
<li>
<p>Time-Travel Simplicity: Cherry-picking or reverting is easier when commits
aren’t tangled in merge commits.</p>
</li>
</ul>
<p>By default, when you run <code>git pull</code> git merges the commits into your local repo.
To change this to a rebase you can set the following:</p>
<pre><code class="language-bash">git config --global pull.rebase true
git config --global rebase.autoStash true
git config --global fetch.prune true # auto delets remote-tracking branches that no longer exist
git config --global pull.ff only # blocks merge pulls
</code></pre>
<p>Note: With pull.ff only pulls will fail if they would have had to merge. This
could happen if your local branch has diverged from the remote (e.g., someone
pushed new commits and you also committed locally) <code>git pull</code> will throw an
error like:</p>
<pre><code class="language-bash">fatal: Not possible to fast-forward, aborting.
</code></pre>
<p><strong>How to fix it</strong></p>
<p>You basically do what Git won’t auto-do:</p>
<pre><code class="language-bash">git fetch origin
git rebase origin/main
</code></pre>
<p>This rewinds your local commits, applies remote commits, and replays yours on
top, keeping the history linear.</p>
<p>If you don’t care about your local changes and want to discard them you can use
the following command:</p>
<pre><code class="language-bash">git reset --hard origin/main
</code></pre>
<p>This just makes your branch identical to the remote, no rebase required. This
prevents rogue merge commits, preserving atomic commits and linear logs.</p>
<p>You could set an alias for this with:</p>
<pre><code class="language-bash">git config --global alias.grs '!git fetch origin && git rebase origin/main'
</code></pre>
<p>To check whether a setting is active or now you can use:</p>
<pre><code class="language-bash">git config --get rebase.autoStash
true
</code></pre>
<p>To set these options with home-manager:</p>
<pre><code class="language-nix"># ... snip ...
extraConfig = lib.mkOption {
type = lib.types.attrs;
default = {
commit.gpgsign = true;
gpg.format = "ssh";
user.signingkey = "/etc/ssh/ssh_host_ed25519_key.pub";
extraConfig = {
pull = {
rebase = true;
ff = "only";
};
};
rebase = {
autoStash = true; # Auto stashes and unstashes local changes during rebase
};
fetch = {
prune = true; # Automatically deletes remote-tracking branches that no longer exist
};
# ... snip ...
</code></pre>
<h2>Time Travel in Git</h2>
<details>
<summary> ✔️ Click to Expand Time Travel Section </summary>
<p><strong>View an old commit</strong>:</p>
<pre><code class="language-bash">git checkout <commit_hash>
</code></pre>
<p>This puts you in a “detached HEAD” state, letting you explore code as it was at
that commit. To return, checkout your branch again.</p>
<p><strong>Go back and keep history (revert)</strong>:</p>
<pre><code class="language-bash">git revert <commit_hash>
</code></pre>
<p><strong>Go back and rewrite history (reset)</strong>:</p>
<ul>
<li>Soft reset (keep changes staged):</li>
</ul>
<pre><code class="language-bash">git reset --soft <commit_hash>
</code></pre>
<ul>
<li>Mixed reset (keep changes in working directory):</li>
</ul>
<pre><code class="language-bash">git reset <commit_hash>
</code></pre>
<ul>
<li>Hard reset (discard all changes after the commit):</li>
</ul>
<pre><code class="language-bash">git reset --hard <commit_hash>
</code></pre>
<p>Use the above command with caution, it can delete commits from history.</p>
<ul>
<li>Relative time travel:</li>
</ul>
<pre><code class="language-bash">git reset --hard HEAD@{5.minutes.ago}
</code></pre>
<p>or</p>
<pre><code class="language-bash">git reset --hard HEAD@{yesterday}
</code></pre>
<p><strong>Create a branch from the past</strong>:</p>
<pre><code class="language-bash">git checkout -b <new-brach> <commit_hash>
</code></pre>
<p>This starts a new branch from any previous commit, preserving current changes.</p>
</details>
<p>Some repositories have guidelines, such as Nixpkgs:</p>
<details>
<summary> ✔️ Click to Expand Nixpkgs Commit Conventions </summary>
<p><strong>Commit conventions</strong></p>
<ul>
<li>
<p>Create a commit for each logical unit.</p>
</li>
<li>
<p>Check for unnecessary whitespace with <code>git diff --check</code> before committing.</p>
</li>
<li>
<p>If you have commits pkg-name: oh, forgot to insert whitespace: squash commits
in this case. Use <code>git rebase -i</code>. See Squashing Commits for additional
information.</p>
</li>
<li>
<p>For consistency, there should not be a period at the end of the commit
message’s summary line (the first line of the commit message).</p>
</li>
<li>
<p>When adding yourself as maintainer in the same pull request, make a separate
commit with the message maintainers: <code>add <handle></code>. Add the commit before
those making changes to the package or module. See Nixpkgs Maintainers for
details.</p>
<p>Make sure you read about any commit conventions specific to the area you’re
touching. See: Commit conventions for changes to <code>pkgs</code>. Commit conventions
for changes to <code>lib</code>. Commit conventions for changes to <code>nixos</code>. Commit
conventions for changes to <code>doc</code>, the Nixpkgs manual.</p>
</li>
</ul>
<p><strong>Writing good commit messages</strong></p>
<p>In addition to writing properly formatted commit messages, it’s important to
include relevant information so other developers can later understand why a
change was made. While this information usually can be found by digging code,
mailing list/Discourse archives, pull request discussions or upstream changes,
it may require a lot of work.</p>
<p>Package version upgrades usually allow for simpler commit messages, including
attribute name, old and new version, as well as a reference to the relevant
release notes/changelog. Every once in a while a package upgrade requires more
extensive changes, and that subsequently warrants a more verbose message.</p>
<p>Pull requests should not be squash merged in order to keep complete commit
messages and GPG signatures intact and must not be when the change doesn’t make
sense as a single commit.</p>
</details>
<p>A <strong>Git workflow</strong> is a recipe or recommendation for how to use Git to
accomplish work in a consistent and productive manner. Having a defined workflow
lets you leverage Git effectively and consistently. This is especially important
when working on a team.</p>
<p><strong>Origin</strong> is the <em>default name</em> (alias) for the <strong>remote repository</strong> that your
<strong>local repository</strong> is connected to, usually the one you cloned from.</p>
<p><strong>Remote Repositories</strong> are versions of your project that are hosted on the
internet or network somewhere.</p>
<ul>
<li>
<p>When you run <code>git push origin main</code>, you’re telling Git to push your changes
to the remote repo called <code>origin</code>.</p>
</li>
<li>
<p>You can see which URL <code>origin</code> points to with <code>git remote -v</code>.</p>
</li>
<li>
<p>You can have multiple remotes (like <code>origin</code>, <code>upstream</code>, etc.) each pointing
to a different remote repo. Each of which is generally either read-only or
read/write for you. Collaborating involves managing these remotes and pushing
and pulling data to and from them when you need to share work.</p>
</li>
</ul>
<blockquote>
<p>❗ You can have a remote repo on your local machine. The word “remote” doesn’t
imply that the repository is somewhere else, only that it’s elsewhere.</p>
</blockquote>
<ul>
<li>The name <code>origin</code> is just a convention, it’s not special. It is automatically
set when you clone a repo.</li>
</ul>
<!-- 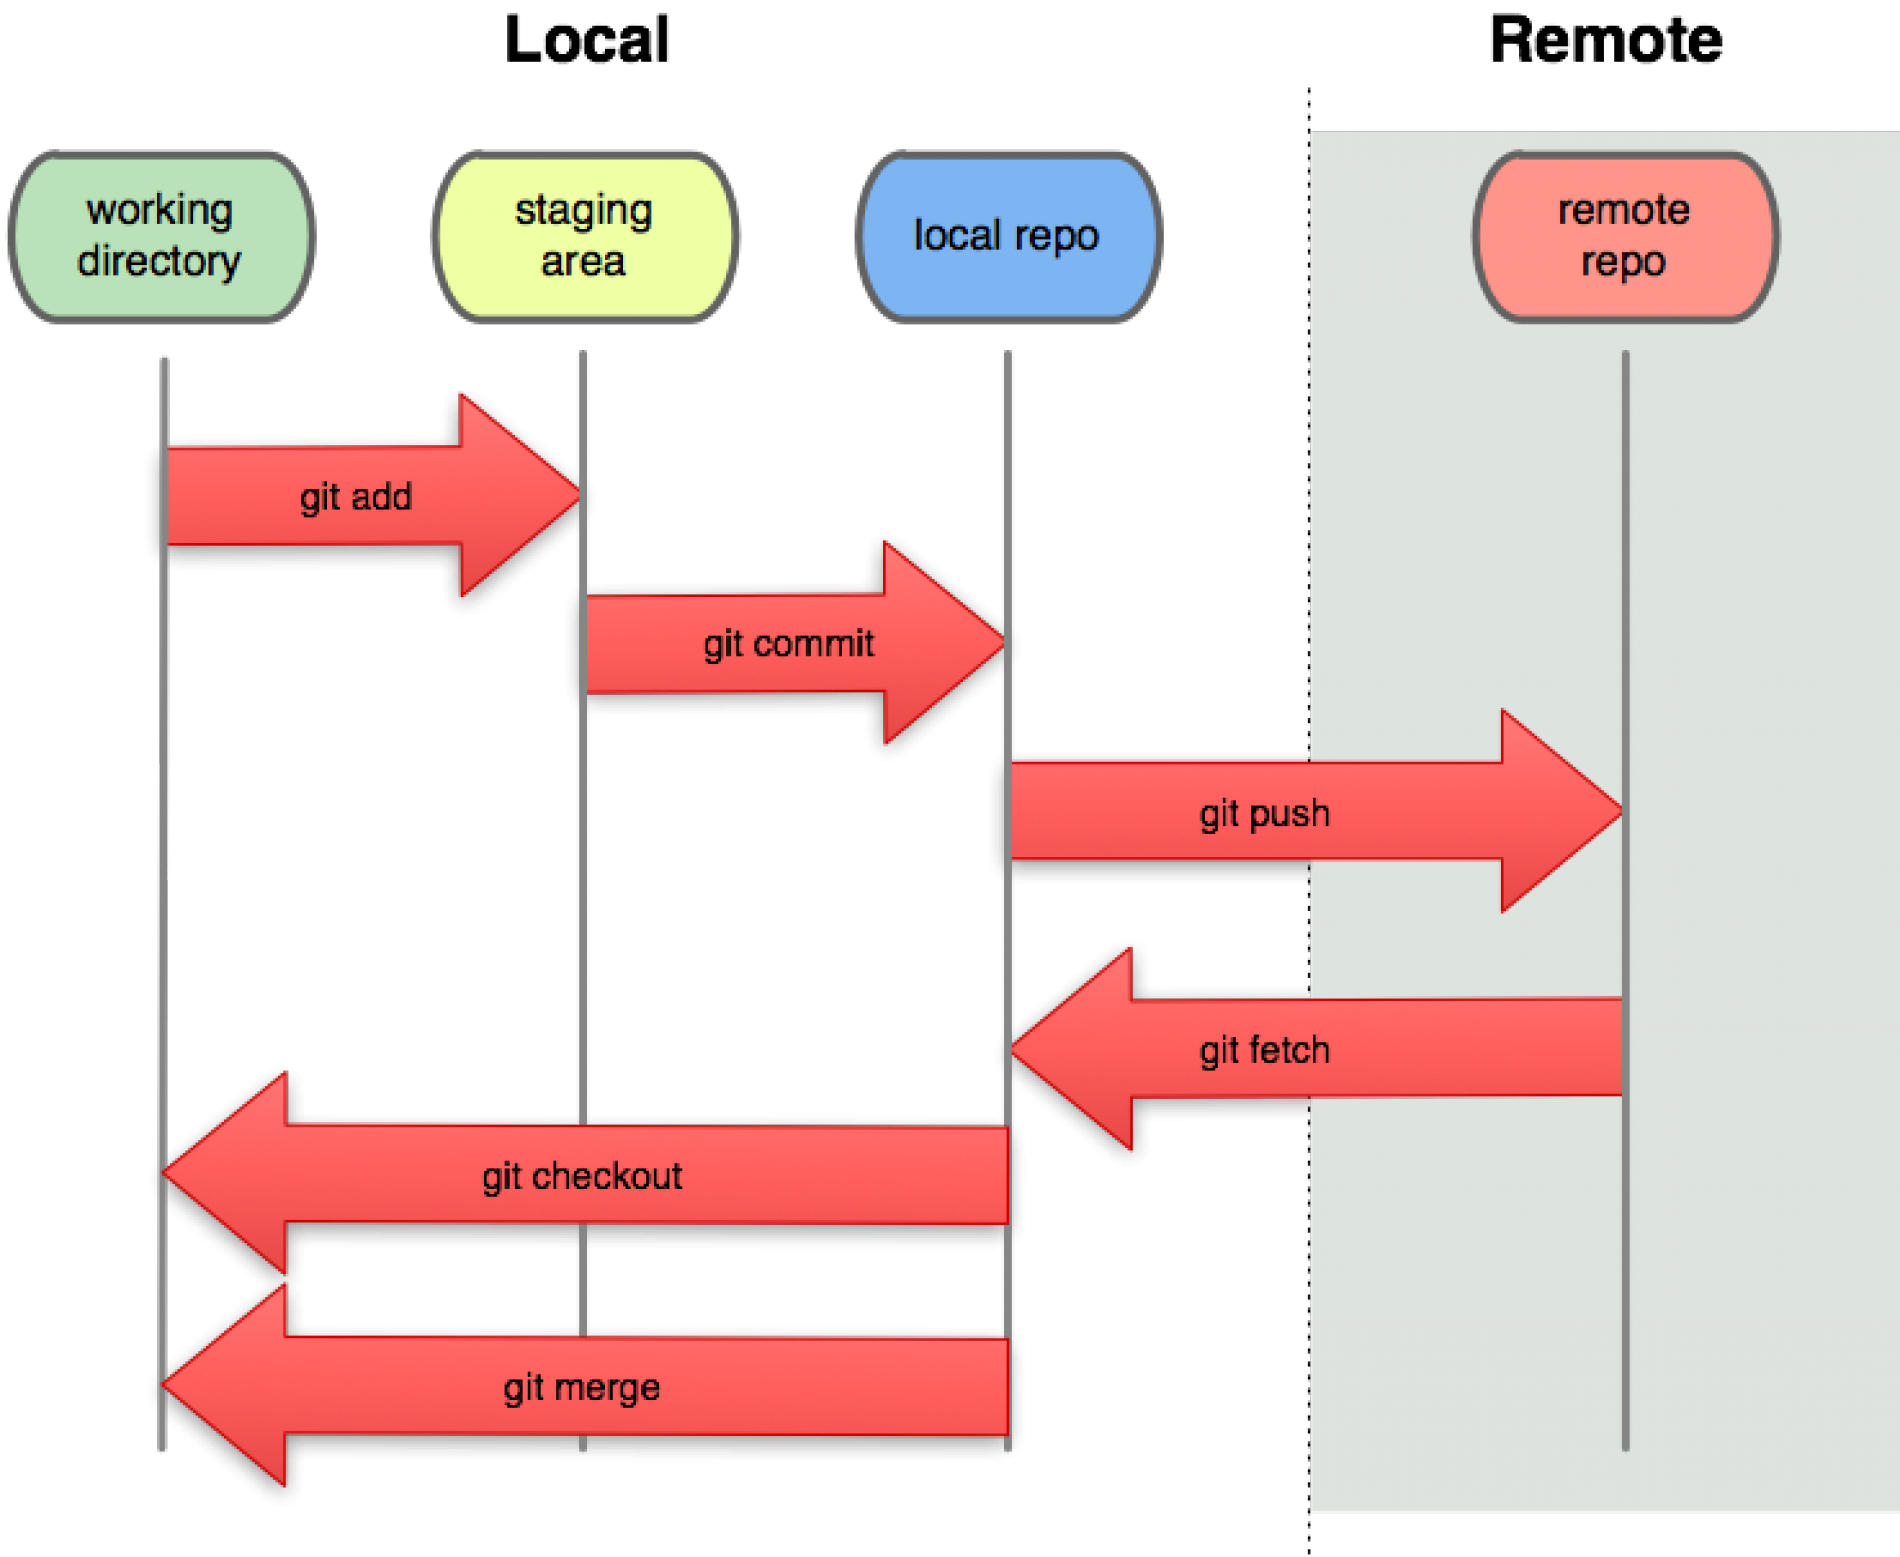 -->
<p><strong>Local</strong> is your local copy of the repository, git tracks the differences
between <strong>local</strong> and <strong>remote</strong> which is a repo hosted elsewhere (e.g., GitHub
GitLab etc.)</p>
<p>The <strong>Upstream</strong> in Git typically refers to the original repository from which
your local repository or fork was derived. The <strong>Upstream</strong> is the remote repo
that serves as the main source of truth, often the original project you forked
from. You typically fetch changes from upstream to update your local repo with
the latest updates from the original project, but you don’t push to upstream
unless you have write access.</p>
<h3>A Basic Git Workflow</h3>
<!--  -->
<ol>
<li>Initialize your Repository:</li>
</ol>
<p>If you haven’t already created a Git repo in your NixOS config directory (for
example, in your flake or <code>/etc/nixos</code>):</p>
<pre><code class="language-bash">cd ~/flake
git init
git add .
git commit -m "Initial commit: NixOS Configuration"
</code></pre>
<p>Taking this initial snapshot with Git is a best practice—it captures the exact
state of your working configuration before you make any changes.</p>
<ul>
<li>
<p>The command <code>git add .</code> stages all files in the directory (and its
subdirectories) for commit, meaning Git will keep track of them in your
project history.</p>
</li>
<li>
<p>The command <code>git commit -m "message"</code> then saves a snapshot of these staged
files, along with your descriptive message, into the repository.</p>
<ul>
<li>Think of a commit as a “save point” in your project. You can always go back
to this point if you need to, making it easy to experiment or recover from
mistakes. This two-step process, staging with <code>git add</code> and saving with
<code>git commit</code> is at the heart of how Git tracks and manages changes over
time.</li>
</ul>
</li>
</ul>
<!-- 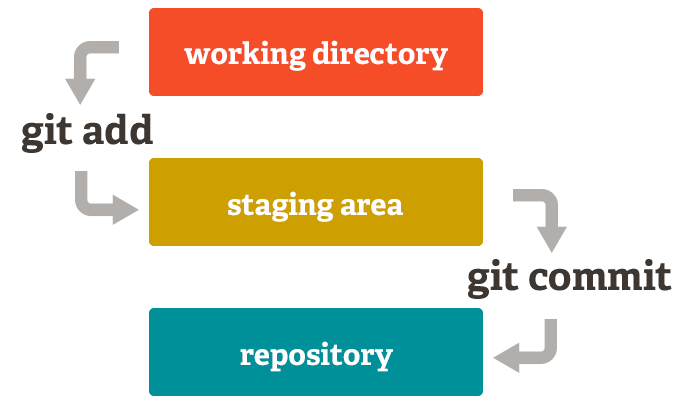 -->
<ol start="2">
<li>Make and Track Changes:</li>
</ol>
<p>Now that you’ve saved a snapshot of your working configuration, you’re free to
experiment and try new things, even if they might break your setup.</p>
<p>Suppose you want to try a new desktop environment, like Xfce. You edit your
<code>configuration.nix</code> to add:</p>
<pre><code class="language-nix">services.xserver.desktopManager.xfce.enable = true;
</code></pre>
<p>You run:</p>
<pre><code class="language-bash">sudo nixos-rebuild switch # if configuration.nix is in /etc/nixos/
</code></pre>
<p>But something goes wrong: the system boots, but your desktop is broken or won’t
start. You decide to roll back using the boot menu or:</p>
<pre><code class="language-bash">sudo nixos-rebuild switch --rollback
</code></pre>
<p><strong>What happens?</strong></p>
<ul>
<li>
<p>Your system reverts to the previous working generation in <code>/nix/store</code></p>
</li>
<li>
<p>But: Your <code>configuration.nix</code> file is still changed, it still has the line
enabling Xfce. If you rebuild again, you’ll get the same broken system,
because your config itself wasn’t rolled back.</p>
</li>
</ul>
<p><strong>How does Git Help on Failure?</strong></p>
<p>Git gives you quite a few options and ways to inspect what has been done.</p>
<ul>
<li>
<p>Use <code>git status</code> to see what’s changed, and <code>git checkout -- <file></code> to
restore any file to its last committed state.</p>
</li>
<li>
<p>Review your changes with <code>git diff</code> to see exactly what you modified before
deciding whether to keep or revert those changes.</p>
</li>
<li>
<p>Reset everything with <code>git reset --hard HEAD</code>, this will discard all local
changes and return to your last commit.</p>
</li>
</ul>
<p>With Git you can simply run:</p>
<pre><code class="language-bash">git checkout HEAD~1 configuration.nix
# or, if you committed before the change:
git revert <commit-hash>
</code></pre>
<p>Show the full hash of the latest commit:</p>
<pre><code class="language-bash">git rev-parse HEAD
f53fef375d89496c0174e70ce94993d43335098e
</code></pre>
<p>Short hash:</p>
<pre><code class="language-bash">git log --pretty=format:'%h' -n 1
f53fef3
git revert f53fef3
</code></pre>
<p>Show a list of Recent commits:</p>
<pre><code class="language-bash">git log
# a list of all commits, with hashes, author, date, and message
git log --oneline
git log --oneline
f53fef3 (HEAD -> main) thunar
b34ea22 thunar
801cbcf thunar
5e72ba5 sops
8b67c59 sops
1a353cb sops
</code></pre>
<p>You can copy the commit hash from any of these and use it in commands like
<code>git checkout <hash></code> or <code>git revert <hash></code>.</p>
<p><strong>Commit successful experiments</strong></p>
<ul>
<li>If your changes work, stage, and commit them:</li>
</ul>
<pre><code class="language-bash">git add .
# or more specifically the file you changed or created
git add configuration.nix
git commit -m "Describe the new feature or fix"
</code></pre>
<h3>Basic Branching</h3>
<p>With Git you’re always on a branch and the default branch is <code>master</code>. Many
change it to <code>main</code> because of the suggestion Git gives you. I think people are
too easily offended these days, just keep this in mind that <code>main</code> and <code>master</code>
refer to the main development branch.</p>
<p>You can get a listing of your current branches with:</p>
<pre><code class="language-bash">git branch
* (no branch)
main
</code></pre>
<p>The <code>*</code> is next to the current branch and is where the <code>HEAD</code> is currently
pointing. It says <code>(no branch)</code> because I’m currently in detached <code>HEAD</code> where
<code>HEAD</code> points to no branch. The reason for this is because I’ve been trying out
Jujutsu VCS and that’s JJ’s default setting, a detached <code>HEAD</code>.</p>
<p>Git actually gives you a warning about working in a detached <code>HEAD</code>:</p>
<pre><code class="language-bash">You are in 'detached HEAD' state. You can make experimental
changes and commit them, and you can discard any commits you make
in this state without impacting any branch by switching back.
If you want to create a new branch to retain commits you create,
you can do so now (using 'git switch -c <new-branch-name>') or
later (using 'git branch <new-branch-name> <commit-id>').
See 'git help switch' for details.
</code></pre>
<p>To attach the <code>HEAD</code> (i.e., have the pointer pointing to a branch), use the
<code>git checkout</code> command</p>
<pre><code class="language-bash">git checkout main
Switched to branch 'main'
</code></pre>
<pre><code class="language-bash">git branch
* main
# Ensure that you have the latest "tip" from the remote repository `origin`
git fetch origin main
From github.com:sayls8/flake
* branch main -> FETCH_HEAD
</code></pre>
<p>Although we’re working on our own repo and there is basically no chance of our
local branch diverging from our remote, it’s still good to get in the practice
of getting everything in sync before merging or rebasing etc.</p>
<p><code>git fetch</code> doesn’t update <code>main</code>, it just updates your references. To update
<code>main</code> you would use <code>git pull origin/main</code> or <code>git rebase origin/main</code></p>
<p>You can inspect your upstream branches with the following command:</p>
<pre><code class="language-bash">git remote show origin
* remote origin
Fetch URL: git@github.com:saylesss88/flake.git
Push URL: git@github.com:saylesss88/flake.git
HEAD branch: main
Remote branch:
main tracked
Local ref configured for 'git push':
main pushes to main (fast-forwardable)
</code></pre>
<p><code>* branch main -> FETCH_HEAD</code>: This line signifies that the <code>main</code>
branch from the remote repository (likely <code>origin</code>) was successfully fetched,
and the commit ID of its current tip (its latest commit) is now stored in your
local <code>FETCH_HEAD</code> reference.</p>
<p>Now that we know our local <code>main</code> is up to date with our remote <code>origin/main</code> we
can safely create a new feature branch:</p>
<pre><code class="language-bash">git checkout -b feature/prose_wrap
Switched to a new branch 'feature/prose_wrap'
</code></pre>
<p>Right now the branch <code>feature/prose_wrap</code> is exactly the same as <code>main</code> and we
can safely make changes without affecting <code>main</code>. We can try crazy or even
“dangerous” things and always be able to revert to a working state with
<code>git checkout main</code>.</p>
<p>If our crazy idea works out, we can then merge our feature branch into <code>main</code>.</p>
<p>Ok the feature works, I’ve added and committed the change. Now it’s time to
point the <code>HEAD</code> to <code>main</code> and then either merge or rebase the feature branch
into <code>main</code>:</p>
<pre><code class="language-bash">git checkout main
git fetch origin main
git merge feature/prose_wrap
Updating c8bd54c..b281f79
Fast-forward
home/editors/helix/default.nix | 69 +++++++++++++++++++++++++++++++--------------------------------------
1 file changed, 31 insertions(+), 38 deletions(-)
</code></pre>
<ul>
<li>“fast-forward” means that our <code>feature/prose_wrap</code> branch was directly ahead
of the last commit on <code>main</code>. When you merge one commit with another commit
that can be reached by following the first commits history, remember the
feature branch is exactly the same as <code>main</code> until I made another commit. If
the branches diverged more and the history can’t be followed, Git will perform
a 3-way merge where it creates a new “merge commit” that combines the 2
changes.</li>
</ul>
<p>If you have a bunch of branches and forget which have been merged yet use:</p>
<pre><code class="language-bash">git branch --merged
feature/prose_wrap
* main
# OR to see branches that haven't been merged use:
git branch --no-merged
</code></pre>
<p>It’s now safe to delete the feature branch:</p>
<pre><code class="language-bash">git branch -d feature/prose_wrap
Deleted branch feature/prose_wrap (was b281f79)
</code></pre>
<blockquote>
<p>❗ TIP: If your feature branch has a lot of sloppy commits that won’t be of
much benefit to anyone, squash them first then merge. The workflow would look
something like this:</p>
<pre><code class="language-bash"> # Make sure you're on the main branch
git checkout main
# Merge the feature branch with squash
git merge --squash feature/prose_wrap
</code></pre>
<ul>
<li>This combines all the commits in your branch and adds them to your <code>main</code>
staging area, it doesn’t move HEAD or create a merge commit for you. To
apply the changes into one big commit, finalize it with:</li>
</ul>
<pre><code class="language-bash"> git commit -m "Add prose wrapping feature"
</code></pre>
<p>This is often referred to as the “squash commit”.</p>
</blockquote>
<p>Branching means to diverge from the main line of development and continue to do
work without risking messing up your main branch. There are a few commits on
your main branch so to visualize this it would look something like this, image
is from <a href="https://git-scm.com/book/en/v2">Pro Git</a>:</p>
<!--  -->
<h2>Nix flake update example with branches</h2>
<p>Let’s say you haven’t ran <code>nix flake update</code> in a while and you don’t want to
introduce errors to your working configuration. To do so we can first, make sure
we don’t lose any changes on our main branch:</p>
<pre><code class="language-bash">git add .
git commit -m "Staging changes before switching branches"
# I always like to make sure the configuration will build before pushing to git
sudo nixos-rebuild switch --flake .
# If everything builds and looks correct
git push origin main
</code></pre>
<p>OR, if you have incomplete changes that you don’t want to commit yet you can
stash them with <code>git stash</code>:</p>
<pre><code class="language-bash">git status
On branch main
Your branch is ahead of 'origin/main' by 1 commit.
(use "git push" to publish your local commits)
Changes not staged for commit:
(use "git add <file>..." to update what will be committed)
(use "git restore <file>..." to discard changes in working directory)
modified: home/git.nix
no changes added to commit (use "git add" and/or "git commit -a")
</code></pre>
<p>Now we want to switch branches, without committing the incomplete changes to
<code>git.nix</code>:</p>
<pre><code class="language-bash">git stash
Saved working directory and index state WIP on main: 0e46d6b git: lol alias
git status
On branch main
Your branch is ahead of 'origin/main' by 1 commit.
(use "git push" to publish your local commits)
nothing to commit, working tree clean
</code></pre>
<blockquote>
<p>❗ <code>git stash</code> is equivalent to <code>git stash push</code></p>
</blockquote>
<p>To see which stashes you have stored, use <code>git sash list</code>:</p>
<pre><code class="language-bash">git stash list
stash@{0}: WIP on main: 0e46d6b git: lol alias
</code></pre>
<p>To apply the most recent stash:</p>
<pre><code class="language-bash">git stash apply
git add home/git.nix
On branch main
Your branch is ahead of 'origin/main' by 1 commit.
(use "git push" to publish your local commits)
Changes not staged for commit:
(use "git add <file>..." to update what will be committed)
(use "git restore <file>..." to discard changes in working directory)
modified: home/git.nix
# or for multiple stashes
git stash apply stash@{2}
</code></pre>
<p>Running <code>git stash apply</code> applies the changes that were in your stash but
doesn’t automatically restage them, to apply the changes and stage them in one
command:</p>
<pre><code class="language-bash">git stash apply --index
</code></pre>
<p>Now let’s create our branch so we can safely update:</p>
<pre><code class="language-bash">git checkout -b update-test
Switched to a new branch 'update-test'
</code></pre>
<p><code>-b</code> is to switch to the branch that was just created</p>
<p>Some may prefer a more descriptive branch name such as: <code>update/flake-inputs</code>, I
kept it short for the example. Or if your company uses an issue tracker,
including the ticket number in the branch name can be helpful:
<code>update/123-flake-inputs</code></p>
<p>The above command is equivalent to:</p>
<pre><code class="language-bash">git branch update-test
git checkout update-test
</code></pre>
<p><del>Now our branches would look something like this, note how both branches
currently point to the same commit:</del> I discovered that Git Book has pretty
restrictive licensing and will eventually find a replacement.</p>
<!--  -->
<p>Now, lets run our update:</p>
<pre><code class="language-bash">nix flake update
sudo nixos-rebuild test --flake .
# If everything looks ok let's try applying the changes
sudo nixos-rebuild switch --flake .
# And if everything looks ok:
git add .
git commit -m "feat: Updated all flake inputs"
git push origin update-test
</code></pre>
<blockquote>
<p>❗ This is the same workflow for commiting a PR. After you first fork and
clone the repo you want to work on, you then create a new feature branch and
push to that branch on your fork. This allows you to create a PR comparing
your changes to their existing configuration.</p>
</blockquote>
<p><del>At this point our graph would look similar to the following</del>:</p>
<!--  -->
<p>If we are satisfied, we can switch back to our <code>main</code> branch and merge
<code>update-test</code> into it:</p>
<pre><code class="language-bash">git checkout main
git merge origin/update-test
git branch -D update-test
sudo nixos-rebuild test --flake .
sudo nixos-rebuild switch --flake .
</code></pre>
<p>It’s good practice to delete a branch after you’ve merged and are done with it.</p>
<h2>Rebasing Branches</h2>
<p>To combine two seperate branches into one unified history you typically use
<code>git merge</code> or <code>git rebase</code>.</p>
<p><code>git merge</code> takes two commit pointers and finds a common base commit between
them, it then creates a “merge commit” that combines the changes.</p>
<p><code>git rebase</code> is used to move a sequence of commits to a new base commit.</p>
<!--  -->
<h2>Configure Git Declaratively</h2>
<p>The following example is the <code>git.nix</code> from the hydenix project it shows some
custom options and a way to manage everything from a single location:</p>
<pre><code class="language-nix"># git.nix from hydenix: declarative Git configuration for Home Manager
{ lib, config, ... }:
let
cfg = config.hydenix.hm.git;
in
{
options.hydenix.hm.git = {
enable = lib.mkOption {
type = lib.types.bool;
default = config.hydenix.hm.enable;
description = "Enable git module";
};
name = lib.mkOption {
type = lib.types.nullOr lib.types.str;
default = null;
description = "Git user name";
};
email = lib.mkOption {
type = lib.types.nullOr lib.types.str;
default = null;
description = "Git user email";
};
};
config = lib.mkIf cfg.enable {
programs.git = {
enable = true;
userName = cfg.name;
userEmail = cfg.email;
extraConfig = {
init.defaultBranch = "main";
pull.rebase = false;
};
};
};
}
</code></pre>
<blockquote>
<p>❗ You can easily change the name of the option, everything after <code>config.</code> is
custom. So you could change it to for example, <code>config.custom.git</code> and you
would enable it with <code>custom.git.enable = true;</code> in your <code>home.nix</code> or
equivalent.</p>
</blockquote>
<p>Then he has a <code>hm/default.nix</code> with the following to enable it.</p>
<pre><code class="language-nix">#...snip...
# hydenix home-manager options go here
hydenix.hm = {
#! Important options
enable = true;
git = {
enable = true; # enable git module
name = null; # git user name eg "John Doe"
email = null; # git user email eg "john.doe@example.com"
};
}
# ... snip ...
</code></pre>
<p>You can enable git, and set your git username as well as git email right here.</p>
<h3>Resources</h3>
<ul>
<li>
<p><a href="https://gist.github.com/luismts/495d982e8c5b1a0ced4a57cf3d93cf60">GitCommitBestPractices</a></p>
</li>
<li>
<p><a href="https://git-scm.com/book/en/v2">ProGit</a></p>
</li>
<li>
<p><a href="https://ohshitgit.com/">Oh shit Git</a></p>
</li>
</ul>
Intro to Nushellhttps://saylesss88.github.io/intro_to_nushell_on_NixOS.html2025-11-30T00:00:00+00:00saylesss87@proton.me (saylesss88)<h1>Chapter 12</h1>
<details>
<summary> ✔️ Click to Expand Table of Contents</summary>
<!-- toc -->
</details>
<p><img src="https://saylesss88.github.io/images/nu.png" alt="Nu" /></p>
<h2>Intro to Nushell on NixOS</h2>
<ul>
<li>
<p><strong>TL;DR</strong>:I recently switched default shells from zsh to nushell, this post is
about some of the challenges and advantages of using nushell with NixOS.</p>
</li>
<li>
<p>While the average user might not immediately see significant advantages, those
who frequently work with structured data formats like JSON, YAML, and CSV –
such as developers interacting with APIs, system administrators managing
configurations, and data professionals – will likely find Nushell’s native
data handling and powerful pipeline capabilities a plus. Additionally, users
who value a more consistent and safer scripting experience might appreciate
Nushell’s language-first design and features like strong typing.</p>
</li>
<li>
<p>I’ll start with some of the unique build design choices and unique features
that I think make Nushell special, then show an example using Nushell to
manipulate JSON data. Finally, I will highlight some of the visually appealing
aspects of Nushell and lastly I share some resources for learning more.</p>
</li>
</ul>
<h2>The Good</h2>
<ul>
<li>
<p>Nushell borrows concepts from many shells and languages and is itself both a
programming language and a shell. Because of this, it has its own way of
working with files, directories, websites, and more.</p>
</li>
<li>
<p>Nushell is powerful and has many essential commands built directly into the
shell (“internal” commands) rather than a link to an executable. You can use
this set of commands across different operating systems, having this
consistency is helpful when creating cross-platform code.</p>
</li>
<li>
<p>When internal Nushell commands (like <code>ls</code>, <code>open</code>, <code>where</code>, <code>get</code>, <code>sort-by</code>,
etc.) produce output, they generally do so in Nushell’s structured data format
(tables or records). This is the shell’s native way of representing
information.</p>
</li>
<li>
<p>Beyond these foundational strengths, Nushell offers a range of unique features
that enhance its functionality and make it particularly well-suited for
data-heavy tasks. Here are some highlights that showcase its versatility.</p>
</li>
</ul>
<p><strong>Some Unique Features</strong>:</p>
<ul>
<li>
<p>Besides the built-in commands, Nushell has a
<a href="https://www.nushell.sh/book/standard_library.html">standard library</a> Nushell
operates on <em>structured data</em>. You could call it a “data-first” shell and
programming language.</p>
</li>
<li>
<p>Also included, is a full-featured dataframe processing engine using
<a href="https://github.com/pola-rs/polars">Polars</a> if you want to process large data
efficiently directly in your shell, check out the
<a href="https://www.nushell.sh/book/dataframes.html">Dataframes-Docs</a></p>
</li>
<li>
<p><strong>Multi-Line Editing</strong>:</p>
</li>
<li>
<p>When writing a long command you can press Enter to add a newline and move to
the next line. For example:</p>
</li>
</ul>
<pre><code class="language-nu">ls | # press enter
where name =~ | # press enter, comments after pipe ok
get name | # press enter
mv ...$in ./backups/
</code></pre>
<ul>
<li>
<p>This allows you to cycle through the entire multi-line command using the up
and down arrow keys and then customize different lines or sections of the
command.</p>
</li>
<li>
<p>You can manually insert a newline using <code>Alt+Enter</code> or <code>Shift+Enter</code>.</p>
</li>
<li>
<p>The <a href="https://www.nushell.sh/book/line_editor.html">Reedline-Editor</a> is
powerful and provides good <code>vi-mode</code> or <code>emacs</code> support built in.</p>
</li>
<li>
<p>It’s default <code>Ctrl+r</code> history command is nice to work with out of the box.</p>
</li>
<li>
<p>The <a href="https://www.nushell.sh/book/explore.html#parameters">explore</a> command, is
nu’s version of a table pager, just like <code>less</code> but for table structured data:</p>
</li>
</ul>
<pre><code class="language-nu">$nu | explore --peek
</code></pre>
<ul>
<li>
<p>With the above command you can navigate with vim keybinds or arrow keys.</p>
</li>
<li>
<p>These features demonstrate Nushell’s user-friendly interface, but what truly
sets it apart is its underlying design as a structured data scripting
language. This “language-first” approach powers many of its distinctive
capabilities.</p>
</li>
</ul>
<p><img src="https://saylesss88.github.io/images/explore.png" alt="explore" /></p>
<p><strong>Unique design</strong>:</p>
<ul>
<li>
<p><strong>Fundamentally designed as a structured data scripting language</strong>: and then
it acts as a shell on top of that foundation. This “language first” approach
is what gives it many of its distinctive features and makes it a powerful
scripting language. I reiterate this here because of the implications of this.
A few of those features are:</p>
<ul>
<li>
<p><strong>Pipelines of structured data</strong>: Unlike traditional shells that primarily
deal with plain text streams, Nushell pipelines operate on tables of
structured data. Each command can understand and manipulate this structured
data directly.</p>
</li>
<li>
<p><strong>Consistent syntax</strong>: Its syntax is more consistent and predictable
compared to the often quirky syntax of Bash and Zsh, drawing inspiration
from other programming languages.</p>
</li>
<li>
<p><strong>Strong typing</strong> Nushell has a type system, which helps catch errors early
and allows for more robust scripting.</p>
</li>
<li>
<p><strong>First-class data types</strong>: It treats various data formats (like JSON, CSV,
TOML) as native data types, making it easier to work with them. Because of
this, Nushell aims to replace the need for external tools like <code>jq</code>, <code>awk</code>,
<code>sed</code>, <code>cut</code>, and even some uses of <code>grep</code> and <code>curl</code>.</p>
</li>
</ul>
</li>
<li>
<p><strong>Variables are Immutable by Default</strong>: Nushell’s commands are based on a
functional-style of programming which requires immutability, sound familiar?</p>
</li>
<li>
<p><strong>Nushell’s Environment is Scoped</strong>: Nushell takes many design cues from
compiled languages, one is that languages should avoid global mutable state.
Shells have commonly used global mutation to update the environment, Nushell
attempts to steer clear of this increasing reproducability.</p>
</li>
<li>
<p><strong>Single-use Environment Variables</strong>:</p>
</li>
</ul>
<pre><code class="language-nu">FOO=BAR $env.FOO
# => BAR
</code></pre>
<ul>
<li><strong>Permanent Environment Variables</strong>: In your <code>config.nu</code></li>
</ul>
<pre><code class="language-nu"># config.nu
$env.FOO = 'BAR'
</code></pre>
<ul>
<li>
<p><a href="https://www.nushell.sh/book/coming_from_bash.html">Coming-From-Bash</a></p>
</li>
<li>
<p>These design principles make Nushell a powerful tool for scripting, but
they’re best understood through a hands-on example. Let’s see how Nushell’s
structured data capabilities shine in a common task: processing a JSON file.</p>
</li>
</ul>
<p><strong>Example</strong>: I wanted to provide a practical example to illustrate some of these
“Good” features in action. And break it down for better understanding.</p>
<ul>
<li>
<p>Let’s consider a common task: processing data from a JSON file. Imagine you
have a file containing a list of users with their names and ages. With
traditional shells, you’d likely need to rely on external tools like <code>jq</code> to
parse and filter this data. However, Nushell can handle this directly within
its own commands.</p>
</li>
<li>
<p>For this example you could create a <code>test</code> directory and move to it:</p>
</li>
</ul>
<pre><code class="language-bash">mkdir test ; cd test
</code></pre>
<ul>
<li>Create a <code>users.json</code> with the following contents:</li>
</ul>
<p>👇 users.json</p>
<pre><code class="language-json">[
{ "name": "Alice", "age": 25 },
{ "name": "Bob", "age": 30 },
{ "name": "Charlie", "age": 20 }
]
</code></pre>
<ul>
<li>And create the following <code>filter.nu</code> that first converts <code>users.json</code> into its
own internal structured data format with the <code>open</code> command, then to filters
out people under <code>21</code> with the <code>where</code> control flow construct, then selects
the <code>name</code> and <code>age</code> columns, sorts them by age, and finally converts them
back to <code>json</code> and saves them to a file called <code>filtered_users.json</code>. A lot
happening in a 6 line script.</li>
</ul>
<pre><code class="language-nu"># filter.nu
open users.json # Read JSON file into structured data
| where age > 21 # Filter users older than 21
| select name age # Select only name and age columns
| sort-by age # Sort by age
| to json # Convert back to JSON
| save filtered_users.json # Save result to a new file
</code></pre>
<ul>
<li>The <code>open</code> command takes data from a file (or even a URL in some cases) and
parses it and converts it into Nushells own internal structured data format.
So this command isn’t just showing you the contents of <code>users.json</code> but doing
a conversion to Nu’s special structured format.</li>
</ul>
<pre><code class="language-nu">open users.json
╭───┬─────────┬─────╮
│ # │ name │ age │
├───┼─────────┼─────┤
│ 0 │ Alice │ 25 │
│ 1 │ Bob │ 30 │
│ 2 │ Charlie │ 20 │
╰───┴─────────┴─────╯
</code></pre>
<ul>
<li>The <code>source</code> command in Nushell is used to execute the commands within a
script file (like <code>filter.nu</code>) in the current Nushell environment. It’s
similar to running the script directly in the shell, but keeps the shell open
for further use. In this example, <code>source filter.nu</code> runs the commands inside
<code>filter.nu</code>, processing the <code>users.json</code> file and creating the
<code>filtered_users.json</code> file:</li>
</ul>
<pre><code class="language-nu">source filter.nu
# View the contents with bat
bat filtered_users.json
───────┬──────────────────────────────────────────────────────────────────────────────────────
│ File: filtered_users.json
───────┼──────────────────────────────────────────────────────────────────────────────────────
1 │ [
2 │ {
3 │ "name": "Alice",
4 │ "age": 25
5 │ },
6 │ {
7 │ "name": "Bob",
8 │ "age": 30
9 │ }
10 │ ]
───────┴───────────────────────────────────────────────────────────────────────────────────
</code></pre>
<ul>
<li>As you can see, without needing any external tools, Nushell was able to read,
filter, select, sort, and then re-serialize JSON data using a clear and
concise pipeline. This demonstrates its power in handling structured data
natively, making common data manipulation tasks within the shell significantly
more streamlined and readable compared to traditional approaches.</li>
</ul>
<p><strong>In the filter.nu example:</strong></p>
<pre><code class="language-nu"># filter.nu
open users.json # Read JSON file into structured data
| where age > 21 # Filter users older than 21
| select name age # Select only name and age columns
| sort-by age # Sort by age
| to json # Convert back to JSON
| save filtered_users.json # Save result to a new file
</code></pre>
<details>
<summary> ✔️ Summary of above Command (Click to Expand)</summary>
<ol>
<li>
<p><code>open users.json</code>: Produces a <strong>Nushell table</strong> representing the data.</p>
</li>
<li>
<p><code>| where age > 21</code>: Receives the table, filters rows based on the <code>age</code>
column, and outputs a new, filtered table.</p>
</li>
<li>
<p><code>| select name age</code>: Receives the filtered table, selects only the <code>name</code> and
<code>age</code> columns, and outputs a table with fewer columns.</p>
</li>
<li>
<p><code>| sort-by age</code>: Receives the table, sorts the rows based on the <code>age</code>
column, and outputs a sorted table.</p>
</li>
<li>
<p><code>| to json</code>: Receives the sorted table and converts it back into JSON text.</p>
</li>
<li>
<p><code>| save filtered_users.json</code>: Receives the JSON text and saves it to a file.</p>
</li>
</ol>
<ul>
<li>
<p>So, while the concept of piping is the same, the nature of the data flowing
through the Nushell pipeline is richer and more structured, enabling more
powerful and direct data manipulation.</p>
</li>
<li>
<p>While Nushell’s strengths, like its structured data pipelines, make it a
game-changer for many tasks, it’s not without its challenges, especially when
integrated with NixOS’s Bash-centric ecosystem. Let’s explore some of the
limitations you might encounter when adopting Nushell as your default shell.</p>
</li>
</ul>
</details>
<h3>The Bad</h3>
<ul>
<li>
<p>While the project is still maturing, the active community and ongoing
improvements are promising. Don’t get too discouraged by the following, there
would be a bad section for any shell imo.</p>
</li>
<li>
<p>There are many similarities so it can be easy to forget that some Bash (and
POSIX in general) style constructs just won’t work in Nushell. Considering
that NixOS seems to have been designed for bash, even Zsh isn’t fully
compatable you may want to think twice before you choose Nushell as your
default.</p>
</li>
<li>
<p>The documentation is incomplete and written by devs for devs imo, it is quite
a bit different from anything else I’ve seen so there is a bit of a learning
curve. Nushell is generally still considered to be in a stage where it might
not be the most seamless or trouble-free experience as a daily driver default
shell for most users, especially on a system like NixOS known for its unique
approach.</p>
</li>
<li>
<p>The <a href="https://github.com/haslersn/any-nix-shell">any-nix-shell</a> project doesn’t
include Nushell as with many others because of it’s lack of maturity.</p>
</li>
<li>
<p>The following addition comes from Joey_McKur’s sugggestion, on mentioning the
<code>job</code> command as one of the biggest criticisms against Nu because it doesn’t
support background tasks. I should also note that Nushell’s team is aware of
these criticisms and actively working on improving job control.</p>
</li>
</ul>
<p><strong>Limited Feature Set Compared to Traditional Job Control:</strong></p>
<ul>
<li>
<p><strong>Lack of Full POSIX Job Control</strong>: Nushell’s job control doesn’t yet fully
implement all the features and signals defined by POSIX job control (e.g.,
more nuanced signal handling, stopped jobs). While it covers the basics, users
accustomed to advanced Bash job control might find it lacking.</p>
</li>
<li>
<p><strong>Foregrounding Behavior</strong>: There have been criticisms about how foregrounding
jobs interacts with the terminal and potential issues with signal propagation.</p>
</li>
</ul>
<p><strong>Output Handling Challenges</strong>:</p>
<ul>
<li>
<p><strong>Interleaved Output</strong>: Managing the output of multiple backgrounded jobs can
sometimes be messy, with output from different jobs potentially interleaving
in the terminal. While Nushell tries to handle this, it’s not always as clean
as desired.</p>
</li>
<li>
<p><strong>Redirection Complexity</strong>: Redirecting the input and output of backgrounded
jobs can be less straightforward than in Bash, sometimes requiring more
explicit handling.</p>
</li>
</ul>
<p><strong>Integration with Pipelines:</strong></p>
<ul>
<li><strong>Backgrounding Pipelines</strong>: Backgrounding complex pipelines with multiple
stages can sometimes lead to unexpected behavior or difficulties in managing
the entire pipeline as a single job.</li>
</ul>
<p><strong>Error Reporting:</strong></p>
<ul>
<li>
<p><strong>Difficult to Track Errors in Background Jobs</strong>: Identifying and debugging
errors in backgrounded jobs can be less direct than with foreground processes,
and the job command’s output might not always provide sufficient information
for troubleshooting.</p>
</li>
<li>
<p>Many of Nushell’s challenges stem from its departure from traditional shell
conventions, particularly those of Bash, which NixOS heavily relies on. To
better understand these differences and how they impact your workflow, let’s
compare Nushell’s static, structured approach to Bash’s dynamic, text-based
model.</p>
</li>
</ul>
<h3>Key Differences Between Nushell & Bash</h3>
<table><thead><tr><th><strong>Feature</strong></th><th><strong>Bash (Dynamic)</strong></th><th><strong>Nushell (Static)</strong></th></tr></thead><tbody>
<tr><td>Code Execution</td><td>Line-by-line</td><td>Whole script parsed first</td></tr>
<tr><td>Error Detection</td><td>Runtime errors only</td><td>Catches errors before running</td></tr>
<tr><td>Support for <code>eval</code></td><td>✅ Allowed</td><td>❌ Not supported</td></tr>
<tr><td>Custom Parsing</td><td>Limited</td><td>Built-in semantic analysis</td></tr>
<tr><td>IDE Features</td><td>Basic syntax highlighting</td><td>Advanced integration, linting, and formatting</td></tr>
</tbody></table>
<ul>
<li>
<p><code>&&</code> doesn’t work use <code>;</code> instead.</p>
</li>
<li>
<p><code>></code> is used as the greater-than operator for comparisons:</p>
</li>
</ul>
<pre><code class="language-nu">"hello" | save output.txt
</code></pre>
<p>is equivalent to the following in bash:</p>
<pre><code class="language-bash">echo "hello" > output.txt
</code></pre>
<ul>
<li>If you notice above the nushell command doesn’t require an <code>echo</code> prefix, this
is because Nushell has <strong>Implicit Return</strong>:</li>
</ul>
<pre><code class="language-nu">"Hello, World" == (echo "Hello, World")
# => true
</code></pre>
<ul>
<li>
<p>The above example shows that the string, <code>"Hello, World"</code> is equivalent to the
output value from <code>echo "Hello, World"</code></p>
</li>
<li>
<p><strong>Every Command Returns a Value</strong>:</p>
</li>
</ul>
<pre><code class="language-nu">let p = 7
print $p # 7
$p * 6 # 42
</code></pre>
<ul>
<li>Understanding these differences highlights why Nushell feels so distinct from
Bash, but it’s the shell’s advanced features and integrations that truly make
it shine. Let’s dive into some of the beautiful and powerful tools and custom
commands that elevate Nushell for NixOS users.</li>
</ul>
<h3>The Beautiful and Powerful</h3>
<ul>
<li>
<p><code>Ctrl+t</code> List Commands with carapace and fzf:</p>
<p><img src="https://saylesss88.github.io/images/nu4.png" alt="nu4" /></p>
</li>
<li>
<p><code>Carapace</code>
<a href="https://carapace-sh.github.io/carapace-bin/install.html">Carapace-Bin Install</a>:</p>
</li>
</ul>
<p>The folling is showing tab completion, I typed <code>hx fl<TAB></code>:</p>
<p><img src="https://saylesss88.github.io/images/nu9.png" alt="nu9" /></p>
<ul>
<li>
<p><code>Carapace</code> man example:</p>
<p><img src="https://saylesss88.github.io/images/nu7.png" alt="nu7" /></p>
</li>
</ul>
<p><strong>Custom Nushell Commands</strong></p>
<p>Most of the following scripts come from the
<a href="https://github.com/nushell/nu_scripts#">nu_scripts repo</a></p>
<ul>
<li>The following command allows you to choose which input to update interactively
with fzf.</li>
</ul>
<details>
<summary> ✔️ Click to See Command</summary>
<pre><code class="language-nu"># nix.nu
# upgrade system packages
# `nix-upgrade` or `nix-upgrade -i`
def nix-upgrade [
flake_path: string = "/home/jr/flake", # path that contains a flake.nix
--interactive (-i) # select packages to upgrade interactively
]: nothing -> nothing {
let working_path = $flake_path | path expand
if not ($working_path | path exists) {
echo "path does not exist: $working_path"
exit 1
}
let pwd = $env.PWD
cd $working_path
if $interactive {
let selections = nix flake metadata . --json
| from json
| get locks.nodes
| columns
| str join "\n"
| fzf --multi --tmux center,20%
| lines
# Debug: Print selections to verify
print $"Selections: ($selections)"
# Check if selections is empty
if ($selections | is-empty) {
print "No selections made."
cd $pwd
return
}
# Use spread operator to pass list items as separate arguments
nix flake update ...$selections
} else {
nix flake update
}
cd $pwd
nh os switch $working_path
}
</code></pre>
</details>
<p><strong>Usage</strong>:</p>
<pre><code class="language-nu">nix-upgrade
# or for individual packages
nix-upgrade -i
</code></pre>
<p><img src="https://saylesss88.github.io/images/nu5.png" alt="nu5" /></p>
<ul>
<li>The <code>ns</code> command is designed to search for Nix packages using <code>nix search</code> and
present the results in a cleaner format, specifically removing the
architecture and operating system prefix that nix search often includes.</li>
</ul>
<details>
<summary> ✔️ Click To Expand</summary>
<pre><code class="language-nu">def ns [
term: string # Search target.
] {
let info = (
sysctl -n kernel.arch kernel.ostype
| lines
| {arch: ($in.0|str downcase), ostype: ($in.1|str downcase)}
)
nix search --json nixpkgs $term
| from json
| transpose package description
| flatten
| select package description version
| update package {|row| $row.package | str replace $"legacyPackages.($info.arch)-($info.ostype)." ""}
}
</code></pre>
</details>
<p><strong>Usage</strong>:</p>
<pre><code class="language-nu">ns fzf<ENTER>
</code></pre>
<p><img src="https://saylesss88.github.io/images/nu10.png" alt="nu10" /></p>
<ul>
<li><code>nufetch</code> command:</li>
</ul>
<details>
<summary> ✔️ Click To Expand</summary>
<pre><code class="language-nu"># `nufetch` `(nufetch).packages`
def nufetch [] {
{
"kernel": $nu.os-info.kernel_version,
"nu": $env.NU_VERSION,
"packages": (ls /etc/profiles/per-user | select name | prepend [[name];
["/run/current-system/sw"]] | each { insert "number" (nix path-info --recursive
($in | get name) | lines | length) | insert "size" ( nix path-info -S
($in | get name) | parse -r '\s(.*)' | get capture0.0 | into filesize) | update
"name" ($in | get name | parse -r '.*/(.*)' | get capture0.0 | if $in == "sw"
{"system"} else {$in}) | rename "environment"}),
"uptime": (sys host).uptime
}
}
</code></pre>
</details>
<p><img src="https://saylesss88.github.io/images/nu1.png" alt="nu1" /></p>
<ul>
<li><code>duf</code> command, I have mine aliased to <code>df</code>:</li>
</ul>
<p><img src="https://saylesss88.github.io/images/nu8.png" alt="nu8" /></p>
<ul>
<li><code>ps</code> command:</li>
</ul>
<p><img src="https://saylesss88.github.io/images/ps.png" alt="ps" /></p>
<ul>
<li><code>nix-list-system</code> command lists all installed packages:</li>
</ul>
<pre><code class="language-nu"># list all installed packages
def nix-list-system []: nothing -> list<string> {
^nix-store -q --references /run/current-system/sw
| lines
| filter { not ($in | str ends-with 'man') }
| each { $in | str replace -r '^[^-]*-' '' }
| sort
}
</code></pre>
<p><strong>Usage</strong>:</p>
<pre><code class="language-bash">nix-list-system
</code></pre>
<p><img src="https://saylesss88.github.io/images/nu6.png" alt="nu6" /></p>
<ul>
<li>These custom Nushell commands showcase its flexibility, but sometimes you need
to work around Nushell’s limitations, like compatability with certain NixOS
tools. This is where <code>just</code> and <code>justfiles</code> come in, simplifying complex
workflows and bridging gaps in Nushell’s functionality.</li>
</ul>
<h2>Using Just and Justfiles</h2>
<ul>
<li>
<p>The following is my <code>justfile</code> that I keep right next to my <code>flake.nix</code> it
simplifies some commands and makes things work that weren’t working with
nushell for my case, you’ll have to change it to match your configuration.
It’s not perfect but works for my use case, take whats useful and leave the
rest.</p>
</li>
<li>
<p>You’ll first need to install <a href="https://github.com/casey/just">just</a> to make use
of <code>justfiles</code>.</p>
</li>
</ul>
<pre><code class="language-bash"># nix shell nixpkgs#just nixpkgs#nushell
set shell := ["nu", "-c"]
flake_path := "/home/jr/flake"
hostname := "magic"
home_manager_output := "jr@magic"
utils_nu := absolute_path("utils.nu")
default:
@just --list
# Rebuild
[group('nix')]
fr:
nh os switch --hostname {{hostname}} {{flake_path}}
# Flake Update
[group('nix')]
fu:
nh os switch --hostname {{hostname}} --update {{flake_path}}
# Update specific input
# Usage: just upp nixpkgs
[group('nix')]
upp input:
nix flake update {{input}}
# Test
[group('nix')]
ft:
nh os test --hostname {{hostname}} {{flake_path}}
# Collect Garbage
[group('nix')]
ncg:
nix-collect-garbage --delete-old ; sudo nix-collect-garbage -d ; sudo /run/current-system/bin/switch-to-configuration boot
[group('nix')]
cleanup:
nh clean all
</code></pre>
<ul>
<li>To list available commands type, (you must be in the same directory as the
justfile): <code>just</code></li>
</ul>
<p><img src="https://saylesss88.github.io/images/just2.png" alt="just" /></p>
<ul>
<li>
<p>So <code>just fmt</code> will run <code>nix fmt</code>.</p>
</li>
<li>
<p>A lot of the <code>.nu</code> files came from this repo by BlindFS:</p>
<ul>
<li>
<p><a href="https://github.com/blindFS/modern-dot-files/tree/main">modern-dot-files</a> he
uses Nix Darwin so there are a few changes for NixOS. I found this through
<a href="https://github.com/nushell/this_week_in_nu">this_week_in_nu</a>.</p>
</li>
<li>
<p><a href="https://github.com/TSawyer87/flakes/tree/main/homeManagerModules/shells/nushell">my-nu-config</a>
If you use this, you’ll need to change the first line of <code>fzf.nu</code> to the
location of your config. You’ll also need to change the constants at the top
of <code>config.nu</code>. These are my old dotfiles, I have recently updated and made
sure this config is up to date with recent nushell changes. Also, change the
<code>let flake_path = ($env.HOME | path join "flake")</code> to your flake path.</p>
</li>
<li>
<p>The examples use this starship
config<a href="https://github.com/Aylur/dotfiles/blob/main/home/starship.nix">Aylur-dotfiles</a>
The logic on the bottom enables starship for Nushell, Zsh, and Bash!</p>
</li>
<li>
<p>If you wan’t to use my config you’ll have to enable the experimental-feature
<code>pipe-operators</code> in the same place you enable flakes and nix-command.</p>
</li>
</ul>
</li>
<li>
<p>There are still situations where I need to switch to zsh or bash to get
something to work i.e. <code>nix-shell</code> and a few others.</p>
</li>
<li>
<p>From custom commands to <code>justfile</code> integrations, Nushell offers a wealth of
tools to enhance your NixOS experience, even if occasional workarounds are
needed. To dive deeper into Nushell and tailor it to your needs, here are some
valuable resources to explore, from official documentation to community-driven
configurations.</p>
</li>
</ul>
<h4>Resources</h4>
<details>
<summary> ✔️ Click to Expand Resources </summary>
<ul>
<li>
<p><a href="https://www.nushell.sh/book/">Nushell-Book</a></p>
</li>
<li>
<p><a href="https://www.nushell.sh/cookbook/">Nushell-Cookbook</a></p>
</li>
<li>
<p><a href="https://github.com/nushell/nu_scripts">nu_scripts</a> some of the custom
commands came from here.</p>
</li>
<li>
<p><a href="https://github.com/nushell/nushell/tree/main/crates/nu-utils/src/default_files">nushell sample-config</a></p>
</li>
<li>
<p><a href="https://github.com/nushell/awesome-nu#plugins">awesome-nu repo</a></p>
</li>
<li>
<p><a href="https://github.com/nushell/showcase">nu showcase-repo</a></p>
</li>
<li>
<p><a href="https://discord.com/invite/NtAbbGn">discord</a> You can find custom commands,
configurations, etc here.</p>
</li>
</ul>
</details>
Intro to Derivationshttps://saylesss88.github.io/Intro_to_Nix_Derivations_7.html2025-11-29T00:00:00+00:00saylesss87@proton.me (saylesss88)<h1>Chapter 7</h1>
<details>
<summary> ✔️ Click to Expand Table of Contents</summary>
<!-- toc -->
</details>
<h2>Introduction to Nix Derivations</h2>
<p><img src="https://saylesss88.github.io/images/gruv10.png" alt="gruv10" /></p>
<p>Nix’s build instructions, known as <strong>derivations</strong>, are defined using the Nix
Language. These derivations can describe anything from individual software
packages to complete system configurations. The Nix package manager then
deterministically “realizes” (builds) these derivations, ensuring consistency
because they rely solely on a predefined set of inputs.</p>
<p>Most things in NixOS are built around derivations. Your NixOS system is
described by such a single system derivation. When you want to apply a new
configuration, <code>nixos-rebuild</code> handles the process:</p>
<p>It first builds this derivation:</p>
<pre><code class="language-bash">nix-build '<nixpkgs/nixos>' -A system
</code></pre>
<p>Then, once the build is complete, it switches to that new system:</p>
<pre><code class="language-bash">result/bin/switch-to-configuration
</code></pre>
<p>After the build, <code>nixos-rebuild</code> updates a crucial symbolic link:
<code>/run/current-system</code> This symlink always points to the active, running version
of your system in the Nix store. In essence, the <code>/run/current-system</code> path is
the currently active system derivation. This design choice gives NixOS its
powerful atomic upgrade and rollback capabilities: changing your system involves
building a new system derivation and updating this symlink to point to the
latest version.</p>
<blockquote>
<pre><code class="language-nix"> ls -lsah /run/current-system
0 lrwxrwxrwx 1 root root 85 May 23 12:11 /run/current-system -> /nix/store/
cy2c0kxpjrl7ajlg9v3zh898mhj4dyjv-nixos-system-magic-25.11.20250520.2795c50
</code></pre>
</blockquote>
<ul>
<li>
<p>The <code>-></code> indicates a symlink and it’s pointing to a <strong>store path</strong> which is
the result of a derivation being built (the system closure)</p>
</li>
<li>
<p>For beginners, the analogy of a cooking recipe is helpful:</p>
<ul>
<li>
<p><strong>Ingredients (Dependencies):</strong> What other software or libraries are needed.</p>
</li>
<li>
<p><strong>Steps (Build Instructions):</strong> The commands to compile, configure, and
install.</p>
</li>
<li>
<p><strong>Final Dish (Output):</strong> The resulting package or resource.</p>
</li>
</ul>
</li>
</ul>
<p>A Nix derivation encapsulates all this information, telling Nix what inputs to
use, how to build it, and what the final output should be.</p>
<p>Nix derivations run in <strong>pure</strong>, <strong>isolated environments</strong>, meaning they
<strong>cannot</strong> access the internet during the build phase. This ensures that builds
are reproducible – they don’t depend on external sources that might change over
time.</p>
<p>There are <code>Fixed-output-derivations</code> that allow fetching resources during the
build process by explicitly specifying the expected hash upfront. Just keep this
in mind that normal derivations don’t have network access.</p>
<h2>Creating Derivations in Nix</h2>
<p>The primary way to define packages in Nix is through the <code>mkDerivation</code>
function, which is part of the standard environment (<code>stdenv</code>). While a
lower-level <code>derivation</code> function exists for advanced use cases, <code>mkDerivation</code>
simplifies the process by automatically managing dependencies and the build
environment.</p>
<p><code>mkDerivation</code> (and <code>derivation</code>) takes a set of attributes as its argument. At
a minimum, you’ll often encounter these essential attributes:</p>
<ol>
<li>
<p><strong>name:</strong> A human-readable identifier for the derivation (e.g., “foo”,
“hello.txt”). This helps you and Nix refer to the package.</p>
</li>
<li>
<p><strong>system:</strong> Specifies the target architecture for the build (e.g.,
<code>builtins.currentSystem</code> for your current machine).</p>
</li>
<li>
<p><strong>builder:</strong> Defines the program that will execute the build instructions
(e.g., <code>bash</code>).</p>
</li>
</ol>
<p><strong>How do we pass these required attributes to the <code>derivation</code> function?</strong></p>
<p>Functions in Nix often take a single argument which is an attribute set. For
<code>derivation</code> and <code>mkDerivation</code>, this takes the form
<code>functionName { attribute1 = value1; attribute2 = value2; ... }</code>, where the <code>{}</code>
encloses the set of attributes being passed as the function’s argument.</p>
<p>Remember that <code>derivation</code> and <code>mkDerivation</code> take a set (i.e. <code>{}</code>) of
attributes as its first argument. So, in order to pass the required attributes
you would do something like this:</p>
<pre><code class="language-nix">nix-repl> pkgs = import <nixpkgs> {}
nix-repl> d = derivation {
name = "mydrv";
builder = "${pkgs.bash}/bin/bash";
args = [
"-c" # Tells bash to execute the following string as a command
''
# Explicitly set PATH to include coreutils bin directory
export PATH="${pkgs.coreutils}/bin:$PATH"
mkdir $out
''
];
system = builtins.currentSystem;
}
nix-repl> :b d
</code></pre>
<ul>
<li>When I was starting out, seeing the above written in the following format made
it clearer in my mental map that we were passing these attributes as arguments
but both accomplish the same thing.</li>
</ul>
<pre><code class="language-nix">d = derivation { name = "myname"; builder = "${coreutils}/bin/true"; system = builtins.currentSystem; }
</code></pre>
<ul>
<li>When you write <code>pkgs = import <nixpkgs> {};</code>, you are importing the Nixpkgs
<code>default.nix</code> file, which resolves to a function. Calling that function by
passing it an empty attribute set <code>{}</code> as its argument. The function then
evaluates and returns the entire <code>pkgs</code> attribute set. To specify a different
system for example, you could do something like:</li>
</ul>
<pre><code class="language-nix">pkgsForAarch64 = import <nixpkgs> { system = "aarch64-linux"; };
</code></pre>
<p>So when you see:</p>
<pre><code class="language-nix">import <nixpkgs> { overlays = []; config = {}; }
</code></pre>
<ul>
<li>
<p>Instead, these empty sets explicitly override any global or implicit
overlays/configurations that Nix might otherwise pick up from environment
variables (like <code>NIXPKGS_CONFIG</code>), default locations (like
<code>~/.config/nixpkgs/config.nix</code> or <code>~/.config/nixpkgs/overlays</code>), or other
mechanisms.</p>
</li>
<li>
<p>This is to prevent accidental partial application from other parts of your
configuration and is saying “Do not pass any custom configuration options for
this particular import”</p>
</li>
<li>
<p><code>derivation</code> is a pre-made, built-in function in the Nix language. Here, we
are passing it an attribute set as argument with the three required
attributes. (<code>name</code>, <code>builder</code>, <code>system</code>, and we added an extra argument
<code>args</code>.)</p>
</li>
</ul>
<h2>The Hello World Derivation</h2>
<p>For this example, first create a <code>hello</code> directory and add the
<a href="https://ftp.gnu.org/gnu/hello/hello-2.12.1.tar.gz">Hello tarball</a> to said
directory.</p>
<p>Now lets create the classic Hello derivation:</p>
<pre><code class="language-nix"># hello.nix
let
pkgs = import <nixpkgs> { };
in
derivation {
name = "hello";
builder = "${pkgs.bash}/bin/bash";
args = [ ./hello_builder.sh ];
inherit (pkgs)
gnutar
gzip
gnumake
gcc
coreutils
gawk
gnused
gnugrep
;
bintools = pkgs.binutils.bintools;
src = ./hello-2.12.1.tar.gz;
system = builtins.currentSystem;
}
</code></pre>
<ul>
<li>As you can see, this isn’t the only required file but is a recipe outlining
how to build the <code>hello</code> package. The <code>tar.gz</code> package can be found
<a href="https://ftp.gnu.org/gnu/hello/hello-2.12.1.tar.gz">here</a> You would just place
the tarball in the same directory as the derivation along with the following
<code>hello_builder.sh</code>:</li>
</ul>
<pre><code class="language-bash"># hello_builder.sh
export PATH="$gnutar/bin:$gcc/bin:$gnumake/bin:$coreutils/bin:$gawk/bin:$gzip/bin:$gnugrep/bin:$gnused/bin:$bintools/bin"
tar -xzf $src
cd hello-2.12.1
./configure --prefix=$out
make
make install
</code></pre>
<p>And build it with:</p>
<pre><code class="language-bash">nix-build hello.nix
</code></pre>
<p>Finally execute it with:</p>
<pre><code class="language-bash">./result/bin/hello
Hello, world!
</code></pre>
<h2>Simple Rust Derivation</h2>
<p>Create a <code>simple.rs</code> with the following contents:</p>
<pre><code class="language-rust">fn main() {
println!("Simple Rust!")
}
</code></pre>
<p>And a <code>rust_builder.sh</code> like this (this is our builder script):</p>
<pre><code class="language-bash"># rust_builder.sh
# Set up the PATH to include rustc coreutils and gcc
export PATH="$rustc/bin:$coreutils/bin:$gcc/bin"
# IMPORTANT: Create the $out directory BEFORE rustc tries to write to it
mkdir -p "$out"
# Compile the Rust source code and place the executable inside $out
rustc -o "$out/simple_rust" "$src"
</code></pre>
<p>Now we’ll enter the <code>nix repl</code> and build it:</p>
<pre><code class="language-bash">❯ nix repl
Nix 2.28.3
Type :? for help.
nix-repl> :l <nixpkgs>
added 3950 variables.
# Define the variables for rustc, coreutils, bash, AND gcc from the loaded nixpkgs
nix-repl> rustc = pkgs.rustc
nix-repl> coreutils = pkgs.coreutils
nix-repl> bash = pkgs.bash
nix-repl> gcc = pkgs.gcc
# Now define the derivation
nix-repl> simple_rust_program = derivation {
name = "simple-rust-program";
builder = "${bash}/bin/bash";
args = [ ./rust_builder.sh ];
rustc = rustc;
coreutils = coreutils;
gcc = gcc;
src = ./simple.rs;
system = builtins.currentSystem;
}
nix-repl> :b simple_rust_program
This derivation produced the following outputs:
out -> /nix/store/fmyqr2d3ph0lpnxd0xppwvwyhv3iyb7y-simple-rust-program
</code></pre>
<pre><code class="language-bash">nix-store -r /nix/store/fmyqr2d3ph0lpnxd0xppwvwyhv3iyb7y-simple-rust-program
warning: you did not specify '--add-root'; the result might be removed by the garbage collector
/nix/store/fmyqr2d3ph0lpnxd0xppwvwyhv3iyb7y-simple-rust-program
</code></pre>
<p>This simple Rust example, built with a direct derivation call, illustrates:</p>
<ul>
<li>
<p>How Nix explicitly manages every single tool in your build environment
(<code>bash</code>, <code>rustc</code>, <code>gcc</code>, <code>coreutils</code>).</p>
</li>
<li>
<p>The strict isolation of Nix builds, where nothing is implicitly available.</p>
</li>
<li>
<p>The deterministic mapping of inputs to unique output paths in the Nix store.</p>
</li>
<li>
<p>The above example shows the fundamental structure of a Nix derivation, how
it’s defined within the <code>nix-repl</code>.</p>
</li>
<li>
<p><code>.drv</code> files are intermediate files that describe how to build a derivation;
it’s the bare minimum information.</p>
</li>
</ul>
<h2>When Derivations are Built</h2>
<p>Nix doesn’t build derivations during the evaluation of your Nix expressions.
Instead, it processes your code in two main phases (and why you need to use
<code>:b simple_rust_program</code> or <code>nix-store -r</code> to actually build or realize it):</p>
<ol>
<li>
<p>Evaluation/Instantiate Phase: This is when Nix parses and interprets your
.nix expression. The result is a precise derivation description (often
represented as a .drv file on disk), and the unique “out paths” where the
final built products will go are calculated. No actual code is compiled or
executed yet. Achieved with <code>nix-instantiate</code></p>
</li>
<li>
<p>Realize/Build Phase: Only after a derivation has been fully described does
Nix actually execute its build instructions. It first ensures all the
derivation’s inputs (dependencies) are built, then runs the builder script
in an isolated environment, and places the resulting products into their
designated “out paths” in the Nix store. Achieved with <code>nix-store -r</code></p>
</li>
</ol>
<h2>Referring to other derivations</h2>
<p>The way that we can refer to other packages/derivations is to use the <code>outPath</code>.</p>
<p>The <code>outPath</code> describes the location of the files of that derivation. Nix can
then convert the derivation set into a string:</p>
<pre><code class="language-bash">nix repl
nix-repl> :l <nixpkgs>
nix-repl> fzf
«derivation /nix/store/vw1zag9q4xvf10z24j1qybji7wfsz78v-fzf-0.62.0.drv»
nix-repl> fzf.outPath
"/nix/store/z3ayhjslz72ldiwrv3mn5n7rs96p2g8a-fzf-0.62.0"
nix-repl> builtins.toString fzf
"/nix/store/z3ayhjslz72ldiwrv3mn5n7rs96p2g8a-fzf-0.62.0"
</code></pre>
<ul>
<li>As long as there is an <code>outPath</code> attribute, Nix will do the “set to string
conversion”.</li>
</ul>
<h2>Produce a development shell from a derivation</h2>
<p>Building on the concept of a derivation as a recipe, let’s create our first
practical derivation. This example shows how to define a temporary development
environment (a shell) using stdenv.mkDerivation, which is the primary function
for defining packages in Nix.</p>
<pre><code class="language-nix"># my-shell.nix
# We use a `let` expression to bring `pkgs` and `stdenv` into scope.
# This is a recommended practice over `with import <nixpkgs> {}`
# for clarity and to avoid potential name collisions.
let
pkgs = import <nixpkgs> {};
stdenv = pkgs.stdenv; # Access stdenv from the imported nixpkgs
in
# Make a new "derivation" that represents our shell
stdenv.mkDerivation {
name = "my-environment";
# The packages in the `buildInputs` list will be added to the PATH in our shell
buildInputs = [
# cowsay is an arbitrary package
# see https://nixos.org/nixos/packages.html to search for more
pkgs.cowsay
pkgs.fortune
];
}
</code></pre>
<p><strong>Usage</strong></p>
<pre><code class="language-bash">nix-shell my-shell.nix
fortune | cowsay
_________________________________________
/ "Lines that are parallel meet at \
| Infinity!" Euclid repeatedly, heatedly, |
| urged. |
| |
| Until he died, and so reached that |
| vicinity: in it he found that the |
| damned things diverged. |
| |
\ -- Piet Hein /
-----------------------------------------
\ ^__^
\ (oo)\_______
(__)\ )\/\
||----w |
|| ||
</code></pre>
<ul>
<li>To exit type: <code>exit</code></li>
</ul>
<p>This Nix expression defines a temporary development shell. Let’s break it down:</p>
<ul>
<li>
<p><code>pkgs = import <nixpkgs> {};</code>: Standard way to get access to all the packages
and helper functions (i.e. <code>nixpkgs.lib</code>)</p>
</li>
<li>
<p><code>stdenv = pkgs.stdenv;</code>: <code>stdenv</code> provides us <code>mkDerivation</code> and is from the
<code>nixpkgs</code> collection.</p>
</li>
<li>
<p><code>stdenv.mkDerivation { ... };</code>: This is the core function for creating
packages.</p>
<ul>
<li><code>stdenv</code> provides a set of common build tools and conventions.</li>
</ul>
</li>
<li>
<p><code>mkDerivation</code> takes an attribute set (a collection of key-value pairs) as its
argument.</p>
</li>
<li>
<p><code>name = "my-environment";</code>: This gives your derivation a human-readable name.</p>
</li>
<li>
<p><code>buildInputs = [ pkgs.cowsay ];</code>: This is a list of dependencies that will be
available in the build environment of this derivation (or in the <code>PATH</code> if you
enter the shell created by this derivation). <code>pkgs.cowsay</code> refers to the
<code>cowsay</code> package from the imported <code>pkgs</code> collection.</p>
</li>
</ul>
<p>The command <code>nix-instantiate --eval my-shell.nix</code> evaluates the Nix expression
in the file. It does not build the derivation. Instead, it returns the Nix value
that the expression evaluates to.</p>
<pre><code class="language-bash">nix-instantiate --eval my-shell.nix
</code></pre>
<p>This value is a structured data type that encapsulates all the attributes (like
<code>name</code>, <code>system</code>, <code>buildInputs</code>, etc.) required to build the derivation. Your
output shows this detailed internal representation of the derivation’s “recipe”
as understood by Nix. This is useful for debugging and inspecting the
derivation’s definition.</p>
<h2>Our Second Derivation: Understanding the Builder</h2>
<details>
<summary> Understanding the Builder (Click to Expand) </summary>
<ul>
<li>To understand how derivations work, let’s create a very basic example using a
bash script as our <code>builder</code>.</li>
</ul>
<h3>Why a Builder Script?</h3>
<ul>
<li>The <code>builder</code> attribute in a derivation tells Nix <em>how</em> to perform the build
steps. A simple and common way to define these steps is with a bash script.</li>
</ul>
<h3>The Challenge with Shebangs in Nix</h3>
<ul>
<li>
<p>In typical Unix-like systems, you might start a bash script with a shebang
(<code>#!/bin/bash</code> or <code>#!/usr/bin/env bash</code>) to tell the system how to execute it.
However, in Nix derivations, we generally avoid this.</p>
</li>
<li>
<p><strong>Reason:</strong> Nix builds happen in an isolated environment where the exact path
to common tools like <code>bash</code> isn’t known beforehand (it resides within the Nix
store). Hardcoding a path or relying on the system’s <code>PATH</code> would break Nix’s
stateless property.</p>
</li>
</ul>
<h3>The Importance of Statelessness in Nix</h3>
<ul>
<li>
<p><strong>Stateful Systems (Traditional):</strong> When you install software traditionally,
it often modifies the core system environment directly. This can lead to
dependency conflicts and makes rollbacks difficult.</p>
</li>
<li>
<p><strong>Stateless Systems (Nix):</strong> Nix takes a different approach. When installing a
package, it creates a unique, immutable directory in the Nix store. This
means:</p>
<ul>
<li>
<p><strong>No Conflicts:</strong> Different versions of the same package can coexist without
interfering with each other.</p>
</li>
<li>
<p><strong>Reliable Rollback:</strong> You can easily switch back to previous versions
without affecting system-wide files.</p>
</li>
<li>
<p><strong>Reproducibility:</strong> Builds are more likely to produce the same result
across different machines if they are “pure” (don’t rely on external system
state).</p>
</li>
</ul>
</li>
</ul>
<h3>The Isolated Nix Build Environment: A Quick Overview</h3>
<p>When Nix executes a builder script, it sets up a highly controlled and pristine
environment to ensure <strong>reproducibility</strong> and <strong>isolation</strong>. Here’s what
happens:</p>
<ol>
<li>
<p><strong>Fresh Start:</strong> Nix creates a temporary, empty directory for the build and
makes it the current working directory.</p>
</li>
<li>
<p><strong>Clean Environment:</strong> It completely clears the environment variables from
your shell.</p>
</li>
<li>
<p><strong>Controlled Inputs:</strong> Nix then populates the environment with <em>only</em> the
variables essential for the build, such as:</p>
<ul>
<li>
<p><code>$NIX_BUILD_TOP</code>: The path to the temporary build directory.</p>
</li>
<li>
<p><code>$PATH</code>: Carefully set to include only the explicit <code>buildInputs</code> you’ve
specified, preventing reliance on arbitrary system tools.</p>
</li>
<li>
<p><code>$HOME</code>: Set to <code>/homeless-shelter</code> to prevent programs from reading
user-specific configuration files.</p>
</li>
<li>
<p>Variables for each declared output (<code>$out</code>, etc.), indicating where the
final results should be placed in the Nix store.</p>
</li>
</ul>
</li>
<li>
<p><strong>Execution & Logging:</strong> The builder script is run with its specified
arguments. All its output (stdout/stderr) is captured in a log.</p>
</li>
<li>
<p><strong>Clean Up & Registration:</strong> If successful, the temporary directory is
removed. Nix then scans the build outputs for references to other store
paths, ensuring all dependencies are correctly tracked for future use and
garbage collection. Finally, it normalizes file permissions and timestamps
in the output for consistent hashing.</p>
</li>
</ol>
<p>This meticulous setup ensures that your builds are independent of the machine
they run on and always produce the same result, given the same inputs.</p>
<h2>Our builder Script</h2>
<ul>
<li>For our first derivation, we’ll create a simple <code>builder.sh</code> file in the
current directory:</li>
</ul>
<pre><code class="language-bash"># builder.sh
declare -xp
echo foo > $out
</code></pre>
<ul>
<li>
<p>The command <code>declare -xp</code> lists exported variables (it’s a bash builtin
function).</p>
</li>
<li>
<p>Nix needs to know where the final built product (the “cake” in our earlier
analogy) should be placed. So, during the derivation process, Nix calculates a
unique output path within the Nix store. This path is then made available to
our builder script as an environment variable named <code>$out</code>. The <code>.drv</code> file,
which is the recipe, contains instructions for the builder, including setting
up this <code>$out</code> variable. Our builder script will then put the result of its
work (in this case, the “foo” file) into this specific <code>$out</code> directory.</p>
</li>
<li>
<p>As mentioned earlier we need to find the nix store path to the bash
executable, common way to do this is to load Nixpkgs into the repl and check:</p>
</li>
</ul>
<pre><code class="language-bash">nix-repl> :l <nixpkgs>
Added 3950 variables.
nix-repl> "${bash}"
"/nix/store/ihmkc7z2wqk3bbipfnlh0yjrlfkkgnv6-bash-4.2-p45"
</code></pre>
<p>So, with this little trick we are able to refer to <code>bin/bash</code> and create our
derivation:</p>
<pre><code class="language-bash">nix-repl> d = derivation { name = "foo"; builder = "${bash}/bin/bash";
args = [ ./builder.sh ]; system = builtins.currentSystem; }
nix-repl> :b d
[1 built, 0.0 MiB DL]
this derivation produced the following outputs:
out -> /nix/store/gczb4qrag22harvv693wwnflqy7lx5pb-foo
</code></pre>
<ul>
<li>
<p>The contents of the resulting store path (<code>/nix/store/...-foo</code>) now contain
the file <code>foo</code>, as intended. We have successfully built a derivation!</p>
</li>
<li>
<p>Derivations are the primitive that Nix uses to define packages. “Package” is a
loosely defined term, but a derivation is simply the result of calling
<code>builtins.derivation</code>.</p>
</li>
</ul>
</details>
<h2>Our Last Derivation</h2>
<p>Create a new directory and a <code>hello.nix</code> with the following contents:</p>
<pre><code class="language-nix"># hello.nix
{
stdenv,
fetchzip,
}:
stdenv.mkDerivation {
pname = "hello";
version = "2.12.1";
src = fetchzip {
url = "https://ftp.gnu.org/gnu/hello/hello-2.12.1.tar.gz";
sha256 = "";
};
}
</code></pre>
<p>Save this file to <code>hello.nix</code> and run <code>nix-build</code> to observe the build failure:</p>
<ul>
<li>Click to expand output:</li>
</ul>
<pre><code class="language-nix">$ nix-build hello.nix
~error: cannot evaluate a function that has an argument without a value ('stdenv')
~ Nix attempted to evaluate a function as a top level expression; in
~ this case it must have its arguments supplied either by default
~ values, or passed explicitly with '--arg' or '--argstr'. See
~ https://nix.dev/manual/nix/stable/language/constructs.html#functions.
~
~ at /home/nix-user/hello.nix:3:3:
~
~ 2| {
~ 3| stdenv,
~ | ^
~ 4| fetchzip,
</code></pre>
<p><strong>Problem</strong>: The expression in <code>hello.nix</code> is a <em>function</em>, which only produces
it’s intended output if it is passed the correct <em>arguments</em>.(i.e. <code>stdenv</code> is
available from <code>nixpkgs</code> so we need to import <code>nixpkgs</code> before we can use
<code>stdenv</code>):</p>
<p>The recommended way to do this is to create a <code>default.nix</code> file in the same
directory as the <code>hello.nix</code> with the following contents:</p>
<pre><code class="language-nix"># default.nix
let
nixpkgs = fetchTarball "https://github.com/NixOS/nixpkgs/tarball/nixos-24.05";
pkgs = import nixpkgs { config = {}; overlays = []; };
in
{
hello = pkgs.callPackage ./hello.nix { };
}
</code></pre>
<p>This allows you to run <code>nix-build -A hello</code> to realize the derivation in
<code>hello.nix</code>, similar to the current convention used in Nixpkgs:</p>
<ul>
<li>Click to expand Output:</li>
</ul>
<pre><code class="language-nix">nix-build -A hello
~error: hash mismatch in fixed-output derivation '/nix/store/pd2kiyfa0c06giparlhd1k31bvllypbb-source.drv':
~ specified: sha256-AAAAAAAAAAAAAAAAAAAAAAAAAAAAAAAAAAAAAAAAAAA=
~ got: sha256-1kJjhtlsAkpNB7f6tZEs+dbKd8z7KoNHyDHEJ0tmhnc=
~error: 1 dependencies of derivation '/nix/store/b4mjwlv73nmiqgkdabsdjc4zq9gnma1l-hello-2.12.1.drv' failed to build
</code></pre>
<ul>
<li>Another way to do this is with
<a href="https://nix.dev/manual/nix/2.24/command-ref/nix-prefetch-url">nix-prefetch-url</a>
It is a utility to calculate the sha beforehand.</li>
</ul>
<pre><code class="language-bash">nix-prefetch-url https://ftp.gnu.org/gnu/hello/hello-2.12.1.tar.gz
path is '/nix/store/pa10z4ngm0g83kx9mssrqzz30s84vq7k-hello-2.12.1.tar.gz'
086vqwk2wl8zfs47sq2xpjc9k066ilmb8z6dn0q6ymwjzlm196cd
</code></pre>
<ul>
<li>When you use <code>nix-prefetch-url</code>, you get a Base32 hash when nix needs SRI
format.</li>
</ul>
<p>Run the following command to convert from Base32 to SRI:</p>
<pre><code class="language-bash">nix hash to-sri --type sha256 086vqwk2wl8zfs47sq2xpjc9k066ilmb8z6dn0q6ymwjzlm196cd
sha256-jZkUKv2SV28wsM18tCqNxoCZmLxdYH2Idh9RLibH2yA=
</code></pre>
<ul>
<li>This actually fetched a different sha than the Nix compiler returned in the
example where we replace the empty sha with the one Nix gives us. The
difference was that <code>fetchzip</code> automatically extracts archives before
computing the hash and slight differences in the metadata cause different
results. I had to switch from <code>fetchzip</code> to <code>fetchurl</code> to get the correct
results.
<ul>
<li>
<p>Extracted archives can differ in timestamps, permissions, or compression
details, causing different hash values.</p>
</li>
<li>
<p>A simple takeaway is to use <code>fetchurl</code> when you need an exact match, and
<code>fetchzip</code> when working with extracted contents.</p>
</li>
<li>
<p><a href="https://nixos.org/manual/nixpkgs/stable/#fetchurl">fetchurl</a></p>
</li>
<li>
<p><code>fetchurl</code> returns a <code>fixed-output derivation</code>(FOD): A derivation where a
cryptographic hash of the output is determined in advance using the
outputHash attribute, and where the builder executable has access to the
network.</p>
</li>
</ul>
</li>
</ul>
<p>Lastly replace the empty sha256 placeholder with the returned value from the
last command:</p>
<pre><code class="language-nix"># hello.nix
{
stdenv,
fetchzip,
}:
stdenv.mkDerivation {
pname = "hello";
version = "2.12.1";
src = fetchzip {
url = "https://ftp.gnu.org/gnu/hello/hello-2.12.1.tar.gz";
sha256 = "sha256-1kJjhtlsAkpNB7f6tZEs+dbKd8z7KoNHyDHEJ0tmhnc=";
};
}
</code></pre>
<p>Run <code>nix-build -A hello</code> again and you’ll see the derivation successfully
builds.</p>
<h2>Best Practices</h2>
<p><strong>Reproducible source paths</strong>: If we built the following derivation in
<code>/home/myuser/myproject</code> then the store path of <code>src</code> will be
<code>/nix/store/<hash>-myproject</code> causing the build to no longer be reproducible:</p>
<pre><code class="language-nix">let pkgs = import <nixpkgs> {}; in
pkgs.stdenv.mkDerivation {
name = "foo";
src = ./.;
}
</code></pre>
<blockquote>
<p>❗ TIP: Use <code>builtins.path</code> with the <code>name</code> attribute set to something fixed.
This will derive the symbolic name of the store path from the <code>name</code> instead
of the working directory:</p>
<pre><code class="language-nix">let pkgs = import <nixpkgs> {}; in
pkgs.stdenv.mkDerivation {
name = "foo";
src = builtins.path { path = ./.; name = "myproject"; };
}
</code></pre>
</blockquote>
<h3>Conclusion</h3>
<p>In this chapter, we’ve laid the groundwork for understanding Nix derivations,
the fundamental recipes that define how software and other artifacts are built
within the Nix ecosystem. We’ve explored their key components – inputs, builder,
build phases, and outputs – and how they contribute to Nix’s core principles of
reproducibility and isolated environments. Derivations are the workhorses behind
the packages and tools we use daily in Nix.</p>
<p>As you’ve learned, derivations offer a powerful and principled approach to
software management. However, the way we organize and manage these derivations,
along with other Nix expressions and dependencies, has evolved over time.
Traditionally, Nix projects often relied on patterns involving <code>default.nix</code>
files, channel subscriptions, and manual dependency management.</p>
<p>A more recent and increasingly popular approach to structuring Nix projects and
managing dependencies is through Nix Flakes. Flakes introduce a standardized
project structure, explicit input tracking, and a more robust way to ensure
reproducible builds across different environments.</p>
<p>In our next chapter,
<a href="https://saylesss88.github.io/Comparing_Flakes_and_Traditional_Nix_8.html">Comparing Flakes and Traditional Nix</a>,
we will directly compare and contrast these two approaches. We’ll examine the
strengths and weaknesses of traditional Nix practices in contrast to the
benefits and features offered by Nix Flakes. This comparison will help you
understand the motivations behind Flakes and when you might choose one approach
over the other for your Nix projects.</p>
<p>As you can see below, there is a ton of information on derivations freely
available.</p>
<h4>Links To Articles about Derivations</h4>
<details>
<summary> Click To Expand Resources </summary>
<ul>
<li>
<p><a href="https://nixos.org/guides/nix-pills/06-our-first-derivation">NixPillsOurFirstDerivation</a></p>
</li>
<li>
<p><a href="https://nixos.org/guides/nix-pills/07-working-derivation">NixPills-WorkingDerivation</a></p>
</li>
<li>
<p><a href="https://nix.dev/manual/nix/2.24/language/derivations">nix.dev-Derivations</a></p>
</li>
<li>
<p><a href="https://nix.dev/tutorials/packaging-existing-software">nix.dev-packagingExistingSoftware</a></p>
</li>
<li>
<p><a href="https://ianthehenry.com/posts/how-to-learn-nix/my-first-derivation/">howToLearnNix-MyFirstDerivation</a></p>
</li>
<li>
<p><a href="https://ianthehenry.com/posts/how-to-learn-nix/derivations-in-detail/">howToLearnNix-DerivationsInDetail</a></p>
</li>
<li>
<p><a href="https://www.sam.today/blog/creating-a-super-simple-derivation-learning-nix-pt-3">Sparky/blog-creatingASuperSimpleDerivation</a> #
How to learn Nix</p>
</li>
<li>
<p><a href="https://www.sam.today/blog/derivations-102-learning-nix-pt-4">Sparky/blog-Derivations102</a></p>
</li>
<li>
<p><a href="https://scrive.github.io/nix-workshop/04-derivations/01-derivation-basics.html">ScriveNixWorkshop-nixDerivationBasics</a></p>
</li>
<li>
<p><a href="https://zero-to-nix.com/concepts/derivations/">zeroToNix-Derivations</a></p>
</li>
<li>
<p><a href="https://www.tweag.io/blog/2021-02-17-derivation-outputs-and-output-paths/">Tweag-derivationOutputs</a></p>
</li>
<li>
<p><a href="https://ayats.org/blog/nix-tuto-2">theNixLectures-Derivations</a></p>
</li>
<li>
<p><a href="https://bmcgee.ie/posts/2023/02/nix-what-are-fixed-output-derivations-and-why-use-them/">bmcgee-whatAreFixed-OutputDerivations</a></p>
</li>
</ul>
</details>
Flake Inputshttps://saylesss88.github.io/flakes/flake_inputs_4.1.html2025-11-28T00:00:00+00:00saylesss87@proton.me (saylesss88)<h1>Nix Flake Inputs</h1>
<details>
<summary> ✔️ Click to Expand Table of Contents</summary>
<!-- toc -->
</details>
<p>The attribute <code>inputs</code> specifies the dependencies of a flake, as an attrset
mapping input names to flake references.</p>
<p>If a repository provides a <code>flake.nix</code> you can include it as an input in your
<code>flake.nix</code>.</p>
<p>For example, I like yazi as my file explorer and have been using helix as my
editor. To be able to get yazi to work with helix I needed the latest versions
of both yazi and helix. One way to get the latest versions was to add their
flakes as inputs to my flake:</p>
<pre><code class="language-nix">{
inputs = {
nixpkgs.url = "github:NixOS/nixpkgs/nixos-24.11";
home-manager = {
url = "github:nix-community/home-manager/release-24.11";
inputs.nixpkgs.follows = "nixpkgs";
};
helix = {
url = "github:helix-editor/helix";
inputs.nixpkgs.follows = "nixpkgs";
};
yazi.url = "github:sxyazi/yazi";
};
outputs = { nixpkgs, home-manager, ... } @ inputs: {
# ... snip ... #
</code></pre>
<ul>
<li>Now to use this input, I would reference these inputs in both my yazi and
helix modules:</li>
</ul>
<pre><code class="language-nix"># yazi.nix
{ pkgs, config, inputs, ... }: {
programs.yazi = {
enable = true;
package = inputs.yazi.packages.${pkgs.system}.default;
};
}
</code></pre>
<pre><code class="language-nix"># helix.nix
{ pkgs, config, inputs, ... }: {
programs.helix = {
enable = true;
package = inputs.helix.packages.${pkgs.system}.helix;
};
}
</code></pre>
<p>Understanding <code>.default</code> vs. Named Outputs (e.g., <code>.helix</code>) from the Source</p>
<p>The difference between <code>inputs.yazi.packages.${pkgs.system}.default</code> and
<code>inputs.helix.packages.${pkgs.system}.helix</code> comes down to how the respective
upstream flakes define their outputs. You can always inspect a flake’s
<code>flake.nix</code> or use <code>nix flake show <flake-reference></code> to understand its
structure.</p>
<h2>Helix <code>flake.nix</code></h2>
<p>Let’s look at the relevant section of Helix’s <code>flake.nix</code> click the eye to see
the full flake:</p>
<pre><code class="language-nix">~ {
~ description = "A post-modern text editor.";
~
~ inputs = {
~ nixpkgs.url = "github:nixos/nixpkgs/nixos-unstable";
~ rust-overlay = {
~ url = "github:oxalica/rust-overlay";
~ inputs.nixpkgs.follows = "nixpkgs";
~ };
~ };
~
~ outputs = {
~ self,
~ nixpkgs,
~ rust-overlay,
~ ...
~ }: let
~ inherit (nixpkgs) lib;
~ systems = [
~ "x86_64-linux"
~ "aarch64-linux"
~ "x86_64-darwin"
~ "aarch64-darwin"
~ ];
~ eachSystem = lib.genAttrs systems;
~ pkgsFor = eachSystem (system:
~ import nixpkgs {
~ localSystem.system = system;
~ overlays = [(import rust-overlay) self.overlays.helix];
~ });
~ gitRev = self.rev or self.dirtyRev or null;
in {
packages = eachSystem (system: {
inherit (pkgsFor.${system}) helix;
/*
The default Helix build. Uses the latest stable Rust toolchain, and unstable
nixpkgs.
The build inputs can be overridden with the following:
packages.${system}.default.override { rustPlatform = newPlatform; };
Overriding a derivation attribute can be done as well:
packages.${system}.default.overrideAttrs { buildType = "debug"; };
*/
default = self.packages.${system}.helix;
});
~ checks =
~ lib.mapAttrs (system: pkgs: let
~ # Get Helix's MSRV toolchain to build with by default.
~ msrvToolchain = pkgs.pkgsBuildHost.rust-bin.fromRustupToolchainFile ./rust-toolchain.toml;
~ msrvPlatform = pkgs.makeRustPlatform {
~ cargo = msrvToolchain;
~ rustc = msrvToolchain;
~ };
~ in {
~ helix = self.packages.${system}.helix.override {
~ rustPlatform = msrvPlatform;
~ };
~ })
~ pkgsFor;
~
~ # Devshell behavior is preserved.
~ devShells =
~ lib.mapAttrs (system: pkgs: {
~ default = let
~ commonRustFlagsEnv = "-C link-arg=-fuse-ld=lld -C target-cpu=native --cfg tokio_unstable";
~ platformRustFlagsEnv = lib.optionalString pkgs.stdenv.isLinux "-Clink-arg=-Wl,--no-rosegment";
~ in
~ pkgs.mkShell {
~ inputsFrom = [self.checks.${system}.helix];
~ nativeBuildInputs = with pkgs;
~ [
~ lld
~ cargo-flamegraph
~ rust-bin.nightly.latest.rust-analyzer
~ ]
~ ++ (lib.optional (stdenv.isx86_64 && stdenv.isLinux) cargo-tarpaulin)
~ ++ (lib.optional stdenv.isLinux lldb)
~ ++ (lib.optional stdenv.isDarwin darwin.apple_sdk.frameworks.CoreFoundation);
~ shellHook = ''
~ export RUST_BACKTRACE="1"
~ export RUSTFLAGS="''${RUSTFLAGS:-""} ${commonRustFlagsEnv} ${platformRustFlagsEnv}"
~ '';
~ };
~ })
~ pkgsFor;
~
~ overlays = {
~ helix = final: prev: {
~ helix = final.callPackage ./default.nix {inherit gitRev;};
~ };
~
~ default = self.overlays.helix;
~ };
~ };
~ nixConfig = {
~ extra-substituters = ["https://helix.cachix.org"];
~ extra-trusted-public-keys = ["helix.cachix.org-1:ejp9KQpR1FBI2onstMQ34yogDm4OgU2ru6lIwPvuCVs="];
~ };
~}
</code></pre>
<p>Dissecting <code>inherit (pkgsFor.${system}) helix;</code></p>
<p>Imagine the Nix evaluation process for Helix <code>flake.nix</code> in the <code>outputs</code>
section:</p>
<ol>
<li>
<p><code>packages = eachSystem (system: { ... });</code> Part iterates through each
<code>system</code> (like <code>x86_64-linux</code>). For each <code>system</code>, it’s creating an attribute
set that will become <code>self.packages.${system}</code>.</p>
</li>
<li>
<p>Inside the <code>eachSystem</code> function, for a specific system (e.g.
<code>x86_64-linux</code>): The code is building an attribute set that will ultimately
be assigned to <code>self.packages.x86_64-linux</code>.</p>
</li>
<li>
<p>When you write <code>inherit (sourceAttrset) attributeName;</code>, it’s equivalent to
writing <code>attributeName = sourceAttrset.attributeName;</code>.</p>
</li>
</ol>
<p>So, <code>inherit (pkgsFor.${system}) helix;</code> is equivalent to:</p>
<pre><code class="language-nix">helix = pkgsFor.${system}.helix;
</code></pre>
<p>Therefore, because of <code>inherit (pkgsFor.${system}) helix;</code>, the helix attribute
is explicitly defined under
<code>packages.${system}``. This is why you access it as </code>inputs.helix.packages.${pkgs.system}.helix;`.</p>
<h2>Yazi <code>flake.nix</code></h2>
<p>Now this is yazi’s <code>flake.nix</code>, yazi’s documentation tells you to use <code>.default</code>
but lets examine the flake and see why:</p>
<pre><code class="language-nix">~{
~ inputs = {
~ nixpkgs.url = "github:NixOS/nixpkgs/nixpkgs-unstable";
~ flake-utils.url = "github:numtide/flake-utils";
~ rust-overlay = {
~ url = "github:oxalica/rust-overlay";
~ inputs.nixpkgs.follows = "nixpkgs";
~ };
~ };
~
~ outputs =
~ {
~ self,
~ nixpkgs,
~ rust-overlay,
~ flake-utils,
~ ...
~ }:
~ flake-utils.lib.eachDefaultSystem (
~ system:
~ let
~ pkgs = import nixpkgs {
~ inherit system;
~ overlays = [ rust-overlay.overlays.default ];
~ };
~ toolchain = pkgs.rust-bin.stable.latest.default;
~ rustPlatform = pkgs.makeRustPlatform {
~ cargo = toolchain;
~ rustc = toolchain;
~ };
~
~ rev = self.shortRev or self.dirtyShortRev or "dirty";
~ date = self.lastModifiedDate or self.lastModified or "19700101";
~ version =
~ (builtins.fromTOML (builtins.readFile ./yazi-fm/Cargo.toml)).package.version
~ + "pre${builtins.substring 0 8 date}_${rev}";
~ in
{
packages = {
yazi-unwrapped = pkgs.callPackage ./nix/yazi-unwrapped.nix {
inherit
version
rev
date
rustPlatform
;
};
yazi = pkgs.callPackage ./nix/yazi.nix { inherit (self.packages.${system}) yazi-unwrapped; };
default = self.packages.${system}.yazi;
};
~ devShells = {
~ default = pkgs.callPackage ./nix/shell.nix { };
~ };
~
~ formatter = pkgs.nixfmt-rfc-style;
~ }
~ )
~ // {
~ overlays = {
~ default = self.overlays.yazi;
~ yazi = _: prev: { inherit (self.packages.${prev.stdenv.system}) yazi yazi-unwrapped; };
~ };
~ };
~}
</code></pre>
<p>In this case using <code>inputs.yazi.packages.${pkgs.system}.yazi</code> would also work</p>
<ul>
<li>
<p><code>yazi = pkgs.callPackage ./nix/yazi.nix { inherit (self.packages.${system}) yazi-unwrapped; };</code>
This line defines the yazi variable (or, more precisely, creates an attribute
named yazi within the <code>packages.${system}</code> set). It assigns to this yazi
attribute the result of calling the Nix expression in <code>./nix/yazi.nix</code> with
yazi-unwrapped as an argument. This yazi attribute represents the actual,
runnable Yazi package.</p>
</li>
<li>
<p><code>default = self.packages.${system}.yazi;</code> This line then aliases the yazi
package. It creates another attribute named <code>default</code> within the same
<code>packages.${system}</code> set and points it directly to the yazi attribute that was
just defined.</p>
</li>
<li>
<p>So, when you access <code>inputs.yazi.packages.${pkgs.system}.default</code>, you’re
effectively following the alias to the yazi package.</p>
</li>
<li>
<p>The choice to use <code>.default</code> is primarily for convenience and adherence to a
common flake convention, making the flake easier for users to consume without
needing to dive into its internal structure.</p>
</li>
</ul>
Flake outputshttps://saylesss88.github.io/flakes/flake_outputs_4.2.html2025-11-28T00:00:00+00:00saylesss87@proton.me (saylesss88)<h1>Nix Flake Outputs</h1>
<details>
<summary> ✔️ Click to Expand Table of Contents</summary>
<!-- toc -->
</details>
<p>Flake outputs are what the flake produces when built. Flakes can have multiple
outputs simultaneously such as:</p>
<ul>
<li>
<p><strong>Packages</strong>: Self-contained bundles that are built using derivations and
provide either some kind of software or dependencies of software.</p>
</li>
<li>
<p><a href="https://saylesss88.github.io/NixOS_Modules_Explained_3.html">NixOS modules</a></p>
</li>
<li>
<p>Nix development environments</p>
</li>
<li>
<p><a href="https://github.com/NixOS/templates">Nix templates</a></p>
</li>
<li>
<p>The <code>outputs</code> top-level attribute is actually a function that takes an
attribute set of inputs and returns an attribute set that is essentially a
recipe for building the flake.</p>
</li>
</ul>
<h2>Output Schema</h2>
<p>Once the inputs are resolved, they’re passed to the <code>outputs</code> attribute. This
<code>outputs</code> attribute is, in fact, a function, as indicated by the <code>:</code> colon (or
the <code>lambda</code> syntax) that follows its definition. This function takes the
resolved inputs (and <code>self</code>, the flake’s directory in the store) as arguments,
and its return value dictates the outputs of the flake, following this schema:</p>
<pre><code class="language-nix">{ self, nixpkgs, ... }@inputs:
{
# Executed by `nix flake check`
checks."<system>"."<name>" = derivation;
# Executed by `nix build .#<name>`
packages."<system>"."<name>" = derivation;
# Executed by `nix build .`
packages."<system>".default = derivation;
# Executed by `nix run .#<name>`
apps."<system>"."<name>" = {
type = "app";
program = "<store-path>";
};
# Executed by `nix run . -- <args?>`
apps."<system>".default = { type = "app"; program = "..."; };
# Formatter (alejandra, nixfmt or nixpkgs-fmt)
formatter."<system>" = derivation;
# Used for nixpkgs packages, also accessible via `nix build .#<name>`
legacyPackages."<system>"."<name>" = derivation;
# Overlay, consumed by other flakes
overlays."<name>" = final: prev: { };
# Default overlay
overlays.default = final: prev: { };
# Nixos module, consumed by other flakes
nixosModules."<name>" = { config, ... }: { options = {}; config = {}; };
# Default module
nixosModules.default = { config, ... }: { options = {}; config = {}; };
# Used with `nixos-rebuild switch --flake .#<hostname>`
# nixosConfigurations."<hostname>".config.system.build.toplevel must be a derivation
nixosConfigurations."<hostname>" = {};
# Used by `nix develop .#<name>`
devShells."<system>"."<name>" = derivation;
# Used by `nix develop`
devShells."<system>".default = derivation;
# Hydra build jobs
hydraJobs."<attr>"."<system>" = derivation;
# Used by `nix flake init -t <flake>#<name>`
templates."<name>" = {
path = "<store-path>";
description = "template description goes here?";
};
# Used by `nix flake init -t <flake>`
templates.default = { path = "<store-path>"; description = ""; };
}
</code></pre>
<p>The first line <code>{ self, nixpkgs, ... }@ inputs:</code> defines the functions
parameters: It’s important to understand that within the scope of the <code>outputs</code>
function <code>nixpkgs</code> is available at the top-level because we explicitly passed it
as an argument but for individual modules outside this flake the scope is lost,
and you need to use <code>inputs.nixpkgs</code> (or equivalent)</p>
<ol>
<li>
<p>It explicitly names the <code>self</code> attribute, making it directly accessible. The
variadic <code>...</code> ellipses part of the function signature is what allows all
your flake inputs to be brought into the function’s scope without having to
list each one explicitly.</p>
</li>
<li>
<p>It destructures all other attributes (your defined <code>inputs</code>) into the
functions scope.</p>
</li>
<li>
<p>It gives you a convenient single variable, <code>inputs</code>, that refers to the
entire attribute set passed to the <code>outputs</code> function. This allows you to
access inputs either individually (e.g. <code>nixpkgs</code>) or through the <code>inputs</code>
variable (e.g. <code>inputs.nixpkgs</code>).</p>
</li>
</ol>
<p>You can also define additional arbitrary attributes, but these are the outputs
that Nix knows about.</p>
<p>As you can see, the majority of the outputs within the outputs schema expect a
derivation. This means that for packages, applications, formatters, checks, and
development shells, you’ll be defining a Nix derivation—a set of instructions
that tells Nix how to build a particular software component. This is central to
Nix’s declarative nature.</p>
<ul>
<li>The command <code>nix flake show</code>, takes a flake URI and prints all the outputs of
the flake as a nice tree structure, mapping attribute paths to the types of
values.</li>
</ul>
<pre><code class="language-bash"> ~/players/third 3s
❯ nix flake show
path:/home/jr/players/third?lastModified=1748272555&narHash=sha256-oNzkC6X9hA0MpOBmJSZ89w4znXxv4Q5EkFhp0ewehY0%3D
├───nixosConfigurations
│ └───testing: NixOS configuration
└───nixosModules
└───default: NixOS module
</code></pre>
<p>To show you the structure of this little flake project:</p>
<pre><code class="language-bash"> ~/players
❯ tree
.
├── first
│ ├── flake.lock
│ ├── flake.nix
│ └── result -> /nix/store/701vyaanmqchd2nnaq71y65v8ws11zx0-nixos-system-nixos-24.11.20250523.f09dede
├── second
│ ├── flake.lock
│ └── flake.nix
└── third
├── flake.lock
├── flake.nix
└── result -> /nix/store/mlszr5ws3xaly8m4q9jslgs31w6w76y2-nixos-system-nixos-24.11.20250523.f09dede
</code></pre>
<h2>Simple Example providing an output</h2>
<pre><code class="language-nix"># flake.nix
{
outputs = { self }: {
bada = "bing";
};
}
</code></pre>
<p>You can then evaluate this specific output using <code>nix eval</code>:</p>
<pre><code class="language-bash">nix eval .#bada
"bing"
</code></pre>
<h2>Outputs understood by Nix</h2>
<p>While the attribute set that <code>outputs</code> returns may contain arbitrary attributes,
meaning any valid Nix value. Some of the standard outputs are understood by
various <code>nix</code> utilities. <code>packages</code> is one of these:</p>
<pre><code class="language-nix"># flake.nix
{
inputs = {
nixpkgs.url = "github:nixos/nixpkgs";
};
outputs = { self, nixpkgs }: {
# this is the re-exporting part!
packages.x86_64-linux.hello = nixpkgs.legacyPackages.x86_64-linux.hello;
};
}
</code></pre>
<ul>
<li>Re-exporting happens when you take the value of <code>hello</code> in its standard
derivation format, exactly as <code>nixpkgs</code> produces it and assign it to an
attribute in your own flake’s outputs.
<ul>
<li>
<p><code>packages.x86_64-linux.hello</code>(your flake’s output path) <code>=</code>
<code> nixpkgs.legacyPackages.x86_64-linux.hello</code>(the source from the <code>nixpkgs</code>
flake’s output)</p>
</li>
<li>
<p>We’re saying, My flakes <code>hello</code> package is exactly the same as the <code>hello</code>
package found inside the <code>nixpkgs</code> input flake.</p>
</li>
<li>
<p>It’s important to understand that within the scope of the <code>outputs</code> function
(i.e. within your flake), <code>nixpkgs</code> is available at the top-level (i.e. the
<code>= nixpkgs</code> part) because we explicitly passed it as an argument but for
individual modules outside of this flake the scope is lost, and
<code>inputs.nixpkgs</code> is needed.</p>
</li>
</ul>
</li>
</ul>
<p>The following command builds the reexported package:</p>
<pre><code class="language-bash">nix build .#hello
</code></pre>
<p>or run it with:</p>
<pre><code class="language-bash">nix run .#hello
</code></pre>
<p>You might notice <code>x86_64-linux</code> appearing in the package path, and there’s a
good reason for it. Flakes are designed to provide <em>hermetic evaluation</em>,
meaning their outputs should be identical regardless of the environment where
they’re built. A key factor in any build system is the platform (which combines
the architecture and operating system, like <code>x86_64-linux</code> or <code>aarch64-darwin</code>).</p>
<p>Because of Nix’s commitment to reproducibility across different systems, any
flake output that involves building software packages must explicitly specify
the platform. The standard approach is to structure these outputs as an
attribute set where the names are platforms, and the values are the outputs
specific to that platform. For the packages output, each platform-specific value
is itself an attribute set containing the various packages built for that
particular system.</p>
<h2>Exporting Functions</h2>
<p>This example outputs a <code>sayGoodbye</code> function, via the <code>lib</code> attribute, that
takes a name for its input and outputs a string saying Goodbye very nicely to
the person with that name:</p>
<pre><code class="language-nix">{
outputs = { self }: {
lib = {
sayGoodbye = name: "Goodbye F*** Off, ${name}!";
};
};
}
</code></pre>
<p>You could then specify this flake as an input to another flake and use
<code>sayGoodbye</code> however you’d like.</p>
<p>Or load it into the <code>nix repl</code> like so:</p>
<pre><code class="language-bash">nix repl
nix-repl> :lf .
nix-repl> lib.sayGoodbye
«lambda sayGoodbye @ /nix/store/665rwfvkwdx6kwvk9ldijp2a6jvcgv1n-source/flake.nix:4:20»
nix-repl> lib.sayGoodbye "Jr"
"Goodbye F*** Off, Jr!"
</code></pre>
<ul>
<li>As you can see, specifying <code>lib.sayGoodbye</code> without any arguments returns a
function. (a lambda function)</li>
</ul>
<h2>Simplifying Multi-Platform Outputs with flake-utils</h2>
<p>Manually repeating these platform definitions for every output (<code>packages</code>,
<code>devShells</code>, <code>checks</code>, etc.) can quickly become verbose. This is where the
flake-utils helper flake comes in handy. It provides utilities to reduce
boilerplate when defining outputs for multiple systems.</p>
<p>A commonly used function is <code>flake-utils.lib.eachDefaultSystem</code>, which
automatically generates outputs for common platforms (like <code>x86_64-linux</code>,
<code>aarch64-linux</code>, <code>x86_64-darwin</code>, <code>aarch64-darwin</code>). This transforms your
outputs definition from manually listing each system to a more concise
structure:</p>
<h1>Example using flake-utils</h1>
<pre><code class="language-nix">{
inputs = {
nixpkgs.url = "github:NixOS/nixpkgs/nixos-unstable";
flake-utils.url = "github:numtide/flake-utils"; # Don't forget to add flake-utils to inputs!
};
outputs = {
self,
nixpkgs,
flake-utils,
...
}:
flake-utils.lib.eachDefaultSystem (
system: let
pkgs = import nixpkgs {inherit system;};
in {
packages.hello = pkgs.hello; # Now directly defines 'hello' for the current 'system' # packages.default = self.packages.${system}.hello; # Optional default alias
devShells.default = pkgs.mkShell {
packages = [pkgs.hello];
};
}
);
}
</code></pre>
<ul>
<li>This flake-utils pattern is particularly useful for defining consistent
development environments across platforms, which can then be activated simply
by running <code>nix develop</code> in the flake’s directory.</li>
</ul>
<h3>Adding Formatter, Checks, and Devshell Outputs</h3>
<p>This is a minimal flake for demonstration with a hardcoded <code>system</code>, for more
portability:</p>
<pre><code class="language-nix">{
description = "NixOS configuration";
inputs = {
nixpkgs.url = "github:nixos/nixpkgs/nixos-unstable";
home-manager.url = "github:nix-community/home-manager";
home-manager.inputs.nixpkgs.follows = "nixpkgs";
treefmt-nix.url = "github:numtide/treefmt-nix";
};
outputs = inputs@{ nixpkgs, home-manager, treefmt-nix, ... }: let
system = "x86_64-linux";
host = "your-hostname-goes-here";
# Define pkgs with allowUnfree
pkgs = import inputs.nixpkgs {
inherit system;
config.allowUnfree = true;
};
# Formatter configuration
treefmtEval = treefmt-nix.lib.evalModule pkgs ./lib/treefmt.nix;
in {
formatter.${system} = treefmtEval.config.build.wrapper;
# Style check for CI
checks.${system}.style = treefmtEval.config.build.check self;
# Development shell
devShells.${system}.default = import ./lib/dev-shell.nix {
inherit inputs;
};
nixosConfigurations = {
hostname = nixpkgs.lib.nixosSystem {
system = "x86_64-linux";
modules = [
./configuration.nix
home-manager.nixosModules.home-manager
{
home-manager.useGlobalPkgs = true;
home-manager.useUserPackages = true;
home-manager.users.jdoe = ./home.nix;
# Optionally, use home-manager.extraSpecialArgs to pass
# arguments to home.nix
}
];
};
};
};
}
</code></pre>
<p>And in <code>lib/treefmt.nix</code>:</p>
<pre><code class="language-nix"># treefmt.nix
{
projectRootFile = "flake.nix";
programs = {
alejandra.enable = true;
deadnix.enable = true;
# rustfmt.enable = true;
# shellcheck.enable = true;
# prettier.enable = true;
statix.enable = true;
keep-sorted.enable = true;
# nixfmt = {
# enable = true;
# # strict = true;
# };
};
settings = {
global.excludes = [
"LICENSE"
"README.md"
".adr-dir"
"nu_scripts"
# unsupported extensions
"*.{gif,png,svg,tape,mts,lock,mod,sum,toml,env,envrc,gitignore,sql,conf,pem,*.so.2,key,pub,py,narHash}"
"data-mesher/test/networks/*"
"nss-datamesher/test/dns.json"
"*.age"
"*.jpg"
"*.nu"
"*.png"
".jj/*"
"Cargo.lock"
"flake.lock"
"hive/moonrise/borg-key-backup"
"justfile"
];
formatter = {
deadnix = {
priority = 1;
};
statix = {
priority = 2;
};
alejandra = {
priority = 3;
};
};
};
}
</code></pre>
<p>Now we have a few commands available to us in our flake directory:</p>
<ul>
<li>
<p><code>nix fmt</code>: Will format your whole configuration consistently</p>
</li>
<li>
<p><code>nix flake check</code>: While this command was already available, it is now tied to
treefmt’s check which will check the style of your syntax and provide
suggestions.</p>
</li>
</ul>
<p>And this is <code>lib/dev-shell.nix</code>:</p>
<pre><code class="language-nix">{
inputs,
system ? "x86_64-linux",
}: let
# Instantiate nixpkgs with the given system and allow unfree packages
pkgs = import inputs.nixpkgs {
inherit system;
config.allowUnfree = true;
overlays = [
# Add overlays if needed, e.g., inputs.neovim-nightly-overlay.overlays.default
];
};
in
pkgs.mkShell {
name = "nixos-dev";
packages = with pkgs; [
# Nix tools
nixfmt-rfc-style # Formatter
deadnix # Dead code detection
nixd # Nix language server
nil # Alternative Nix language server
nh # Nix helper
nix-diff # Compare Nix derivations
nix-tree # Visualize Nix dependencies
# Code editing
helix # Your editor
# General utilities
git
ripgrep
jq
tree
];
shellHook = ''
echo "Welcome to the NixOS development shell!"
echo "System: ${system}"
echo "Tools available: nixfmt, deadnix, nixd, nil, nh, nix-diff, nix-tree, helix, git, ripgrep, jq, tree"
'';
}
</code></pre>
<p>Now you can run <code>nix develop</code> in the flake directory and if successfull, you’ll
see the <code>echo</code> commands above and you will have all the tools available in your
environment without having to explicitly install them.</p>
Flake outputshttps://saylesss88.github.io/flakes/flake_examples_4.3.html2025-11-28T00:00:00+00:00saylesss87@proton.me (saylesss88)<h1>Nix Flake Examples</h1>
<details>
<summary> ✔️ Click to Expand Table of Contents</summary>
<!-- toc -->
</details>
<p>This chapter provides practical examples to illustrate the concepts discussed in
“Nix Flakes Explained.”</p>
<h2>Example showing the extensibility of Flakes</h2>
<p>NixOS modules and configurations offer us a powerful and composable way to
define and share system configurations. Imagine we have several independent
“players,” each with their own unique set of configurations or modules. How do
we combine these individual contributions into a single, cohesive system without
directly altering each player’s original flake?</p>
<p>This example demonstrates how flakes can extend and compose each other, allowing
you to layer configurations on top of existing ones. This is particularly useful
when you want to:</p>
<ul>
<li>
<p>Build upon a base configuration without modifying its source.</p>
</li>
<li>
<p>Combine features from multiple independent flakes into a single system.</p>
</li>
<li>
<p>Create specialized versions of an existing configuration.</p>
</li>
</ul>
<p>Let’s simulate this by creating a players directory with three sub-directories:
<code>first</code>, <code>second</code>, and <code>third</code>. Each of these will contain its own <code>flake.nix</code>.</p>
<pre><code class="language-bash">mkdir players
cd players
mkdir first
mkdir second
mkdir third
cd first
</code></pre>
<p>Now create a <code>flake.nix</code> with the following contents:</p>
<pre><code class="language-nix"># flake.nix
{
inputs = {
nixpkgs.url = "github:nixos/nixpkgs/nixos-24.11";
};
outputs = {
self,
nixpkgs,
}: {
nixosModules.default = {
config,
pkgs,
lib,
...
}: {
# Create a file `/etc/first-file`
environment.etc.first-file.text = "Hello player # 1!";
boot.initrd.includeDefaultModules = false;
documentation.man.enable = false;
boot.loader.grub.enable = false;
fileSystems."/".device = "/dev/null";
system.stateVersion = "24.11";
};
nixosConfigurations.testing = nixpkgs.lib.nixosSystem {
system = "x86_64-linux";
modules = [
self.nixosModules.default
];
};
};
}
</code></pre>
<ul>
<li>This demonstrates using <code>self</code> to reference this flake from within its own
outputs. This is the main use for <code>self</code> with flakes. Without <code>self</code>, I
wouldn’t have a direct way to refer to the <code>nixosModules.default</code> that’s
defined within the same flake.</li>
</ul>
<p>Now in the <code>players/second</code> directory create this <code>flake.nix</code>:</p>
<pre><code class="language-nix"># flake.nix
{
inputs = {
nixpkgs.url = "github:nixos/nixpkgs/nixos-24.11";
};
outputs = {
self,
nixpkgs,
}: {
nixosModules.default = {
config,
pkgs,
lib,
...
}: {
# Create a file `/etc/second-file`
environment.etc.second-file.text = "Hello player # 2!";
};
};
}
</code></pre>
<ul>
<li><code>nixosModules.default</code> is a module which is a function that, when called by
the NixOS module system, returns an attribute set representing a piece of
system configuration.
<ul>
<li>Within that attribute set, it specifies that the file <code>/etc/second-file</code>
should exist with “Hello player # 2!” as its content.</li>
</ul>
</li>
</ul>
<p>And finally in <code>players/third</code> create another <code>flake.nix</code>:</p>
<pre><code class="language-nix"># flake.nix
{
inputs = {
first.url = "/home/jr/players/first";
nixpkgs.follows = "first/nixpkgs";
second = {
url = "/home/jr/players/second";
inputs.nixpkgs.follows = "first/nixpkgs";
};
};
outputs = {
self,
nixpkgs,
first,
second,
}:
first.outputs
// {
nixosConfigurations.testing = first.nixosConfigurations.testing.extendModules {
modules = [
second.nixosModules.default
];
};
};
}
</code></pre>
<ul>
<li>You’ll have to change the locations to where you placed your <code>players</code>
directory in the <code>inputs</code> above.</li>
</ul>
<p>In your <code>third</code> directory inspect it with:</p>
<pre><code class="language-bash"> ~/players/third
❯ nix flake show
path:/home/jr/players/third?lastModified=1748271697&narHash=sha256-oNzkC6X9hA0MpOBmJSZ89w4znXxv4Q5EkFhp0ewehY0%3D
├───nixosConfigurations
│ └───testing: NixOS configuration
└───nixosModules
└───default: NixOS module
</code></pre>
<p>and build it with:</p>
<pre><code class="language-bash">nix build .#nixosConfigurations.testing.config.system.build.toplevel
</code></pre>
<pre><code class="language-bash">cat result/etc/first-file
Hello player # 1!
cat result/etc/second-file
Hello player # 2!
</code></pre>
<p><strong>Understanding the Extension</strong></p>
<p>As you saw in the <code>flake.nix</code> for the third player, we leveraged two key flake
features to combine and extend the previous configurations:</p>
<ol>
<li><strong>Attribute Set Union</strong> (<code>//</code> operator):</li>
</ol>
<pre><code class="language-nix">outputs = { ..., first, second, ... }:
first.outputs // { # ... your extensions here ...
};
</code></pre>
<p>The <code>//</code> (attribute set union) operator allows us to take all the outputs from
<code>first.outputs</code> (which includes its <code>nixosConfigurations</code> and <code>nixosModules</code>)
and then overlay or add to them on the right-hand side. This means our third
flake will inherit all the outputs from first, but we can then modify or add new
ones without changing the first flake itself.</p>
<ol start="2">
<li><code>config.extendModules</code>:</li>
</ol>
<pre><code class="language-nix"> nixosConfigurations.testing = first.nixosConfigurations.testing.extendModules {
modules = [
second.nixosModules.default
];
};
</code></pre>
<p>This is the core of the extension. We’re taking the testing NixOS configuration
defined in the first flake (<code>first.nixosConfigurations.testing</code>) and then
calling its <code>extendModules</code> function. This function allows us to inject
additional NixOS modules into an already defined system configuration. In this
case, we’re adding the default module from the second flake
(<code>second.nixosModules.default</code>).</p>
<p>By combining these techniques, the third flake successfully creates a NixOS
configuration that includes both the settings from first (like <code>/etc/first-file</code>
and the base system options) and the settings from second (like
<code>/etc/second-file</code>), all without directly altering the first or second flakes.
This demonstrates the incredible power of flake extensibility for building
complex, modular, and composable systems.</p>
Nix Pull Requestshttps://saylesss88.github.io/Nix_Pull_Requests_11.html2025-11-27T00:00:00+00:00saylesss87@proton.me (saylesss88)<h1>Chapter 11</h1>
<details>
<summary> ✔️ Click to Expand Table of Contents</summary>
<!-- toc -->
</details>
<p><img src="https://saylesss88.github.io/images/gruv16.png" alt="gruv16" /></p>
<h2>Nix Pull Requests</h2>
<p><strong>Pull requests</strong> communicate changes to a branch in a repository. Once a pull
request is opened, you can review changes with collaborators and add follow-up
commits.</p>
<ul>
<li>
<p>A <strong>pull request</strong> is a proposal to merge a set of changes from one branch
into another. In a pull request, collaborators can review and discuss the
proposed set of changes before they integrate the changes into the main
codebase.</p>
</li>
<li>
<p>Pull requests display the differences, or diffs, between the content in the
source branch and the content in the target branch.</p>
</li>
</ul>
<pre><code class="language-mermaid">graph LR
A[Your Local Repository] --> B(Feature Branch);
B --> C{GitHub Repository};
C -- "Open Pull Request" --> D[Pull Request on GitHub];
D -- "Review & Discussion" --> D;
D -- "Merge" --> E(Main Branch on GitHub);
E --> F[Nixpkgs Users];
</code></pre>
<p><strong>Explanation of the Diagram</strong>:</p>
<details>
<summary> ✔️ Click to see Explanation </summary>
<ul>
<li>
<p><strong>A[Your Local Repository]</strong>: This represents the copy of the Nixpkgs repo on
your computer where you make changes.</p>
</li>
<li>
<p><strong>B (Feature Branch)</strong>: You create a dedicated branch (e.g.<code>my-pack-update</code>)
to isolate your changes.</p>
</li>
<li>
<p><strong>C {GitHub Repository}</strong>: This is the central online repo for Nixpkgs on
Github. You push your feature branch to this repo.</p>
</li>
<li>
<p><strong>C – “Open Pull Request” – D [Pull Request on Github]</strong>: You initiate a
pull request from your feature branch to the main branch (usually <code>master</code> or
<code>main</code>) through the GitHub interface.</p>
</li>
<li>
<p><strong>D [Pull Request on GitHub]</strong>: This is where collaborators can see your
proposed changes, discuss them, and provide feedback.</p>
</li>
<li>
<p><strong>D – “Review & Discussion” –> D</strong>: The pull request facilitates
communication and potential revisions based on the review.</p>
</li>
<li>
<p><strong>D – “Merge” –> E (Main Branch on GitHub)</strong>: Once the changes are approved,
they are merged into the main branch of the Nixpkgs repository.</p>
</li>
<li>
<p><strong>E (Main Branch on GitHub)</strong>: The main branch now contains the integrated
changes.</p>
</li>
<li>
<p><strong>E –> F [Nixpkgs Users]</strong>): Eventually, these changes become available to
all Nixpkgs users through updates to their Nix installations.</p>
</li>
</ul>
</details>
<p>Flakes often rely on having access to the full history of the Git repository to
correctly determine dependencies, identify specific revisions of inputs, and
evaluate the flake. Not in all situations will a shallow clone work and this is
one of them.</p>
<p>If you have any changes to your local copy of Nixpkgs make sure to stash them
before the following:</p>
<pre><code class="language-bash">git stash -u
</code></pre>
<ul>
<li>This command saves your uncommited changes (including staged files)
temporarily. You can restore them later with <code>git stash pop</code></li>
</ul>
<p><strong>Step 1 Clone Nixpkgs Locally</strong></p>
<p>If you don’t have Nixpkgs locally, you’ll need to clone it:</p>
<pre><code class="language-bash">git clone https://github.com/NixOS/nixpkgs.git
</code></pre>
<p><strong>Step 2 Find a Relevant Pull Request</strong></p>
<p>To find specifig commits and releases:</p>
<p><a href="https://status.nixos.org/">status.nixos.org</a> provides the latest tested commits
for each release - use when pinning to specific commits. List of active release
channels - use when tracking latest channel versions.</p>
<p>The complete list of channels is available at
<a href="https://channels.nixos.org/">nixos.org/channels</a></p>
<p>To find a relevant PR you can go to:</p>
<ul>
<li>
<p><a href="https://github.com/NixOS/nixpkgs/pulls">Nixpkgs Pull Requests</a></p>
</li>
<li>
<p>The following example actually uses the
<a href="https://github.com/NixOS/nix/pulls">Nix Pull Requests</a> the process is the
same, but that is an important distinction.</p>
</li>
<li>
<p>In the Filters enter <code>stack trace</code> for this example.</p>
</li>
<li>
<p>The pull request I chose was <a href="https://github.com/nixos/nix/pull/8623">8623</a></p>
</li>
</ul>
<p><strong>Step 3 Add the Remote Repository (if necessary)</strong></p>
<p>If the pull request is from a different repository than your local clone (as in
the case of the <code>nix</code> PR while working in a <code>nixpkgs</code> clone), you need to add
that repository as a remote. It’s common to name the main Nixpkgs remote
<code>origin</code> and other related repositories like <code>nix</code> as <code>upstream</code>.</p>
<p>Assuming you are in your <code>nixpkgs</code> clone and want to test a PR from the <code>nix</code>
repository:</p>
<pre><code class="language-bash">git remote add upstream https://github.com/NixOS/nix.git
</code></pre>
<p><strong>Step 4 Fetch the Pull Request Changes</strong></p>
<p>Fetch the Pull Request Information:</p>
<pre><code class="language-bash">git fetch upstream refs/pull/8623/head:pr-8623
</code></pre>
<ul>
<li>This command fetches the branch named <code>head</code> from the pull request <code>8623</code> in
the <code>upstream</code> remote and creates a local branch named <code>pr-8623</code> that tracks
it.</li>
</ul>
<p><strong>Output</strong>:</p>
<details>
<summary> ✔️ Output (Click to Enlarge) </summary>
<pre><code>remote: Enumerating objects: 104651, done.
remote: Counting objects: 100% (45/45), done.
remote: Compressing objects: 100% (27/27), done.
remote: Total 104651 (delta 33), reused 20 (delta 18), pack-reused 104606 (from 1)
Receiving objects: 100% (104651/104651), 61.64 MiB | 12.56 MiB/s, done.
Resolving deltas: 100% (74755/74755), done.
From https://github.com/NixOS/nix
* [new ref] refs/pull/8623/head -> pr-8623
* [new tag] 1.0 -> 1.0
* [new tag] 1.1 -> 1.1
* [new tag] 1.10 -> 1.10
* [new tag] 1.11 -> 1.11
* [new tag] 1.11.1 -> 1.11.1
* [new tag] 1.2 -> 1.2
* [new tag] 1.3 -> 1.3
* [new tag] 1.4 -> 1.4
* [new tag] 1.5 -> 1.5
* [new tag] 1.5.1 -> 1.5.1
* [new tag] 1.5.2 -> 1.5.2
* [new tag] 1.5.3 -> 1.5.3
* [new tag] 1.6 -> 1.6
* [new tag] 1.6.1 -> 1.6.1
* [new tag] 1.7 -> 1.7
* [new tag] 1.8 -> 1.8
* [new tag] 1.9 -> 1.9
* [new tag] 2.0 -> 2.0
* [new tag] 2.2 -> 2.2
</code></pre>
</details>
<p><strong>Step 5 Checkout the Local Branch:</strong></p>
<pre><code class="language-bash">git checkout pr-8623
</code></pre>
<p>Or with the <code>gh</code> cli:</p>
<pre><code class="language-bash">gh pr checkout 8623
</code></pre>
<h2>Build and Test the Changes</h2>
<ul>
<li>Now we want to see if the code changes introduced by the pull request actually
build correctly within the Nix ecosystem.</li>
</ul>
<pre><code class="language-bash">nix build
</code></pre>
<p><strong>Output:</strong></p>
<details>
<summary> ✔️ Output (Click to Enlarge) </summary>
<pre><code class="language-bash">error: builder for '/nix/store/rk86daqgf6a9v6pdx6vcc5b580lr9f09-nix-2.20.0pre20240115_20b4959.drv' failed with exit code 2;
last 25 log lines:
>
> _NIX_TEST_ACCEPT=1 make tests/functional/lang.sh.test
>
> to regenerate the files containing the expected output,
> and then view the git diff to decide whether a change is
> good/intentional or bad/unintentional.
> If the diff contains arbitrary or impure information,
> please improve the normalization that the test applies to the output.
> make: *** [mk/lib.mk:90: tests/functional/lang.sh.test] Error 1
> make: *** Waiting for unfinished jobs....
> ran test tests/functional/selfref-gc.sh... [PASS]
> ran test tests/functional/store-info.sh... [PASS]
> ran test tests/functional/suggestions.sh... [PASS]
> ran test tests/functional/path-from-hash-part.sh... [PASS]
> ran test tests/functional/gc-auto.sh... [PASS]
> ran test tests/functional/path-info.sh... [PASS]
> ran test tests/functional/flakes/show.sh... [PASS]
> ran test tests/functional/fetchClosure.sh... [PASS]
> ran test tests/functional/completions.sh... [PASS]
> ran test tests/functional/build.sh... [PASS]
> ran test tests/functional/impure-derivations.sh... [PASS]
> ran test tests/functional/build-delete.sh... [PASS]
> ran test tests/functional/build-remote-trustless-should-fail-0.sh... [PASS]
> ran test tests/functional/build-remote-trustless-should-pass-2.sh... [PASS]
> ran test tests/functional/nix-profile.sh... [PASS]
For full logs, run:
nix log /nix/store/rk86daqgf6a9v6pdx6vcc5b580lr9f09-nix-2.20.0pre20240115_20b4959.drv
</code></pre>
</details>
<ul>
<li><strong><code>nix build</code></strong> (Part of the Nix Unified CLI):
<ul>
<li>
<p>Declarative: when used within a Nix flake (<code>flake.nix</code>), <code>nix build</code> is a
bit more declarative. It understands the outputs defined in your flake.</p>
</li>
<li>
<p>Clearer Output Paths: <code>nix build</code> typically places build outputs in the
<code>./result</code> directory by default (similar to <code>nix-build</code>’s <code>result</code> symlink)</p>
</li>
<li>
<p>Better Error Reporting: It gives more informative error messages.</p>
</li>
<li>
<p>Future Direction</p>
</li>
</ul>
</li>
</ul>
<p><strong>Benefits of using <code>nix build</code>:</strong></p>
<ul>
<li>
<p><strong>Flake Integration:</strong> <code>nix build</code> naturally understands the flake’s outputs.</p>
</li>
<li>
<p><strong>Development Shells:</strong> When you are in a <code>nix develop</code> shell, <code>nix build</code> is
the more idiomatic way to build packages defined in your dev environment.</p>
</li>
<li>
<p><strong>Consistency:</strong> Using the unified CLI promotes a more consistent workflow.</p>
</li>
</ul>
<h2>Next Steps</h2>
<p>As you can see this build failed, as for why the build failed, the key part of
the error message is:</p>
<pre><code class="language-bash">make: *** [mk/lib.mk:90: tests/functional/lang.sh.test] Error 1
</code></pre>
<ul>
<li>This suggests that one of the functional tests (<code>lang.sh.test</code>) failed. This
happens when the expected output of the test doesn’t match the actual output.</li>
</ul>
<p>This can heppen when:</p>
<ol>
<li>
<p>The test expectations are outdated due to changes in the codebase.</p>
</li>
<li>
<p>The test captures environment-specific or transient outputs that are not
properly normalized.</p>
</li>
<li>
<p>The test includes impure or non-deterministic information, making it hard to
verify.</p>
</li>
</ol>
<p>To address this, _NIX_TEST_ACCEPT=1 is used as an override mechanism that tells
the test framework: > “Accept whatever output is generated as the new expected
result.”</p>
<p>The message advises running:</p>
<pre><code class="language-bash">_NIX_TEST_ACCEPT=1 make tests/functional/lang.sh.test
</code></pre>
<ul>
<li>This will regenerate the expected output files, allowing you to inspect what
changed with <code>git diff</code>:</li>
</ul>
<pre><code class="language-bash">git diff tests/functional/lang.sh.test
</code></pre>
<ul>
<li><strong>Verifies if Changes are Intentional:</strong> If the difference is reasonable and
expected (due to a legitimate update in the logic), you can commit these
changes to update the test suit. If not, you have to refine the test
normalization process further.</li>
</ul>
<p>If the changes seem valid, commit them:</p>
<pre><code class="language-bash">git add tests/functional/lang.sh.test
git commit -m "Update expected test output for lang.sh.test"
</code></pre>
<p>Running the following will provide the full logs:</p>
<pre><code class="language-bash">nix log /nix/store/rk86daqgf6a9v6pdx6vcc5b580lr9f09-nix-2.20.0pre20240115_20b4959.drv
</code></pre>
<h3>Conclusion</h3>
<p>Testing Nixpkgs pull requests is a vital part of contributing to a healthy and
reliable Nix ecosystem. By following these steps, you can help ensure that
changes are well-vetted before being merged, ultimately benefiting all Nix
users. Your efforts in testing contribute significantly to the quality and
stability of Nixpkgs.</p>
Unencrypted BTRFS Impermanence with Flakeshttps://saylesss88.github.io/installation/unenc/unenc_impermanence.html2025-11-24T00:00:00+00:00saylesss87@proton.me (saylesss88)<h1>Unencrypted BTRFS Impermanence with Flakes</h1>
<details>
<summary> ✔️ Click to Expand Table of Contents</summary>
<!-- toc -->
</details>
<p>Figure 1: Impermanence Logo: Image of the Impermanence logo. Sourced from the</p>
<p><a href="https://github.com/nix-community/impermanence">Impermanence repo</a></p>
<p>This guide is for an unencrypted setup, there are a few links at the end for
encrypted setups. This guide follows the previous
<a href="https://saylesss88.github.io/installation/unencrypted_setups.html">minimal install guide</a>
but you should be able to adjust it carefully to meet your needs.</p>
<p>This section details how to set up impermanence on your NixOS system using BTRFS
subvolumes. With impermanence, your operating system’s root filesystem will
reset to a pristine state on each reboot, while designated directories and files
remain persistent. This provides a highly reliable and rollback-friendly system.</p>
<p>In NixOS, “state” is any data or condition of the system that isn’t defined in
your declarative configuration. The impermanence approach aims to make this
state temporary (ephemeral) or easily resettable, so your system always matches
your configuration and can recover from unwanted changes or corruption.</p>
<h2>Impermanence: The Concept and Its BTRFS Implementation</h2>
<p>In a traditional Linux system, most of this state is stored on the disk and
persists indefinitely unless manually deleted or modified. However, this can
lead to configuration drift, where the system accumulates changes (e.g., log
files, temporary files, or unintended configuration tweaks) that make it harder
to reproduce or maintain.</p>
<p>Impermanence, in the context of operating systems, refers to a setup where the
majority of the system’s root filesystem (<code>/</code>) is reset to a pristine state on
every reboot. This means any changes made to the system (e.g., installing new
packages, modifying system files outside of configuration management, creating
temporary files) are discarded upon shutdown or reboot.</p>
<h2>What Does Impermanence Do?</h2>
<p>Impermanence is a NixOS approach that makes the system stateless (or nearly
stateless) by wiping the root filesystem (<code>/</code>) on each boot, ensuring a clean,
predictable starting point. Only explicitly designated data (persistent state)
is preserved across reboots, typically stored in specific locations like the
/nix/persist subvolume. This is possible because NixOS can boot with only the
<code>/boot</code>, and <code>/nix</code> directories. This achieves:</p>
<ol>
<li>Clean Root Filesystem:</li>
</ol>
<ul>
<li>
<p>The root subvolume is deleted and recreated on each boot, erasing transient
state (e.g., temporary files, runtime data).</p>
</li>
<li>
<p>This ensures the system starts fresh, reducing clutter and making it behave
closer to a declarative system defined by your NixOS configuration.</p>
</li>
</ul>
<ol start="2">
<li>Selective Persistence:</li>
</ol>
<ul>
<li>
<p>Critical state (e.g., user files, logs, system configuration) is preserved in
designated persistent subvolumes (e.g., /nix/persist, /var/log, /var/lib) or
files.</p>
</li>
<li>
<p>You control exactly what state persists by configuring
<code>environment.persistence."/nix/persist"</code> or other mechanisms.</p>
</li>
<li>
<p>❗ The understanding around persisting <code>/var/lib/nixos</code> seems to be evolving.
See,The importance of persisting <code>/var/lib/nixos</code> See also necessary system
state</p>
</li>
</ul>
<ol start="3">
<li>Reproducibility and Security:</li>
</ol>
<ul>
<li>
<p>By wiping transient state, impermanence prevents unintended changes from
accumulating, making the system more reproducible.</p>
</li>
<li>
<p>It enhances security by ensuring sensitive temporary data (e.g., /tmp, runtime
credentials) is erased on reboot.</p>
</li>
</ul>
<h3>Getting Started</h3>
<ol>
<li>Add impermanence to your flake.nix. You will change the hostname in the flake
to match your networking.hostName.</li>
</ol>
<pre><code class="language-nix"># flake.nix
{
description = "NixOS configuration";
inputs = {
nixpkgs.url = "github:nixos/nixpkgs/nixos-unstable";
disko.url = "github:nix-community/disko/latest";
disko.inputs.nixpkgs.follows = "nixpkgs";
impermanence.url = "github:nix-community/impermanence";
};
outputs = inputs@{ nixpkgs, ... }: {
nixosConfigurations = {
hostname = nixpkgs.lib.nixosSystem {
system = "x86_64-linux";
modules = [
./configuration.nix
inputs.disko.nixosModules.disko
inputs.impermanence.nixosModules.impermanence
];
};
};
};
}
</code></pre>
<ol start="2">
<li>Discover where your root subvolume is located with <code>findmnt</code>:</li>
</ol>
<p>Before configuring impermanence, it’s crucial to know the device path and
subvolume path of your main BTRFS partition where the root filesystem (/) is
located. This information is needed for the mount command within the
impermanence script.</p>
<pre><code class="language-bash">findmnt /
TARGET SOURCE FSTYPE OPTIONS
/ /dev/disk/by-partlabel/disk-main-root[/root]
btrfs rw,noatime,compress=zstd:3,ssd,discard=async,space_cache=v2,subvolid=275,sub
</code></pre>
<p>From the SOURCE column, note the full path, including the device (e.g.,
<code>/dev/disk/by-partlabel/disk-main-root</code>) and the subvolume in brackets (e.g.,
<code>[/root]</code>). You will use the device path in the next step</p>
<p><code>/dev/disk/by-partlabel/disk-main-root</code> is a symlink to the actual device path
(e.g. <code>/dev/nvme0n1p2</code>), but using the partlabel is generally more robust for
scripts.</p>
<ol start="3">
<li>Create an impermanence.nix:</li>
</ol>
<p>Now, create a new file named <code>impermanence.nix</code> in your configuration directory
(i.e. your flake directory). This file will contain all the specific settings
for your impermanent setup, including BTRFS subvolume management and persistent
data locations. Since this file is right next to your <code>configuration.nix</code>,
you’ll just add an <code>imports = [ ./impermanence.nix</code> ] to your
<code>configuration.nix</code> apply it to your configuration.</p>
<pre><code class="language-nix">{lib, ...}: {
# Reset root subvolume on boot
boot.initrd.postResumeCommands = lib.mkAfter ''
mkdir /btrfs_tmp
mount /dev/disk/by-partlabel/disk-main-root /btrfs_tmp # CONFIRM THIS IS CORRECT FROM findmnt
if [[ -e /btrfs_tmp/root ]]; then
mkdir -p /btrfs_tmp/old_roots
timestamp=$(date --date="@$(stat -c %Y /btrfs_tmp/root)" "+%Y-%m-%-d_%H:%M:%S")
mv /btrfs_tmp/root "/btrfs_tmp/old_roots/$timestamp"
fi
delete_subvolume_recursively() {
IFS=$'\n'
for i in $(btrfs subvolume list -o "$1" | cut -f 9- -d ' '); do
delete_subvolume_recursively "/btrfs_tmp/$i"
done
btrfs subvolume delete "$1"
}
for i in $(find /btrfs_tmp/old_roots/ -maxdepth 1 -mtime +30); do
delete_subvolume_recursively "$i"
done
btrfs subvolume create /btrfs_tmp/root
umount /btrfs_tmp
'';
# Use /persist as the persistence root, matching Disko's mountpoint
environment.persistence."/nix/persist" = {
hideMounts = true;
directories = [
"/etc" # System configuration (Keep this here for persistence via bind-mount)
"/var/spool" # Mail queues, cron jobs
"/srv" # Web server data, etc.
"/root"
];
files = [
];
};
}
</code></pre>
<p>With btrfs subvolumes since each directory is its own subvolume, when the root
is wiped on reboot the subvolumes are untouched.</p>
<h3>Applying Your Impermanence Configuration</h3>
<p>Once you have completed all the steps and created or modified the necessary
files (<code>flake.nix</code>, <code>impermanence.nix</code>), you need to apply these changes to your
NixOS system.</p>
<ol>
<li>Navigate to your NixOS configuration directory (where your flake.nix is
located).</li>
</ol>
<pre><code class="language-bash">cd /path/to/your/flake
</code></pre>
<ol start="2">
<li>Rebuild and Switch: Execute the <code>nixos-rebuild switch</code> command. This command
will:</li>
</ol>
<ul>
<li>
<p>Evaluate your flake.nix and the modules it imports (including your new
impermanence.nix).</p>
</li>
<li>
<p>Build a new NixOS system closure based on your updated configuration.</p>
</li>
<li>
<p>Activate the new system configuration, making it the current running system.</p>
</li>
</ul>
<blockquote>
<p>❗ NOTE: On the first rebuild after setting up impermanence, you may find that
you’re not in the password database or cannot log in/sudo. This occurs because
the initial state of your new ephemeral root filesystem, including /etc (where
user passwords are stored), is fresh. It has to do with the timing of when
environment.persistence takes effect during the first boot.</p>
</blockquote>
<blockquote>
<p>To avoid this password issue, before your first nixos-rebuild switch for
impermanence, run:</p>
<pre><code class="language-bash">sudo mkdir -p /nix/persist/etc # Ensure the target directory exists
sudo cp -a /etc/* /nix/persist/etc
</code></pre>
<ul>
<li>This copies your current /etc directory contents (including existing user
passwords) into your persistent >>storage.</li>
<li>Crucially: You must also ensure that <code>/etc</code> is explicitly included in your
<code>environment.persistence."/nix/persist"</code>.directories list in your
<code>impermanence.nix</code> like we did above, (or main configuration). This
configures >NixOS to persistently bind-mount <code>/nix/persist/etc</code> over <code>/etc</code>
on every subsequent boot. Once these steps are done and you reboot, your
user passwords should function correctly, and future rebuilds will > not
present this problem.</li>
</ul>
</blockquote>
<pre><code class="language-bash">sudo nixos-rebuild switch --flake .#hostname # Replace 'hostname' with your actual system hostname
</code></pre>
<ol start="3">
<li>Perform an Impermanence Test (Before Reboot):</li>
</ol>
<ul>
<li>Before you reboot, create a temporary directory and file in a non-persistent
location. Since you haven’t explicitly added <code>/imperm_test</code> to your
<code>environment.persistence."/nix/persist"</code> directories, this file should not
survive a reboot.</li>
</ul>
<pre><code class="language-bash">mkdir /imperm_test
echo "This should be Gone after Reboot" | sudo tee /imperm_test/testfile
ls -l /imperm_test/testfile # Verify the file exists
cat /imperm_test/testfile # Verify content
</code></pre>
<ol start="4">
<li>Reboot Your System: For the impermanence setup to take full effect and for
your root filesystem to be reset for the first time, you must reboot your
machine.</li>
</ol>
<pre><code class="language-bash">sudo reboot
</code></pre>
<ol start="5">
<li>Verify Impermanence (After Reboot):</li>
</ol>
<ul>
<li>After the system has rebooted, check if the test directory and file still
exist:</li>
</ul>
<pre><code class="language-bash">ls -l /imperm_test/testfile
</code></pre>
<p>You should see an output like <code>ls: cannot access '/imperm_test/testfile'</code>: No
such file or directory. This confirms that the <code>/imperm_test</code> directory and its
contents were indeed ephemeral and were removed during the reboot process,
indicating your impermanence setup is working correctly!</p>
<p>Your system should now come up with a fresh root filesystem, and only the data
specified in your <code>environment.persistence."/nix/persist"</code> configuration will be
persistent.</p>
<h3>Recovery with nixos-enter and chroot</h3>
<p>This is if you followed the minimal_install guide, it will need to be changed
for a different disk layout.</p>
<p><a href="https://en.wikipedia.org/wiki/Chroot">Chroot</a> is an operation that changes the
apparent root directory for the current running process and their children. A
program that is run in such a modified environment cannot access files and
commands outside that environmental directory tree. This modified environment is
called a chroot jail. –NixOS wiki</p>
<p><code>nixos-enter</code> allows you to access a NixOS installation from a NixOS rescue
system. To use, setup <code>/mnt</code> as described in the
<a href="https://nixos.org/manual/nixos/stable/#sec-installation">installation manual</a></p>
<p>🛠️ Recovery: Chroot into Your NixOS Btrfs+Impermanence System</p>
<p>Take note of your layout from commands like:</p>
<pre><code class="language-bash">sudo fdisk -l
lsblk
sudo btrfs subvol list /
</code></pre>
<p>Also inspect your <code>disk-config.nix</code> to ensure you refer to the correct <code>subvol=</code>
names.</p>
<p>If you need to repair your system (e.g., forgot root password, fix a broken
config, etc.), follow these steps to chroot into your NixOS install:</p>
<ol>
<li>Boot a Live ISO</li>
</ol>
<p>Boot from a NixOS (or any recent Linux) live USB.</p>
<p>Open a terminal and become root:</p>
<pre><code class="language-bash">sudo -i
</code></pre>
<ol start="2">
<li>Identify Your Devices</li>
</ol>
<p>Your main disk is <code>/dev/nvme0n1</code></p>
<ul>
<li>
<p>EFI partition: <code>/dev/nvme0n1p1</code> (mounted at <code>/boot</code>)</p>
</li>
<li>
<p>Root partition: <code>/dev/nvme0n1p2</code> (Btrfs, with subvolumes)</p>
</li>
</ul>
<ol start="3">
<li>Mount the Btrfs Root Subvolume</li>
</ol>
<p>First, mount the Btrfs partition somewhere temporary (not as / yet):</p>
<pre><code class="language-bash">mount -o subvol=root,compress=zstd,noatime /dev/nvme0n1p2 /mnt
</code></pre>
<ol start="4">
<li>Mount Other Subvolumes</li>
</ol>
<p>Now mount your other subvolumes as defined in your <code>disko.nix</code>:</p>
<pre><code class="language-bash"># Mount Other Subvolumes
# (Ensure /mnt directories are created for each *mountpoint*)
# Home
mkdir -p /mnt/home
mount -o subvol=home,compress=zstd,noatime /dev/nvme0n1p2 /mnt/home
# IMPORTANT: No separate mount for /mnt/home/user, as it's a nested subvolume
# and handled by the /home mount.
# Nix store
mkdir -p /mnt/nix
mount -o subvol=nix,compress=zstd,noatime /dev/nvme0n1p2 /mnt/nix
# Nix persist
mkdir -p /mnt/nix/persist
# CRITICAL: Based our disko.nix, the subvolume name is 'persist', not 'nix/persist'
mount -o subvol=persist,compress=zstd,noatime /dev/nvme0n1p2 /mnt/nix/persist
# /var/log
mkdir -p /mnt/var/log
mount -o subvol=log,compress=zstd,noatime /dev/nvme0n1p2 /mnt/var/log
# /var/lib
mkdir -p /mnt/var/lib
# Confirmed: The subvolume named 'lib' is mounted to /var/lib
mount -o subvol=lib,compress=zstd,noatime /dev/nvme0n1p2 /mnt/var/lib
</code></pre>
<p>Note: If you get “subvolume not found,” check the subvolume names with
<code>btrfs subvol list /mnt</code>.</p>
<ol start="5">
<li>Mount the EFI Partition</li>
</ol>
<pre><code class="language-bash">mkdir -p /mnt/boot mount /dev/nvme0n1p1 /mnt/boot
</code></pre>
<ol start="6">
<li>(Optional) Mount Virtual Filesystems</li>
</ol>
<pre><code class="language-bash">mount --bind /dev /mnt/dev mount --bind /proc /mnt/proc mount --bind /sys
/mnt/sys mount --bind /run /mnt/run
</code></pre>
<ol start="7">
<li>Chroot</li>
</ol>
<pre><code class="language-bash">chroot /mnt /run/current-system/sw/bin/bash
</code></pre>
<p>or, if using a non-NixOS live system:</p>
<pre><code class="language-bash">nixos-enter
</code></pre>
<p>(You may need to install nixos-enter with nix-shell -p nixos-enter.) 8. You’re
In!</p>
<p>You can now run nixos-rebuild, reset passwords, or fix configs as needed. 🔎</p>
<p>📓 Notes</p>
<ul>
<li>
<p>Adjust <code>compress=zstd,noatime</code> if your config uses different mount options.</p>
</li>
<li>
<p>For impermanence, make sure to mount all persistent subvolumes you need.</p>
</li>
<li>
<p>If you use swap, you may want to enable it too (e.g., swapon /dev/zram0 if
relevant).</p>
</li>
</ul>
<p>You can now recover, repair, or maintain your NixOS system as needed!</p>
<h4>Related Material</h4>
<ul>
<li>
<p><a href="https://wiki.nixos.org/wiki/Change_root">Change root (chroot</a></p>
</li>
<li>
<p><a href="https://www.mankier.com/8/nixos-enter">nixos-enter</a></p>
</li>
<li>
<p><a href="https://grahamc.com/blog/erase-your-darlings/">erase your darlings</a></p>
</li>
<li>
<p><a href="https://haseebmajid.dev/posts/2024-07-30-how-i-setup-btrfs-and-luks-on-nixos-using-disko/">Guide for Btrfs with LUKS</a></p>
</li>
<li>
<p><a href="https://notashelf.dev/posts/impermanence">notashelf impermanence</a></p>
</li>
<li>
<p><a href="https://wiki.nixos.org/wiki/Impermanence">NixOS wiki Impermanence</a></p>
</li>
<li>
<p><a href="https://github.com/nix-community/impermanence">nix-community impermanence module</a></p>
</li>
</ul>
Nix Langhttps://saylesss88.github.io/nix/nix_language.html2025-11-22T00:00:00+00:00saylesss87@proton.me (saylesss88)<h1>Nix Language</h1>
<details>
<summary> ✔️ Click to Expand Table of Contents</summary>
<!-- toc -->
</details>
<!--  -->
<h2>Nix Expression Language Syntax Overview</h2>
<p>The Nix language is designed for conveniently creating and composing
<em>derivations</em> precise descriptions of how contents of files are used to derive
new files. –<a href="https://nix.dev/manual/nix/2.28/language/">Nix Reference Manual</a></p>
<p>Nix is often described as “JSON with functions.” It’s a declarative language
where you define outcomes, not step-by-step instructions. Instead of writing
sequential code, you create expressions that describe data structures,
functions, and dependencies. These expressions are evaluated lazily, meaning Nix
computes values only when needed, making it efficient for managing large
systems.</p>
<p>You can plug most of the following into the <code>nix repl</code> I’m showing it in a
single code block here for brevity:</p>
<pre><code class="language-nix,editable"># Comments Look Like This!
# Strings
"This is a string" # String literal
''
one
two # multi-line String
three
''
("foo" + "bar") # => "foobar"
"foo" != "bar" # Inequality test # => true
!false # => true
("Home dir is ${builtins.getEnv "HOME"}") # String Interpolation
# => "Home dir is /home/jr"
"3 6 ${builtins.toString 9}"
# => "3 6 9"
"goodbye ${ { d = "world";}.d}"
# => "goodbye world"
# Booleans
(false && true) # AND # => false
(true || false) # OR # => true
(if 6 < 9 then "yay" else "nay") # => "yay"
null # Null Value
679 # Integer
(6 + 7 + 9) # => 22 # Addition
(9 - 3 - 2) # => 4 # Subtraction
(6 / 3) # => 2 # Division
6.79 # Floating Point
/etc/nixos # Absolute Path
../modules/nixos/boot.nix # relative
# Let expressions
(let a = "2"; in # Let expressions are a way to create variables
a + a + builtins.toString "4")
# => "224"
(let first = "firstname"; in
"lastname " first)
# => "lastname firstname"
# Lists
[ 1 2 "three" "bar" "baz" ] # lists are whitespace separated
builtins.elemAt [ 1 2 3 4 5 ] 3
# => 4
builtins.length [ 1 2 3 4 ]
# => 4
# Attrsets
{ first = "Jim"; last = "Bo"; }.last # Attribute selection
# => "Bo"
{ a = 1; b = 3; } // { c = 4; b = 2; } # Attribute Set merging
# => { a = 1; b = 2; c = 4; } # Right Side takes precedence
builtins.listToAttrs [ { name = "Jr"; value = "Jr Juniorville"; } {name = "$"; value = "JR"; } { name = "jr"; value = "jr
ville"; }]
# => { "$" = "JR"; Jr = "Jr Juniorville"; jr = "jrville"; }
# Control Flow
if 2 * 2 == 4
then "yes!"
else "no!"
# => "yes!"
assert 2 * 2
== 4; "yes!"
# => "yes!"
with builtins;
head [ 5 6 7 ]
# => 5
# or
builtins.head[ 5 6 7 ]
inherit pkgs # pkgs = pkgs;
src; # src = src;
</code></pre>
<h3>Understanding Laziness</h3>
<p>Nix expressions are evaluated lazily, meaning Nix computes values only when
needed. This is a powerful feature that makes Nix efficient for managing large
systems, as it avoids unnecessary computations.</p>
<p>For example, observe how <code>a</code> is never evaluated in the following <code>nix-repl</code>
session:</p>
<pre><code class="language-nix">nix-repl> let a = builtins.div 4 0; b = 6; in b
6
</code></pre>
<ul>
<li>Since <code>a</code> isn’t used in the final result, there’s no division by zero error.</li>
</ul>
<h3>Strings and String Interpolation</h3>
<p><strong>Strings</strong>: Strings are enclosed in double quotes (<code>"</code>) or two single quotes
(<code>''</code>).</p>
<pre><code class="language-nix">nix-repl> "stringDaddy"
"stringDaddy"
nix-repl> ''
This is a
multi-line
string
''
"This is a\nmulti-line\nstring.\n"
</code></pre>
<p><a href="https://nix.dev/manual/nix/2.24/language/string-interpolation">string interpolation</a>.
is a language feature where a string, path, or attribute name can contain an
expressions enclosed in <code>${ }</code>. This construct is called an <em>interpolated
string</em>, and the expression inside is an <em>interpolated expression</em>.</p>
<p>Rather than writing:</p>
<pre><code class="language-nix">let path = "/usr/local"; in "--prefix=${path}"
</code></pre>
<p>This evaluates to <code>"--prefix=/usr/local"</code>. Interpolated expressions must
evaluate to a string, path, or an attribute set with an <code>outPath</code> or
<code>__toString</code> attribute.</p>
<h3>Attribute Sets</h3>
<p><strong>Attribute sets</strong> are all over Nix code and deserve their own section, they are
name-value pairs wrapped in curly braces, where the names must be unique:</p>
<pre><code class="language-nix">{
string = "hello";
int = 8;
}
</code></pre>
<p>Attribute names usually don’t need quotes.</p>
<p>You can access attributes using <em>dot notation</em>:</p>
<pre><code class="language-nix">let person = { name = "Alice"; age = 30; }; in person.name
"Alice"
</code></pre>
<p>You will sometimes see attribute sets with <code>rec</code> prepended. This allows access
to attributes within the set:</p>
<pre><code class="language-nix">rec {
x = y;
y = 123;
}.x
</code></pre>
<p><strong>Output</strong>: <code>123</code></p>
<p>or</p>
<pre><code class="language-nix">rec {
one = 1;
two = one + 1;
three = two + 1;
}
</code></pre>
<p><strong>Output</strong>:</p>
<pre><code class="language-nix"> {
one = 1;
three = 3;
two = 2;
}
</code></pre>
<pre><code class="language-nix"># This would fail:
{
one = 1;
two = one + 1; # Error: undefined variable 'one'
three = two + 1;
}
</code></pre>
<p>Recursive sets introduce the danger of <em>infinite recursion</em> For example:</p>
<pre><code class="language-nix">rec {
x = y;
y = x;
}.x
</code></pre>
<p>Will crash with an <code>infinite recursion encountered</code> error message.</p>
<p>The
<a href="https://nix.dev/manual/nix/2.24/language/operators.html#update">attribute set update operator</a>
merges two attribute sets.</p>
<p><strong>Example</strong>:</p>
<pre><code class="language-nix">{ a = 1; b = 2; } // { b = 3; c = 4; }
</code></pre>
<p><strong>Output</strong>:</p>
<pre><code class="language-nix">{ a = 1; b = 3; c = 4; }
</code></pre>
<p>However, names on the right take precedence, and updates are shallow.</p>
<p><strong>Example</strong>:</p>
<pre><code class="language-nix">{ a = { b = 1; }; } // { a = { c = 3; }; }
</code></pre>
<p><strong>Output</strong>:</p>
<pre><code class="language-nix">{ a = { c = 3; }; }
</code></pre>
<p>Above, key <code>b</code> was completely removed, because the whole <code>a</code> value was replaced.</p>
<p><strong>Inheriting Attributes</strong></p>
<ul>
<li>Click to see Output:</li>
</ul>
<pre><code class="language-nix">let x = 123; in
{
inherit x;
y = 456;
}
</code></pre>
<p>is equivalent to</p>
<pre><code class="language-nix">let x = 123; in
{
x = x;
y = 456;
}
</code></pre>
<p>which are both equivalent to</p>
<pre><code class="language-nix">{
x = 123;
y = 456;
}
</code></pre>
<blockquote>
<p>❗: This works because <code>x</code> is added to the lexical scope by the <code>let</code>
construct.</p>
</blockquote>
<p>Now that we understand attribute sets lets move on to functions, a powerful
feature of the Nix language that gives you the ability to reuse and share
logical pieces of code.</p>
<h3>Functions(lambdas):</h3>
<p>Functions in Nix help you build reusable components and are the the building
blocks of Nix. In the next chapter we’ll go even further into Nix functions and
how to use them but I will touch on them here.</p>
<p>Nix functions have this form:</p>
<pre><code class="language-nix">pattern: body
</code></pre>
<p>The following is a function that expects an integer and returns it increased by
1:</p>
<pre><code class="language-nix">x: x + 1 # lambda function, not bound to a variable
</code></pre>
<p>The pattern tells us what the argument of the function has to look like, and
binds variables in the body to (parts of) the argument.</p>
<pre><code class="language-nix">(x: x + 5) 200
205
</code></pre>
<p>They are all lambdas (i.e. anonymous functions without names) until we assign
them to a variable like the following example.</p>
<p>Functions are defined using this syntax, where <code>x</code> and <code>y</code> are attributes passed
into the function:</p>
<pre><code class="language-nix">{
my_function = x: y: x + y;
}
</code></pre>
<p>The code below calls a function called <code>my_function</code> with the parameters <code>2</code> and
<code>3</code>, and assigns its output to the <code>my_value</code> field:</p>
<pre><code class="language-nix">{
my_value = my_function 2 3;
}
my_value
5
</code></pre>
<p>The body of the function automatically returns the result of the function.
Functions are called by spaces between it and its parameters. No commas are
needed to separate parameters.</p>
<p>The following is a function that expects an attribute set with required
attributes <code>a</code> and <code>b</code> and concatenates them:</p>
<pre><code class="language-nix">{ a, b }: a + b
</code></pre>
<p><strong>Default Values in Functions</strong>:</p>
<p>Functions in Nix can define <strong>default values</strong> for their arguments. This allows
for more flexible function calls where some arguments are optional.</p>
<pre><code class="language-nix">{ x, y ? "foo", z ? "bar" }: z + y + x
</code></pre>
<ul>
<li>Specifies a function that only requires an attribute named <code>x</code>, but optionally
accepts <code>y</code> and <code>z</code>.</li>
</ul>
<p><strong>@-patterns in functions</strong>:</p>
<p>An <code>@-pattern</code> provides a means of referring to the whole value being matched by
the function’s argument pattern, in addition to destructuring it. This is
especially useful when you want to access attributes that are not explicitly
destructured in the pattern:</p>
<pre><code class="language-nix">args@{ x, y, z, ... }: z + y + x + args.a
# or
{ x, y, z, ... } @ args: z + y + x + args.a
</code></pre>
<ul>
<li>
<p>Here, <code>args</code> is bound to the argument as <em>passed</em>, which is further matched
against the pattern <code>{ x, y, z, ... }</code>. The <code>@-pattern</code> makes mainly sense
with an ellipsis(<code>...</code>) as you can access attribute names as <code>a</code>, using
<code>args.a</code>, which was given as an additional attribute to the function.</p>
</li>
<li>
<p>We will expand on Functions in
<a href="https://saylesss88.github.io/Understanding_Nix_Functions_2.html">This Chapter</a></p>
</li>
</ul>
<h3>If, Let, and With Expressions</h3>
<p>Nix is a pure expression language, meaning every construct evaluates to a value
— there are no statements. Because of this, <strong>if expressions</strong> in Nix work
differently than in imperative languages, where conditional logic often relies
on statements (<code>if</code>, <code>elsif</code>, etc.).</p>
<p><strong>If expressions in Nix</strong>:</p>
<p>Since everything in Nix is an expression, an <code>if</code> expression must always produce
a value:</p>
<pre><code class="language-nix">nix-repl> a = 6
nix-repl> b = 10
nix-repl> if a > b then "yes" else "no"
"no"
</code></pre>
<p>Here, <code>"no"</code> is the result because <code>a</code>(6) is not greater than <code>b</code>(10). Notice
that there’s no separate conditional statement – the entire construct evaluates
to a value.</p>
<p>Another example, integrating built-in functions:</p>
<pre><code class="language-nix">{
key = if builtins.pathExists ./path then "YES" else "NO!";
}
</code></pre>
<p>If <code>./path</code> exists it will evaluate to the value <code>"YES"</code> or else it will
evaluate to <code>"NO!"</code>.</p>
<p>Thus, the final result of the expression would be:</p>
<pre><code class="language-nix">{ key = "YES"; }
# or
{ key = "NO!"; }
</code></pre>
<p>Since Nix does not have statements, Nix’s <code>if</code> statements behave more like
<a href="https://en.wikipedia.org/wiki/Ternary_conditional_operator">ternary operators</a>
(<code>condition ? value_if_true : value_if_false</code>) in other languages.</p>
<p><strong>Let expressions</strong>:</p>
<p>Let expressions in Nix is primarily a mechanism for local variable binding and
scoping. It allows you to define named values that are only accessible within
the <code>in</code> block of the <code>let</code> expression. This is useful for keeping code clean
and avoiding repitition.</p>
<p>For example:</p>
<pre><code class="language-nix">let
a = "foo";
b = "fighter";
in a + b
"foofighter"
</code></pre>
<p>Here, <code>a</code> and <code>b</code> are defined inside the <code>let</code> block, and their values are used
in the <code>in</code> expression. Since everything in Nix is an expression, <code>a + b</code>
evaluates to <code>"foofighter"</code></p>
<p><strong>Using Let Expressions Inside Attribute Sets</strong></p>
<p>Let expressions are commonly used when defining attribute sets (Click for
output):</p>
<pre><code class="language-nix">let
appName = "nix-app";
version = "1.0";
in {
name = appName;
fullName = appName + "-" + version;
}
~{
~ name = "nix-app";
~ fullName = "nix-app-1.0";
~}
</code></pre>
<p>This allows you to reuse values within an attribute set, making the code more
modular and preventing duplication.</p>
<p><strong>Let Expressions in Function Arguments</strong></p>
<p>You can also use let expressions within function arguments to define
intermediate values before returning an output:</p>
<pre><code class="language-nix">{ pkgs, lib }:
let
someVar = "hello";
otherVar = "world";
in
{ inherit pkgs lib someVar otherVar; }
</code></pre>
<p>Result:</p>
<pre><code class="language-nix">{
pkgs = <value>;
lib = <value>;
someVar = "hello";
otherVar = "world";
}
</code></pre>
<p>Here, <code>inherit</code> brings <code>pkgs</code> and <code>lib</code> into the resulting attribute set,
alongside the locally defined variables <code>someVar</code> and <code>otherVar</code>.</p>
<p><strong>Key Takeaways</strong>:</p>
<ul>
<li>
<p>Let expressions allow local variable bindings that are only visible inside the
in block. They also help avoid repitition and improve readability.</p>
</li>
<li>
<p>Commonly used inside attribute sets or function arguments.</p>
</li>
<li>
<p>Their scope is limited to the expression in which they are declared.</p>
</li>
</ul>
<p><strong>With expressions</strong>:</p>
<p>A <code>with</code> expression in Nix is primarily used to simplify access to attributes
within an attribute set. Instead of repeatedly referring to a long attribute
path, with temporarily brings the attributes into scope, allowing direct access
without prefixing them.</p>
<p><strong>Basic Example: Reducing Attribute Path Usage</strong></p>
<p>Consider the following expressions:</p>
<pre><code class="language-nix">nix-repl> longName = { a = 3; b = 4; }
nix-repl> longName.a + longName.b
7
</code></pre>
<p>Here, we must explicitly reference <code>longName.a</code> and <code>longName.b</code>. Using a <code>with</code>
expression simplifies this:</p>
<pre><code class="language-nix">nix-repl> with longName; a + b
7
</code></pre>
<p>Now, within the scope of the with expression, <code>a</code> and <code>b</code> are accessible without
prefixing them with <code>longName</code>.</p>
<p><strong>Practical Use Case: Working with <code>pkgs</code></strong></p>
<p>One of the most common uses of <code>with</code> that you’ll see is when dealing with
packages from <code>nixpkgs</code> is writing the following:</p>
<pre><code class="language-nix">{ pkgs }:
with pkgs; {
myPackages = [ vim git neofetch ];
}
</code></pre>
<p>Instead of writing this:</p>
<pre><code class="language-nix">{ pkgs }:
{
myPackages = [ pkgs.vim pkgs.git pkgs.neofetch ];
}
</code></pre>
<blockquote>
<p>Tip: Overusing <code>with lib;</code> or <code>with pkgs;</code> can reduce clarity, it may be fine
for smaller modules where the scope is limited. For larger configurations,
explicit references (<code>pkgs.something</code>) often make dependencies clearer and
prevent ambiguity.</p>
</blockquote>
<h3>Nix Language Quirks</h3>
<ol>
<li><code>with</code> gets less priority than <code>let</code>. This can be confusing, especially if
you like to write <code>with pkgs;</code>:</li>
</ol>
<pre><code class="language-nix">nix-repl> pkgs = { x = 2; }
nix-repl> with pkgs; x
2
nix-repl> with pkgs; let x = 4; in x
4
</code></pre>
<p>This shows us that the <code>let</code> binding overrides the <code>with</code> binding.</p>
<pre><code class="language-nix">let x = 4; in with pkgs; x
4
</code></pre>
<p>Still returns <code>4</code>, but the reasoning is different. The <code>with</code> expression doesn’t
define new bindings; it simply makes attributes from <code>pkgs</code> available as
unqualified names. However, because <code>let x = 4</code> is <strong>outside</strong> the <code>with</code>, it
already extablished <code>x = 4</code>, so when <code>with pkgs; x</code> is evaluated inside, <code>x</code>
still refers to the <strong>outer</strong> <code>let</code> binding, not the one from <code>pkgs</code>.</p>
<ol start="2">
<li>Default values aren’t bound in <code>@-patterns</code></li>
</ol>
<p>In the following example, calling a function that binds a default value <code>"baz"</code>
to the attribute <code>b</code> of an argument using an alias (<code>@</code>) pattern, with an empty
attribute set as argument, results in the alias variable inputs being bound to
the original empty attribute set instead of including the default value:</p>
<pre><code class="language-nix">(inputs@(b ? "baz"): inputs) {}
</code></pre>
<p>Output:</p>
<pre><code class="language-nix">{}
</code></pre>
<p>This happens because the alias <code>inputs@</code> binds to the argument as passed, before
the default value for <code>b</code> is applied.</p>
<p>The syntax requires curly brackets around the attribute set pattern for
correctness, so the fixed syntax would be:</p>
<pre><code class="language-nix">(inputs@{b ? "baz"}: inputs) {}
</code></pre>
<p>However, even with this fix, the inputs alias still refers to the original
argument without defaults applied. So the quirk persists, showing how default
values in <code>@-patterns</code> do not propagate into the aliased variable.</p>
<ol start="3">
<li>Destructuring function arguments:</li>
</ol>
<pre><code class="language-nix">nix-repl> f = { x ? 2, y ? 4 }: x + y
nix-repl> f { }
6
</code></pre>
<p>The function <code>f</code> takes an attribute set with default values (<code>x = 2</code>, <code>y = 4</code>)</p>
<p>When called with <code>{}</code> (an empty set), it falls back to the default values
(<code>2 + 4</code> -> <code>6</code>)</p>
<p>Using <code>@args</code> to capture the entire input set:</p>
<p>The <code>@args</code> syntax allows us to retain access to the full attribute set, even
after destructuring:</p>
<pre><code class="language-nix">nix-repl> f = { x ? 1, y ? 2, ... }@args: with args; x + y + z
nix-repl> f { z = 3; }
6
</code></pre>
<p>The <code>{ x ? 1, y ? 2, ... }</code> syntax means <code>x</code> and <code>y</code> have defaults, while <code>...</code>
allows additional attributes.</p>
<p><code>@args</code> binds the entire attribute set (<code>args</code>) so that we can access <code>z</code>, which
wouldn’t be destructured by default.</p>
<p>When calling <code>f { z = 3; }</code>, we pass an extra attribute (<code>z = 3</code>), making
<code>x + y + z</code> → <code>1 + 2 + 3 = 6</code>.</p>
<ol start="4">
<li>Imports and namespaces</li>
</ol>
<p>There is a keyword import, but it’s equivalent in other languages is eval. It
can be used for namespacing too:</p>
<pre><code class="language-nix">let
pkgs = import <nixpkgs> {};
lib = import <nixpkgs/lib>;
in
pkgs.runCommand (lib.strings.removePrefix "....
</code></pre>
<p>consider using <code>import</code> here as using <code>qualified import ...</code> in Haskell or
<code>import ...</code> in Python.</p>
<p>Another way of importing is with <code>import ...;</code>, which corresponds to Python
<code>from ... import *</code>.</p>
<p>But because of not very great IDE support in Nix, <code>with import ...;</code> is
discouraged. Rather use inherit, especially if you are targeting source code for
Nix newcomers:</p>
<pre><code class="language-nix">let
lib = import <nixpkgs/lib>;
inherit (lib.strings)
removePrefix removeSuffix
;
inherit (lib.lists)
isList init drop
;
in
removePrefix ...
</code></pre>
<p><code>inherit</code> has higher priority than <code>with</code>, and conflicts with <code>let</code></p>
<pre><code class="language-nix">nix-repl> let pkgs = { x = 1; }; x = 2; x = 3; inherit (pkgs) x; in x
error: attribute ‘x’ at (string):1:31 already defined at (string):1:24
</code></pre>
<p>This makes it a sane citizen of Nix lanugage… except it has a twin, called
<code>{ inherit ...; }</code>. They DON’T do the same - <code>let inherit ...</code> adds
let-bindings, and <code>{ inherit ...; }</code> adds attributes to a record.
–<a href="https://nixos.wiki/wiki/Nix_Language_Quirks">https://nixos.wiki/wiki/Nix_Language_Quirks</a></p>
<ol start="5">
<li>Only attribute names can be interpolated, not Nix code:</li>
</ol>
<pre><code class="language-nix">nix-repl> let ${"y"} = 4; in y
4
nix-repl> with { ${"y"} = 4; }; y
4
let y = 1; x = ${y}; in x
error: syntax error, unexpected DOLLAR_CURLY
</code></pre>
<p><strong>Conclusion</strong></p>
<ul>
<li>
<p><code>let</code> bindings introduce new local values and override anything from <code>with</code>.</p>
</li>
<li>
<p><code>with</code> doesn’t create bindings - it only makes attributes available within its
scope.</p>
</li>
<li>
<p>The order matters: If <code>let x = 4</code> is outside <code>with</code>, then <code>x = 4</code> already
exists before <code>with</code> runs, so <code>with pkgs; x</code> resolves to <code>4</code>, not the value
from <code>pkgs</code>.</p>
</li>
</ul>
<h4>Resources</h4>
<details>
<summary> ✔️ Resources (Click to Expand) </summary>
<p>A few resources to help get you started with the Nix Language, I have actually
grown to love the language. I find it fairly simple but powerful!</p>
<ul>
<li>
<p><a href="https://nix.dev/tutorials/nix-language.html">nix.dev nixlang-basics</a></p>
</li>
<li>
<p><a href="https://nix.dev/manual/nix/2.24/language/">Nix Language Overview</a></p>
</li>
<li>
<p><a href="https://learnxinyminutes.com/nix/">learn nix in y minutes</a></p>
</li>
<li>
<p><a href="https://github.com/tazjin/nix-1p">nix onepager</a></p>
</li>
<li>
<p><a href="https://zero-to-nix.com/concepts/nix-language/">zero-to-nix nix lang</a></p>
</li>
<li>
<p><a href="https://nixos.org/guides/nix-pills/04-basics-of-language.html">nix-pills basics of nixlang</a></p>
</li>
<li>
<p><a href="https://nixos.org/guides/nix-pills/04-basics-of-language">Basics of the Language Pill</a></p>
</li>
</ul>
</details>
<pre><code class="language-nix">builtins.head[ 5 6 7 ]
</code></pre>
Nix Package Managerhttps://saylesss88.github.io/nix/nix_package_manager.html2025-11-22T00:00:00+00:00saylesss87@proton.me (saylesss88)<h1>Nix Package Manager</h1>
<details>
<summary> Click to Expand Table of Contents</summary>
<!-- toc -->
</details>
<!--  -->
<h2>Nix Package Manager</h2>
<p>Nix is a <em>purely functional package manager</em>. This means that it treats packages
like values in purely functional programming languages – they are built by
functions that don’t have side-effects, and they never change after they have
been built.</p>
<p>Nix stores packages in the <em>Nix store</em>, usually the directory <code>/nix/store</code>,
where each package has its own unique subdirectory such as:</p>
<pre><code class="language-bash">/nix/store/y53c0lamag5wpx7vsiv7wmnjdgq97yd6-yazi-25.5.14pre20250526_74a8ea9
</code></pre>
<p>You can use the Nix on most Linux distributions and Mac OS also has good support
for Nix. It should work on most platforms that support POSIX threads and have a
C++11 compiler.</p>
<p>When I install Nix on a distro like Arch Linux I usually use the Zero to Nix
installer as it automates several steps, such as enabling flakes by default:</p>
<pre><code class="language-bash">curl --proto '=https' --tlsv1.2 -sSf -L https://install.determinate.systems/nix | sh -s -- install
</code></pre>
<p>If you have concerns about the “curl to Bash” approach you could examine the
installation script
<a href="https://raw.githubusercontent.com/DeterminateSystems/nix-installer/main/nix-installer.sh">here</a>
then download and run it:</p>
<pre><code class="language-bash">curl --proto '=https' --tlsv1.2 -sSf -L https://install.determinate.systems/nix > nix-installer.sh
chmod +x nix-installer.sh
./nix-installer.sh install
</code></pre>
<p>I got the above commands from
<a href="https://zero-to-nix.com/start/install/">zero-to-nix</a></p>
<p>The main difference between using the nix package manager on another
distribution and NixOS is that NixOS uses Nix not just for package management
but also to manage the system configuration (e.g., to build config files in
<code>/etc</code>).</p>
<p><a href="https://nix-community.github.io/home-manager/">Home Manager</a> is a Nix-powered
tool for reproducible management of the contents of the users’ home directories.
This includes programs, configuration files, environment variables, and
arbitrary files. Home manager uses the same module system as NixOS.</p>
<p>Now that we’ve discussed some of the basics of the Nix package manager, lets see
how it is used to build and manage software in NixOS.</p>
<h2>Channels</h2>
<p>Nix packages are distributed through Nix channels; mechanisms for distributing
Nix expressions and the associated binary caches for them. Channels are what
determine which versions your packages have. (i.e. <em>stable</em> or <em>unstable</em>). A
channel is a name for the latest “verified” git commits in Nixpkgs. Each channel
represents a different policy for what “verified” means. Whenever a new commit
in <code>Nixpkgs</code> passes the verification process, the respective channel is updated
to point to that new commit.</p>
<p>While channels provide a convenient way to get the latest stable or unstable
packages, they introduce a challenge for strict reproducibility. Because a
channel like <code>nixos-unstable</code> is constantly updated, fetching packages from it
today might give you a different set of package versions than fetching from it
tomorrow, even if your configuration remains unchanged. This “rolling release”
nature at a global level can make it harder to share and reproduce exact
development environments or system configurations across different machines or
at different points in time.</p>
<h2>Channels vs. Flakes Enhancing Reproducibility</h2>
<p>Before the introduction of <strong>Nix Flakes</strong>, channels were the primary mechanism
for sourcing <code>Nixpkgs</code>. While functional, they posed a challenge for exact
reproducibility because they point to a moving target (the latest commit on a
branch). This meant that a <code>nix-build</code> command run yesterday might produce a
different result than one run today, simply because the channel updated.</p>
<p>Nix Flakes were introduced to address this. Flakes bring a built-in,
standardized way to define the exact inputs to a Nix build, including the
precise Git revision of <code>Nixpkgs</code> or any other dependency.</p>
<p>Here’s a quick comparison:</p>
<table><thead><tr><th style="text-align: left">Feature</th><th style="text-align: left">Nix Channels (traditional)</th><th style="text-align: left">Nix Flakes (modern approach)</th></tr></thead><tbody>
<tr><td style="text-align: left"><strong>Input Source</strong></td><td style="text-align: left">Global system configuration (<code>nix-channel --update</code>)</td><td style="text-align: left">Explicitly defined in <code>flake.nix</code> (e.g., <code>github:NixOS/nixpkgs/nixos-23.11</code>)</td></tr>
<tr><td style="text-align: left"><strong>Reproducibility</strong></td><td style="text-align: left">“Rolling release”; less reproducible across time/machines</td><td style="text-align: left">Highly reproducible due to locked inputs (<code>flake.lock</code>)</td></tr>
<tr><td style="text-align: left"><strong>Dependency Mgmt.</strong></td><td style="text-align: left">Implicitly managed by global channel</td><td style="text-align: left">Explicitly declared and version-locked within <code>flake.nix</code></td></tr>
<tr><td style="text-align: left"><strong>Sharing</strong></td><td style="text-align: left">Relies on users having same channel version</td><td style="text-align: left">Self-contained; <code>flake.lock</code> ensures everyone gets same inputs</td></tr>
<tr><td style="text-align: left"><strong>Learning Curve</strong></td><td style="text-align: left">Simpler initial setup, but tricky reproducibility debugging</td><td style="text-align: left">Higher initial learning curve, but simplifies reproducibility</td></tr>
</tbody></table>
<p>The ability of Flakes to “lock” the exact version of all dependencies in a
<code>flake.lock</code> file is a game-changer for collaboration and long-term
reproducibility, ensuring that your Nix configuration builds the same way, every
time, everywhere.</p>
<h2>Nixpkgs</h2>
<p><strong>Nixpkgs</strong> is the largest repository of Nix packages and NixOS modules.</p>
<p>For <strong>NixOS</strong> users, <code>nixos-unstable</code> channel branch is the rolling release,
where the packages are tested and must pass integration tests.</p>
<p>For <strong>standalone Nix</strong> users, <code>nixpkgs-unstable</code> channel branch is the rolling
release, where packages pass only basic build tests and are upgraded often.</p>
<p>For Flakes, as mentioned above they don’t use channels so <code>nixpkgs</code> will be
listed as an <code>input</code> to your flake. (e.g.,
<code>inputs.nixpkgs.url = "github:nixos/nixpkgs/nixos-unstable";</code>) When using flakes
you can actually disable channels and actually recommended to avoid conflicts
between traditional channel-based workflows and the flake system.</p>
<h3>Updates</h3>
<p>The mechanism for updating your Nix environment differs fundamentally between
channels and flakes, directly impacting reproducibility and control.</p>
<h4>Updating with Channels (Traditional Approach)</h4>
<p>With channels, updates are a global operation that pulls the latest state of a
specific branch.</p>
<p><strong>How it works</strong>: You typically use <code>nix-channel --update</code> to fetch the latest
commit from the channels you’ve subscribed to. For instance,
<code>sudo nix-channel --update nixos</code> (for NixOS) or <code>nix-channel --update nixpkgs</code>
(for <code>nix-env</code> on other Linux distributions).</p>
<p><strong>Implication</strong>: This command updates your local system’s understanding of what
“nixos” or “nixpkgs-unstable” means. From that point on, any
<code>nixos-rebuild switch</code>, <code>nix-env -iA</code>, or <code>nix-build</code> commands that implicitly
or explicitly refer to <code>nixpkgs</code> will use this newly updated version.</p>
<p><strong>Reproducibility Challenge</strong>: The update itself is not recorded in your
configuration files. If you share your <code>configuration.nix</code> with someone, they
might run <code>nix-channel --update</code> on a different day and get a different set of
package versions because the channel has moved. This makes it challenging to
guarantee that two users building the “same” configuration will get identical
results. You’re effectively relying on the implicit, globally managed state of
your channels.</p>
<h4>Updating with Flakes (Modern Approach)</h4>
<p><strong>Flakes</strong>, by contrast, use a more explicit and localized update mechanism tied
to your <code>flake.lock</code> file.</p>
<p><strong>How it works</strong>: When you define a <code>flake.nix</code>, you specify the exact URL
(e.g., a Git repository with a specific branch or tag) for each input. When you
first use a flake, Nix resolves these URLs to a precise Git commit hash and
records this hash, along with a content hash, in a <code>flake.lock</code> file.</p>
<p>To update your flake inputs, you run <code>nix flake update</code>.</p>
<p><strong>Implication</strong>: This command goes to each input’s specified URL (e.g.,
<code>github:NixOS/nixpkgs/nixos-unstable</code>) and fetches the latest commit for that
input. It then updates your <code>flake.lock</code> file with the new, precise Git commit
hash and content hash for that input. Your <code>flake.nix</code> itself doesn’t change,
but the <code>flake.lock</code> file now points to newer versions of your dependencies.</p>
<p><strong>Reproducibility Advantage</strong>: The <code>flake.lock</code> file acts as a manifest of your
exact dependency versions.</p>
<p><strong>Sharing</strong>: When you share your flake (the <code>flake.nix</code> and <code>flake.lock</code> files),
anyone using it will fetch precisely the same Git commit hashes recorded in the
<code>flake.lock</code>, guaranteeing identical inputs and thus, identical builds (assuming
the same system architecture).</p>
<p><strong>Updating Selectively</strong>: You can update individual inputs within your flake by
specifying them: <code>nix flake update nixpkgs</code>. This provides fine-grained control
over which parts of your dependency graph you want to advance.</p>
<p><strong>Rolling Back</strong>: Because the <code>flake.lock</code> explicitly records the versions, you
can easily revert to a previous state by checking out an older <code>flake.lock</code> from
your version control system.</p>
<p><strong>In essence</strong>: Channels involve a global “pull” of the latest branch state,
making reproducibility harder to guarantee across time and machines. Flakes,
however, explicitly pin all inputs in <code>flake.lock</code>, and updates involve
explicitly refreshing these pins, providing strong reproducibility and version
control out of the box.</p>
<h3>Managing software with Nix</h3>
<p><strong>Derivation Overview</strong></p>
<p>In Nix, the process of managing software starts with <strong>package definitions</strong>.
These are files written in the Nix language that describe how a particular piece
of software should be built. These package definitions, when processed by Nix,
are translated into derivations.</p>
<p>At its core, a derivation in Nix is a blueprint or a recipe that describes how
to build a specific software package or any other kind of file or directory.
It’s a declarative specification of:</p>
<ul>
<li>
<p><strong>Inputs</strong>: What existing files or other derivations are needed as
dependencies.</p>
</li>
<li>
<p><strong>Build Steps</strong>: The commands that need to be executed to produce the desired
output.</p>
</li>
<li>
<p><strong>Environment</strong>: The specific environment (e.g., build tools, environment
variables) required for the build process.</p>
</li>
<li>
<p><strong>Outputs</strong>: The resulting files or directories that the derivation produces.</p>
</li>
</ul>
<p>Think of a package definition as the initial instructions, and the derivation as
the detailed, low-level plan that Nix uses to actually perform the build.</p>
<p>Again, a derivation is like a blueprint that describes how to build a specific
software package or any other kind of file or directory.</p>
<p><strong>Key Characteristics of Derivations:</strong></p>
<ul>
<li>
<p><strong>Declarative</strong>: You describe the desired outcome and the inputs, not the
exact sequence of imperative steps. Nix figures out the necessary steps based
on the builder and args.</p>
</li>
<li>
<p><strong>Reproducible</strong>: Given the same inputs and build instructions, a derivation
will always produce the same output. This is a cornerstone of Nix’s
reproducibility.</p>
</li>
<li>
<p><strong>Tracked by Nix</strong>: Nix keeps track of all derivations and their outputs in
the Nix store. This allows for efficient management of dependencies and
ensures that different packages don’t interfere with each other.</p>
</li>
<li>
<p><strong>Content-Addressed</strong>: The output of a derivation is stored in the Nix store
under a unique path that is derived from the hash of all its inputs and build
instructions. This means that if anything changes in the derivation, the
output will have a different path.</p>
</li>
</ul>
<p>Here’s a simple Nix derivation that creates a file named hello in the Nix store
containing the text “Hello, World!”:</p>
<details>
<summary> ✔️ Hello World Derivation Example (Click to expand):</summary>
<pre><code class="language-nix">{pkgs ? import <nixpkgs> {}}:
pkgs.stdenv.mkDerivation {
name = "hello-world";
dontUnpack = true;
# No need for src = null; when dontUnpack = true;
# src = null;
buildPhase = ''
# Create a shell script that prints "Hello, World!"
echo '#!${pkgs.bash}/bin/bash' > hello-output-file # Shebang line
echo 'echo "Hello, World!"' >> hello-output-file # The command to execute
chmod +x hello-output-file # Make it executable
'';
installPhase = ''
mkdir -p $out/bin
cp hello-output-file $out/bin/hello # Copy the file from build directory to $out/bin
'';
meta = {
description = "A simple Hello World program built with Nix";
homepage = null;
license = pkgs.lib.licenses.unfree; # licenses.mit is often used as well
maintainers = [];
};
}
</code></pre>
<p>And a <code>default.nix</code> with the following contents:</p>
<pre><code class="language-nix">{ pkgs ? import <nixpkgs> {} }:
import ./hello.nix { pkgs = pkgs; }
</code></pre>
<ul>
<li>
<p><code>{ pkgs ? import <nixpkgs> {} }</code>: This is a function that takes an optional
argument <code>pkgs</code>. We need Nixpkgs to access standard build environments like
<code>stdenv</code>.</p>
</li>
<li>
<p><code>pkgs.stdenv.mkDerivation { ... }:</code> This calls the mkDerivation function from
the standard environment (stdenv). mkDerivation is the most common way to
define software packages in Nix.</p>
</li>
<li>
<p><code>name = "hello-world";</code>: Human-readable name of the derivation</p>
</li>
<li>
<p>The rest are the build phases and package metadata.</p>
</li>
</ul>
<p>To use the above derivation, save it as a <code>.nix</code> file (e.g. <code>hello.nix</code>). Then
build the derivation using,:</p>
<pre><code class="language-bash">nix-build
this derivation will be built:
/nix/store/9mc855ijjdy3r6rdvrbs90cg2gf2q160-hello-world.drv
building '/nix/store/9mc855ijjdy3r6rdvrbs90cg2gf2q160-hello-world.drv'...
Running phase: patchPhase
Running phase: updateAutotoolsGnuConfigScriptsPhase
Running phase: configurePhase
no configure script, doing nothing
Running phase: buildPhase
Running phase: installPhase
Running phase: fixupPhase
shrinking RPATHs of ELF executables and libraries in /nix/store/2ydxh5pd9a6djv7npaqi9rm6gmz2f73b-hello-world
checking for references to /build/ in /nix/store/2ydxh5pd9a6djv7npaqi9rm6gmz2f73b-hello-world...
patching script interpreter paths in /nix/store/2ydxh5pd9a6djv7npaqi9rm6gmz2f73b-hello-world
stripping (with command strip and flags -S -p) in /nix/store/2ydxh5pd9a6djv7npaqi9rm6gmz2f73b-hello-world/bin
/nix/store/2ydxh5pd9a6djv7npaqi9rm6gmz2f73b-hello-world
</code></pre>
<ul>
<li>
<p>Nix will execute the <code>buildPhase</code> and <code>installPhase</code></p>
</li>
<li>
<p>After a successful build, the output will be in the Nix store. You can find
the exact path by looking at the output of the nix build command (it will be
something like <code>/nix/store/your-hash-hello-world</code>).</p>
</li>
</ul>
<p>Run the “installed” program:</p>
<pre><code class="language-bash">./result/bin/hello
</code></pre>
<ul>
<li>This will execute the <code>hello</code> file from the Nix store and print
<code>"Hello, World!"</code>.</li>
</ul>
</details>
Nix Pathshttps://saylesss88.github.io/nix/nixLang/nix_paths.html2025-11-22T00:00:00+00:00saylesss87@proton.me (saylesss88)<h1>Nix Paths</h1>
<details>
<summary> ✔️ Click to Expand Table of Contents</summary>
<!-- toc -->
</details>
<p>The following examples are done with a local <code>nixpkgs</code> clone located at
<code>~/src/nixpkgs</code></p>
<p>Paths in Nix always need a <code>/</code> in them and always expand to absolute paths
relative to your current directory.</p>
<pre><code class="language-bash">nix repl
nix-repl> ./.
/home/jr/src/nixpkgs
nix-repl> ./. + "/lib"
/home/jr/src/nixpkgs/lib
</code></pre>
<p>Nix does <em>path normalization</em> every time you append strings, so if you just add
a slash <code>/</code> its not actually there:</p>
<pre><code class="language-bash">nix-repl> ./.
/home/jr/src/nixpkgs
nix-repl> ./. + "/"
/home/jr/src/nixpkgs
nix-repl> ./. + "/" + "lib"
/home/jr/src/nixpkgslib
nix-repl> "${./.}/lib"
# using ${./.} causes a store copy
copying '/homr/jr/src/nixpkgs' to the store
"/nix/store/3z9fzx8z03wslxvri5syv3jnnhn5fkbd-nixpkgs/lib"
nix-repl> "${toString ./.}/lib"
# using toString avoids making a store copy
"/home/jr/src/nixpkgs/lib"
nix-repl> ./lib/.. # nix removes all `..` to avoid redundant path resolutions
/home/jr/src/nixpkgs
nix-repl> :q
</code></pre>
<pre><code class="language-bash">realpath ./lib/..
/home/jr/src/nixpkgs
ln -s pkgs/applications lib-symlink
realpath ./lib-symlink/..
/home/jr/src/nixpkgs/pkgs
nix repl
nix-repl> ./lib-symlink/.. # Nix doesn't read this file at all like realpath did
/home/jr/src/nixpkgs
nix-repl> builtins.readDir ./. # listing of all entries in current dir and their types
{
".devcontainer" = "directory";
".editorconfig" = "regular";
".git" = "directory";
".git-blame-ignore-revs" = "regular";
".gitattributes" = "regular";
".github" = "directory";
".gitignore" = "regular";
".mailmap" = "regular";
".mergify.yml" = "regular";
".version" = "symlink";
"CONTRIBUTING.md" = "regular";
COPYING = "regular";
"README.md" = "regular";
ci = "directory";
"default.nix" = "regular";
doc = "directory";
"flake.nix" = "regular";
lib = "directory";
maintainers = "directory";
nixos = "directory";
pkgs = "directory";
"shell.nix" = "regular";
}
nix-repl> builtins.readFile ./default.nix
"let\n requiredVersion = import ./lib/minver.nix;\nin\n\nif !builtins ? nixVersion
|| builtins.compareVersions requiredVersion builtins.nixVersion == 1 then\n\n abort
''\n\n This version of Nixpkgs requires Nix >= \${requiredVersion}, please
upgrade:\n\n - If you are running NixOS, `nixos-rebuild' can be used to upgrade
your system.\n\n - Alternatively, with Nix > 2.0 `nix upgrade-nix' can be used
to imperatively\n upgrade Nix. You may use `nix-env --version' to check which
version you have.\n\n - If you installed Nix using the install script (https://nixos.org/nix/install),\n
it is safe to upgrade by running it again:\n\n curl -L https://nixos.org/nix/install | sh\n\n
For more information, please see the NixOS release notes at\n https://nixos.org/nixos/manual
or locally at\n \${toString ./nixos/doc/manual/release-notes}.\n\n If you need further help,
see https://nixos.org/nixos/support.html\n ''\n\nelse\n\n import ./pkgs/top-level/impure.nix\n"
nix-repl> :l <nixpkgs/lib>
nix-repl> importJSON ./pkgs/development/python-modules/notebook/missing-hashes.json # Return the nix value for JSON
{
"@nx/nx-darwin-arm64@npm:16.10.0" = "aabcc8499602b98c9fc3b768fe46dfd4e1b818caa84b740bd4f73a2e4528c719b979ecb1c10a0d793a1fead83073a08bc86417588046aa3e587e80af880bffd3";
"@nx/nx-darwin-x64@npm:16.10.0" = "9dd20f45f646d05306f23f5abb7ade69dcb962e23a013101e93365847722079656d30a19c735fdcfa5c4e0fdf08691f9d621073c58aef2861c26741ff4638375";
"@nx/nx-freebsd-x64@npm:16.10.0" = "35b93aabe3b3274d53157a6fc10fec7e341e75e6818e96cfbc89c3d5b955d225ca80a173630b6aa43c448c6b53b23f06a2699a25c0c8bc71396ee20a023d035f";
"@nx/nx-linux-arm-gnueabihf@npm:16.10.0" = "697b9fa4c70f84d3ea8fe32d47635864f2e40b0ceeb1484126598c61851a2ec34b56bb3eeb9654c37d9b14e81ce85a36ac38946b4b90ca403c57fe448be51ccb";
"@nx/nx-linux-arm64-gnu@npm:16.10.0" = "001e71fedfc763a4dedd6c5901b66a4a790d388673fb74675235e19bb8fe031ff3755568ed867513dd003f873901fabda31a7d5628b39095535cb9f6d1dc7191";
"@nx/nx-linux-arm64-musl@npm:16.10.0" = "58e3b71571bdadd2b0ddd24ea6e30cd795e706ada69f685403412c518fba1a2011ac8c2ac46145eab14649aa5a78e0cedcdb4d327ccb3b6ec12e055171f3840b";
"@nx/nx-linux-x64-gnu@npm:16.10.0" = "97729a7efb27301a67ebf34739784114528ddb54047e63ca110a985eaa0763c5b1ea7c623ead1a2266d07107951be81e82ffa0a30e6e4d97506659303f2c8c78";
"@nx/nx-linux-x64-musl@npm:16.10.0" = "442bdbd5e61324a850e4e7bd6f54204108580299d3c7c4ebcec324da9a63e23f48d797a87593400fc32af78a3a03a3c104bfb360f107fe732e6a6c289863853a";
"@nx/nx-win32-arm64-msvc@npm:16.10.0" = "b5c74184ebfc70294e85f8e309f81c3d40b5cf99068891e613f3bef5ddb946bef7c9942d9e6c7688e22006d45d786342359af3b4fc87aadf369afcda55c73187";
"@nx/nx-win32-x64-msvc@npm:16.10.0" = "c5b174ebd7a5916246088e17d3761804b88f010b6b3f930034fa49af00da33b6d1352728c733024f736e4c2287def75bafdc3d60d8738bd24b67e9a4f11763f8";
}
nix-repl> builtins.toJSON # serialize
«primop toJSON»
nix-repl> builtins.fromTOML
«primop fromTOML»
nix-repl> builtins.toXML
</code></pre>
<p>For more serialization formats see <code>nixpkgs/lib/generators.nix</code> as well as in
<code>nixpkgs/pkgs/pkgs-lib/formats/</code> we can see them with the <code>nix repl</code> as follows:</p>
<pre><code class="language-bash">cd ~/src/nixpkgs
nix repl
nix-repl> :l .
nix-repl> lib.generators.toYAML {} { a = 10; }
"{\"a\":10}"
nix-repl> lib.generators.toYAML {} { a.b.c = 10; }
"{\"a\":{\"b\":{\"c\":10}}}"
nix-repl> builtins.trace (lib.generators.toYAML {} { a.b.c = 10; }) null
trace: {"a":{"b":{"c":10}}}
null
nix-repl> yamlFormat = pkgs.formats.yaml {}
nix-repl> yamlFormat
{
generate = «lambda generate @ /home/jr/src/nixpkgs/pkgs/pkgs-lib/formats.nix:111:9»;
type = { ... };
}
</code></pre>
<ul>
<li>We can see that it provides a <code>generate</code> function that we can use. <code>generate</code>
doesn’t just generate a string anymore because if we want to lift the
restriction at evaluation time we can’t return the formatted form at
evaluation time anymore. We need a name to return a derivation continued
below:</li>
</ul>
<pre><code class="language-bash">yamlFormat.generate "name" { a.b.c = 10; }
«derivation /nix/store/xakajb2rzbmqqkjbh08bxwqdf0xqvjly-name.drv»
nix-repl> :b yamlFormat.generate "name" { a.b.c = 10; }
This derivation produced the following outputs:
out -> /nix/store/y4c5029k6w3l0qmdw7cq396zrdy5x8yj-name
nix-repl> :q
</code></pre>
<p>Let’s cat the result to see if it’s formatted correctly as YAML:</p>
<pre><code class="language-bash">cat /nix/store/y4c5029k6w3l0qmdw7cq396zrdy5x8yj-name
───────┬───────────────────────────────────────────────────────────────
│ File: /nix/store/y4c5029k6w3l0qmdw7cq396zrdy5x8yj-name
───────┼──────────────────────────────────────────────────────────────
1 │ a:
2 │ b:
3 │ c: 10
───────┴───────────────────────────────────────────────────────────
</code></pre>
<p>Looks good. There is also a <code>type</code>:</p>
<pre><code class="language-bash">nix repl
nix-repl> :l .
nix-repl> yamlFormat = pkgs.format.yaml {}
nix-repl> yamlFormat.type
{
_type = "option-type";
check = «lambda check @ /home/jr/src/nixpkgs/lib/types.nix:1029:19»;
deprecationMessage = null;
description = "YAML value";
descriptionClass = "conjunction";
emptyValue = { ... };
functor = { ... };
getSubModules = null;
getSubOptions = «lambda @ /home/jr/src/nixpkgs/lib/types.nix:214:25»;
merge = «lambda merge @ /home/jr/src/nixpkgs/lib/types.nix:1031:13»;
name = "nullOr";
nestedTypes = { ... };
substSubModules = «lambda substSubModules @ /home/jr/src/nixpkgs/lib/types.nix:1046:29»;
typeMerge = «lambda defaultTypeMerge @ /home/jr/src/nixpkgs/lib/types.nix:115:10»;
}
nix-repl> lib.modules.mergeDefinitions [] yamlFormat.type [ { value = null; } ]
{
defsFinal = [ ... ];
defsFinal' = { ... };
isDefined = true;
mergedValue = null;
optionalValue = { ... };
}
nix-repl> (lib.modules.mergeDefinitions [] yamlFormat.type [ { value = null; } ]).mergedValue
null
nix-repl> :p (lib.modules.mergeDefinitions [] yamlFormat.type [ { value = { a.b.c = 10; }; } ]).mergedValue
{
a = {
b = { c = 10; };
};
}
nix-repl> :p (lib.modules.mergeDefinitions [] yamlFormat.type [ { value = { a.b.c = 10; }; } { value = { a.b.d = 20; }; } ]).mergedValue
{
a = {
b = {
c = 10;
d = 20;
};
};
}
</code></pre>
<ul>
<li><code>lib</code> can’t access any packages, it is entirely at evaluation time. It can’t
access any formatters or things like that. If we lift that restriction as is
done in <code>pkgs.formats</code> we can make it look much nicer.</li>
</ul>
<pre><code class="language-bash">cd ~/src/nixpkgs
nix-build -A hello
warning: Nix search path entry '/nix/var/nix/profiles/per-user/root/channels' does not exist, ignoring
this path will be fetched (0.06 MiB download, 0.26 MiB unpacked):
/nix/store/29mhfr5g4dsv07d80b7n4bgs45syk3wl-hello-2.12.2
copying path '/nix/store/29mhfr5g4dsv07d80b7n4bgs45syk3wl-hello-2.12.2' from 'https://cache.nixos.org'...
/nix/store/29mhfr5g4dsv07d80b7n4bgs45syk3wl-hello-2.12.2
</code></pre>
<p>Say we rely on this store path in a derivation:</p>
<pre><code class="language-bash">nix-repl> thePath = "/nix/store/29mhfr5g4dsv07d80b7n4bgs45syk3wl-hello-2.12.2"
nix-repl> thePath + "/bin/hello"
"/nix/store/29mhfr5g4dsv07d80b7n4bgs45syk3wl-hello-2.12.2/bin/hello"
</code></pre>
<pre><code class="language-bash">hx ~/src/nixpkgs/test2.nix
</code></pre>
<pre><code class="language-nix"># test2.nix
with import ./. {};
runCommand "test" {
nativeBuildInputs = [
hello
];
}''
hello > $out
''
</code></pre>
<p>Try building it:</p>
<pre><code class="language-bash">nix-build test2.nix && cat result
warning: Nix search path entry '/nix/var/nix/profiles/per-user/root/channels' does not exist, ignoring
/nix/store/m55p4vpb8s7s28s20vs89i467kxbrdac-test
Hello, world!
</code></pre>
<p>Now if we try it with the store path:</p>
<pre><code class="language-nix"># test2.nix
with import ./. {};
runCommand "test" {
}''
/nix/store/29mhfr5g4dsv07d80b7n4bgs45syk3wl-hello-2.12.2/bin/hello > $out
''
</code></pre>
<p>This doesn’t work</p>
<pre><code class="language-bash">nix-build test2.nix
last 1 log lines:
> /build/.attr-0l2nkwhif96f51f4amnlf414lhl4rv9vh8iffyp431v6s28gsr90: line 1: /nix/store/29mhfr5g4dsv07d80b7n4bgs45syk3wl-hello-2.12.2/bin/hello: No such file or directory
For full logs, run:
nix log /nix/store/58zcp9xwgf1sirmzf9sh61j8gz9lkw34-test.drv
nix-instantiate test2.nix
/nix/store/58zcp9xwgf1sirmzf9sh61j8gz9lkw34-test.drv
nix derivation show /nix/store/58zcp9xwgf1sirmzf9sh61j8gz9lkw34-test.drv | jq
{
"/nix/store/58zcp9xwgf1sirmzf9sh61j8gz9lkw34-test.drv": {
"args": [
"-e",
"/nix/store/vj1c3wf9c11a0qs6p3ymfvrnsdgsdcbq-source-stdenv.sh",
"/nix/store/shkw4qm9qcw5sc5n1k5jznc83ny02r39-default-builder.sh"
],
"builder": "/nix/store/xy4jjgw87sbgwylm5kn047d9gkbhsr9x-bash-5.2p37/bin/bash",
"env": {
"__structuredAttrs": "",
"buildCommand": "/nix/store/29mhfr5g4dsv07d80b7n4bgs45syk3wl-hello-2.12.2/bin/hello > $out\n",
"buildInputs": "",
"builder": "/nix/store/xy4jjgw87sbgwylm5kn047d9gkbhsr9x-bash-5.2p37/bin/bash",
"cmakeFlags": "",
"configureFlags": "",
"depsBuildBuild": "",
"depsBuildBuildPropagated": "",
"depsBuildTarget": "",
"depsBuildTargetPropagated": "",
"depsHostHost": "",
"depsHostHostPropagated": "",
"depsTargetTarget": "",
"depsTargetTargetPropagated": "",
"doCheck": "",
"doInstallCheck": "",
"enableParallelBuilding": "1",
"enableParallelChecking": "1",
"enableParallelInstalling": "1",
"mesonFlags": "",
"name": "test",
"nativeBuildInputs": "",
"out": "/nix/store/ljrkx5midby3j7p4g96d74jrq8f9rpya-test",
"outputs": "out",
"passAsFile": "buildCommand",
"patches": "",
"propagatedBuildInputs": "",
"propagatedNativeBuildInputs": "",
"stdenv": "/nix/store/aq801xbgs98nxx3lckrym06qfvl8mfsf-stdenv-linux",
"strictDeps": "",
"system": "x86_64-linux"
},
"inputDrvs": {
"/nix/store/bmncp7arkdhrl6nkyg0g420935x792gl-stdenv-linux.drv": {
"dynamicOutputs": {},
"outputs": [
"out"
]
},
"/nix/store/rfkzz952hz2d58d90mscxvk87v5wa5bz-bash-5.2p37.drv": {
"dynamicOutputs": {},
"outputs": [
"out"
]
}
},
"inputSrcs": [
"/nix/store/shkw4qm9qcw5sc5n1k5jznc83ny02r39-default-builder.sh",
"/nix/store/vj1c3wf9c11a0qs6p3ymfvrnsdgsdcbq-source-stdenv.sh"
],
"name": "test",
"outputs": {
"out": {
"path": "/nix/store/ljrkx5midby3j7p4g96d74jrq8f9rpya-test"
}
},
"system": "x86_64-linux"
}
}
</code></pre>
<p>You see the <code>"inputDrvs"</code>, they are the derivations that we depend on and it
doesn’t know about the <code>hello.drv</code>. In Nix for the builder sandbox it creates a
sandbox that only contains the derivations that you depend on which ensures that
you can’t depend on any derivation that you haven’t explicitly decalred.</p>
<p>Nix does have <code>builtins.storePath</code> that allows you to do this, otherwise it’s
kind of an anti pattern.</p>
<pre><code class="language-nix"># test2.nix
# test2.nix
# test2.nix
with import ./. {};
runCommand "test" {
} ''
${builtins.storePath "/nix/store/29mhfr5g4dsv07d80b7n4bgs45syk3wl-hello-2.12.2"}/bin/hello > $out
''
</code></pre>
<p><code>builtins.storePath</code>: Turns a store path into the thing that it represents in
the store.</p>
<pre><code class="language-bash">nix-build test2.nix && cat result
/nix/store/x48741w0k9hgqywzv6wc7rk90r1y75js-test
Hello, world!
</code></pre>
<p>To demonstrate what <code>builtins.storePath</code> does:</p>
<pre><code class="language-bash">nix-repl> builtins.storePath "/nix/store/29mhfr5g4dsv07d80b7n4bgs45syk3wl-hello-2.12.2/bin/hello"
"/nix/store/29mhfr5g4dsv07d80b7n4bgs45syk3wl-hello-2.12.2/bin/hello"
nix-repl> builtins.getContext "/nix/store/29mhfr5g4dsv07d80b7n4bgs45syk3wl-hello-2.12.2"
{ }
nix-repl> builtins.getContext (builtins.storePath "/nix/store/29mhfr5g4dsv07d80b7n4bgs45syk3wl-hello-2.12.2")
{
"/nix/store/29mhfr5g4dsv07d80b7n4bgs45syk3wl-hello-2.12.2" = { ... };
}
nix-repl> :p builtins.getContext (builtins.storePath "/nix/store/29mhfr5g4dsv07d80b7n4bgs45syk3wl-hello-2.12.2")
{
"/nix/store/29mhfr5g4dsv07d80b7n4bgs45syk3wl-hello-2.12.2" = { path = true; };
}
</code></pre>
<pre><code class="language-bash">nix-repl> :l .
warning: Nix search path entry '/nix/var/nix/profiles/per-user/root/channels' does not exist, ignoring
Added 24878 variables.
nix-repl> hello.outPath
# this is the output path of the hello derivation
"/nix/store/29mhfr5g4dsv07d80b7n4bgs45syk3wl-hello-2.12.2"
nix-repl> :p builtins.getContext hello.outPath
# we see that this is a `.drv`, this is because derivations can have multiple outputs
{
"/nix/store/ljxsxdy1syy03b9kfnnh8x7zsk21fdcq-hello-2.12.2.drv" = {
outputs = [ "out" ];
};
}
# for example
nix-repl> openssl.outputs
[
"bin"
"dev"
"out"
"man"
"doc"
"debug"
]
nix-repl> openssl.all
# a list of all the derivations
[
«derivation /nix/store/rw3y8k94ib37dc86n0wivr551wyzxgsk-openssl-3.4.1.drv»
«derivation /nix/store/rw3y8k94ib37dc86n0wivr551wyzxgsk-openssl-3.4.1.drv»
«derivation /nix/store/rw3y8k94ib37dc86n0wivr551wyzxgsk-openssl-3.4.1.drv»
«derivation /nix/store/rw3y8k94ib37dc86n0wivr551wyzxgsk-openssl-3.4.1.drv»
«derivation /nix/store/rw3y8k94ib37dc86n0wivr551wyzxgsk-openssl-3.4.1.drv»
«derivation /nix/store/rw3y8k94ib37dc86n0wivr551wyzxgsk-openssl-3.4.1.drv»
]
nix-repl> lib.concatStringsSep " " openssl.all
"/nix/store/rjzx8v679rwd6dsb6s08iy3j2rrax72s-openssl-3.4.1-bin /nix/store/kcgqglb4iax0zh5jlrxmjdik93wlgsrq-openssl-3.4.1-dev /nix/store/8pviily4fgsl02ijm65binz236717wfs-openssl-3.4.1 /nix/store/1l5b31cnswnbcdcac9rzs9xixnc2n9r5-openssl-3.4.1-man /nix/store/9fz5qmj0z70cbzy7mapml0sbi8z6ap0a-openssl-3.4.1-doc /nix/store/yk2g2gfcj2fy1ffyi1g91q7jmp4h8pxa-openssl-3.4.1-debug"
nix-repl> :p builtins.getContext (builtins.unsafeDiscardOutputDependency (lib.concatStringsSep " " openssl.all))
{
"/nix/store/rw3y8k94ib37dc86n0wivr551wyzxgsk-openssl-3.4.1.drv" = {
outputs = [
"bin"
"debug"
"dev"
"doc"
"man"
"out"
];
};
}
nix-repl> :p builtins.getContext openssl.drvPath
{
"/nix/store/rw3y8k94ib37dc86n0wivr551wyzxgsk-openssl-3.4.1.drv" = { allOutputs = true; };
}
# useful if you need to create a derivation that copies this derivation to another machine
# remote builders usually take care of this but you may need it occasionally
nix-repl> :p builtins.getContext (builtins.unsafeDiscardOutputDependency openssl.drvPath)
{
"/nix/store/rw3y8k94ib37dc86n0wivr551wyzxgsk-openssl-3.4.1.drv" = { path = true; };
}
</code></pre>
<p>Relying on paths outside of the nix store is generally not recommended because
of garbage collection and it’s considered unsafe.</p>
Practical Nix Functionshttps://saylesss88.github.io/functions/practical_functions_2.1.html2025-11-22T00:00:00+00:00saylesss87@proton.me (saylesss88)<h1>Practical Nix Functions</h1>
<details>
<summary>
✔️
If you want to follow along with this example you'll have to place the following
in your project directory. Section is collapsed to focus on functions:
</summary>
<p><img src="https://saylesss88.github.io/images/coding6.png" alt="coding6" /></p>
<ol>
<li>
<p><a href="https://gitlab.com/api/v4/projects/4207231/packages/generic/graphviz-releases/2.49.3/graphviz-2.49.3.tar.gz">graphviz</a></p>
</li>
<li>
<p><a href="https://ftp.gnu.org/gnu/hello/hello-2.12.1.tar.gz">hello</a></p>
</li>
<li>
<p><code>autotools.nix</code>:</p>
</li>
</ol>
<pre><code class="language-nix"># autotools.nix
pkgs: attrs:
with pkgs; let
defaultAttrs = {
builder = "${bash}/bin/bash";
args = [./builder.sh];
setup = ./setup.sh;
baseInputs = [gnutar gzip gnumake gcc binutils-unwrapped coreutils gawk gnused gnugrep patchelf findutils];
buildInputs = [];
system = builtins.currentSystem;
};
in
derivation (defaultAttrs // attrs)
</code></pre>
<ol start="4">
<li><code>setup.sh</code>:</li>
</ol>
<pre><code class="language-bash"># setup.sh (This is a library of functions setting up the environment, not directly executable)
unset PATH
for p in $baseInputs $buildInputs; do
if [ -d $p/bin ]; then
export PATH="$p/bin${PATH:+:}$PATH"
fi
if [ -d $p/lib/pkgconfig ]; then
export PKG_CONFIG_PATH="$p/lib/pkgconfig${PKG_CONFIG_PATH:+:}$PKG_CONFIG_PATH"
fi
done
function unpackPhase() {
tar -xzf $src
for d in *; do
if [ -d "$d" ]; then
cd "$d"
break
fi
done
}
function configurePhase() {
./configure --prefix=$out
}
function buildPhase() {
make
}
function installPhase() {
make install
}
function fixupPhase() {
find $out -type f -exec patchelf --shrink-rpath '{}' \; -exec strip '{}' \; 2>/dev/null
}
function genericBuild() {
unpackPhase
configurePhase
buildPhase
installPhase
fixupPhase
}
</code></pre>
<ol start="5">
<li>And finally <code>builder.sh</code>:</li>
</ol>
<pre><code class="language-bash"># builder.sh (This is the actual builder script specified in the derivation and
# what `nix-build` expects)
set -e
source $setup
genericBuild
</code></pre>
</details>
<p>This is another example from the Nix-Pill series shown in another way to show
some powerful aspects of functions.</p>
<p>If you have a <code>default.nix</code> like this:</p>
<pre><code class="language-nix"># default.nix
{
hello = import ./hello.nix;
graphviz = import ./graphviz.nix;
}
</code></pre>
<p>It expects the files that it imports to look like this:</p>
<pre><code class="language-nix"># graphviz.nix
let
pkgs = import <nixpkgs> { };
mkDerivation = import ./autotools.nix pkgs;
in
mkDerivation {
name = "graphviz";
src = ./graphviz-2.49.3.tar.gz;
}
</code></pre>
<p>And <code>hello.nix</code>:</p>
<pre><code class="language-nix"># hello.nix
let
pkgs = import <nixpkgs> { };
mkDerivation = import ./autotools.nix pkgs;
in
mkDerivation {
name = "hello";
src = ./hello-2.12.1.tar.gz;
}
</code></pre>
<p>You would build these with:</p>
<pre><code class="language-bash">nix-build -A hello
nix-build -A graphviz
</code></pre>
<p>As you can see both derivations are dependendent on <code>nixpkgs</code> which they
<strong>both</strong> import directly. To centralize our dependencies and avoid redundant
imports, we’ll refactor our individual package definitions (<code>hello.nix</code>,
<code>graphviz.nix</code>) into functions. Our <code>default.nix</code> will then be responsible for
setting up the common inputs (like <code>pkgs</code> and <code>mkDerivation</code>) and passing them
as arguments when it imports and calls these package functions.</p>
<p>Here is what our <code>default.nix</code> will look like:</p>
<pre><code class="language-nix">let
pkgs = import <nixpkgs> { };
mkDerivation = import ./autotools.nix pkgs;
in
with pkgs;
{
hello = import ./hello.nix { inherit mkDerivation; };
graphviz = import ./graphviz.nix {
inherit
mkDerivation
lib
gd
pkg-config
;
};
graphvizCore = import ./graphviz.nix {
inherit
mkDerivation
lib
gd
pkg-config
;
gdSupport = false;
};
}
</code></pre>
<p>We define some local variables in the <code>let</code> expression and pass them around.</p>
<p>The whole expression in the above <code>default.nix</code> returns an attribute set with
the keys <code>hello</code>, <code>graphviz</code>, and <code>graphvizCore</code></p>
<p>We import <code>hello.nix</code> and <code>graphviz.nix</code>, which both return a function. We call
the functions, passing them a set of inputs with the <code>inherit</code> construct.</p>
<p>Let’s change <code>hello.nix</code> into a function to match what the <code>default.nix</code> now
expects.</p>
<pre><code class="language-nix"># hello.nix
{mkDerivation}:
mkDerivation {
name = "hello";
src = ./hello-2.12.1.tar.gz;
}
</code></pre>
<p>Now our <code>graphviz</code> attribute expects <code>graphviz.nix</code> to be a function that takes
the arguments listed in the above <code>default.nix</code>, here’s what <code>graphviz.nix</code> will
look like as a function:</p>
<pre><code class="language-nix"># graphviz.nix
{
mkDerivation,
lib,
gdSupport ? true,
gd,
pkg-config,
}:
mkDerivation {
name = "graphviz";
src = ./graphviz-2.49.3.tar.gz;
buildInputs =
if gdSupport
then [
pkg-config
(lib.getLib gd)
(lib.getDev gd)
]
else [];
}
</code></pre>
<p>We factorized the import of <code>nixpkgs</code> and <code>mkDerivation</code>, and also added a
variant of <code>graphviz</code> with gd support disabled. The result is that both
<code>hello.nix</code> and <code>graphviz.nix</code> are independent of the repository and
customizable by passing specific inputs.</p>
<p>Now, we can build the package with <code>gd</code> support disabled with the <code>graphvizCore</code>
attribute:</p>
<pre><code class="language-bash">nix-build -A graphvizCore
# or we can still build the package that now defaults to gd support
nix-build -A graphviz
</code></pre>
<p>This example showed us how to turn expressions into functions. We saw how
functions are passed around and shared between Nix expressions and derivations.</p>
Overlayshttps://saylesss88.github.io/flakes/overlays_4.5.html2025-11-22T00:00:00+00:00saylesss87@proton.me (saylesss88)<h1>Extending Flakes with Custom Packages using Overlays</h1>
<details>
<summary> ✔️ Click to Expand Table of Contents</summary>
<!-- toc -->
</details>
<p><img src="https://saylesss88.github.io/../images/pokego.png" alt="Pokego Logo" />–<a href="https://github.com/rubiin/pokego">pokego repo</a></p>
<p>Overlays are Nix functions that accept two arguments, <code>final</code> and <code>prev</code> and
return a set of packages. Overlays are similar to <code>packageOverrides</code> as a way to
customize Nixpkgs, <code>packageOverrides</code> acts as an overlay with only the <code>prev</code>
argument. Therefore, <code>packageOverrides</code> is appropriate for basic use, but
overlays are more powerful and easier to distribute.</p>
<p>Example:</p>
<pre><code class="language-nix">final: prev: {
firefox = prev.firefox.overrideAttrs (old: {
buildInputs = (old.buildInputs or []) ++ [ prev.vlc ];
env.FIREFOX_DISABLE_GMP_UPDATER = "1";
});
}
</code></pre>
<p>To see the original derivation, run <code>nix edit -f "<nixpkgs>" firefox</code>.</p>
<p>This modifies Firefox by:</p>
<ul>
<li>
<p>Adding <code>vlc</code> to <code>buildInputs</code>, useful if a package requires additional
dependencies.</p>
</li>
<li>
<p>Setting an environment variable (<code>FIREFOX_DISABLE_GMP_UPDATER=1</code>) to disable
automatic updates of the Gecko Media Plugin.</p>
</li>
</ul>
<p>It is very common to use overlays in Nix to install packages that aren’t
available in the standard Nixpkgs repository.</p>
<p><strong>Overlays</strong> are one of the primary and recommended ways to extend and customize
your Nix environment. It’s important to remember that Nix overlays are made to
allow you to modify or extend the package set provided by Nixpkgs (or other Nix
sources) without directly altering the original package definitions. This is
crucial for maintaining reproducibility and avoiding conflicts. Overlays are
essentially functions that take the previous package set and allow you to add,
modify, or remove packages.</p>
<ul>
<li>To better understand the structure of my <code>flake.nix</code> it may be helpful to
first read <a href="https://tsawyer87.github.io/posts/nix_flakes_tips/">This</a> blog
post first.</li>
</ul>
<h2>Adding the overlays output to your Flake</h2>
<p>I’ll show the process of adding the <code>pokego</code> package that is not in Nixpkgs:</p>
<ol>
<li>In my <code>flake.nix</code> I have a custom inputs variable within my let block of my
flake like so just showing the necessary parts for brevity:</li>
</ol>
<pre><code class="language-nix"># flake.nix
outputs = my-inputs @ {
self,
nixpkgs,
treefmt-nix,
...
}: let
system = "x86_64-linux";
host = "magic";
userVars = {
username = "jr";
gitUsername = "saylesss88";
editor = "hx";
term = "ghostty";
keys = "us";
browser = "firefox";
flake = builtins.getEnv "HOME" + "/flake";
};
inputs =
my-inputs
// {
pkgs = import inputs.nixpkgs {
inherit system;
};
lib = {
overlays = import ./lib/overlay.nix;
nixOsModules = import ./nixos;
homeModules = import ./home;
inherit system;
};
};
# ... snip ...
</code></pre>
<ul>
<li>Why I Created <code>inputs.lib</code> in My <code>flake.nix</code>. In the above example, you’ll
notice a <code>lib</code> attribute defined within the main <code>let</code> block.
<ul>
<li>
<p>This might seem a bit unusual at first, as inputs are typically defined at
the top level of a flake. However, this structure provides a powerful way to
organize and reuse common Nix functions and configurations across my flake.</p>
</li>
<li>
<p>By bundling my custom logic and modules into <code>inputs.lib</code>, I can pass
<code>inputs</code> (which now includes my custom <code>lib</code>) as a <code>specialArgs</code> to other
modules. This provides a clean way for all modules to access these shared
resources. For example, in <code>configuration.nix</code>, <code>inputs.lib.overlays</code>
directly references my custom overlay set.</p>
</li>
<li>
<p>My <code>inputs.lib</code> is my own project-specific library, designed to hold
functions and attribute sets relevant to my flake’s custom configurations.
While <code>nixpkgs.lib</code> is globally available, my custom <code>lib</code> contains my
unique additions.</p>
</li>
</ul>
</li>
</ul>
<p>While defining <code>inputs</code> within the <code>let</code> block to achieve this structure is a
personal preference and works well for my setup, the core benefit is the
creation of a dedicated, centralized <code>lib</code> attribute that encapsulates my
flake’s reusable Nix code, leading to a more organized and maintainable
configuration.</p>
<h2>The Actual Overlay</h2>
<ol start="2">
<li>In the <code>overlay.nix</code> I have this helper function and the defined package:</li>
</ol>
<pre><code class="language-nix"># overlay.nix
_final: prev: let
# Helper function to import a package
callPackage = prev.lib.callPackageWith (prev // packages);
# Define all packages
packages = {
# Additional packages
pokego = callPackage ./pac_defs/pokego.nix {};
};
in
packages
</code></pre>
<ol>
<li><code>_final: prev:</code>: This is the function definition of the overlay.</li>
</ol>
<ul>
<li>
<p><code>_final</code>: This argument represents the final, merged package set after all
overlays have been applied. It’s often unused within a single overlay, hence
the <code>_</code> prefix (a Nix convention for unused variables).</p>
</li>
<li>
<p><code>prev</code>: This is the crucial argument. It represents the package set before
this overlay is applied. This allows you to refer to existing packages and
functions from Nixpkgs.</p>
</li>
</ul>
<ol start="2">
<li>
<p><code>let ... in packages</code>: This introduces a <code>let</code> expression, which defines
local variables within the scope of this overlay function. The <code>in packages</code>
part means that the overlay function will ultimately return the <code>packages</code>
attribute set defined within the <code>let</code> block.</p>
</li>
<li>
<p><code>callPackage = prev.lib.callPackageWith (prev // packages)</code>: This line
defines a helper function called <code>callPackage</code>.</p>
</li>
</ol>
<ul>
<li>
<p><code>prev.lib.callPackageWith</code> Is a function provided by Nixpkgs’ <code>lib</code>.
<code>callPackageWith</code> is like <code>prev.lib.callPackage</code>, but allows the passing of
additional arguments that will then be passed to the package definition.</p>
</li>
<li>
<p><code>(prev // packages)</code>: This is an attribute set merge operation. It takes the
<code>prev</code> package set (Nixpkgs before this overlay) and merges it with the
<code>packages</code> attribute set defined later in this overlay.</p>
</li>
<li>
<p>By using <code>callPackageWith</code> with this merged attribute set, the <code>callPackage</code>
function defined here is set up to correctly import package definitions,
ensuring they have access to both the original Nixpkgs and any other packages
defined within this overlay.</p>
</li>
</ul>
<ol start="4">
<li>
<p><code>packages = { ... };</code>: This defines an attribute set named <code>packages</code>. This
set will contain all the new or modified packages introduced by this overlay.</p>
</li>
<li>
<p><code>pokego = callPackages ./pac_defs/pokego.nix { };</code>: This is the core of how
the <code>pokego</code> package is added.</p>
</li>
</ol>
<ul>
<li>
<p><code>pokego =</code>: This defines a new attribute named <code>pokego</code> within the packages
attribute set. This name will be used to refer to the pokego package later.</p>
</li>
<li>
<p><code>callPackage ./pac_defs/pokego.nix {}</code>: This calls the callPackage helper
function defined earlier.</p>
</li>
<li>
<p><code>./pac_defs/pokego.nix</code>: This is the path to another Nix file(<code>pokego.nix</code>)
that contains the actual package definition for pokego. This file would define
how to fetch, build, and install the pokego software</p>
</li>
<li>
<p><code>{}</code>: This is an empty attribute set passed as additional arguments to the
<code>pokego.nix</code> package definition. If <code>pokego.nix</code> expected any specific
parameters (like versions or dependencies), you would provide them here. Since
it’s empty, it implies pokego.nix either has no required arguments or uses
default values.</p>
</li>
</ul>
<ol start="6">
<li><code>in packages</code>: As mentioned earlier, the overlay function returns the
packages attribute set. When this overlay is applied, the packages defined
within this packages set (including pokego) will be added to the overall Nix
package set.</li>
</ol>
<h2>The pokego Package definition</h2>
<p>The following is the <code>./pac_defs/pokego.nix</code>:</p>
<pre><code class="language-nix"># pokego.nix
{
lib,
buildGoModule,
fetchFromGitHub,
}:
buildGoModule rec {
pname = "pokego";
version = "0.3.0";
src = fetchFromGitHub {
owner = "rubiin";
repo = "pokego";
rev = "v${version}";
hash = "sha256-cFpEi8wBdCzAl9dputoCwy8LeGyK3UF2vyylft7/1wY=";
};
vendorHash = "sha256-7SoKHH+tDJKhUQDoVwAzVZXoPuKNJEHDEyQ77BPEDQ0=";
# Install shell completions
postInstall = ''
install -Dm644 completions/pokego.bash "$out/share/bash-completion/completions/pokego"
install -Dm644 completions/pokego.fish "$out/share/fish/vendor_completions.d/pokego.fish"
install -Dm644 completions/pokego.zsh "$out/share/zsh/site-functions/_pokego"
'';
meta = with lib; {
description = "Command-line tool that lets you display Pokémon sprites in color directly in your terminal";
homepage = "https://github.com/rubiin/pokego";
license = licenses.gpl3Only;
maintainers = with maintainers; [
rubiin
jameskim0987
vinibispo
];
mainProgram = "pokego";
platforms = platforms.all;
};
}
</code></pre>
<h2>Adding the overlay to your configuration</h2>
<p>There are a few places you could choose to put the following, I choose to use my
<code>configuration.nix</code> because of my setup:</p>
<pre><code class="language-nix"># configuration.nix
nixpkgs.overlays = [inputs.lib.overlays]
</code></pre>
<h2>Installing Pokego</h2>
<ul>
<li>If you are managing your entire system configuration with NixOS, you would
typically add <code>pokego</code> to your <code>environment.systemPackages</code>.</li>
</ul>
<pre><code class="language-nix"># configuration.nix
environment.systemPackages = with pkgs; [
pokego
]
</code></pre>
<ul>
<li>If you prefer home-manager you can install <code>pokego</code> with home-manager also:</li>
</ul>
<pre><code class="language-nix"># home.nix
home.packages = [
pkgs.pokego
]
</code></pre>
<h3>Another Overlay Example</h3>
<pre><code class="language-nix">{
inputs = {
nixpkgs.url = "https://flakehub.com/NixOS/nixpkgs/*.tar.gz";
nix.url = "https://flakehub.com/f/NixOS/nix/2.17.0.tar.gz";
};
outputs = { self, nixpkgs, nix }:
let
system = "aarch64-darwin";
pkgs = import nixpkgs {
inherit system;
overlays = [
nix.overlays.default
];
};
in
{
# `pkgs` is nixpkgs for the system, with nix's overlay applied
};
}
</code></pre>
<ul>
<li>
<p>Normally,
<code>pkgs = import nixpkgs { }`` imports Nixpkgs with default settings. However, the example above customizes this import by passing arguments: </code>pkgs
= import nixpkgs { inherit system; overlays = [
nix.overlays.default];}<code>. This makes the pkgs variable represent nixpkgs specifically for the </code>aarch64-darwin`
system, with the overlay from the nix flake applied.</p>
</li>
<li>
<p>Consequently, any packages built using this customized <code>pkgs</code> will now depend
on or use the specific nix version (<code>2.17.0</code>) provided by the nix flake,
instead of the version that comes with the fetched <code>nixpkgs</code>. This technique
can be useful for ensuring a consistent environment or testing specific
package versions.</p>
</li>
</ul>
<h2>Customizing Nixpkgs Imports and Overlays</h2>
<p>While overlays are typically used to add or modify packages within a single
<code>nixpkgs</code> instance, Nix’s lazy evaluation and flake inputs allow for even more
powerful scenarios. You can have multiple versions of nixpkgs in a single flake,
and they will only be evaluated when a package from that specific version is
actually referenced. This complements overlays by giving you fine-grained
control over which nixpkgs instance an overlay applies to, or which <code>nixpkgs</code>
version a specific part of your project depends on.</p>
<p>Consider this example where we import nixpkgs with a specific overlay applied
directly at the import site:</p>
<pre><code class="language-nix">{
inputs = {
nixpkgs.url = "[https://flakehub.com/NixOS/nixpkgs/*.tar.gz](https://flakehub.com/NixOS/nixpkgs/*.tar.gz)"; # This will be the base nixpkgs
nix.url = "[https://flakehub.com/f/NixOS/nix/2.17.0.tar.gz](https://flakehub.com/f/NixOS/nix/2.17.0.tar.gz)"; # This flake provides an overlay for a specific Nix version
};
outputs = { self, nixpkgs, nix }:
let
system = "aarch64-darwin";
# Here, we import nixpkgs and apply the 'nix' flake's overlay.
# This 'pkgs' variable now holds a customized Nix package set.
# In this 'pkgs' set, the 'nix' package (and anything that depends on it)
# will be version 2.17.0 as defined by the 'nix' flake's overlay.
pkgs_with_custom_nix = import nixpkgs {
inherit system;
overlays = [
nix.overlays.default # Apply the overlay from the 'nix' flake here
];
};
in
{
# We can then expose packages or devShells that use this customized `pkgs` set.
devShells.${system}.default = pkgs_with_custom_nix.mkShell {
packages = [
pkgs_with_custom_nix.nix # This 'nix' package is now version 2.17.0 due to the overlay!
];
shellHook = ''
echo "Using Nix version: <span class="math-inline">\(nix \-\-version\)"
'';
};
# You can also make this customized package set available as a top-level overlay
# if other parts of your flake or configuration want to use it.
# overlays.custom-nix-version = final: prev: {
# inherit (pkgs_with_custom_nix) nix; # Expose the specific nix package from our overlayed pkgs
# };
# You can also import multiple versions of nixpkgs and select packages from them:
# pkgs-2505 = import (inputs.nixpkgs-2505 or nixpkgs) { inherit system; }; # Example, assuming 2505 is an input
# packages.</span>{system}.my-tool-2505 = pkgs-2505.myTool; # Using a package from a specific stable version
};
}
</code></pre>
<p>Normally, <code>pkgs = import nixpkgs { }</code> imports Nixpkgs with default settings.
However, the example above customizes this import by passing arguments:
<code>pkgs = import nixpkgs { inherit system; overlays = [ nix.overlays.default];}</code>.
This makes the <code>pkgs_with_custom_nix</code> variable represent Nixpkgs specifically
for the <code>aarch64-darwin</code> system, with the overlay from the nix flake applied at
the time of import.</p>
<p>Consequently, any packages built using this customized <code>pkgs_with_custom_nix</code>
will now depend on or use the specific Nix version (<code>2.17.0</code>) provided by the
nix flake’s overlay, instead of the version that comes with the base <code>nixpkgs</code>
input. This technique is highly useful for ensuring a consistent environment or
testing specific package versions without affecting the entire system’s
<code>nixpkgs</code> set.</p>
Specialisationshttps://saylesss88.github.io/flakes/specialisations_4.6.html2025-11-22T00:00:00+00:00saylesss87@proton.me (saylesss88)<h1>NixOS Specialisations For Multiple Profiles</h1>
<details>
<summary> ✔️ Click to Expand Table of Contents</summary>
<!-- toc -->
</details>
<p><strong>NixOS specialisations</strong> are a powerful feature that allow you to define
alternative system configurations variations within a single NixOS setup. Each
specialisation can modify or extend the base configuration, and NixOS will
generate separate boot entries for each, letting you choose at boot time (or
switch at runtime) which environment to use. This is ideal for testing,
hardware-specific tweaks, or separating work and personal environments without
maintaining multiple configuration files</p>
<h2>How Specialisations Work</h2>
<p>Specialisations are defined as attributes under the <code>specialisation</code> option in
your configuration. Each key (e.g., <code>niri-test</code>) represents a named
specialisation, and its configuration attribute contains the NixOS options to
apply on top of the base system</p>
<p>By default, a specialisation inherits the parent configuration and applies its
changes on top. You can also set <code>inheritParentConfig = false;</code> to create a
completely separate configuration.</p>
<p>After running <code>nixos-rebuild boot</code>, your bootloader will present extra entries
for each specialisation. Selecting one boots into the system with that
specialisation’s settings applied</p>
<p>Runtime Switching: You can switch to a specialisation at runtime using
activation scripts, e.g.:</p>
<pre><code class="language-bash">nixos-rebuild switch --specialisation niri-test
</code></pre>
<p>or</p>
<pre><code class="language-bash">/run/current-system/specialisation/niri-test/bin/switch-to-configuration switch
</code></pre>
<blockquote>
<p>Note: Some changes (like kernel switches) require a reboot to take effect</p>
</blockquote>
<p>Example: Let’s create a basic specialisation to try out the Niri Window Manager:</p>
<p>First we have to add the <code>niri-flake</code> as an input to our <code>flake.nix</code> and add the
module to install it:</p>
<pre><code class="language-nix"># flake.nix
inputs = {
niri.url = "github:sodiboo/niri-flake";
};
</code></pre>
<pre><code class="language-nix"># configuration.nix
{ pkgs, inputs, ... }: {
# ... snip ...
imports = [
inputs.niri.nixosModules.niri
];
# This is the top-level overlay
nixpkgs.overlays = [inputs.niri.overlays.niri];
# ... snip ...
specialisation = {
niri-test.configuration = {
system.nixos.tags = ["niri"];
# Add the Niri overlay for this specialisation
nixpkgs.overlays = [inputs.niri.overlays.niri];
# Enable Niri session
programs.niri = {
enable = true;
package = pkgs.niri-unstable;
};
# Optionally, add a test user and greetd for login
users.users.niri = {
isNormalUser = true;
extraGroups = ["networkmanager" "video" "wheel"];
initialPassword = "test"; # for testing only!
createHome = true;
};
services.greetd = {
enable = true;
settings = rec {
initial_session = {
command = lib.mkForce "${pkgs.niri}/bin/niri";
user = lib.mkForce "niri";
};
default_session = initial_session;
};
};
environment.etc."niri/config.kdl".text = ''
binds {
Mod+T { spawn "alacritty"; }
Mod+D { spawn "fuzzel"; }
Mod+Q { close-window; }
Mod+Shift+Q { exit; }
}
'';
environment.systemPackages = with pkgs; [
alacritty
waybar
fuzzel
mako
firefox
];
programs.firefox.enable = true;
services.pipewire = {
enable = true;
alsa.enable = true;
pulse.enable = true;
# Optionally:
jack.enable = true;
};
hardware.alsa.enablePersistence = true;
networking.networkmanager.enable = true;
};
};
}
</code></pre>
<p>I chose to use the nightly version so it was required to add the overlay at the
top-level as well as inside the <code>specialisation</code> block.</p>
<p>On my system it sped up build times to first run:</p>
<pre><code class="language-bash">sudo nixos-rebuild switch --flake .
# And Then Run
sudo nixos-rebuild boot --flake .
</code></pre>
<p><strong>What this does</strong>:</p>
<ul>
<li>
<p>Creates a boot entry called <code>niri-test</code> with the Niri Wayland compositor, a
test user, and a <code>greetd</code> login manager.</p>
</li>
<li>
<p>Installs a set of packages and enables PipeWire with ALSA, PulseAudio, and
JACK support.</p>
</li>
<li>
<p>Provides a custom Niri configuration file for a few keybinds and enables
NetworkManager.</p>
</li>
</ul>
<h2>Using Your Specialisation After Boot</h2>
<p>Once you have rebooted and selected your specialisation from the boot menu, you
can use your system as usual. If you want to add or remove programs, change
settings, or update your environment within a specialisation, simply:</p>
<ol>
<li>
<p>Edit your configuration: Add or remove packages (e.g., add <code>ghostty</code> to
<code>environment.systemPackages</code>) or change any other options inside the
relevant <code>specialisation</code> block in your NixOS configuration.</p>
</li>
<li>
<p>Apply changes with a rebuild: Run the standard NixOS rebuild command. If you
are currently running the specialisation you want to update, use:</p>
</li>
</ol>
<pre><code class="language-bash">sudo nixos-rebuild switch
</code></pre>
<p>This will apply your changes to the current specialisation</p>
<p>If you want to build and activate a different specialisation from your current
session, use:</p>
<pre><code class="language-bash">sudo nixos-rebuild switch --specialisation name
</code></pre>
<p>Or, you can activate a specialisation directly with:</p>
<pre><code class="language-bash">sudo /run/current-system/specialisation/<name>/bin/switch-to-configuration switch
</code></pre>
<p>Replace <code><name></code> with your specialisation’s name.</p>
<p>Reboot if needed: Most changes apply immediately, but some (like kernel or
<code>initrd</code> changes) require a reboot for the specialisation to fully take effect</p>
<p><strong>Tip</strong>:</p>
<p>Each specialisation can have its own set of installed programs. Only those
listed in the <code>environment.systemPackages</code> (or enabled via modules) inside the
<code>specialisation</code> block will be available when you boot into that context.</p>
<p>You manage and update your specialisation just like your main NixOS system no
special commands or workflow are required beyond specifying the specialisation
when rebuilding or switching.</p>
<h2>Use Cases for Specialisations</h2>
<ul>
<li>
<p><strong>Hardware Profiles</strong>: Enable/disable drivers or services for specific
hardware (e.g., eGPU, WiFi, or SR-IOV setups)</p>
</li>
<li>
<p><strong>Desktop Environments</strong>: Quickly switch between different desktop
environments or compositors (e.g., GNOME, Plasma, Niri)</p>
</li>
<li>
<p><strong>Testing</strong>: Safely try out unstable packages, new kernels, or experimental
features without risking your main environment</p>
</li>
<li>
<p><strong>User Separation</strong>: Create profiles for different users, each with their own
settings, packages, and auto-login</p>
</li>
<li>
<p><strong>Secure Environments</strong>: Combine with encrypted partitions for more secure,
isolated setups</p>
</li>
</ul>
<h2>Securely Separated Contexts with NixOS Specialisations</h2>
<p>I will just explain the concept here for completeness, if you want to implement
this I recommend following:</p>
<p><a href="https://www.tweag.io/blog/2022-11-01-hard-user-separation-with-nixos/">Tweag Hard User Separation with NixOS</a></p>
<details>
<summary> ✔️ Click To Expand Section on Separate Contexts </summary>
<p>If you use the same computer in different contexts such as for work and for your
private life you may worry about the risks of mixing sensitive environments. For
example, a cryptolocker received through a compromised work email could
potentially encrypt your personal files, including irreplaceable family photos.</p>
<p>A common solution is to install two different operating systems and dual-boot
between them, keeping work and personal data isolated. However, this approach
means you have two systems to maintain, update, and configure, which can be a
significant hassle.</p>
<p>NixOS offers a third alternative: With NixOS specialisations, you can manage two
(or more) securely separated contexts within a single operating system. At boot
time, you select which context you want to use work or personal. Each context
can have its own encrypted root partition, user accounts, and configuration, but
both share the same Nix store for packages. This means:</p>
<ul>
<li>
<p>No duplicated packages: Both contexts use the same system-wide package store,
saving space and simplifying updates.</p>
</li>
<li>
<p>Single system to maintain: You update and manage only one NixOS installation,
not two.</p>
</li>
<li>
<p>Strong security boundaries: Each context can have its own encrypted root, so a
compromise in one context (such as malware in your work environment) cannot
access the data in the other context.</p>
</li>
<li>
<p>Flexible management: You can configure both contexts from either environment,
making administration easier.</p>
</li>
</ul>
<p>This approach combines the security of dual-booting with the convenience and
efficiency of a single, unified system.</p>
<p><strong>How It Works</strong>:</p>
<ul>
<li>
<p>Encrypted Partitions: Each context (work and personal) has its own encrypted
root partition. The shared /nix/store partition is also encrypted, but can be
unlocked by either context.</p>
</li>
<li>
<p>Specialisations at Boot: NixOS generates multiple boot entries, one for each
context. You simply choose your desired environment at boot time.</p>
</li>
<li>
<p>Separation of Data: Your work and personal home directories, settings, and
documents remain isolated from each other, while still benefiting from shared
system packages.</p>
</li>
</ul>
<p>Benefits Over Traditional Dual-Boot</p>
<ul>
<li>
<p>Only one system to update and configure.</p>
</li>
<li>
<p>No wasted disk space on duplicate packages.</p>
</li>
<li>
<p>Seamless switching between contexts with a reboot.</p>
</li>
<li>
<p>Consistent NixOS tooling and workflows in both environments.</p>
</li>
</ul>
<p>What You Need</p>
<ul>
<li>
<p>A physical or virtual machine supported by NixOS.</p>
</li>
<li>
<p>Willingness to erase the system disk during setup.</p>
</li>
<li>
<p>LVM (Logical Volume Manager) support: This setup requires using LVM for disk
partitioning and management. LVM allows you to create multiple logical volumes
on a single physical disk, making it possible to securely separate your work
and personal environments while sharing a common Nix store. You will use LVM
commands such as <code>pvcreate</code>, <code>vgcreate</code>, and <code>lvcreate</code> to prepare your disk
layout</p>
</li>
</ul>
<p>In summary: With NixOS specialisations and careful disk partitioning, you can
achieve secure, convenient, and efficient context separation—no need to
compromise between security and manageability.</p>
</details>
<h3>Tips and Best Practices</h3>
<ul>
<li>
<p>Overriding Values: Use <code>lib.mkDefault</code> or <code>lib.mkForce</code> to make options
overridable or forced in specialisations. I had to do it above because I have
greetd setup for my main configuration as well.</p>
</li>
<li>
<p>Selective Configuration: If you want certain options only in the default
(non-specialised) system, use:</p>
</li>
</ul>
<pre><code class="language-nix">config = lib.mkIf (config.specialisation != {}) { ... }
</code></pre>
<ul>
<li>
<p>This condition checks if you’re in a specialisation.</p>
</li>
<li>
<p>Any settings inside this block will <strong>not</strong> be inherited by specialisations,
keeping them exclusive to the main system.</p>
</li>
<li>
<p>Runtime Limitations: Not all changes (e.g., kernel or <code>initrd</code>) can be fully
applied at runtime; a reboot is required for those.</p>
</li>
<li>
<p>Modularity: Specialisations work well with modular NixOS configs keep
hardware, user, and service configs in separate files for easier management</p>
</li>
</ul>
<p>References to Official Documentation and Community Resources</p>
<ul>
<li>
<p><a href="https://www.tweag.io/blog/2022-08-18-nixos-specialisations/">Tweag: Introduction to NixOS specialisations</a></p>
</li>
<li>
<p><a href="https://wiki.nixos.org/wiki/Specialisation">NixOS Wiki: Specialisation</a></p>
</li>
<li>
<p><a href="https://www.tweag.io/blog/2022-11-01-hard-user-separation-with-nixos/">Tweag Hard User Separation with NixOS</a></p>
</li>
</ul>
Comparing Flakes and Traditional Nixhttps://saylesss88.github.io/Comparing_Flakes_and_Traditional_Nix_8.html2025-11-22T00:00:00+00:00saylesss87@proton.me (saylesss88)<h1>Chapter 8</h1>
<details>
<summary> ✔️ Click to Expand Table of Contents</summary>
<!-- toc -->
</details>
<!--  -->
<h2>Comparing Flakes and Traditional Nix</h2>
<ul>
<li>This post is based on notes from Nix-Hour #4, comparing Traditional Nix and
Flakes, focusing on achieving pure build results. See the
<a href="https://www.youtube.com/watch?v=atmoYyBAhF4">YouTube video</a> for the original
content. This guide adapts the information for clarity and ease of
understanding.</li>
</ul>
<details>
<summary> What is Purity in Nix? (click here) </summary>
<ul>
<li>
<p>A key benefit of Nix Flakes is their <em>default</em> enforcement of <strong>pure
evaluation</strong>.</p>
</li>
<li>
<p>In Nix, an <strong>impure operation</strong> depends on something <em>outside</em> its explicit
inputs. Examples include:</p>
<ul>
<li>User’s system configuration</li>
<li>Environment variables</li>
<li>Current time</li>
</ul>
</li>
<li>
<p>Impurity leads to unpredictable builds that may differ across systems or time.</p>
</li>
</ul>
</details>
<h2>Building a Simple “hello” Package: Flakes vs. Traditional Nix</h2>
<ul>
<li>We’ll demonstrate building a basic “hello” package using both Flakes and
Traditional Nix to highlight the differences in handling purity.</li>
</ul>
<h2>Using Nix Flakes</h2>
<details>
<summary> Building Hello with Flakes (click here) </summary>
<ol>
<li>
<p><strong>Setup:</strong></p>
<pre><code class="language-bash">mkdir hello && cd hello/
</code></pre>
</li>
<li>
<p><strong>Create <code>flake.nix</code> (Initial Impure Example):</strong></p>
<pre><code class="language-nix"># flake.nix
{
outputs = { self, nixpkgs }: {
myHello = (import nixpkgs {}).hello;
};
}
</code></pre>
<ul>
<li>Note: Flakes don’t have access to <code>builtins.currentSystem</code> directly.</li>
</ul>
</li>
<li>
<p><strong>Impure Build (Fails):</strong></p>
<pre><code class="language-bash">nix build .#myHello
</code></pre>
<ul>
<li>This fails because Flakes enforce purity by default.</li>
</ul>
</li>
<li>
<p><strong>Force Impure Build:</strong></p>
<pre><code class="language-bash">nix build .#myHello --impure
</code></pre>
</li>
<li>
<p><strong>Making the Flake Pure:</strong></p>
<pre><code class="language-nix"># flake.nix
{
inputs = {
nixpkgs.url = "github:NixOS/nixpkgs";
flake-utils.url = "github:numtide/flake-utils";
};
outputs = { self, nixpkgs, flake-utils }:
flake-utils.lib.eachDefaultSystem (system:
let
pkgs = nixpkgs.legacyPackages.${system};
in {
packages.myHello = pkgs.hello;
}
);
}
</code></pre>
<ul>
<li><code>flake-utils</code> simplifies making flakes system-agnostic and provides the
<code>system</code> attribute.</li>
</ul>
</li>
<li>
<p><strong>Pure Build (Success):</strong></p>
<pre><code class="language-bash">nix build .#myHello
</code></pre>
</li>
</ol>
</details>
<h2>Using Traditional Nix</h2>
<details>
<summary> Building hello with Traditional Nix </summary>
<ol>
<li>
<p><strong>Setup:</strong></p>
<pre><code class="language-bash">mkdir hello2 && cd hello2/
</code></pre>
</li>
<li>
<p><strong>Create <code>default.nix</code> (Initial Impure Example):</strong></p>
<pre><code class="language-nix"># default.nix
{ myHello = (import <nixpkgs> { }).hello; }
</code></pre>
</li>
<li>
<p><strong>Build (Impure):</strong></p>
<pre><code class="language-bash">nix-build -A myHello
</code></pre>
</li>
<li>
<p><strong>Impurity Explained:</strong></p>
<pre><code class="language-bash">nix repl
nix-repl> <nixpkgs>
/nix/var/nix/profiles/per-user/root/channels/nixos
</code></pre>
<ul>
<li><code><nixpkgs></code> depends on the user’s environment (Nixpkgs channel), making it
impure. Even with channels disabled, it relies on a specific Nixpkgs
version in the store.</li>
</ul>
</li>
<li>
<p><strong>Achieving Purity: Using <code>fetchTarball</code></strong></p>
<ul>
<li>
<p>GitHub allows downloading repository snapshots at specific commits,
crucial for reproducibility.</p>
</li>
<li>
<p><strong>Get Nixpkgs Revision from <code>flake.lock</code> (from the Flake example):</strong></p>
</li>
</ul>
<pre><code class="language-nix"># flake.lock
"nixpkgs": {
"locked": {
"lastModified": 1746372124,
"narHash": "sha256-n7W8Y6bL7mgHYW1vkXKi9zi/sV4UZqcBovICQu0rdNU=",
"owner": "NixOS",
"repo": "nixpkgs",
"rev": "f5cbfa4dbbe026c155cf5a9204f3e9121d3a5fe0",
"type": "github"
},
</code></pre>
</li>
<li>
<p><strong>Modify <code>default.nix</code> for Purity:</strong></p>
<pre><code class="language-nix"># default.nix
let
nixpkgs = fetchTarball {
url = "[https://github.com/NixOS/nixpkgs/archive/f5cbfa4dbbe026c155cf5a9204f3e9121d3a5fe0.tar.gz](https://github.com/NixOS/nixpkgs/archive/f5cbfa4dbbe026c155cf5a9204f3e9121d3a5fe0.tar.gz)";
sha256 = "0000000000000000000000000000000000000000000000000000"; # Placeholder
};
in {
myHello = (import nixpkgs {}).hello;
}
</code></pre>
<ul>
<li>Replace <code><nixpkgs></code> with <code>fetchTarball</code> and a specific revision. A
placeholder <code>sha256</code> is used initially.</li>
</ul>
</li>
<li>
<p><strong>Build (Nix provides the correct <code>sha256</code>):</strong></p>
<pre><code class="language-bash">nix-build -A myHello
</code></pre>
</li>
<li>
<p><strong>Verification:</strong> Both Flake and Traditional Nix builds now produce the same
output path.</p>
</li>
<li>
<p><strong>Remaining Impurities in Traditional Nix:</strong></p>
<ul>
<li>Default arguments to <code>import <nixpkgs> {}</code> can introduce impurity:
<ul>
<li><code>overlays</code>: <code>~/.config/nixpkgs/overlays</code> (user-specific)</li>
<li><code>config</code>: <code>~/.config/nixpkgs/config.nix</code> (user-specific)</li>
<li><code>system</code>: <code>builtins.currentSystem</code> (machine-specific)</li>
</ul>
</li>
</ul>
</li>
<li>
<p><strong>Making Traditional Nix Fully Pure:</strong></p>
<pre><code class="language-nix"># default.nix
{system ? builtins.currentSystem}:
let
nixpkgs = fetchTarball {
url =
"[https://github.com/NixOS/nixpkgs/archive/0243fb86a6f43e506b24b4c0533bd0b0de211c19.tar.gz](https://github.com/NixOS/nixpkgs/archive/0243fb86a6f43e506b24b4c0533bd0b0de211c19.tar.gz)";
sha256 = "1qvdbvdza7hsqhra0yg7xs252pr1q70nyrsdj6570qv66vq0fjnh";
};
in {
myHello = (import nixpkgs {
overlays = [];
config = {};
inherit system;
}).hello;
}
</code></pre>
<ul>
<li>Override impure defaults for <code>overlays</code>, <code>config</code>, and make <code>system</code> an
argument.</li>
</ul>
</li>
<li>
<p><strong>Building with a Specific System:</strong></p>
<pre><code class="language-bash">nix-build -A myHello --argstr system x86_64-linux
</code></pre>
</li>
<li>
<p><strong>Pure Evaluation Mode in Traditional Nix:</strong></p>
<pre><code class="language-bash">nix-instantiate --eval --pure-eval --expr 'fetchGit { url = ./.; rev = "b4fe677e255c6f89c9a6fdd3ddd9319b0982b1ad"; }'
</code></pre>
<ul>
<li>Example of using <code>--pure-eval</code>.</li>
</ul>
<pre><code class="language-bash">nix-build --pure-eval --expr '(import (fetchGit { url = ./.; rev = "b4fe677e255c6f89c9a6fdd3ddd9319b0982b1ad"; }) { system = "x86_64-linux"; }).myHello'
</code></pre>
<ul>
<li>Building with a specific revision and system.</li>
</ul>
</li>
</ol>
</details>
<h3>Updating Nixpkgs</h3>
<details>
<summary> Updating Nixpkgs with Flakes </summary>
<pre><code class="language-bash">nix flake update
</code></pre>
<pre><code class="language-nix">nix build .#myHello --override-input nixpkgs github:NixOS/nixpkgs/nixos-24.11
</code></pre>
</details>
<h3>Updating Traditional Nix (using <code>niv</code>)</h3>
<details>
<summary> Updating with niv </summary>
<pre><code class="language-nix">nix-shell -p niv
niv init
</code></pre>
<pre><code class="language-nix"># default.nix
{ system ? builtins.currentSystem,
sources ? import nix/sources.nix,
nixpkgs ? sources.nixpkgs,
pkgs ? import nixpkgs {
overlays = [ ];
config = { };
inherit system;
}, }: {
myHello = pkgs.hello;
}
</code></pre>
<p>And build it with:</p>
<pre><code class="language-bash">nix-build -A myHello
</code></pre>
<pre><code class="language-bash">niv update nixpkgs --branch=nixos-unstable
nix-build -A myHello
</code></pre>
</details>
<details>
<summary> Adding Home-Manager with Flakes (click here) </summary>
<pre><code class="language-nix"># flake.nix
{
inputs = {
nixpkgs.url = "github:NixOS/nixpkgs";
flake-utils.url = "github:numtide/flake-utils";
home-manager.url = "github:nix-community/home-manager";
};
outputs = { self, nixpkgs, flake-utils, home-manager, ... }:
flake-utils.lib.eachDefaultSystem (system:
let pkgs = nixpkgs.legacyPackages.${system};
in {
packages.myHello = pkgs.hello;
packages.x86_64-linux.homeManagerDocs =
home-manager.packages.x86_64-linux.docs-html;
});
}
</code></pre>
<pre><code class="language-bash">nix flake update
nix flake show github:nix-community/home-manager
</code></pre>
<pre><code class="language-nix">home-manager.inputs.follows = "nixpkgs";
</code></pre>
</details>
<h4>Adding Home-Manager with Traditional Nix</h4>
<details>
<summary> Adding Home-Manager with Traditional Nix (click here) </summary>
```nix
niv add nix-community/home-manager
```
<pre><code class="language-nix">nix repl
nix-repl> s = import ./nix/sources.nix
nix-repl> s.home-manager
</code></pre>
<pre><code class="language-nix">{ system ? builtins.currentSystem, sources ? import nix/sources.nix
, nixpkgs ? sources.nixpkgs, pkgs ? import nixpkgs {
overlays = [ ];
config = { };
inherit system;
}, }: {
homeManagerDocs = (import sources.home-manager { pkgs = pkgs; }).docs;
myHello = pkgs.hello;
}
</code></pre>
<pre><code class="language-bash">nix-build -A homeManagerDocs
</code></pre>
</details>
<h4>Conclusion</h4>
<p>In this chapter, we’ve explored the key differences between traditional Nix and
Nix Flakes, particularly focusing on how each approach handles purity,
dependency management, and project structure. We’ve seen that while traditional
Nix can achieve purity with careful configuration, Flakes enforce it by default,
offering a more robust and standardized way to build reproducible environments.
Flakes also streamline dependency management and provide a more structured
project layout compared to the often ad-hoc nature of traditional Nix projects.</p>
<p>However, regardless of whether you’re working with Flakes or traditional Nix,
understanding how to debug and trace issues within your Nix code is crucial.
When things go wrong, you’ll need tools and techniques to inspect the evaluation
process, identify the source of errors, and understand how your modules and
derivations are being constructed.</p>
<p>In our next chapter,
<a href="https://saylesss88.github.io/Debugging_and_Tracing_NixOS_Modules_9.html">Debugging and Tracing Modules</a>,
we will delve into the world of Nix debugging. We’ll explore various techniques
and tools that can help you understand the evaluation process, inspect the
values of expressions, and trace the execution of your Nix code, enabling you to
effectively troubleshoot and resolve issues in both Flake-based and traditional
Nix projects.</p>
My Chapterhttps://saylesss88.github.io/installation/index.html2025-11-22T00:00:00+00:00saylesss87@proton.me (saylesss88)<h1>Installation Guides</h1>
<p>This section provides detailed guides for installing NixOS. You’ll choose
between an <strong>unencrypted</strong> or <strong>encrypted</strong> base setup. After your core
installation, you can explore adding optional features like <code>sops</code> for encrypted
secrets, <code>lanzaboote</code> for Secure Boot, or <code>impermanence</code> for a stateless system.</p>
<hr />
<h2>1. Unencrypted Disko Btrfs Subvol Installation</h2>
<ul>
<li>
<p><strong>Guide:</strong>
<a href="https://saylesss88.github.io/installation/unenc/unencrypted_setups.html">Minimal Btrfs-Subvol Install with Disko and Flakes</a></p>
</li>
<li>
<p><strong>Best for:</strong></p>
<ul>
<li>
<p>Users who want a straightforward and quick setup.</p>
</li>
<li>
<p><a href="https://saylesss88.github.io/installation/unenc/unenc_impermanence.html">Unencrypted Impermanence</a></p>
</li>
<li>
<p>You can still add Lanzaboote and sops secrets after the install for a more
secure system. To get the full benefits of Lanzaboote it is recommended to
use full disk encryption.</p>
</li>
</ul>
</li>
</ul>
<hr />
<h2>2. Encrypted Disko Btrfs Subvol Installation</h2>
<ul>
<li>
<p><strong>Encrypted Install Guide:</strong>
<a href="https://saylesss88.github.io/installation/enc/enc_install.html">Encrypted Install</a></p>
</li>
<li>
<p><a href="https://saylesss88.github.io/installation/enc/encrypted_impermanence.html">Encrypted Impermanence</a></p>
</li>
<li>
<p><strong>Important Considerations:</strong></p>
<ul>
<li>
<p><a href="https://saylesss88.github.io/installation/enc/lanzaboote.html">Secure Boot with Lanzaboote</a>
For the full benefit of Secure Boot (with Lanzaboote), it’s highly
recommended to have a second stage of protection, such as an encrypted disk.</p>
</li>
<li>
<p><a href="https://saylesss88.github.io/installation/enc/sops-nix.html">Adding Sops</a>
You can easily add <code>sops</code> (for managing encrypted secrets) to your
configuration <em>after</em> the initial encrypted installation and reboot. This
can simplify the initial setup process. However, always remember the core
goal of using encrypted secrets: <strong>never commit unencrypted or even hashed
sensitive data directly into your Git repository.</strong> With modern equipment
brute force attacks are a real threat.</p>
</li>
</ul>
</li>
</ul>
<hr />
<h2>3. Post-Installation Security & Features</h2>
<p>Once your base NixOS system is installed, consider these powerful additions:</p>
<ul>
<li>
<p><strong><code>sops-nix</code>:</strong> For managing encrypted secrets directly within your NixOS
configuration, ensuring sensitive data is never stored in plain text.</p>
</li>
<li>
<p><strong><code>lanzaboote</code>:</strong> For enabling Secure Boot, verifying the integrity of your
boot chain (requires UEFI and custom keys).</p>
</li>
<li>
<p><strong><code>impermanence</code>:</strong> For setting up a stateless NixOS system, where the root
filesystem reverts to a clean state on every reboot.</p>
</li>
</ul>
Unencrypted Installhttps://saylesss88.github.io/installation/unenc/unencrypted_setups.html2025-11-22T00:00:00+00:00saylesss87@proton.me (saylesss88)<h1>Minimal BTRFS-Subvol Install with Disko and Flakes</h1>
<details>
<summary> ✔️ Click to Expand Table of Contents</summary>
<!-- toc -->
</details>
<h1>Unencrypted Setups</h1>
<p>Figure 1: BTRFS Logo: Image of the BTRFS logo. Sourced from the BTRFS repo BTRFS
logo</p>
<p>Why I Chose BTRFS I chose BTRFS because I was already familiar with it from
using it with Arch Linux and I found it to be very easy to use. From what I’ve
read, there are licensing issues between the Linux Kernel and ZFS which means
that ZFS is not part of the Linux Kernel; it’s maintained by the OpenZFS project
and available as a separate kernel module. This can cause issues and make you
think more about your filesystem than I personally want to at this point.</p>
<details>
<summary>✔️ Click for BTRFS Subvolume Overview</summary>
<p>A <strong>Btrfs subvolume</strong> is essentially a distinct section within a Btrfs
filesystem that maintains its own set of files and directories, along with a
separate inode numbering system. Unlike block-level partitions (such as LVM
logical volumes), Btrfs subvolumes operate at the file level and are based on
file extents.</p>
<p><strong>Extents</strong> in Btrfs are contiguous blocks of data on disk that store the actual
contents of files. When files are created or modified, Btrfs manages these
extents efficiently, allowing features like deduplication and snapshots.
Multiple subvolumes can reference the same extents, meaning that identical data
is not duplicated on disk, which saves space and improves performance.</p>
<p>A <strong>snapshot</strong> in Btrfs is a special kind of subvolume that starts with the same
content as another subvolume at the time the snapshot is taken. Snapshots are
typically writable by default, so you can make changes in the snapshot without
affecting the original subvolume. This is possible because Btrfs tracks changes
at the extent level, only creating new extents when files are modified (a
technique called copy-on-write).</p>
<p>Subvolumes in Btrfs behave much like regular directories from a user’s
perspective, but they support additional operations such as renaming, moving,
and nesting (placing subvolumes within other subvolumes). There are no
restrictions on nesting, though it can affect how snapshots are created and
managed. Each subvolume is assigned a unique and unchangeable numeric ID
(subvolid or rootid).</p>
<p>You can access a Btrfs subvolume in two main ways:</p>
<ul>
<li>
<p>As a normal directory within the filesystem.</p>
</li>
<li>
<p>By mounting it directly as if it were a separate filesystem, using the subvol
or subvolid mount options. When mounted this way, you only see the contents of
that subvolume, similar to how a bind mount works.</p>
</li>
</ul>
<p>When a new Btrfs filesystem is created, it starts with a “top-level” subvolume
(with an internal ID of 5). This subvolume is always present and cannot be
deleted or replaced, and it is the default mount point unless changed with btrfs
subvolume set-default.</p>
<p>Subvolumes can also have storage quotas set using Btrfs’s quota groups , but
otherwise, they all draw from the same underlying storage pool. Thanks to
features like deduplication and snapshots, subvolumes can share data efficiently
at the extent level.While ZFS is a solid choice and offers some benefits over
BTRFS, I recommend looking into it before making your own decision.</p>
<p>If you have a ton of RAM you could most likely skip the minimal install and just
set your system up as needed or just use
<a href="https://elis.nu/blog/2020/05/nixos-tmpfs-as-root/">tmpfs as root</a></p>
</details>
<h2>Getting Started with Disko</h2>
<p>Disko allows you to declaratively partition and format your disks, and then
mount them to your system. I recommend checking out the
<a href="https://github.com/nix-community/disko/tree/master?tab=readme-ov-file">README</a>
as it is a disk destroyer if used incorrectly.</p>
<p>We will mainly be following the
<a href="https://github.com/nix-community/disko/blob/master/docs/quickstart.md">disko quickstart guide</a></p>
<p>Figure 2: <strong>Disko Logo</strong>: Image of the logo for Disko, the NixOS declarative
disk partitioning tool. Sourced from the
<a href="https://github.com/nix-community/disko">Disko project</a> disko logo</p>
<ol>
<li>Get the
<a href="https://channels.nixos.org/nixos-25.05/latest-nixos-minimal-x86_64-linux.iso">Nixos Minimal ISO</a>
Get it on a usb stick, I use Ventoy with Ventoy2Disk.sh. The following is the
link to the
<a href="https://sourceforge.net/projects/ventoy/files/v1.1.05/ventoy-1.1.05-linux.tar.gz/download">Ventoy TarBall</a>
download, untar it with <code>tar -xzf ventoy-1.1.05-linux.tar.gz</code>, and make it
executable with <code>chmod +x Ventoy2Disk.sh</code>, and finally execute it with
<code>sudo ./Ventoy2Disk.sh</code> Follow the prompts to finish the install.</li>
</ol>
<p>You’ll have to run it on for the USB drive you’re trying to use, you can do that
by unplugging the USB stick and running <code>lsblk</code>, then plug it in again and run:</p>
<pre><code class="language-bash">lsblk -f
NAME FSTYPE FSVER LABEL UUID FSAVAIL FSUSE% MOUNTPOINTS
sda
└─sda1 vfat FAT32 MYUSB 46E8-9304
sdb vfat FAT12 F054-697D 1.4M 0% /run/media/jr/F054-697D
nvme0n1
├─nvme0n1p1 vfat FAT32 BCD8-8C51 1.8G 12% /boot
</code></pre>
<ul>
<li><code>sdb</code> is a USB plugin for a mouse. <code>sda</code> is the USB stick that I want to
target here:</li>
</ul>
<pre><code class="language-bash">sudo ./Ventoy2Disk.sh -i /dev/sda
# Or to force overwrite an existing Ventoy entry
sudo ./Ventoy2Disk.sh -I /dev/sda
</code></pre>
<ol start="2">
<li>The minimal installer uses wpa_supplicant instead of NetworkManager, to
enable networking run the following:</li>
</ol>
<pre><code class="language-bash">sudo systemctl start wpa_supplicant
wpa_cli
</code></pre>
<pre><code class="language-bash">> add_network
0
> set_network 0 ssid "myhomenetwork"
OK
> set_network 0 psk "mypassword"
OK
> enable_network 0
OK
</code></pre>
<p>To exit type <code>quit</code>, then check your connection with <code>ping google.com</code>.</p>
<p>Another option is to do the following, so either the above method or the below
method after starting <code>wpa_supplicant</code>:</p>
<pre><code class="language-bash"># Alternative for quick setup (less interactive, but often faster)
sudo wpa_passphrase "myhomenetwork" "mypassword" >> /etc/wpa_supplicant/wpa_supplicant-wlan0.conf
sudo systemctl restart wpa_supplicant@wlan0.service
</code></pre>
<ol start="3">
<li>Get your Disk Name with lsblk</li>
</ol>
<p>The output should be something like:</p>
<pre><code class="language-bash">NAME MAJ:MIN RM SIZE RO TYPE MOUNTPOINTS
nvme0n1 259:0 0 1,8T 0 disk
</code></pre>
<ol start="4">
<li>Copy the disk configuration to your machine. You can choose one from the
examples directory.</li>
</ol>
<ul>
<li><strong>Option A</strong>: (Simpler for new users) I also created a starter repo containing
much of what’s needed. If you choose this option follow the README.md included
with the repo.</li>
</ul>
<pre><code class="language-bash">cd ~
git clone https://github.com/saylesss88/my-flake.git
</code></pre>
<blockquote>
<p>Make sure to change line 7 in disk-config.nix to what you got from step 3
device = “/dev/nvme0n1”;</p>
</blockquote>
<ul>
<li><strong>Option B</strong>: (More flexible, more manual steps) Skip cloning the repo above
and for the btrfs-subvolume default layout, run the following:</li>
</ul>
<pre><code class="language-bash">cd /tmp
curl https://raw.githubusercontent.com/nix-community/disko/refs/heads/master/example/btrfs-subvolumes.nix -o /tmp/disk-config.nix
</code></pre>
<ol start="5">
<li>Make Necessary changes, I set mine up for impermanence with the following:</li>
</ol>
<pre><code class="language-bash">nano /tmp/disk-config.nix
</code></pre>
<pre><code class="language-nix">{
disko.devices = {
disk = {
main = {
type = "disk";
device = "/dev/nvme0n1";
content = {
type = "gpt";
partitions = {
ESP = {
priority = 1;
name = "ESP";
start = "1M";
end = "512M";
type = "EF00";
content = {
type = "filesystem";
format = "vfat";
mountpoint = "/boot";
mountOptions = ["umask=0077"];
};
};
root = {
size = "100%";
content = {
type = "btrfs";
extraArgs = ["-f"]; # Override existing partition
# Subvolumes must set a mountpoint in order to be mounted,
# unless their parent is mounted
subvolumes = {
# Subvolume name is different from mountpoint
"/root" = {
mountpoint = "/";
mountOptions = ["subvol=root" "compress=zstd" "noatime"];
};
# Subvolume name is the same as the mountpoint
"/home" = {
mountOptions = ["subvol=home" "compress=zstd" "noatime"];
mountpoint = "/home";
};
# Sub(sub)volume doesn't need a mountpoint as its parent is mounted
"/home/user" = {};
# Parent is not mounted so the mountpoint must be set
"/nix" = {
mountOptions = [
"subvol=nix"
"compress=zstd"
"noatime"
];
mountpoint = "/nix";
};
"/nix/persist" = {
mountpoint = "/nix/persist";
mountOptions = ["subvol=persist" "compress=zstd" "noatime"];
};
"/log" = {
mountpoint = "/var/log";
mountOptions = ["subvol=log" "compress=zstd" "noatime"];
};
"/lib" = {
mountpoint = "/var/lib";
mountOptions = ["subvol=lib" "compress=zstd" "noatime"];
};
# This subvolume will be created but not mounted
"/test" = {};
};
};
};
};
};
};
};
};
fileSystems."/nix/persist".neededForBoot = true;
fileSystems."/var/log".neededForBoot = true;
fileSystems."/var/lib".neededForBoot = true;
}
</code></pre>
<ul>
<li>For <code>/tmp</code> on RAM use something like the following. I’ve found that having
disko manage swaps causes unnecessary issues. Using zram follows the ephemeral
route:</li>
</ul>
<pre><code class="language-nix">{
lib,
config,
...
}: let
cfg = config.custom.zram;
in {
options.custom.zram = {
enable = lib.mkEnableOption "Enable utils module";
};
config = lib.mkIf cfg.enable {
zramSwap = {
enable = true;
# one of "lzo", "lz4", "zstd"
algorithm = "zstd";
priority = 5;
memoryPercent = 50;
};
};
}
</code></pre>
<p>And in your <code>configuration.nix</code> you would add:</p>
<pre><code class="language-nix"># configuration.nix
custom = {
zram.enable = true;
};
</code></pre>
<p>After adding the above module, you can see it with:</p>
<pre><code class="language-bash">swapon --show
NAME TYPE SIZE USED PRIO
/dev/zram0 partition 7.5G 0B 5
</code></pre>
<ol start="6">
<li>Run disko to partition, format and mount your disks. Warning this will wipe
EVERYTHING on your disk. Disko doesn’t work with dual boot.</li>
</ol>
<pre><code class="language-bash">sudo nix --experimental-features "nix-command flakes" run github:nix-community/disko/latest -- --mode destroy,format,mount /tmp/disk-config.nix
</code></pre>
<p>Check it with the following:</p>
<pre><code class="language-bash">mount | grep /mnt
</code></pre>
<p>The output for an nvme0n1 disk would be similar to the following:</p>
<pre><code class="language-bash">#... snip ...
/dev/nvme0n1p2 on /mnt type btrfs (rw,noatime,compress=zstd:3,ssd,discard=async,space_cache=v2,subvolid=285,subvol=/root)
/dev/nvme0n1p2 on /mnt/persist type btrfs (rw,noatime,compress=zstd:3,ssd,discard=async,space_cache=v2,subvolid=261,subvol=/persist)
/dev/nvme0n1p2 on /mnt/etc type btrfs (rw,noatime,compress=zstd:3,ssd,discard=async,space_cache=v2,subvolid=261,subvol=/persist)
/dev/nvme0n1p2 on /mnt/nix type btrfs (rw,noatime,compress=zstd:3,ssd,discard=async,space_cache=v2,subvolid=260,subvol=/nix)
/dev/nvme0n1p2 on /mnt/var/lib type btrfs (rw,noatime,compress=zstd:3,ssd,discard=async,space_cache=v2,subvolid=258,subvol=/lib)
/dev/nvme0n1p2 on /mnt/var/log type btrfs (rw,noatime,compress=zstd:3,ssd,discard=async,space_cache=v2,subvolid=259,subvol=/log)
/dev/nvme0n1p2 on /mnt/nix/store type btrfs (ro,noatime,compress=zstd:3,ssd,discard=async,space_cache=v2,subvolid=260,subvol=/nix)
# ... snip ...
</code></pre>
<ol start="7">
<li>Generate necessary files, here we use –no-filesystems because disko handles
the fileSystems attribute for us.</li>
</ol>
<pre><code class="language-bash">nixos-generate-config --no-filesystems --root /mnt
</code></pre>
<p>It may be helpful to add a couple things to your <code>configuration.nix</code> now,
rebuild and then move on. Such as, your hostname, git, an editor of your choice.
After your additions run <code>sudo nixos-rebuild</code> switch to apply the changes. If
you do this, you can skip the <code>nix-shell -p</code> command coming up.</p>
<pre><code class="language-bash">sudo mv /tmp/disk-config.nix /mnt/etc/nixos
</code></pre>
<h2>Setting a Flake for your minimal Install</h2>
<ol start="8">
<li>Create the flake in your home directory, then move it to /mnt/etc/nixos. This
avoids needing to use sudo for every command while in the /mnt/etc/nixos
directory.</li>
</ol>
<pre><code class="language-bash">cd ~
mkdir flake && cd flake
nix-shell -p git yazi helix
export NIX_CONFIG='experimental-features = nix-command flakes'
export EDITOR='hx'
hx flake.nix
</code></pre>
<blockquote>
<p>You’ll change hostname = nixpkgs.lib.nixosSystem to your chosen hostname,
(e.g. magic = nixpkgs.lib.nixosSystem). This will be the same as your
networking.hostName = “magic”; in your configuration.nix that we will set up
shortly.</p>
</blockquote>
<pre><code class="language-nix"># flake.nix
{
description = "NixOS configuration";
inputs = {
nixpkgs.url = "github:nixos/nixpkgs/nixos-unstable";
disko.url = "github:nix-community/disko/latest";
disko.inputs.nixpkgs.follows = "nixpkgs";
# impermanence.url = "github:nix-community/impermanence";
};
outputs = inputs@{ nixpkgs, ... }: {
nixosConfigurations = {
# Change `my-hostname` to match `networking.hostName`
my-hostname = nixpkgs.lib.nixosSystem {
system = "x86_64-linux";
modules = [
./configuration.nix
inputs.disko.nixosModules.disko
# inputs.impermanence.nixosModules.impermanence
];
};
};
};
}
</code></pre>
<p>Move all the files into your flake:</p>
<pre><code class="language-bash">cd /mnt/etc/nixos/
sudo mv disk-config.nix hardware-configuration.nix configuration.nix ~/flake
</code></pre>
<ol start="9">
<li>Edit configuration.nix with what is required, the following is required, I
clone my original flake repo and move the pieces into place but it’s fairly
easy to just type it all out:</li>
</ol>
<ul>
<li>
<p>Bootloader, (e.g., boot.loader.systemd-boot.enable = true;)</p>
</li>
<li>
<p>User, the example uses username change this to your chosen username. If you
don’t set your hostname it will be nixos.</p>
</li>
<li>
<p>Networking, networking.networkmanager.enable = true;</p>
</li>
<li>
<p><code>hardware-configuration.nix</code> & <code>disk-config.nix</code> for this setup</p>
</li>
<li>
<p><code>initialHashedPassword</code>: Run <code>mkpasswd --method=yescrypt</code>, then enter your
desired password. Example output,</p>
</li>
</ul>
<pre><code class="language-bash">mkpasswd --method=yescrypt > /tmp/pass.txt
</code></pre>
<ul>
<li>You can check the quality with pwscore:</li>
</ul>
<pre><code class="language-bash">nix-shell -p libpwquality
pwscore
very-secure-password
100
</code></pre>
<p>read the hashed password into the file with :r /tmp/pass.txt and move it into
place.</p>
<pre><code class="language-nix"># configuration.nix
{
config,
lib,
pkgs,
inputs,
...
}: {
imports = [
# Include the results of the hardware scan.
./hardware-configuration.nix
./disk-config.nix
];
networking.hostName = "my-hostname"; # This will match the `hostname` of your flake
networking.networkmanager.enable = true;
boot.loader.systemd-boot.enable = true; # (for UEFI systems only)
# List packages installed in system profile.
# You can use https://search.nixos.org/ to find more packages (and options).
environment.systemPackages = with pkgs; [
vim # Do not forget to add an editor to edit configuration.nix! The Nano editor is also installed by default.
# wget
git
];
time.timeZone = "America/New_York";
# Change `nixos` to your chosen username, change the group to match
users.users.nixos = {
isNormalUser = true;
extraGroups = [ "wheel" "networkmanager" ]; # Add "wheel" for sudo access
initialHashedPassword = "COPY_YOUR_MKPASSWD_OUTPUT_HERE"; # <-- This is where it goes!
# home = "/home/nixos"; # Optional: Disko typically handles home subvolumes
};
# Create a matching group
users.groups.nixos = {};
console.keyMap = "us";
nixpkgs.config.allowUnfree = true;
system.stateVersion = "25.05";
}
</code></pre>
<p>Shred pass.txt:</p>
<pre><code class="language-bash">shred /tmp/pass.txt
rm /tmp/pass.txt
</code></pre>
<ol start="10">
<li>Move the flake to /mnt/etc/nixos and run nixos-install:</li>
</ol>
<pre><code class="language-bash">sudo mv ~/flake /mnt/etc/nixos/
sudo nixos-install --flake /mnt/etc/nixos/flake .#hostname
# if the above command doesn't work try this:
sudo nixos-install --flake /mnt/etc/nixos/flake#hostname
</code></pre>
<p>You will be prompted to enter a new password if everything succeeds.</p>
<p>If everything checks out, reboot the system and you should be prompted to enter
your user and password to login to a shell to get started.</p>
<p>The flake will be placed at <code>/etc/nixos/flake</code>, I choose to move it to my home
directory. Since the file was first in <code>/etc</code> you’ll need to adjust the
permissions with something like <code>sudo chown nixos:nixos ~/flake</code>. This is based
off of the example above where we created both a nixos user and group.</p>
<p>You can check the layout of your btrfs system with:</p>
<pre><code class="language-bash">sudo btrfs subvolume list /
</code></pre>
<ul>
<li>You may notice some old_roots in the output, which are snapshots, which are
likely created before system upgrades or reboots for rollback purposes. They
can be deleted or rolled back as needed.</li>
</ul>
<p><a href="https://btrfs.readthedocs.io/en/latest/Subvolumes.html">BTRFS Subvolumes</a></p>
<p>To continue following along and set up impermanence
<a href="https://saylesss88.github.io/installation/unencrypted/impermanence.html">Click Here</a></p>
Encrypted Install (BTRFS)https://saylesss88.github.io/installation/enc/enc_install.html2025-11-22T00:00:00+00:00saylesss87@proton.me (saylesss88)<h1>Encrypted Setups</h1>
<details>
<summary> ✔️ Click to Expand Table of Contents</summary>
<!-- toc -->
</details>
<p>NixOS supports file systems that are encrypted using LUKS (Linux Unified Key
Setup). This guide walks you through an encrypted NixOS installation using Disko
for disk management and Btrfs for subvolumes. It is designed for users who want
full disk encryption and a modern filesystem layout. If you prefer an
unencrypted setup, you can skip the LUKS and encryption steps, but this guide
focuses on security and flexibility.</p>
<ul>
<li>For Unencrypted layout
<a href="https://saylesss88.github.io/installation/unencrypted/unencrypted.html">Click Here</a></li>
</ul>
<p>If you choose to set up impermanence, ensure it matches your install. Encrypted
Setup with Encrypted Impermanence and Unencrypted Setup with Unencrypted
Impermanence.</p>
<blockquote>
<p>❗ NOTE: This is a bit convoluted, there are a few paths you can follow. If
you choose to use the starter repo (<a href="https://github.com/saylesss88/my-flake">https://github.com/saylesss88/my-flake</a>)
just follow the included README and use this for reference.</p>
</blockquote>
<h2>What does LUKS Encryption Protect?</h2>
<p>It’s important to understand what disk encryption protects and what it doesn’t
protect so you don’t have any misconceptions about how safe your data is.</p>
<ul>
<li>
<p><a href="https://wiki.nixos.org/wiki/Full_Disk_Encryption">NixOS Wiki FDE</a></p>
</li>
<li>
<p><a href="https://wiki.archlinux.org/title/Data-at-rest_encryption">Arch Wiki Data-at-rest encryption</a></p>
</li>
<li>
<p><a href="https://0pointer.net/blog/authenticated-boot-and-disk-encryption-on-linux.html">Authenticated Booot and DE on Linux</a></p>
</li>
<li>
<p><a href="https://oddlama.org/blog/bypassing-disk-encryption-with-tpm2-unlock/">Bypassing FDE with TPM2 Unlock</a></p>
</li>
</ul>
<p><strong>What LUKS Protects</strong>:</p>
<ul>
<li>
<p><strong>Data Confidentiality at Rest</strong>: LUKS encrypts entire block devices (such as
disk partitions or whole drives), ensuring that all data stored on the
encrypted device is unreadable without the correct decryption key or
passphrase. This protects sensitive information from unauthorized access if
the device is lost, stolen, or physically accessed by an attacker.</p>
</li>
<li>
<p><strong>Physical Security</strong>: If someone gains physical possession of your device
(for example, by stealing your laptop or removing a hard drive), LUKS ensures
the data remains inaccessible and appears as random, meaningless bytes without
the correct credentials.</p>
</li>
<li>
<p><strong>Protection Against Offline Attacks</strong>: LUKS defends against attackers who
attempt to bypass the operating system by booting from another device or
removing the drive and mounting it elsewhere. Without the decryption key, the
data remains protected.</p>
</li>
</ul>
<p><strong>What LUKS Does Not Protect</strong>:</p>
<ul>
<li>
<p><strong>Data in Use</strong>: Once the system is booted and the encrypted device is
unlocked, the data becomes accessible to the operating system and any user or
process with the necessary permissions. LUKS does not protect against attacks
on a running system, such as malware, remote exploits, or unauthorized users
with access to an unlocked session.</p>
</li>
<li>
<p><strong>File-Level Access Control</strong>: LUKS encrypts entire partitions or disks, not
individual files or directories. It does not provide granular file-level
encryption or access control within the operating system.</p>
</li>
<li>
<p><strong>Network Attacks</strong>: LUKS only protects data stored on disk. It does not
encrypt data transmitted over networks or protect against network-based
attacks.</p>
</li>
<li>
<p><strong>Bootloader and EFI Partitions</strong>: The initial bootloader or EFI system
partition cannot be encrypted with LUKS, so some parts of the boot process may
remain exposed unless additional measures are taken. (i.e., Secure Boot,
additional passwords, TPM2)</p>
</li>
</ul>
<p>To Sum it Up: LUKS encryption protects the confidentiality of all data stored on
an encrypted block device by making it unreadable without the correct passphrase
or key. This ensures that, if your device is lost or stolen, your data remains
secure and inaccessible to unauthorized users. However, LUKS does not protect
data once the system is unlocked and running, nor does it provide file-level
encryption or protect against malware and network attacks. For comprehensive
security, LUKS should be combined with strong access controls and other security
best practices.</p>
<h2>The Install</h2>
<ol>
<li>
<p>Get the
<a href="https://channels.nixos.org/nixos-25.05/latest-nixos-minimal-x86_64-linux.iso">Nixos Minimal ISO</a>
Get it on a usb stick, I use Ventoy with Ventoy2Disk.sh. The following is the
link to the
<a href="https://sourceforge.net/projects/ventoy/files/v1.1.05/ventoy-1.1.05-linux.tar.gz/download">Ventoy TarBall</a>
download, untar it with <code>tar -xzf ventoy-1.1.05-linux.tar.gz</code>, and make it
executable with <code>chmod +x Ventoy2Disk.sh</code>, and finally execute it with
<code>sudo bash Ventoy2Disk.sh</code> Follow the prompts to finish the install.</p>
</li>
<li>
<p>Configuring Networking</p>
</li>
</ol>
<p>The minimal installer uses <code>wpa_supplicant</code> instead of NetworkManager. Choose
one of the following methods to enable networking:</p>
<pre><code class="language-bash">sudo systemctl start wpa_supplicant
wpa_cli
</code></pre>
<h3>Option A: Interactive <code>wpa_cli</code></h3>
<pre><code class="language-bash">> add_network
0
> set_network 0 ssid "myhomenetwork"
OK
> set_network 0 psk "mypassword"
OK
> enable_network 0
OK
</code></pre>
<p>To exit type <code>quit</code>, then check your connection with <code>ping google.com</code>.</p>
<h3>Option B: Non-Interactive <code>wpa_passphrase</code></h3>
<p>This method is quicker for known networks and persists the configuration for the
live environment.</p>
<p>First, identify your wireless interface name (e.g., <code>wlan0</code>) using <code>ip a</code>.</p>
<pre><code class="language-bash">sudo systemctl start wpa_supplicant # Ensure wpa_supplicant is running
# This command generates the config and appends it to a file specific to wlan0
sudo wpa_passphrase "myhomenetwork" "mypassword" | sudo tee /etc/wpa_supplicant/wpa_supplicant-wlan0.conf
sudo systemctl restart wpa_supplicant@wlan0.service
</code></pre>
<p>After either method, exit <code>wpa_cli</code> with <code>quit</code>. Then test your connection:</p>
<pre><code class="language-bash">ping 1.1.1.1
</code></pre>
<ol start="3">
<li>Get your Disk Name with <code>lsblk</code></li>
</ol>
<p>The output should be something like:</p>
<pre><code class="language-bash">NAME MAJ:MIN RM SIZE RO TYPE MOUNTPOINTS
nvme0n1 259:0 0 1,8T 0 disk
</code></pre>
<blockquote>
<p>❗ From here, you can either</p>
</blockquote>
<ol start="4">
<li>Copy the disk configuration to your machine. You can choose one from the
<a href="https://github.com/nix-community/disko/tree/master/example">examples directory</a>.</li>
</ol>
<p>There is still a starter repo that can save you some typing, make sure to
carefully review if you decide to use it:</p>
<pre><code class="language-bash">export NIX_CONFIG='experimental-features = nix-command flakes'
export EDITOR='hx' # or 'vi'
nix-shell -p git yazi helix mkpasswd
git config --global user.name "gitUsername"
git config --global user.email "gitEmail"
# OPTIONAL starter repo containing disk-config set up for impermanence
git clone https://github.com/saylesss88/my-flake.git
</code></pre>
<p>I prefer <code>helix</code> here as it’s defaults are great. (i.e., auto closing brackets
and much more)</p>
<p>If you choose to use the starter repo you won’t need to run the next command as
it is already populated in the repo and should use the
<a href="https://github.com/saylesss88/my-flake">Starter Repo README</a> most of the rest
of the guide is for manual disko without the starter repo.</p>
<p>If you click on the layout you want then click the <code>Raw</code> button near the top,
then copy the <code>url</code> and use it in the following command:</p>
<pre><code class="language-bash">cd /tmp
curl https://raw.githubusercontent.com/nix-community/disko/refs/heads/master/example/luks-btrfs-subvolumes.nix -o /tmp/disk-config.nix
</code></pre>
<p>The above curl command is to the <code>luks-btrfs-subvolumes.nix</code> layout.</p>
<ol start="5">
<li>Make Necessary changes, I prepared mine for impermanence with the following:</li>
</ol>
<pre><code class="language-bash">hx /tmp/disk-config.nix
</code></pre>
<p>Make sure you identify your system disk name with <code>lsblk</code> and change the
<code>device</code> attribute below to match your disk.</p>
<pre><code class="language-bash">lsblk
nvme0n1 259:0 0 476.9G 0 disk
├─nvme0n1p1 259:1 0 512M 0 part /boot
└─nvme0n1p2 259:2 0 476.4G 0 part
</code></pre>
<p>My disk is <code>nvme0n1</code>, change below to match yours:</p>
<pre><code class="language-nix">{
disko.devices = {
disk = {
nvme0n1 = {
type = "disk";
# Make sure this is correct with `lsblk`
device = "/dev/nvme0n1";
content = {
type = "gpt";
partitions = {
ESP = {
label = "boot";
name = "ESP";
size = "1G";
type = "EF00";
content = {
type = "filesystem";
format = "vfat";
mountpoint = "/boot";
mountOptions = [
"defaults"
];
};
};
luks = {
size = "100%";
label = "luks";
content = {
type = "luks";
name = "cryptroot";
content = {
type = "btrfs";
extraArgs = ["-L" "nixos" "-f"];
subvolumes = {
"/root" = {
mountpoint = "/";
mountOptions = ["subvol=root" "compress=zstd" "noatime"];
};
"/root-blank" = {
mountOptions = ["subvol=root-blank" "nodatacow" "noatime"];
};
"/home" = {
mountpoint = "/home";
mountOptions = ["subvol=home" "compress=zstd" "noatime"];
};
"/nix" = {
mountpoint = "/nix";
mountOptions = ["subvol=nix" "compress=zstd" "noatime"];
};
"/persist" = {
mountpoint = "/persist";
mountOptions = ["subvol=persist" "compress=zstd" "noatime"];
};
"/log" = {
mountpoint = "/var/log";
mountOptions = ["subvol=log" "compress=zstd" "noatime"];
};
"/lib" = {
mountpoint = "/var/lib";
mountOptions = ["subvol=lib" "compress=zstd" "noatime"];
};
"/persist/swap" = {
mountpoint = "/persist/swap";
mountOptions = ["subvol=swap" "noatime" "nodatacow" "compress=no"];
swap.swapfile.size = "18G";
};
};
};
};
};
};
};
};
};
};
fileSystems."/persist".neededForBoot = true;
fileSystems."/var/log".neededForBoot = true;
fileSystems."/var/lib".neededForBoot = true;
}
</code></pre>
<p>I have 16G of RAM so to be safe for hibernation I chose to give it some extra
space. The boot partition is 1G, this extra space is for specialisations and
lanzaboote.</p>
<p>or for a swapfile:</p>
<pre><code class="language-nix">swapDevices = [
{
device = "/persist/swap/swapfile";
size = 18 * 1024; # Size in MB (18GB)
# or
# size = 16384; # Size in MB (16G);
}
];
</code></pre>
<h2>Setting up zram and /tmp on RAM</h2>
<p>While <code>/tmp</code> is handled by <code>tmpfs</code> (as shown the below <code>configuration.nix</code>), you
can further enhance memory efficiency with <code>zram</code> for compressed swap, as shown
below.</p>
<blockquote>
<pre><code class="language-nix">{
lib,
config,
...
}: let
cfg = config.custom.zram;
in {
options.custom.zram = {
enable = lib.mkEnableOption "Enable utils module";
};
config = lib.mkIf cfg.enable {
zramSwap = {
enable = true;
# one of "lzo", "lz4", "zstd"
algorithm = "zstd";
priority = 5;
memoryPercent = 50;
};
};
}
</code></pre>
<p>And in your <code>configuration.nix</code> you would add:</p>
<pre><code class="language-nix"># configuration.nix
custom = {
zram.enable = true;
};
</code></pre>
</blockquote>
<p>After adding the above module and rebuilding, you can see it with:</p>
<pre><code class="language-bash">swapon --show
NAME TYPE SIZE USED PRIO
/dev/zram0 partition 7.5G 0B 5
</code></pre>
<ol start="6">
<li>Run disko to partition, format and mount your disks. <strong>Warning</strong> this will
wipe <strong>EVERYTHING</strong> on your disk. Disko doesn’t work with dual boot.</li>
</ol>
<pre><code class="language-bash">sudo nix --experimental-features "nix-command flakes" run github:nix-community/disko/latest -- --mode destroy,format,mount /tmp/disk-config.nix
</code></pre>
<p>Check it with the following:</p>
<pre><code class="language-bash">mount | grep /mnt
</code></pre>
<p>The output for an <code>nvme0n1</code> disk would be similar to the following:</p>
<pre><code class="language-bash">#... snip ...
/dev/nvme0n1p2 on /mnt type btrfs (rw,noatime,compress=zstd:3,ssd,discard=async,space_cache=v2,subvolid=285,subvol=/root)
/dev/nvme0n1p2 on /mnt/persist type btrfs (rw,noatime,compress=zstd:3,ssd,discard=async,space_cache=v2,subvolid=261,subvol=/persist)
/dev/nvme0n1p2 on /mnt/etc type btrfs (rw,noatime,compress=zstd:3,ssd,discard=async,space_cache=v2,subvolid=261,subvol=/persist)
/dev/nvme0n1p2 on /mnt/nix type btrfs (rw,noatime,compress=zstd:3,ssd,discard=async,space_cache=v2,subvolid=260,subvol=/nix)
/dev/nvme0n1p2 on /mnt/var/lib type btrfs (rw,noatime,compress=zstd:3,ssd,discard=async,space_cache=v2,subvolid=258,subvol=/lib)
/dev/nvme0n1p2 on /mnt/var/log type btrfs (rw,noatime,compress=zstd:3,ssd,discard=async,space_cache=v2,subvolid=259,subvol=/log)
/dev/nvme0n1p2 on /mnt/nix/store type btrfs (ro,noatime,compress=zstd:3,ssd,discard=async,space_cache=v2,subvolid=260,subvol=/nix)
# ... snip ...
</code></pre>
<ol start="7">
<li>Generate necessary files, here we use <code>--no-filesystems</code> because disko
handles the <code>fileSystems</code> attribute for us.</li>
</ol>
<pre><code class="language-bash">nixos-generate-config --no-filesystems --root /mnt
</code></pre>
<ul>
<li>The above command will place a <code>configuration.nix</code> and
<code>hardware-configuration.nix</code> in <code>/mnt/etc/nixos/</code></li>
</ul>
<p>It may be helpful to add a couple things to your <code>configuration.nix</code> now, while
it’s in its default location. You can just add what you want and rebuild once
with <code>sudo nixos-rebuild switch</code> and move on. (i.e. <code>git</code>, an editor, etc.).</p>
<h3>Setting a Flake for your minimal Install</h3>
<ol start="8">
<li>Create the flake in your home directory to avoid needing to use sudo for
every command:</li>
</ol>
<pre><code class="language-bash">cd # Move to home directory
mkdir flake
cd /mnt/etc/nixos/
sudo mv hardware-configuration.nix configuration.nix ~/flake/
sudo mv /tmp/disk-config.nix ~/flake/
</code></pre>
<pre><code class="language-bash">cd flake
hx flake.nix
</code></pre>
<blockquote>
<p>You’ll change <code>hostName = nixpkgs.lib.nixosSystem</code> to your chosen hostname,
(e.g. <code>magic = nixpkgs.lib.nixosSystem</code>). This will be the same as your
<code>networking.hostName = "magic";</code> in your <code>configuration.nix</code> that we will set
up shortly.</p>
</blockquote>
<pre><code class="language-nix"># flake.nix
{
description = "NixOS configuration";
inputs = {
nixpkgs.url = "github:nixos/nixpkgs/nixos-unstable";
disko.url = "github:nix-community/disko/latest";
disko.inputs.nixpkgs.follows = "nixpkgs";
# impermanence.url = "github:nix-community/impermanence";
};
outputs = inputs@{ nixpkgs, ... }: {
nixosConfigurations = {
# Change `hostName` to your chosen host name
nixos = nixpkgs.lib.nixosSystem {
system = "x86_64-linux";
modules = [
./configuration.nix
inputs.disko.nixosModules.disko
# inputs.impermanence.nixosModules.impermanence
];
};
};
};
}
</code></pre>
<ol start="9">
<li>Edit <code>configuration.nix</code> with what is required, the following are required, I
clone my original flake repo and move the pieces into place but it’s fairly
easy to just type it all out:</li>
</ol>
<ul>
<li>
<p>Bootloader, (e.g., <code>boot.loader.systemd-boot.enable = true;</code>)</p>
</li>
<li>
<p>User, the example uses <code>username</code> change this to your chosen username. If you
don’t set your hostname it will be <code>nixos</code>.</p>
</li>
<li>
<p>Networking, <code>networking.networkmanager.enable = true;</code></p>
</li>
<li>
<p><code>hardware-configuration.nix</code> & <code>disk-config.nix</code> for this setup</p>
</li>
<li>
<p>If you type this out by hand and mess up a single character, you will have to
start over completely. A fairly safe way to do this is with <code>vim</code> or <code>hx</code> and
redirect the hashed pass to a <code>/tmp/pass.txt</code>, you can then read it into your
<code>users.nix</code>:</p>
</li>
</ul>
<pre><code class="language-bash">mkpasswd --method=yescrypt > /tmp/pass.txt
# Enter your chosen password
</code></pre>
<p>And then when inside <code>configuration.nix</code>, move to the line where you want the
hashed password and type <code>:r /tmp/pass.txt</code> to read the hash into your current
file.</p>
<pre><code class="language-nix"># configuration.nix
{
config,
lib,
pkgs,
inputs,
...
}: {
imports = [
# Include the results of the hardware scan.
./hardware-configuration.nix
./disk-config.nix
];
# systemd Stage 1: if enabled, it handles unlocking of LUKS-encrypted volumes during boot.
boot.initrd.luks.devices = {
cryptroot = {
device = "/dev/disk/by-partlabel/luks";
allowDiscards = true;
};
};
# This complements using zram, putting /tmp on RAM
boot = {
tmp = {
useTmpfs = true;
tmpfsSize = "50%";
};
};
# Enable autoScrub for btrfs
services.btrfs.autoScrub = {
enable = true;
interval = "weekly";
fileSystems = ["/"];
};
# Change me!
networking.hostName = "nixos"; # This will match the `hostname` of your flake
networking.networkmanager.enable = true;
boot.loader.systemd-boot.enable = true; # (for UEFI systems only)
# List packages installed in system profile.
# You can use https://search.nixos.org/ to find more packages (and options).
environment.systemPackages = with pkgs; [
vim # Do not forget to add an editor to edit configuration.nix! The Nano editor is also installed by default.
# wget
git
];
time.timeZone = "America/New_York";
# Change me to your chosen username (i.e. change nixosUser to your username)
users.users.nixosUser = {
isNormalUser = true;
extraGroups = [ "wheel" "networkmanager" ]; # Add "wheel" for sudo access
initialHashedPassword = "READ_MKPASSWD_OUTPUT_HERE"; # <-- This is where it goes!
# home = "/home/nixos"; # Optional: Disko typically handles home subvolumes
};
# Change me to match your chosen username
users.group.nixosUser = {};
console.keyMap = "us";
nixpkgs.config.allowUnfree = true;
system.stateVersion = "25.05";
}
</code></pre>
<p>Although, just adding the <code>disk-config.nix</code> works for prompting you for your
encryption passphrase adding the following is a more robust way of ensuring Nix
is aware of this:</p>
<pre><code class="language-nix"> boot.initrd.luks.devices = {
cryptroot = {
device = "/dev/disk/by-partlabel/luks";
allowDiscards = true;
};
};
</code></pre>
<ol start="10">
<li>Move the flake to <code>/mnt/etc/nixos</code> and run <code>nixos-install</code>:</li>
</ol>
<pre><code class="language-bash">sudo mv ~/flake /mnt/etc/nixos/
</code></pre>
<ul>
<li>Give everything a quick once over, insuring your host is set in both your
<code>flake.nix</code>, and <code>configuration.nix</code>. Ensure you changed the username in the
<code>configuration.nix</code> from <code>nixos</code> to your chosen name, this is the name you’ll
use to login after you enter your encryption passphrase.</li>
</ul>
<p>The below command uses <code>#nixos</code> because that’s what the defaults are, you’ll
change it to your chosen hostname.</p>
<pre><code class="language-bash">sudo nixos-install --flake /mnt/etc/nixos/flake#nixos
</code></pre>
<ul>
<li>You will be prompted to enter a new password if everything succeeds.</li>
</ul>
<h2>Create a Blank Snapshot of /root</h2>
<p>This is essential if you plan on using impermanence with this encrypted setup.
We take a snapshot of <code>/root</code> while it’s a clean slate, right after we run disko
to format the disk.</p>
<p>To access all of the subvolumes, we have to mount the Btrfs partitions
top-level.</p>
<ol>
<li>Unlock the LUKS device, if not already unlocked as it should be from running
disko:</li>
</ol>
<pre><code class="language-bash">sudo cryptsetup open /dev/disk/by-partlabel/luks cryptroot
</code></pre>
<ol start="2">
<li>Mount the Btrfs top-level (<code>subvolid=5</code>):</li>
</ol>
<pre><code class="language-bash">sudo mount -o subvolid=5 /dev/mapper/cryptroot /mnt
</code></pre>
<ol start="3">
<li>List the contents:</li>
</ol>
<pre><code class="language-bash">ls /mnt
# you should see something like
root home nix persist log lib ...
</code></pre>
<ol start="4">
<li>Now we can take a snapshot of the <code>root</code> subvolume:</li>
</ol>
<pre><code class="language-bash">sudo btrfs subvolume snapshot -r /mnt/root /mnt/root-blank
</code></pre>
<ol start="5">
<li>Verify Your Blank Snapshot:</li>
</ol>
<p>Before continuing, make sure your blank snapshot exists. This is crucial for
impermanence to work properly.</p>
<pre><code class="language-bash">sudo btrfs subvolume list /mnt
</code></pre>
<p>You should see output containing both <code>root</code> and <code>root-blank</code> subvolumes:</p>
<pre><code class="language-bash">ID 256 gen ... path root
ID 257 gen ... path root-blank
</code></pre>
<p>Check that the snapshot is read only, this ensures that our snapshot will remain
the same as the day we took it. It was set <code>ro</code> in disko but lets check anyways:</p>
<pre><code class="language-bash">sudo btrfs property get -ts /mnt/root-blank
# output should be
ro=true
</code></pre>
<ol start="5">
<li>Make sure to unmount:</li>
</ol>
<pre><code class="language-bash">sudo umount /mnt
</code></pre>
<ul>
<li>
<p>If everything checks out, reboot the system and you should be prompted to
enter your <code>user</code> and <code>password</code> to login to a shell to get started.</p>
</li>
<li>
<p>The flake will be placed at <code>/etc/nixos/flake</code> after the install and reboot, I
choose to move it to my home directory. Since the file was first in <code>/etc</code>
you’ll need to adjust the permissions with something like
<code>sudo chown -R $USER:$USER ~/flake</code> and then you can work on it without
privilege escalation. This requires that you create a group for your user as
done in the <code>configuration.nix</code> above.</p>
</li>
<li>
<p>You can check the layout of your btrfs system with:</p>
</li>
</ul>
<pre><code class="language-bash">sudo btrfs subvolume list /
</code></pre>
<h2>Persisting Critical System State</h2>
<p>The following is a one time operation, we’re just getting it out of the way now.
This moves all of the important system state to a persistant location, further
preparing for impermanence.</p>
<p>It’s essential that you have first run the <code>nixos-install</code> command to populate
these directories before copying them over.</p>
<pre><code class="language-bash">sudo mkdir -p /mnt/persist/etc
sudo mkdir -p /mnt/persist/var/lib
sudo mkdir -p /mnt/persist/var/log
sudo mkdir -p /mnt/persist/home
sudo mkdir -p /mnt/persist/root
sudo cp -a /mnt/etc/. /mnt/persist/etc/
sudo cp -a /mnt/var/lib/. /mnt/persist/var/lib
sudo cp -a /mnt/var/log/. /mnt/persist/var/log
sudo cp -a /mnt/home/. /mnt/persist/home/
sudo cp -a /mnt/root/. /mnt/persist/root/
</code></pre>
<p>Since we are in a live environment, after the install and reboot the <code>/mnt</code>
prefix will be removed.</p>
<h2>Reboot</h2>
<p>Now that everything is done, we can safely reboot and ensure that our LUKS
password/passphrase is accepted as well as our userlevel password and username.</p>
<p>After reboot, you can continue to setup
<a href="https://saylesss88.github.io/installation/enc/sops-nix.html">Sops Encrypted Secrets</a>
and
<a href="https://saylesss88.github.io/installation/enc/lanzaboote.html">Lanzaboote Secure Boot</a></p>
<ul>
<li>
<p>To set up impermanence for this specific layout, follow the link
<a href="https://saylesss88.github.io/installation/enc/encrypted_impermanence.html">Encrypted Impermanence</a></p>
</li>
<li>
<p><a href="https://btrfs.readthedocs.io/en/latest/Subvolumes.html">BTRFS Subvolumes</a></p>
</li>
<li>
<p><a href="https://www.freedesktop.org/software/systemd/man/latest/systemd-cryptenroll.html">systemd-cryptenroll man page</a></p>
</li>
<li>
<p><a href="https://uapi-group.org/specifications/specs/linux_tpm_pcr_registry/">Linux TPM PCR Registry</a></p>
</li>
<li>
<p><a href="https://oddlama.org/blog/bypassing-disk-encryption-with-tpm2-unlock/">Bypassing FDE with TPM2</a></p>
</li>
</ul>
USB Keyfilehttps://saylesss88.github.io/installation/enc/USB_keyfile.html2025-11-22T00:00:00+00:00saylesss87@proton.me (saylesss88)<h1>USB Stick Keyfile</h1>
<details>
<summary> ✔️ Click to Expand Table of Contents</summary>
<!-- toc -->
</details>
<p>This allows you to use a USB stick for your keyfile, with a backup in case you
want or need it. There is a setting <code>fallbackToPassword</code> that protects you in
case something fails with the USB key.</p>
<p>First, I’ll show how to set up a dedicated USB stick for a keyfile. (i.e., one
that is only used for this). After that I will show the process of adding the
keyfile to a USB stick with existing data on it that you don’t want to lose.</p>
<p><strong>Generate the keyfile</strong></p>
<pre><code class="language-bash">sudo dd if=/dev/urandom of=/root/usb-luks.key bs=4096 count=1
</code></pre>
<h2>Keyfile Enrollment Methods</h2>
<p>This is for a dedicated USB stick that we will wipe first then add the key.</p>
<p>Disko defaults to LUKS2</p>
<pre><code class="language-bash"># cryptsetup works for both LUKS1 and LUKS2 formats but doesn't work for
# TPM2, FIDO2, and smartcards
sudo cryptsetup luksAddKey /dev/disk/by-partlabel/luks /root/usb-luks.key
</code></pre>
<p><strong>OR</strong></p>
<details>
<summary> ✔️ Click to expand Experimental TPM2 auto-unlock for LUKS </summary>
<blockquote>
<p>⚠️ WARNING: Security Implications of TPM2 Auto-Unlock</p>
</blockquote>
<blockquote>
<p>Enabling TPM2 auto-unlock fundamentally changes your system’s security model.
While this feature protects against certain forms of malicious software
injection by tying the decryption key to the system’s boot state, it
eliminates the need for a user password at boot. This creates a significant
risk if your machine is stolen or seized, do not use this feature if the
physical security of your machine is a concern. This is still at a stage where
you can expect rough edges and workarounds.</p>
</blockquote>
<blockquote>
<p>⚠️ WARNING: Do NOT use TPM auto-unlock if your CPU is vulnerable to faulTPM!
All AMD Zen2 and Zen3 Processors are known to be affected with AMD Zen1 likely
also affected and Zen4 unknown! Misconfigurations are also common, do your own
research!</p>
</blockquote>
<ul>
<li>
<p><a href="https://ieeexplore.ieee.org/document/10190531">faulTPM:Exposing AMD fTPMs’ Deepest Secrets</a></p>
</li>
<li>
<p><a href="https://www.techpowerup.com/308124/amd-faultpm-exploit-targets-zen-2-and-zen-3-processors">AMD faulTPM Exploit Targets Zen 2 and Zen 3 Processors</a></p>
</li>
</ul>
<p>You can add an additional layer by encrypting user data, such as individual home
folders, with a different mechanism, such as <code>fscrypt-experimental</code> or
<code>systemd-homed</code>. Or, you can use a TPM pin to benefit from the security
properties of the TPM, while avoiding completely unattended unlocking.
–<a href="https://wiki.archlinux.org/title/Trusted_Platform_Module">Arch Wiki</a></p>
<p>I am reading that <code>fscrypt</code> is no longer experimental.</p>
<pre><code class="language-nix">security.pam.enableFscrypt = true;
</code></pre>
<pre><code class="language-bash">sudo fscrypt setup --all-users
sudo mv /home/<user> /home/old<user>
sudo mkdir /home/<user>
sudo chown <user>:users /home/<user>
sudo fscrypt encrypt --source pam_passphrase --user <user> --skip-unlock /home/<user>/
</code></pre>
<p>–☝️<a href="https://discourse.nixos.org/t/experienced-with-systemd-homed-or-other-encrypted-home/63516/2">Discourse</a></p>
<p>It is fairly complex as to how TPM2 auto-unlock can improve security in some
ways, it has to do with how Linux distributions fail to authenticate the boot
process past the initrd.Even with encryption and Secure Boot enabled, the initrd
stage often remains unverified, meaning a tampered initrd could be substituted
without detection.</p>
<ul>
<li><a href="https://0pointer.net/blog/brave-new-trusted-boot-world.html">Brave New Trusted Boot World</a></li>
</ul>
<p>TPMs protect secrets by releasing them only if the boot process can be
authenticated through “measurements.” During boot, each component involved
(firmware, bootloader, kernel, etc.) is hashed, and these hashes are extended
into special TPM registers called Platform Configuration Registers (PCRs). These
PCRs hold a cumulative, tamper-evident record of the boot process state.</p>
<p>If any part of the boot sequence changes (even slightly), the PCR values will
differ from the expected, causing the TPM to refuse to release the bound secret
(such as a disk decryption key). This ensures that the system only boots or
unlocks secrets when its software stack is known and trusted, providing strong
protection against tampering or unauthorized modifications. The values aren’t
only protected by these PCRs but encrypted with a “seed key” that’s generated on
the TPM chip itself, and cannot leave the TPM.</p>
<p>Check TPM support:</p>
<pre><code class="language-bash">cat /sys/class/tpm/tpm0/device/description
TPM 2.0 Device
</code></pre>
<p>Check for necessary software dependencies:</p>
<pre><code class="language-bash">systemd-analyze has-tpm2
</code></pre>
<p>Find your encrypted partition with <code>lsblk</code>:</p>
<pre><code class="language-bash">lsblk
</code></pre>
<p>First, you need to use the <code>systemd-cryptenroll</code> command to add a TPM2 key to
your encrypted LUKS partition. This process binds a key slot on your disk to the
state of your TPM2 chip’s PCRs (Platform Configuration Registers).</p>
<pre><code class="language-bash"># This command adds a new key to the LUKS volume, using a key generated by the TPM2 chip.
# It binds the key to PCRs 0,2,7,and 15 ensuring the key is only released if the firmware
# and Secure Boot state of your system is unchanged.
sudo systemd-cryptenroll --tpm2-device=auto --tpm2-pcrs=0+2+7+15 /dev/disk/by-partlabel/luks
</code></pre>
<p>There are quite a few options for the above command, some use the following with
less pcrs and a wipe feature:</p>
<pre><code class="language-bash">sudo systemd-cryptenroll --wipe-slot=tpm2 --tpm2-device=auto --tpm2-pcrs=0+7 /dev/disk/by-partlabel/luks
</code></pre>
<ul>
<li>
<p>Using less pcrs could prevent breakage but reduces security. Check out the PCR
Definitions below and decide if you require additional PCRs or less.</p>
</li>
<li>
<p><code>wipe-slot</code> tells the system to delete any key associated with the TPM2 chip
from the LUKS volume’s keyslot before adding a new one.</p>
</li>
</ul>
<p>You can choose a more complex <code>--tpm2-pcrs</code> for more security but it makes the
configuration more fragile because any legitimate system update altering any
measured component tied to these PCRs will prevent the TPM from releasing the
key and lock you out, unless you re-enroll the key with the updated PCR values.</p>
<ul>
<li>
<p><a href="https://uapi-group.org/specifications/specs/linux_tpm_pcr_registry/">PCR Definitions</a></p>
</li>
<li>
<p><a href="https://0pointer.net/blog/authenticated-boot-and-disk-encryption-on-linux.html">Authenticated Boot and FDE</a>
This article explains the limitations and remedies very well.</p>
</li>
</ul>
<p>That said, I do often see people mention a firmware update breaking their TPM2
auto-unlock functionality. Keep this in mind and have a backup plan. This is
also incompatible with the encrypted impermanence setup shared in this book, the
<code>boot.initrd.postDeviceCommands</code> conflict.</p>
<p>Change <code>YourUser</code> to your username and ensure that <code>cryptroot</code> is the name of
yours, if you followed this books encrypted disko install it should be:</p>
<pre><code class="language-nix"> # Adds your user to the 'tss' group, allowing you to interact with the TPM
users.users.YourUser.extraGroups = [ "tss" ];
# Enables TPM2 services and tools on your system
security.tpm2.enable = true;
# Ensure the necessary kernel modules are in the initrd
boot.initrd.kernelModules = ["tpm_tis"];
# switches the initrd to a systemd-based environment, required for TPM2
boot.initrd.systemd.enable = true;
# ❗ Tell the initrd to use the TPM2 key for the encrypted root
boot.initrd.luks.devices.cryptroot = {
device = "/dev/disk/by-partlabel/luks";
# These options tell systemd-cryptsetup to automatically try to unlock the device
# using the TPM2 key. 'tpm2-measure=yes' ensures the PCRs are verified but only works if you use one disk
crypttabExtraOpts = ["tpm2-device=auto" "tpm2-measure=yes"];
fallbackToPassword = true;
};
environment.systemPackages = [ pkgs.tpm2-tss ];
</code></pre>
<blockquote>
<p>❗ NOTE: <code>cryptroot</code> needs to match what your encrypted partition is named, I
have seen quite a few different names here.</p>
</blockquote>
<p>If you use this, you can’t also use the USB Keyfile or the included impermanence
guide.</p>
</details>
<p><strong>Description</strong></p>
<ul>
<li>
<p><code>/dev/disk/by-partlabel/luks</code> refers to your encrypted partition by its
partition label, which is stable and less likely to change than
<code>/dev/nvme0n1p2</code></p>
</li>
<li>
<p><code>/root/usb-luks.key</code> is the keyfile we generated.</p>
</li>
<li>
<p>You’ll be prompted to enter your existing LUKS passphrase to authorize adding
the new key.</p>
</li>
<li>
<p>Now our LUKS volume will accept both our existing passphrase and the new
keyfile (from the USB stick) for unlocking.</p>
</li>
</ul>
<ol>
<li><strong>Clear Data on USB stick and replace with 0’s</strong></li>
</ol>
<pre><code class="language-bash">lsblk
NAME MAJ:MIN RM SIZE RO TYPE MOUNTPOINTS
sda 8:0 1 239M 0 disk
sdb 8:16 1 1.4M 0 disk /run/media/jr/7CD1-149A # Example USB mount
zram0 253:0 0 7.5G 0 disk [SWAP]
nvme0n1 259:0 0 476.9G 0 disk
├─nvme0n1p1 259:1 0 512M 0 part /boot
└─nvme0n1p2 259:2 0 476.4G 0 part
└─cryptroot 254:0 0 476.4G 0 crypt /persist # Main Btrfs mount
# (other subvolumes are within /persist and bind-mounted by impermanence)
# unplug the device and run lsblk again so your sure
</code></pre>
<ol start="2">
<li>Before wiping you must unmount any mounted partitions:</li>
</ol>
<pre><code class="language-bash">sudo umount /dev/sda1
</code></pre>
<pre><code class="language-bash"># Overwrite with Zeros (fast, sufficient for most uses)
sudo dd if=/dev/zero of=/dev/sda bs=4M status=progress
# Or overwrite with Random Data (More Secure, Slower)
sudo dd if=/dev/urandom of=/dev/sda bs=4M status=progress
# Or for the most secure way run multiple passes of
sudo shred -v -n 3 /dev/sda
</code></pre>
<ol start="3">
<li>Create a New Partition and Format (Optional)</li>
</ol>
<pre><code class="language-bash">sudo fdisk /dev/sda
</code></pre>
<ol>
<li>
<p>Press <code>o</code> to create a new empty DOS partition table (if you are creating
partitions on a fresh disk or want to wipe existing partitions and start
over). Be very careful with this step as it will erase all existing
partition information on the disk.</p>
</li>
<li>
<p>Press <code>n</code> to create a new partition.</p>
</li>
</ol>
<ul>
<li>
<p>You will then be prompted for the partition type:</p>
<ul>
<li>
<p><code>p</code> for a primary partition (you can have up to 4 primary partitions)</p>
</li>
<li>
<p><code>e</code> for an extended partition (which can contain logical partitions)</p>
</li>
</ul>
</li>
<li>
<p>Next, you’ll be asked for the partition number (e.g., 1, 2, 3, 4).</p>
</li>
<li>
<p>Then, you’ll be asked for the first sector (press Enter to accept the default,
which is usually the first available sector after the previous partition or
the beginning of the disk).</p>
</li>
<li>
<p>Finally, you’ll be asked for the last sector or size (you can specify a size
like +10G for 10 Gigabytes, +512M for 512 Megabytes, or press Enter to use the
rest of the available space).</p>
</li>
</ul>
<ol start="3">
<li>Press <code>w</code> to write the changes to the partition table and exit fdisk.</li>
</ol>
<p>After pressing <code>w</code>, the kernel needs to be aware of the new partition table.
Sometimes this happens automatically, but if you encounter issues, a reboot or a
command like <code>partprobe</code> (if available and needed) can help.</p>
<p>Formats as FAT32:</p>
<pre><code class="language-bash">sudo mkfs.vfat /dev/sda1
# or as ext4
sudo mkfs.ext4 /dev/sda1
</code></pre>
<p>I chose <code>vfat</code> so I ran <code>sudo mkfs.vfat /dev/sda1</code>. In my case this changed the
device path to <code>/run/media/jr/7CD1-149A</code> so it’s important to find your own UUID
with the following command:</p>
<pre><code class="language-bash">sudo blkid /dev/sda1
/dev/sda1: SEC_TYPE="msdos" UUID="B7B4-863B" BLOCK_SIZE="512" TYPE="vfat" PARTUUID="7d1f9d7f-01"
</code></pre>
<ul>
<li>
<p>As you can see the above UUID is <code>"B7B4-863B"</code></p>
</li>
<li>
<p>Remove and re-insert the USB stick, this ensures the system recognizes the new
partition and filesystem.</p>
</li>
</ul>
<ol start="4">
<li>Copy the keyfile to your USB Stick</li>
</ol>
<pre><code class="language-bash">sudo cp /root/usb-luks.key /run/media/jr/B7B4-863B/
sync
</code></pre>
<ol start="5">
<li>Update your NixOS Configuration</li>
</ol>
<p>Note the output of <code>blkid /dev/sda1</code> and if you have a backup device list that
also:</p>
<p>The following is from the wiki edited for my setup, it was created by Tzanko
Matev:</p>
<pre><code class="language-nix">let
PRIMARYUSBID = "B7B4-863B";
BACKUPUSBID = "Ventoy";
in {
boot.initrd.kernelModules = [
"uas"
"usbcore"
"usb_storage"
"vfat"
"nls_cp437"
"nls_iso8859_1"
];
boot.initrd.postDeviceCommands = lib.mkBefore ''
mkdir -p /key
sleep 2
mount -n -t vfat -o ro $(findfs UUID=${PRIMARYUSBID}) /key || \
mount -n -t vfat -o ro $(findfs UUID=${BACKUPUSBID}) /key || echo "No USB key found"
'';
boot.initrd.luks.devices.cryptroot = {
device = "/dev/disk/by-partlabel/luks";
keyFile = "/key/usb-luks.key";
fallbackToPassword = true;
allowDiscards = true;
preLVM = false; # Crucial!
};
}
</code></pre>
<p>If you have issues or just want to remove the key take note of the path used to
add it so you don’t have to enter the whole key:</p>
<pre><code class="language-bash">sudo cryptsetup luksRemoveKey /dev/disk/by-partlabel/luks --key-file /root/usb-luks.key
</code></pre>
<ol start="6">
<li>Securely Remove the Keyfile from Your System:</li>
</ol>
<pre><code class="language-bash">sudo shred --remove --zero /root/usb-luks.key
</code></pre>
<h2>Instructions for Using a USB Stick with Existing Data</h2>
<ol>
<li>Generate the Keyfile</li>
</ol>
<pre><code class="language-bash">sudo dd if=/dev/urandom of=/root/usb-luks.key bs=4096 count=1
</code></pre>
<ol start="2">
<li>Add the Keyfile to your LUKS Volume</li>
</ol>
<pre><code class="language-bash">sudo cryptsetup luksAddKey /dev/disk/by-partlabel/luks /root/usb-luks.key
</code></pre>
<p>(enter your existing passphrase when prompted)</p>
<ol start="3">
<li>Copy the Keyfile to the USB Stick</li>
</ol>
<ul>
<li>
<p>Plug in the USB Stick and note its mount point
(e.g.,<code>/run/media/$USER/YourLabel</code>)</p>
</li>
<li>
<p>Copy the keyfile:</p>
</li>
</ul>
<pre><code class="language-bash">sudo cp /root/usb-luks.key /run/media/$USER/YourLabel/
sync
</code></pre>
<ul>
<li>
<p>You run the above as 2 commands, the second being <code>sync</code>.</p>
</li>
<li>
<p>You can rename it if you wish (e.g., <code>luks.key</code>)</p>
</li>
</ul>
<ol start="4">
<li>Securely Delete the Local Keyfile</li>
</ol>
<pre><code class="language-bash">sudo shred --remove --zero /root/usb-luks.key
</code></pre>
<ul>
<li>You need to ensure the keyfile is accessible in the initrd. Since automounting
(like <code>/run/media/...</code>) does not happen in <code>initrd</code>, you must manually mount
the USB in the <code>initrd</code> using its <code>UUID</code> or label.</li>
</ul>
<p>Find the USB Partition UUID:</p>
<pre><code class="language-bash">lsblk -o NAME,UUID
# or
blkid /dev/sda1
</code></pre>
<p>Suppose the UUID is <code>B7B4-863B</code></p>
<p>Add to your <code>configuration.nix</code>:</p>
<pre><code class="language-nix">boot.initrd.kernelModules = [ "usb_storage" "vfat" "nls_cp437" "nls_iso8859_1" ];
boot.initrd.postDeviceCommands = lib.mkBefore ''
mkdir -p /key
sleep 1
mount -n -t vfat -o ro $(findfs UUID=B7B4-863B) /key || echo "USB not found"
'';
boot.initrd.luks.devices.cryptroot = {
device = "/dev/disk/by-partlabel/luks";
keyFile = "/key/usb-luks.key"; # or whatever you named it
fallbackToPassword = true;
allowDiscards = true;
};
</code></pre>
Encrypted BTRFS Impermanencehttps://saylesss88.github.io/installation/enc/encrypted_impermanence.html2025-11-22T00:00:00+00:00saylesss87@proton.me (saylesss88)<h1>Encrypted Impermanence</h1>
<details>
<summary> ✔️ Click to Expand Table of Contents</summary>
<!-- toc -->
</details>
<blockquote>
<p>❗ Important Note: This guide details a setup involving encrypted partitions
and impermanent NixOS. While powerful, such configurations require careful
attention to detail. Incorrect steps, especially concerning encryption keys or
persistent data paths, can lead to <strong>permanent data loss</strong>. Please read all
instructions thoroughly before proceeding and consider backing up any critical
data beforehand. This has only been tested with the disk layout described in
<a href="https://saylesss88.github.io/installation/encrypted_manual.html">Encrypted Setups</a></p>
</blockquote>
<p>As a system operates, it gradually accumulates state on its root partition. This
state is stored in various directories such as <code>/etc</code> and <code>/var</code>, capturing all
the configuration changes, logs, and other modifications—whether they’re
well-documented or the result of ad-hoc adjustments made while setting up and
running services.</p>
<p><strong>Impermanence</strong>,in the context of operating systems, refers to a setup where
the majority of the system’s root filesystem (<code>/</code>) is reset to a pristine state
on every reboot. This means any changes made to the system (e.g., installing new
packages, modifying system files outside of configuration management, creating
temporary files) are discarded upon shutdown or reboot.</p>
<p>Having an impermanent root and <code>/tmp</code> has some security benefits as well. By
reducing your persistent footprint you reduce your chance of leaving behind
sensitive activity or data. Since Nix can boot with only <code>/nix</code> and <code>/boot</code>,
experienced users familiar with “stateless” systems can take advantage of this
smaller attack surface.</p>
<p>Although this setup does not use <code>/tmp</code> as the root filesystem, the root itself
is restored to its original state upon each reboot, as it was at installation.
However, by configuring <code>/tmp</code> to reside in RAM, you ensure that temporary files
including sensitive data like passwords are stored only in volatile memory and
are automatically cleared on shutdown or reboot. This significantly enhances the
security of temporary data by preventing it from ever being written to disk.</p>
<h3>Getting Started</h3>
<ol>
<li>Add impermanence to your <code>flake.nix</code>. You will change the <code>hostname</code> in the
flake to match your <code>networking.hostName</code>.</li>
</ol>
<pre><code class="language-nix"># flake.nix
{
description = "NixOS configuration";
inputs = {
nixpkgs.url = "github:nixos/nixpkgs/nixos-unstable";
disko.url = "github:nix-community/disko/latest";
disko.inputs.nixpkgs.follows = "nixpkgs";
impermanence.url = "github:nix-community/impermanence";
};
outputs = inputs@{ nixpkgs, ... }: {
nixosConfigurations = {
hostname = nixpkgs.lib.nixosSystem {
system = "x86_64-linux";
modules = [
./configuration.nix
inputs.disko.nixosModules.disko
inputs.impermanence.nixosModules.impermanence
];
};
};
};
}
</code></pre>
<ol start="2">
<li>Discover where your root subvolume is located with <code>findmnt</code>:</li>
</ol>
<p>If you followed the
<a href="https://saylesss88.github.io/installation/encrypted_manual.html">Encrypted Setups</a>
guide, your encrypted subvolume should be located at:
<code>/dev/mapper/cryptroot /mnt</code></p>
<ul>
<li>Your encrypted Btrfs partition, once unlocked by LUKS, will be available at
<code>/dev/mapper/cryptroot</code> as configured here in the <code>disk-config.nix</code>:</li>
</ul>
<pre><code class="language-nix"># disk-config2.nix
# ... snip ...
luks = {
size = "100%";
label = "luks";
content = {
type = "luks";
name = "cryptroot";
content = {
# ... snip ...
</code></pre>
<p>Double check that the paths exist:</p>
<pre><code class="language-bash">cd /dev/mapper/crypt<TAB> # autocomplete should fill out /dev/mapper/cryptroot
</code></pre>
<ol start="3">
<li>Create an <code>impermanence.nix</code>:</li>
</ol>
<p>Now, create a new file named <code>impermanence.nix</code> in your configuration directory
(i.e. your flake directory). This file will contain all the specific settings
for your impermanent setup, including BTRFS subvolume management and persistent
data locations. Since this file is right next to your <code>configuration.nix</code>,
you’ll just add an <code>imports = [ ./impermanence.nix ]</code> to your
<code>configuration.nix</code> apply it to your configuration.</p>
<pre><code class="language-nix">{
config,
lib,
...
}: {
boot.initrd.postDeviceCommands = lib.mkAfter ''
echo "Rollback running" > /mnt/rollback.log
mkdir -p /mnt
mount -t btrfs /dev/mapper/cryptroot /mnt
# Recursively delete all nested subvolumes inside /mnt/root
btrfs subvolume list -o /mnt/root | cut -f9 -d' ' | while read subvolume; do
echo "Deleting /$subvolume subvolume..." >> /mnt/rollback.log
btrfs subvolume delete "/mnt/$subvolume"
done
echo "Deleting /root subvolume..." >> /mnt/rollback.log
btrfs subvolume delete /mnt/root
echo "Restoring blank /root subvolume..." >> /mnt/rollback.log
btrfs subvolume snapshot /mnt/root-blank /mnt/root
umount /mnt
'';
environment.persistence."/persist" = {
directories = [
"/etc"
"/var/spool"
"/srv"
"/etc/NetworkManager/system-connections"
"/var/lib/bluetooth"
];
files = [
# "/etc/machine-id"
# Add more files you want to persist
];
};
# optional quality of life setting
security.sudo.extraConfig = ''
Defaults lecture = never
'';
}
</code></pre>
<ul>
<li><code>/mnt/rollback.log</code>: this log will be available during the boot process for
debugging if the rollback fails, but won’t persist.</li>
</ul>
<p>With the above impermanence script, the btrfs subvolumes are deleted recursively
and replaced with the <code>root-blank</code> snapshot we took during the install.</p>
<p>I have commented out <code>"/etc/machine-id"</code> because we already copied over all of
the files to their persistent location and the above setting would work once and
then cause a conflict.</p>
<h2>configuration.nix changes</h2>
<pre><code class="language-nix"># configuration.nix
boot.initrd.luks.devices = {
cryptroot = {
device = "/dev/disk/by-partlabel/luks";
allowDiscards = true;
preLVM = true;
};
};
</code></pre>
<ul>
<li>This defines how your system’s initial ramdisk (<code>initrd</code>) should handle a
specific encrypted disk during the boot process. It helps with timing and is a
more robust way of telling Nix that we are using an encrypted disk.</li>
</ul>
<p>The following is optional to enable <code>autoScrub</code> for btrfs, the wiki shows
<code>interval = "monthly";</code> FYI.</p>
<pre><code class="language-nix"># configuration.nix
services.btrfs.autoScrub = {
enable = true;
interval = "weekly";
fileSystems = ["/"];
};
</code></pre>
<ul>
<li>Remember to ensure that your <code>hostname</code> in your <code>configuration.nix</code> matches
the <code>hostname</code> in your <code>flake.nix</code>.</li>
</ul>
<h3>Applying Your Impermanence Configuration</h3>
<p>Once you have completed all the steps and created or modified the necessary
files (<code>flake.nix</code>, <code>impermanence.nix</code>), you need to apply these changes to your
NixOS system.</p>
<ol>
<li>Navigate to your NixOS configuration directory (where your <code>flake.nix</code> is
located).</li>
</ol>
<pre><code class="language-bash">cd /path/to/your/flake
</code></pre>
<ol start="2">
<li>Rebuild and Switch: Execute the <code>nixos-rebuild switch</code> command. This command
will:</li>
</ol>
<ul>
<li>
<p>Evaluate your <code>flake.nix</code> and the modules it imports (including your new
<code>impermanence.nix</code>).</p>
</li>
<li>
<p>Build a new NixOS system closure based on your updated configuration.</p>
</li>
<li>
<p>Activate the new system configuration, making it the current running system.</p>
</li>
</ul>
<pre><code class="language-bash">sudo nixos-rebuild switch --flake .#hostname # Replace 'hostname' with your actual system hostname
</code></pre>
<ol start="3">
<li>Perform an Impermanence Test (Before Reboot):</li>
</ol>
<ul>
<li>Before you reboot, create a temporary directory and file in a non-persistent
location. Since you haven’t explicitly added <code>/imperm_test</code> to your
<code>environment.persistence."/persist"</code> directories, this file should not survive
a reboot.</li>
</ul>
<pre><code class="language-bash">mkdir /imperm_test
echo "This should be Gone after Reboot" | sudo tee /imperm_test/testfile
ls -l /imperm_test/testfile # Verify the file exists
cat /imperm_test/testfile # Verify content
</code></pre>
<ol start="4">
<li>Reboot Your System: For the impermanence setup to take full effect and for
your root filesystem to be reset for the first time, you must reboot your
machine.</li>
</ol>
<pre><code class="language-bash">sudo reboot
</code></pre>
<ol start="5">
<li>Verify Impermanence (After Reboot):</li>
</ol>
<ul>
<li>After the system has rebooted, check if the test directory and file still
exist:</li>
</ul>
<pre><code class="language-bash">ls -l /imperm_test/testfile
</code></pre>
<p>You should see an output like <code>ls: cannot access '/imperm_test/testfile'</code>: No
such file or directory. This confirms that the <code>/imperm_test</code> directory and its
contents were indeed ephemeral and were removed during the reboot process,
indicating your impermanence setup is working correctly!</p>
<p>Your system should now come up with a fresh root filesystem, and only the data
specified in your <code>environment.persistence."/persist"</code> configuration will be
persistent.</p>
Sops-Nixhttps://saylesss88.github.io/installation/enc/sops-nix.html2025-11-22T00:00:00+00:00saylesss87@proton.me (saylesss88)<h1>Sops-Nix encrypted secrets</h1>
<details>
<summary> Click to Expand Table of Contents</summary>
<!-- toc -->
</details>
<p><a href="https://github.com/getsops/sops?ref=blog.gitguardian.com">SOPS</a>, short for
<strong>S</strong>ecrets<strong>OP</strong>eration<strong>S</strong>, is an editor of encrypted files that supports
quite a few BINARY formats and encrypts with AWS KMS, GCP KMS, Azure Key Vault,
age, and PGP.</p>
<p>Managing secrets—like API keys, SSH deploy keys, and password hashes is a
critical part of system configuration, but it’s also one of the trickiest to do
securely and reproducibly. Traditionally, secrets might be stored in ad hoc
locations, referenced by absolute paths, or managed manually outside of version
control. This approach makes it hard to share, rebuild, or audit your
configuration, and increases the risk of accidental leaks or inconsistencies
between systems.</p>
<p><code>sops-nix</code> solves these problems by integrating Mozilla SOPS directly into your
NixOS configuration. Instead of relying on hardcoded file paths or copying
secrets around, you declare your secrets in your Nix code, encrypt them with
strong keys, and let <code>sops-nix</code> handle decryption and placement at activation
time.</p>
<p>Encryption with strong keys, as used by sops-nix, makes brute force attacks
computationally unfeasible with current technology—the time and resources
required to try every possible key would be astronomically high. However, this
protection relies on using strong, secret keys and good security practices;
advances in technology or poor key management can weaken this defense.</p>
<blockquote>
<p>❗ <strong>CRITICAL SECURITY NOTE:</strong> While the encryption itself is robust, this
protection fundamentally relies on using <strong>strong, secret keys</strong> and
<strong>diligent security practices</strong>. If your PGP passphrase is weak, your Age
private key is easily guessable, or the cleartext secret itself is very short
and has low entropy (e.g., “12345”, “true”, “admin”), an attacker might be
able to compromise your secrets regardless of the encryption.</p>
</blockquote>
<ol>
<li>Add sops to your <code>flake.nix</code>:</li>
</ol>
<pre><code class="language-nix">{
inputs.sops-nix.url = "github:Mic92/sops-nix";
inputs.sops-nix.inputs.nixpkgs.follows = "nixpkgs";
outputs = { self, nixpkgs, sops-nix }: {
# change `yourhostname` to your actual hostname
nixosConfigurations.yourhostname = nixpkgs.lib.nixosSystem {
# customize to your system
system = "x86_64-linux";
modules = [
./configuration.nix
sops-nix.nixosModules.sops
];
};
};
}
</code></pre>
<ol start="2">
<li>Add <code>sops</code> and <code>age</code> to your <code>environment.systemPackages</code>:</li>
</ol>
<pre><code class="language-nix">environment.systemPackages = [
pkgs.sops
pkgs.age
];
</code></pre>
<ol start="3">
<li>Generate a key (This is your <strong>private key</strong> and <strong>MUST NEVER BE COMMITTED TO
GIT OR SHARED</strong>):</li>
</ol>
<pre><code class="language-bash">mkdir -p ~/.config/sops/age
age-keygen -o ~/.config/sops/age/keys.txt
</code></pre>
<p>To get the Public Keys Value, run the following command:</p>
<pre><code class="language-bash">age-keygen -y ~/.config/sops/age/keys.txt
age12zlz6lvcdk6eqaewfylg35w0syh58sm7gh53q5vvn7hd7c6nngyseftjxl
</code></pre>
<p>Copy the <code>age</code> value it gives you back.</p>
<ol start="4">
<li>Create a <code>.sops.yaml</code> in the same directory as your <code>flake.nix</code>:</li>
</ol>
<pre><code class="language-yaml"># .sops.yaml
keys:
# Your personal age public key (from age-keygen -y ~/.config/sops/age/keys.txt)
- &personal_age_key age12zlz6lvcdk6eqaewfylg35w0syh58sm7gh53q5vvn7hd7c6nngyseftjxl
# You can also use PGP keys if you prefer, but age is often simpler
# - &personal_pgp_key 0xDEADBEEFCAFE0123
creation_rules:
# This rule applies to any file named 'secrets.yaml' directly in the 'secrets/' directory
# or 'secrets/github-deploy-key.yaml' etc.
- path_regex: "secrets/.*\\.yaml$"
key_groups:
- age:
- *personal_age_key
# Add host keys for decryption on the target system
# sops-nix will automatically pick up the system's SSH host keys
# as decryption keys if enabled in your NixOS config.
# So you typically don't list them explicitly here unless you
# want to restrict it to specific fingerprints, which is rare.
# This part ensures your *personal* key can decrypt it.
</code></pre>
<p>Save it and move on, this file and <code>sops.nix</code> are safe to version control.</p>
<ol start="5">
<li>sops-nix’s automatic decryption feature using system SSH host keys only works
with ed25519 host keys for deriving Age decryption keys. Therefore, for
system decryption, ensure your using ed25519 not rsa keys:</li>
</ol>
<pre><code class="language-bash">ssh-keygen -t ed25519 -C "your_email@example.com"
# for multiple keys run something like
ssh-keygen -t ed25519 -f ~/nix-book-deploy-key -C "deploy-key-nix-book-repo"
</code></pre>
<ol start="6">
<li>Copy the <strong>PRIVATE</strong> key for each and add them to your secrets directory:</li>
</ol>
<p>While in your flake directory:</p>
<pre><code class="language-bash">mkdir secrets
sops secrets/github-deploy-key.yaml # For your github ssh key
</code></pre>
<p>When you call a <code>sops</code> command, it will handle the encryption/decryption
transparently and open the cleartext file in an editor.</p>
<p>Editing will happen in the editor that <code>$SOPS_EDITOR</code> or <code>$EDITOR</code> is set to,
sops will wait for the editor to exit, and then try to reencrypt the file.</p>
<p>The above command will open a default sops <code>github-deploy-key.yaml</code> in your
<code>$EDITOR</code>:</p>
<p>Erase the default <code>sops</code> filler and type <code>github_deploy_key_ed25519: |</code>, move
your cursor 1 line down and type <code>:r ~/.ssh/id_ed25519</code> to read the private key
into the file and repeat as needed.</p>
<pre><code class="language-yaml">github_deploy_key_ed25519: |
-----BEGIN OPENSSH PRIVATE KEY-----
...
-----END OPENSSH PRIVATE KEY-----
github_deploy_key_ed25519_nix-book: |
-----BEGIN OPENSSH PRIVATE KEY-----
...
-----END OPENSSH PRIVATE KEY-----
</code></pre>
<p>The <code>-----BEGIN</code> and the rest of the private key <strong>must</strong> be indented 2 spaces</p>
<p>Ensure sops can decrypt it:</p>
<pre><code class="language-bash">sops -d secrets/github-deploy-key.yaml
</code></pre>
<blockquote>
<p>❗ WARNING: Only ever enter your private keys through the <code>sops</code> command. If
you forget and paste them in without the <code>sops</code> command then run <code>git add</code> at
any point, your git history will have contained an unencrypted secret which is
a nono. Always use the <code>sops</code> command when dealing with files in the <code>secrets</code>
directory, save the file and inspect that it is encrypted on save. If not
something went wrong with the <code>sops</code> process, <strong>do not add it to Git</strong>. If you
do, you will be required to rewrite your entire history which can be bad if
you’re collaborating with others. <code>git-filter-repo</code> is one such solution that
rewrites your history. Just keep this in mind. This happens because Git has a
protection that stops you from doing stupid things.</p>
</blockquote>
<p>Generate an encrypted password hash with:</p>
<pre><code class="language-bash">mkpasswd --method=yescrypt > /tmp/password-hash.txt
# Enter your chosen password and copy the encrypted hash it gives you back
</code></pre>
<pre><code class="language-bash">sops secrets/password-hash.yaml # For your `hashedPasswordFile`
</code></pre>
<p>The above command will open your <code>$EDITOR</code> with the file <code>password-hash.yaml</code>,
add the following content to it. Replace <code>PasteEncryptedHashHere</code> with the
output of the <code>mkpasswd</code> command above:</p>
<p>Delete the default <code>sops</code> filler, type <code>password_hash:</code> and leave your cursor
after the <code>:</code> and type <code>:r /tmp/password-hash.txt</code></p>
<pre><code class="language-yaml">password_hash: PasteEncryptedHashHere
</code></pre>
<p>Ensure sops can decrypt it:</p>
<pre><code class="language-bash">sops -d secrets/password-hash.yaml
</code></pre>
<ol start="7">
<li>Create a <code>sops.nix</code> and import it or add this directly to your
<code>configuration.nix</code>:</li>
</ol>
<p>My <code>sops.nix</code> is located at <code>~/flake/hosts/hostname/sops.nix</code> and the secrets
directory is located at <code>~/flake/secrets</code> so the path from <code>sops.nix</code> to
<code>secrets/pasword-hash.yaml</code> would be <code>../../secrets/password-hash.yaml</code></p>
<p>Another step you can take is to copy your key to a persistent location,
preparing for impermanence:</p>
<pre><code class="language-bash">sudo mkdir /persist/sops/age
sudo cp ~/.config/sops/age/keys.txt /persist/sops/age/keys.txt
</code></pre>
<p>Then you would change the <code>age.keyFile = "/persist/sops/age/keys.txt"</code> to match
this location below.</p>
<pre><code class="language-nix"># ~/flake/hosts/magic/sops.nix # magic is my hostname
# hosts/magic/ is also where my configuration.nix is
{...}: {
sops = {
defaultSopsFile = ../../.sops.yaml; # Or the correct path to your .sops.yaml
# Don't mix sshKeyPaths and keyFile
age.sshKeyPaths = [];
age.keyFile = "/persist/sops/age/keys.txt";
secrets = {
"password_hash" = {
sopsFile = ../../secrets/password-hash.yaml; # <-- Points to your password hash file
owner = "root";
group = "root";
mode = "0400";
neededForUsers = true;
};
"github_deploy_key_ed25519_nix-book" = {
sopsFile = ../../secrets/github-deploy-key.yaml;
key = "github_deploy_key_ed25519_nix-book";
owner = "root";
group = "root";
mode = "0400";
};
"github_deploy_key_ed25519" = {
sopsFile = ../../secrets/github-deploy-key.yaml;
key = "github_deploy_key_ed25519";
owner = "root";
group = "root";
mode = "0400";
};
};
};
}
</code></pre>
<p>Import <code>sops.nix</code> into your <code>configuration.nix</code> or equivalent:</p>
<pre><code class="language-nix"># configuration.nix
imports = [
./sops.nix # Assuming sops.nix is in the same directory as configuration.nix, adjust path as needed
# ... other imports
];
</code></pre>
<blockquote>
<p>❗ NOTE: You may see in the sops quickstart guide that if you’re using
impermanence, the key used for secret decryption (<code>sops.age.keyFile</code>) must be
in a persistent directory, loaded early enough during the boot process. If you
are using the btrfs subvolume layout you don’t need to worry about this
because your home will be on its own partition when only the root partition is
wiped on reboot. Adding <code>neededForUsers = true;</code> tells <code>sops-nix</code> to decrypt
and make that secret available earlier in the boot process specifically,
before user and group accounts are created.</p>
</blockquote>
<p>You typically use <code>age.sshKeyPaths</code> for <strong>system-level secrets</strong> with a
persistent SSH host key</p>
<p>For <strong>user-level secrets</strong>, use <code>age.keyFile</code> pointing to your Age private key,
stored in a safe persistent location.</p>
<p>For reproducibility, keep your key files in a persistent, predictable path and
document which keys are used for which secrets in your <code>.sops.yaml</code>.</p>
<p>If you don’t need both <code>age.keyFile</code> and <code>age.sshKeyPaths</code> it can reduce
complexity to use one or the other. Although most people may choose one, it’s
not bad to use both it just adds complexity.</p>
<p>And finally use the password-hash for your <code>hashedPasswordFile</code> for your user,
my user is <code>jr</code> so I added this:</p>
<pre><code class="language-nix"># ... snip ...
users.users = {
# ${username} = {
jr = {
homeMode = "755";
isNormalUser = true;
# description = userVars.gitUsername;
hashedPasswordFile = config.sops.secrets.password_hash.path;
# ...snip...
</code></pre>
<p>By integrating SOPS with NixOS through <code>sops-nix</code>, you gain a modern, secure,
and reproducible way to manage sensitive secrets. Unlike traditional approaches
where secrets are often scattered in ad hoc locations, referenced by absolute
paths, or managed outside version control, <code>sops-nix</code> keeps your secrets
encrypted, declarative, and version-control friendly.</p>
Readme1https://saylesss88.github.io/nix/index.html2025-11-22T00:00:00+00:00saylesss87@proton.me (saylesss88)<h1>Hardening README</h1>
<details>
<summary> ✔️ Click to Expand Table of Contents</summary>
<!-- toc -->
</details>
<p>📌 <strong>How to Use This Guide</strong></p>
<p><strong>Read warnings</strong>: Advanced hardening can break compatibility or cause data
loss! Pause and research before enabling anything not listed above unless you
understand the consequences.</p>
<p><strong>Hardening NixOS</strong>:</p>
<p>🔷 Start Here:</p>
<ul>
<li>
<p><a href="https://saylesss88.github.io/nix/hardening_NixOS.html">Hardening NixOS</a></p>
</li>
<li>
<p><a href="https://saylesss88.github.io/nix/hardening_networking.html">Hardening Networking</a></p>
</li>
</ul>
<hr />
<p><strong>Additional security/hardening topics</strong></p>
<ul>
<li>
<p><a href="https://saylesss88.github.io/nix/browsing_security.html">Browser/Browsing Security/Privacy</a></p>
</li>
<li>
<p><a href="https://saylesss88.github.io/nix/gpg-agent.html">GnuPG gpg-agent</a></p>
</li>
<li>
<p><a href="https://saylesss88.github.io/nix/whonix_kvm.html">Whonix KVM on NixOS</a></p>
</li>
<li>
<p><a href="https://saylesss88.github.io/nix/kvm.html">Running NixOS in a secureblue VM</a></p>
</li>
</ul>
<h2>Getting Started</h2>
<p>There is a lot covered in this guide which can get overwhelming when trying to
decide what is worth implementing. Here, I will list some common recommendations
that most users should follow to harden their stance.</p>
<blockquote>
<p>“The major problem with current systems is their inability to provide
effective isolation between various programs running on one machine. E.g. if
the user’s Web browser gets compromised (due to a bug exploited by a malicious
web site), the OS is usually unable to protect other user’s applications and
data from also being compromised.”–Qubes arch-spec</p>
</blockquote>
<h2>Threat Modeling</h2>
<p>You should always start by conducting a personal threat assesment to identify
potential threats and vulnerabilities that you need to develop strategies to
defend against.</p>
<p>Threat modeling in computing involves evaluating the security risks to your
computer or network. It helps uncover possible threats and weaknesses so you can
create plans to safeguard your systems and data effectively. By examining
various attack scenarios, you can anticipate potential cyber threats and better
protect your digital resources.</p>
<p>It’s not possible to protect yourself against every attack(er), focus on the
most probable threats to your specific situation.</p>
<ul>
<li>
<p><a href="https://ssd.eff.org/playlist/want-security-starter-pack">EFF Security Starter Pack</a></p>
</li>
<li>
<p><a href="https://ssd.eff.org/module/your-security-plan">EFF Your Security Plan</a></p>
</li>
<li>
<p><a href="https://www.kicksecure.com/wiki/Threat_Modeling">Kicksecure Computer Security Threat Modeling</a></p>
</li>
</ul>
<h3>Baseline Hardening</h3>
<p>Before diving into advanced or specialized hardening, apply these baseline
security measures suitable for all NixOS users. These settings help protect your
system with minimal risk of breaking workflows or causing admin headaches.</p>
<p>There is something to be said about the window manager you use. GNOME, KDE
Plasma, and Sway secure privileged Wayland protocols like screencopy. This means
that on environments outside of GNOME, KDE, and Sway, applications can access
screen content of the entire desktop. This implicitly includes the content of
other applications. It’s primarily for this reason that Silverblue, Kinoite, and
Sericea images are recommended. COSMIC has plans to fix this.
–<a href="https://secureblue.dev/images">secureblue Images</a></p>
<p>Secureblue recommends disabling Xwayland and finding alternatives for those apps
as well as disabling <code>xdg-desktop-portal-wlr</code>, this is because the wlroots
desktop portal reintroduces the screencopy vulnerability.</p>
<ul>
<li>
<p>Use Disk Encryption (LUKS) to protect your data at rest.</p>
</li>
<li>
<p>Keep your system up to date (update regularly).</p>
</li>
<li>
<p>Use strong, unique passwords. To generate one from the command-line, there is
<code>pkgs.diceware</code>. Generate a password with: <code>diceware -n 12 -w en_eff</code>, add
spaces between the words for higher entropy.</p>
<ul>
<li><a href="https://www.kicksecure.com/wiki/Passwords#Password_Generation">Kicksecure Password_Generation</a></li>
</ul>
</li>
<li>
<p>Avoid reusing passwords, use a password manager.</p>
</li>
<li>
<p>Avoid storing files directly in the root home folder (i.e., <code>/home/user</code>),
create sub-folders instead.(i.e., Instead of creating <code>~/notes.txt</code>, create
<code>~/my-notes/notes.txt</code> or <code>~/Documents/notes.txt</code>).</p>
<ul>
<li>
<p>If you are able to implement a Mandatory Access Control framework, there are
more sub-folders that should be avoided such as <code>~/Downloads</code>. Another
reason to use non-default sub-dirs is to avoid typos deleting important
files.</p>
</li>
<li>
<p>Home-Manager has an option <code>xdg.userDirs.enable</code></p>
</li>
</ul>
</li>
</ul>
<pre><code class="language-nix"># home.nix or equivalent
{
xdg.userDirs.enable = true;
xdg.userDirs.createDirectories = true;
# Optionally create non-default sub-dirs
# xdg.userDirs.documents = "/home/jr/my-documents";
# xdg.userDirs.download = "/home/jr/my-downloads";
}
</code></pre>
<ul>
<li>
<p>The XDG Base Directory Specification defines a consistent way for apps and
desktops to store and find files. It helps prevent “dotfile clutter” by
directing application files into clear, organized locations.</p>
</li>
<li>
<p>Only enable what you use, and actively disable what’s no longer in use.</p>
</li>
<li>
<p>Enable at least a basic firewall, a more complex firewall example that
utilizes nftables is shared in the
<a href="https://saylesss88.github.io/nix/hardening_networking.html">Hardening Networking Chapter</a></p>
</li>
</ul>
<p>Although the firewall is enabled by default on NixOS, let’s be explicit about
it, add the following to your <code>configuration.nix</code> or equivalent:</p>
<pre><code class="language-nix"># configuration.nix
# this denies incoming connections but allows outgoing and established connections
networking.firewall.enable = true;
</code></pre>
<p>Many services provide an option to open the required firewall ports
automatically. For example:</p>
<pre><code class="language-nix">services.tor.openFirewall = true;
</code></pre>
<p>This prevents you from having to manually open ports</p>
<p><strong>Audit and remove local user accounts that are no longer needed</strong>: Regularly
review and remove unused or outdated accounts to reduce your system’s attack
surface, improve compliance, and ensure only authorized users have access. The
following setting ensures that user (and group) management is fully declarative:</p>
<pre><code class="language-nix"># configuration.nix
# All users must be declared
users.mutableUsers = false;
</code></pre>
<p>With <code>users.mutableUsers = false;</code>, all non-declaratively managed (imperative)
user management including creation, modification, or password changes will fail
or be reset on rebuild. User and group definitions become entirely controlled by
your system configuration for maximum reproducibility and security. If you need
to add, remove, or modify users, you must do so in your <code>configuration.nix</code> and
rebuild the system.</p>
<p>Don’t log in as <code>root</code>, it’s unnecessary.</p>
<p>Commands that require <code>root</code> permissions should be run individually using <code>sudo</code>
in all cases. Avoid logging in as <code>root</code> & using <code>sudo su</code>.</p>
<p>Never run GUI applications as <code>root</code>. If there is a legitimate reason for doing
this, use <code>lxsudo</code> instead.</p>
<hr />
<blockquote>
<p>NOTE: There is mention of making
<a href="https://github.com/nikstur/userborn">userborn</a> the default for NixOS in the
future. It can be more secure by prohibiting UID/GID re-use and giving
warnings about insecure password hashing schemes.</p>
</blockquote>
<p>I have personally had nothing but problems with <code>userborn</code> and find the docs
extremely lacking, you need to read the source code to figure anything out which
is ridiculous. I don’t personally use this but if you figure it out, more power
to ya.</p>
<p>To enable <code>userborn</code>, just add the following to your <code>configuration.nix</code> or
equivalent:</p>
<pre><code class="language-nix"># users.nix
{pkgs,...}:{
services.userborn = {
enable = true;
# Only needed if `/etc` is immutable
# passwordFilesLocation = "/var/lib/nixos/userborn"
};
users.users = {
"newuser" = {
homeMode = "755";
uid = 1000;
isNormalUser = true;
description = "New user account";
extraGroups = [ "networkmanager" "wheel" "libvirtd" ];
shell = pkgs.bash;
ignoreShellProgramCheck = true;
packages = with pkgs; [];
};
};
}
</code></pre>
<p>With <code>userborn</code>, you configure your users as you normally would declaratively
with NixOS with <code>users.users</code>, change <code>"newuser"</code> to your desired username.</p>
<p>Explicitly setting <code>uid = 1000;</code> is a best practice for compatibility and
predictability.</p>
<hr />
<p><strong>Only install, enable, and run what is needed</strong>: Disable or uninstall
unnecessary software and services to minimize potential vulnerabilities. Take
advantage of NixOS’s easy package management and minimalism to keep your system
lean and secure.</p>
<p><strong>Avoid permanently installing temporary tools</strong>: Use tools like <code>nix-shell</code>,
<code>comma</code>, <code>devShells</code> and <code>nix-direnv</code> to test or run software temporarily. This
prevents clutter and reduces potential risks from unused software lingering on
the system.</p>
<p><strong>Update regularly</strong>: Keep your system and software up to date to receive the
latest security patches. Delaying updates leaves known vulnerabilities open to
exploitation.</p>
<p><strong>Apply the Principle of Least Privilege</strong>: Never run tools or services as root
unless absolutely necessary. Create dedicated users and groups with the minimum
required permissions to limit potential damage if compromised.</p>
<p><strong>Use strong passwords and passphrases</strong>: Aim for at least 14–16 characters by
combining several unrelated words, symbols, and numbers. For example:
<code>sunset-CoffeeHorse$guitar!</code>. Strong passphrases are both memorable and secure.</p>
<p><strong>Use a password manager and enable multi-factor authentication (MFA)</strong>: Manage
unique, strong passwords effectively with a trusted manager and protect accounts
with MFA wherever possible for a second layer of defense.</p>
<p><strong>Check logs regularly</strong>: Reviewing your system logs helps you spot unusual
activity, errors, or failed login attempts that could indicate a security
problem. NixOS uses <code>journald</code> by default, which makes this easy. For example,
to see the logs for your current boot session:</p>
<pre><code class="language-bash">journalctl -b
# for the previous session
journalctl -b -1
</code></pre>
<p>After establishing some standard best practices and a hardened base, it’s time
to dive deeper into system hardening, the process of adding layered safeguards
throughout your NixOS setup. This next section guides you through concrete steps
and options for hardening critical areas of your system: from encryption and
secure boot to managing secrets, tightening kernel security, and leveraging
platform-specific tools.
<a href="https://saylesss88.github.io/nix/hardening_NixOS.html">Hardening NixOS</a></p>
Lanzabootehttps://saylesss88.github.io/installation/enc/lanzaboote.html2025-11-22T00:00:00+00:00saylesss87@proton.me (saylesss88)<h1>Secure Boot with Lanzaboote</h1>
<details>
<summary> Click to Expand Table of Contents</summary>
<!-- toc -->
</details>
<p>⚠️ <strong>Warning: This can easily brick your system</strong> ⚠️</p>
<p>We will mainly follow the lanzaboote
<a href="https://github.com/nix-community/lanzaboote/blob/master/docs/QUICK_START.md">Quick Start Guide</a></p>
<p>For Windows dual-booters and BitLocker users, you should export your BitLocker
recovery keys and confirm that they are correct. Refer to this
<a href="https://support.microsoft.com/en-us/windows/find-your-bitlocker-recovery-key-6b71ad27-0b89-ea08-f143-056f5ab347d6">Microsoft support article</a></p>
<blockquote>
<p>❗ NOTE: There are some serious limitations to this setup when used without
encryption, I’d say it could stop the average person. But an experienced
hacker could easily bypass this without encryption if they had access to your
computer. For more protection look into TPM2 Hardware Requirements, and full
disk encryption.</p>
</blockquote>
<h2>Important Considerations</h2>
<p>I found
<a href="https://0pointer.net/blog/authenticated-boot-and-disk-encryption-on-linux.html">This Article</a>
fairly enlightening as far as the state of Authenticated Boot and Disk
Encryption on Linux.</p>
<ul>
<li><a href="https://0pointer.net/blog/brave-new-trusted-boot-world.html">Brave New Trusted Boot World</a></li>
</ul>
<p>Lanzaboote only secures the boot chain. The userspace remains unverified (i.e.,
the nix store, etc.), to verify userspace you need to implement additional
integrity checks. It’s common to rely to disk encryption to prevent tampering
with and keep the Nix store safe but it’s not always desirable. (i.e.,
unattended boot)</p>
<h2>Requirements</h2>
<p>To be able to setup Secure Boot on your device, NixOS needs to be installed in
UEFI mode and systemd-boot must be used as a boot loader. This means if you wish
to install lanzaboote on a new machine, you need to follow the install
instruction for systemd-boot and then switch to lanzaboote after the first boot.</p>
<p>Check these prerequisits with <code>bootctl status</code>, this is an example output:</p>
<pre><code class="language-bash">sudo bootctl status
System:
Firmware: UEFI 2.70 (Lenovo 0.4720)
Secure Boot: disabled (disabled)
TPM2 Support: yes
Boot into FW: supported
Current Boot Loader:
Product: systemd-boot 251.7
...
</code></pre>
<p>The firmware <strong>must</strong> be <code>UEFI</code> and the current bootloader needs to be
<code>systemd-boot</code>. If you check these boxes, you’re good to go.</p>
<h2>Security Requirements</h2>
<p>To provide any security your system needs to defend against an attacker turning
UEFI Secure Boot off or being able to sign binaries with the keys we are going
to generate.</p>
<p>The easiest way to achieve this is to:</p>
<ol>
<li>
<p>Enable a BIOS password for your system, this will prevent someone from just
shutting off secure boot.</p>
</li>
<li>
<p>Use full disk encryption.</p>
</li>
</ol>
<h2>Preparation</h2>
<p><strong>Finding the UEFI System Partition (ESP)</strong></p>
<p>The UEFI boot process revolves around the ESP, the (U)EFI System Partition. This
partition is conventionally mounted at <code>/boot</code> on NixOS.</p>
<p>Verify this with the command <code>sudo bootctl status</code>. Look for <code>ESP:</code></p>
<p><strong>Creating Your Keys</strong></p>
<p>First you’ll need to install <code>sbctl</code> which is available in <code>Nixpkgs</code>:</p>
<pre><code class="language-nix"># configuration.nix or equivalent
environment.systemPackages = [ pkgs.sbctl ];
</code></pre>
<p>Create the keys:</p>
<pre><code class="language-bash">$ sudo sbctl create-keys
[sudo] password for julian:
Created Owner UUID 8ec4b2c3-dc7f-4362-b9a3-0cc17e5a34cd
Creating secure boot keys...✓
Secure boot keys created!
</code></pre>
<p>If you already have keys in <code>/etc/secureboot</code> migrate these to <code>/var/lib/sbctl</code>:</p>
<pre><code class="language-bash">sbctl setup --migrate
</code></pre>
<h2>Configuring Lanzaboote With Flakes</h2>
<p>Shown all in <code>flake.nix</code> for brevity. Can easily be split up into a <code>boot.nix</code>,
etc:</p>
<pre><code class="language-nix">{
description = "A SecureBoot-enabled NixOS configurations";
inputs = {
nixpkgs.url = "github:NixOS/nixpkgs/nixos-unstable";
lanzaboote = {
url = "github:nix-community/lanzaboote/v0.4.2";
# Optional but recommended to limit the size of your system closure.
inputs.nixpkgs.follows = "nixpkgs";
};
};
outputs = { self, nixpkgs, lanzaboote, ...}: {
nixosConfigurations = {
yourHost = nixpkgs.lib.nixosSystem {
system = "x86_64-linux";
modules = [
# This is not a complete NixOS configuration and you need to reference
# your normal configuration here.
lanzaboote.nixosModules.lanzaboote
({ pkgs, lib, ... }: {
environment.systemPackages = [
# For debugging and troubleshooting Secure Boot.
pkgs.sbctl
];
# Lanzaboote currently replaces the systemd-boot module.
# This setting is usually set to true in configuration.nix
# generated at installation time. So we force it to false
# for now.
boot.loader.systemd-boot.enable = lib.mkForce false;
boot.lanzaboote = {
enable = true;
pkiBundle = "/var/lib/sbctl";
};
})
];
};
};
};
}
</code></pre>
<p><strong>Build it</strong></p>
<pre><code class="language-bash">sudo nixos-rebuild switch --flake /path/to/flake
</code></pre>
<h3>Ensure Your Machine is Ready for Secure Boot enforcement</h3>
<pre><code class="language-bash">$ sudo sbctl verify
Verifying file database and EFI images in /boot...
✓ /boot/EFI/BOOT/BOOTX64.EFI is signed
✓ /boot/EFI/Linux/nixos-generation-355.efi is signed
✓ /boot/EFI/Linux/nixos-generation-356.efi is signed
✗ /boot/EFI/nixos/0n01vj3mq06pc31i2yhxndvhv4kwl2vp-linux-6.1.3-bzImage.efi is not signed
✓ /boot/EFI/systemd/systemd-bootx64.efi is signed
</code></pre>
<h3>Enabling Secure Boot and Entering Setup Mode</h3>
<p>This is where things can get tricky because UEFI/BIOS are widely different and
use different conventions.</p>
<p>You can see your BIOS from the output of <code>bootctl status</code>:</p>
<pre><code class="language-bash">sudo bootctl status
doas (jr@magic) password:
System:
Firmware: UEFI 2.70 (American Megatrends)
</code></pre>
<p>My UEFI is an American Megatrends, find yours and look up which key you have to
hit to enter the BIOS on reboot, mine is the delete key. So I reboot and
repeatedly hit delete until it brings up the BIOS settings.</p>
<p>The lanzaboote guide shows a few systems and how to enter setup mode for them.</p>
<p>For a ThinkPad the steps are:</p>
<ol>
<li>
<p>Select the “Security” tab.</p>
</li>
<li>
<p>Select the “Secure Boot” entry.</p>
</li>
<li>
<p>Set “Secure Boot” to enabled.</p>
</li>
<li>
<p>Select “Reset to Setup Mode”.</p>
</li>
</ol>
<hr />
<p>For my system, it would allow me to do the above steps but when I saved and
exited I got a red screen then blue screen and it said No Valid Keys or
something like that and eventually brought me to the MOK Manager where you can
manually register keys, this is NOT what you want to do.</p>
<p>Even after this mistake I was able to re-enable secure boot and get back into
the system.</p>
<p>After some tinkering, I found that I was able to enter “custom mode” without
enabling secure boot, which in turn allowed me to select the “Reset to Setup
Mode”</p>
<p>It asks if you are sure you want to erase all of the variables to enter setup
mode? Hit “Yes”. Then it asks if you want to exit without saving, we want to
save our changes so hit “No” do not exit without saving.</p>
<p>After this you should see all No Keys entries.</p>
<p>Finally, Hit the setting to save and exit, some BIOS list an F4 or F9 keybind
that saves and exits.</p>
<blockquote>
<p>❗: For my system, choosing “save and reboot” would not work for some reason,
I had to choose “save and exit”.</p>
</blockquote>
<p>After hitting “save and exit”, the system boots into NixOS like normal but you
are in setup mode if everything worked correctly.</p>
<p>Open a terminal and type:</p>
<pre><code class="language-bash">sudo sbctl enroll-keys --microsoft
Enrolling keys to EFI variables...
With vendor keys from microsoft...✓
Enrolled keys to the EFI variables!
</code></pre>
<blockquote>
<p>⚠️ If you used <code>--microsoft</code> while enrolling the keys, you might want to check
that the Secure Boot Forbidden Signature Database (dbx) is not empty. A quick
and dirty way is by checking the file size of
<code>/sys/firmware/efi/efivars/dbx-\*</code>. Keeping an up to date dbx reduces Secure
Boot bypasses, see for example:
<a href="https://uefi.org/sites/default/files/resources/dbx_release_info.pdf">https://uefi.org/sites/default/files/resources/dbx_release_info.pdf</a></p>
</blockquote>
<p>I then Rebooted into BIOS and enabled secure boot, saved and exited. This loads
NixOS as if you just rebooted.</p>
<p>And finally check the output of <code>sbctl status</code>:</p>
<pre><code class="language-bash">sudo sbctl status
System:
Firmware: UEFI 2.70 (American Megatrends)
Firmware Arch: x64
Secure Boot: enabled (user)
TPM2 Support: yes
Measured UKI: yes
Boot into FW: supported
</code></pre>
<p>We can see the <code>Secure Boot: enabled (user)</code></p>
<h2>What Lanzaboote (Secure Boot) Actually Secures on NixOS and Limitations</h2>
<p>As mentioned earlier, this provides some basic protection that may be good
enough for your desktop in your bedroom but there are some serious limitations.
I want to be clear that this may stop an average person but an advanced threat
actor with resources could still fairly easily get in.</p>
<p>Secure Boot (with Lanzaboote or any other tool) on NixOS primarily protects the
boot chain—the bootloader, kernel, and initrd—by ensuring only signed, trusted
binaries are executed at boot. This is a real and valuable security improvement,
especially for defending against “evil maid” attacks (where someone with
physical access tampers with your bootloader or kernel) and for preventing many
forms of persistent malware.</p>
<p>Here are some of the caveats:</p>
<ol>
<li>
<p>Userspace Remains Unverified</p>
<p>Once the kernel and initrd have booted, NixOS (by default) does not
cryptographically verify the integrity of the rest of userspace (the programs
and libraries in the Nix store, your configs, etc.).</p>
<p>This means an attacker who can modify userspace (e.g., by gaining root
access) can potentially install persistent malware, even if your boot chain
is protected</p>
<p>.</p>
</li>
<li>
<p>Kernel Lockdown Is Not Enabled</p>
<p>The Linux kernel’s [lockdown mode]</p>
<p>is designed to prevent even root from tampering with the kernel at runtime
(e.g., by loading unsigned modules, using kexec, or accessing /dev/mem).</p>
<p>NixOS does not enable kernel lockdown by default, and enabling it is
non-trivial, especially given how the Nix store works (modules and kernels
are built dynamically and not always signed at install time).</p>
<p>Without lockdown, a root user (or malware with root) can still compromise the
kernel after boot.</p>
</li>
<li>
<p>Stage 2 Verification Is Lacking</p>
<p>Some distributions (like Fedora Silverblue or systems using dm-verity)
cryptographically verify the entire userspace at boot, making it immutable
and much harder to tamper with. This is not the default on NixOS, though
there are experimental or appliance-focused solutions</p>
<p>.</p>
</li>
<li>
<p>Disk Encryption Complements Secure Boot</p>
<p>Full disk encryption (e.g., LUKS) is strongly recommended alongside Secure
Boot. Encryption protects your data at rest and ensures that even if someone
bypasses Secure Boot, they cannot read or modify your files without your
passphrase</p>
</li>
</ol>
Local Nixpkgshttps://saylesss88.github.io/Working_with_Nixpkgs_Locally_10.html2025-11-22T00:00:00+00:00saylesss87@proton.me (saylesss88)<h1>Chapter 10</h1>
<details>
<summary> ✔️ Click to Expand Table of Contents</summary>
<!-- toc -->
</details>
<p><img src="https://saylesss88.github.io/images/server_rack.cleaned.png" alt="server_rack" /></p>
<!--  -->
<h2>Working with Nixpkgs Locally: Benefits and Best Practices</h2>
<ul>
<li>
<p>Nixpkgs, the package repository for NixOS, is a powerful resource for building
and customizing software.</p>
</li>
<li>
<p>Working with a local copy enhances development, debugging, and contribution
workflows.</p>
</li>
<li>
<p>This post covers setting up a local Nixpkgs repository, searching for
dependencies, and leveraging its advantages, incorporating tips from the Nix
community.</p>
</li>
</ul>
<h1>I. Why Work with Nixpkgs Locally?</h1>
<ul>
<li>
<p>A local Nixpkgs repository offers significant advantages for Nix developers:</p>
<h2>A. Faster Development Cycle</h2>
<ul>
<li>
<p>Local searches for packages and dependencies are significantly quicker than
querying remote repositories or channels.</p>
</li>
<li>
<p>This speedup is crucial for efficient debugging and rapid prototyping of Nix
expressions.</p>
</li>
</ul>
<h2>B. Enhanced Version Control</h2>
<ul>
<li>
<p>By pinning your local repository to specific commits or branches (e.g.,
<code>nixos-unstable</code>), you ensure build reproducibility.</p>
</li>
<li>
<p>This prevents unexpected issues arising from upstream changes in Nixpkgs.</p>
</li>
</ul>
<h2>C. Flexible Debugging Capabilities</h2>
<ul>
<li>
<p>You can directly test and modify package derivations within your local copy.</p>
</li>
<li>
<p>This allows for quick fixes to issues like missing dependencies without
waiting for upstream updates or releases.</p>
</li>
</ul>
<h2>D. Streamlined Contribution Workflow</h2>
<ul>
<li>
<p>Developing and testing new packages or patches locally is essential before
submitting them as pull requests to Nixpkgs.</p>
</li>
<li>
<p>A local setup provides an isolated environment for experimentation.</p>
</li>
</ul>
<h2>E. Up-to-Date Documentation Source</h2>
<ul>
<li>The source code and comments within the Nixpkgs repository often contain the
most current information about packages.</li>
<li>This can sometimes be more up-to-date than official, external documentation.</li>
</ul>
<h2>F. Optimized Storage and Performance</h2>
<ul>
<li>Employing efficient cloning strategies (e.g., shallow clones) and avoiding
unnecessary practices (like directly using Nixpkgs as a flake for local
development) minimizes disk usage and build times.</li>
</ul>
</li>
</ul>
<h1>II. Flake vs. Non-Flake Syntax for Local Nixpkgs</h1>
<ul>
<li>
<p>When working with Nixpkgs locally, the choice between Flake and non-Flake
syntax has implications for performance and storage:</p>
<h2>A. Flake Syntax (<code>nix build .#<package></code>)</h2>
<ul>
<li>
<p>Treats the current directory as a flake, requiring evaluation of
<code>flake.nix</code>.</p>
</li>
<li>
<p>For local Nixpkgs, this evaluates the flake definition in the repository
root.</p>
</li>
<li>
<p><strong>Performance and Storage Overhead:</strong> Flakes copy the entire working
directory (including Git history if present) to <code>/nix/store</code> for evaluation.
This can be slow and storage-intensive for large repositories like Nixpkgs.</p>
</li>
</ul>
<h2>B. Non-Flake Syntax (<code>nix-build -f . <package></code> or <code>nix build -f . <package></code>)</h2>
<ul>
<li>
<p><code>-f .</code> specifies the Nix expression (e.g., <code>default.nix</code> or a specific file)
in the current directory.</p>
</li>
<li>
<p><strong>Efficiency:</strong> Evaluates the Nix expression directly <em>without</em> copying the
entire worktree to <code>/nix/store</code>. This is significantly faster and more
storage-efficient for local development on large repositories.</p>
</li>
</ul>
</li>
</ul>
<h2>III. Setting Up a Local Nixpkgs Repository Efficiently</h2>
<ul>
<li>Cloning Nixpkgs requires careful consideration due to its size.</li>
</ul>
<h2>A.a Initial Clone: Shallow Cloning</h2>
<p>It is common to place your local clone in the <code>/src</code> directory:</p>
<pre><code class="language-bash">mkdir src && cd src
</code></pre>
<blockquote>
<p>❗ Warning, A shallow clone (<code>--depth 1</code>) is not recommended for general
development or contributing changes back to Nixpkgs via pull requests. It’s
primarily suitable for:</p>
<ul>
<li>Quick checks or builds: If you only need to verify a package’s current state
or build a specific version without needing historical context.</li>
<li>CI/CD environments: Where disk space and clone time are critical, and only
the latest commit is needed for automated tests or builds.</li>
</ul>
</blockquote>
<p>With that said, to avoid downloading the entire history, perform a shallow
clone:</p>
<pre><code class="language-bash">git clone [https://github.com/NixOS/nixpkgs](https://github.com/NixOS/nixpkgs) --depth 1
cd nixpkgs
</code></pre>
<h2>A.b A few Examples exploring Nixpkgs</h2>
<p>While in the <code>nixpkgs</code> directory, you can check the version of a package:</p>
<pre><code class="language-bash">nix-instantiate --eval -A openssl.version
"3.4.1"
</code></pre>
<p>Or to directly edit the file you can use <code>nix edit</code>:</p>
<pre><code class="language-bash">nix edit nixpkgs#openssl
</code></pre>
<p>It uses the nix registry and <code>openssl.meta.position</code> to locate the file.</p>
<pre><code class="language-bash">man nix3 registry
</code></pre>
<p>The above command will open the <code>openssl/default.nix</code> in your <code>$EDITOR</code>.</p>
<hr />
<h2>A.1 Full Fork and Clone of Nixpkgs</h2>
<p>If you want to contribute to Nixpkgs, you need to set up a local version
following the
<a href="https://github.com/NixOS/nixpkgs/blob/master/CONTRIBUTING.md">Contributing guide</a></p>
<p>You’ll need to, this is directly from the <code>Contributing.md</code>:</p>
<ol>
<li>
<p><a href="https://docs.github.com/en/pull-requests/collaborating-with-pull-requests/working-with-forks/fork-a-repo#forking-a-repository">Fork</a>
the <a href="https://github.com/nixos/nixpkgs/">Nixpkgs repository</a></p>
</li>
<li>
<p><a href="https://docs.github.com/en/pull-requests/collaborating-with-pull-requests/working-with-forks/fork-a-repo#cloning-your-forked-repository">Clone the forked repo</a>
into a local <code>nixpkgs</code> directory.</p>
</li>
</ol>
<pre><code class="language-bash">git clone git@github.com:your-user/nixpkgs.git
</code></pre>
<ol start="3">
<li><a href="https://docs.github.com/en/pull-requests/collaborating-with-pull-requests/working-with-forks/fork-a-repo#configuring-git-to-sync-your-fork-with-the-upstream-repository">Configure the upstream Nixpkgs repo</a></li>
</ol>
<pre><code class="language-bash">git remote add upstream git@github.com:NixOS/nixpkgs.git
# Check them out
git remove -v
</code></pre>
<h3>The Three Master Branches</h3>
<ol>
<li><strong>Upstream Master</strong> (upstream/master):</li>
</ol>
<ul>
<li>
<p><strong>Where it is</strong>: On the official NixOS servers.</p>
</li>
<li>
<p><strong>Role</strong>: The absolute source of truth. Thousands of people are pushing to
this daily.</p>
</li>
</ul>
<ol start="2">
<li><strong>Local Master</strong> (master):</li>
</ol>
<ul>
<li>
<p><strong>Where it is</strong>: On your physical computer.</p>
</li>
<li>
<p><strong>Role</strong>: Your working copy. This is the only one you can actually “rebase” or
“commit” to directly.</p>
</li>
</ul>
<ol start="3">
<li><strong>Origin Master</strong> (origin/master):</li>
</ol>
<ul>
<li>
<p><strong>Where it is</strong>: On your GitHub fork (github.com/your-user/nixpkgs).</p>
</li>
<li>
<p><strong>Role</strong>: A personal backup and a place to host your code so you can open Pull
Requests.</p>
</li>
</ul>
<h3>Create a branch</h3>
<p>In the nixpkgs ecosystem, the “cleanest” way to work is to <strong>never</strong> add your
own commits to your local master.</p>
<ul>
<li>
<p>Keep your <code>master</code> as a “pure mirror” of <code>upstream/master</code>.</p>
</li>
<li>
<p>Whenever you want to fix a package or add something new, create a feature
branch:</p>
</li>
</ul>
<pre><code class="language-bash">git checkout -b fix-my-package master
</code></pre>
<p>This way, syncing is as simple as a reset:</p>
<pre><code class="language-bash"># Total reset of your local master to match the official one
git fetch upstream
git checkout master
git reset --hard upstream/master
git push origin master --force
</code></pre>
<h3>Pushing a PR</h3>
<p>When you’re ready to push changes you push to <code>origin/feature-branch</code>, visit
your fork on github.com and submit the PR.</p>
<h2>B. Managing Branches with Worktrees</h2>
<ul>
<li>
<p>Use Git worktrees to manage different branches efficiently:</p>
<pre><code class="language-bash">git fetch --all --prune --depth=1
git worktree add -b nixos-unstable nixos-unstable # For just unstable
</code></pre>
</li>
<li>
<p><strong>Explanation of <code>git worktree</code>:</strong> Allows multiple working directories
attached to the same <code>.git</code> directory, sharing history and objects but with
separate checked-out files.</p>
</li>
<li>
<p><code>git worktree add</code>: Creates a new working directory for the specified branch
(<code>nixos-unstable</code> in this case).</p>
</li>
</ul>
<h1>IV. Debugging Missing Dependencies: A Practical Example</h1>
<details>
<summary> Click to see icat Example </summary>
<ul>
<li>Let’s say you’re trying to build <code>icat</code> locally and encounter a missing
dependency error:</li>
</ul>
<pre><code class="language-nix">nix-build -A icat
# ... (Error log showing "fatal error: X11/Xlib.h: No such file or directory")
</code></pre>
<ul>
<li>The error <code>fatal error: X11/Xlib.h: No such file or directory</code> indicates a
missing X11 dependency.</li>
</ul>
<h2>A. Online Search with <code>search.nixos.org</code></h2>
<ul>
<li>The Nixpkgs package search website
(<a href="https://search.nixos.org/packages">https://search.nixos.org/packages</a>) is a
valuable first step.</li>
<li>However, broad terms like “x11” can yield many irrelevant results.</li>
<li><strong>Tip:</strong> Utilize the left sidebar to filter by package sets (e.g., “xorg”).</li>
</ul>
<h2>B. Local Source Code Search with <code>rg</code> (ripgrep)</h2>
<ul>
<li>
<p>Familiarity with searching the Nixpkgs source code is crucial for finding
dependencies.</p>
</li>
<li>
<p>Navigate to your local <code>nixpkgs/</code> directory and use <code>rg</code>:</p>
<pre><code class="language-bash">rg "x11 =" pkgs # Case-sensitive search
</code></pre>
<p><strong>Output:</strong></p>
<pre><code>pkgs/tools/X11/primus/default.nix
21: primus = if useNvidia then primusLib_ else primusLib_.override { nvidia_x11 = null; };
22: primus_i686 = if useNvidia then primusLib_i686_ else primusLib_i686_.override { nvidia_x11 = null; };
pkgs/applications/graphics/imv/default.nix
38: x11 = [ libGLU xorg.libxcb xorg.libX11 ];
</code></pre>
</li>
<li>
<p>Refining the search (case-insensitive):</p>
<pre><code class="language-bash">rg -i "libx11 =" pkgs
</code></pre>
<p><strong>Output:</strong></p>
<pre><code># ... (Output showing "xorg.libX11")
</code></pre>
</li>
<li>
<p>The key result is <code>xorg.libX11</code>, which is likely the missing dependency.</p>
</li>
</ul>
</details>
<h1>V. Local Derivation Search with <code>nix-locate</code></h1>
<details>
<summary> Click to Expand nix-locate command Example</summary>
<ul>
<li>
<p><code>nix-locate</code> (from the <code>nix-index</code> package) allows searching for derivations
on the command line.</p>
<blockquote>
<p><strong>Note:</strong> Install <code>nix-index</code> and run <code>nix-index</code> to create the initial
index.</p>
</blockquote>
<pre><code class="language-bash">nix-locate libx11
# ... (Output showing paths related to libx11)
</code></pre>
</li>
<li>
<p>Combining online and local search tools (<code>search.nixos.org</code>, <code>rg</code>,
<code>nix-locate</code>) provides a comprehensive approach to finding dependencies.</p>
</li>
</ul>
</details>
<h1>VI. Key Benefits of Working with Nixpkgs Locally (Recap)</h1>
<ul>
<li>
<p><strong>Speed:</strong> Faster searches and builds compared to remote operations.</p>
</li>
<li>
<p><strong>Control:</strong> Full control over the Nixpkgs version.</p>
</li>
<li>
<p><strong>Up-to-Date Information:</strong> Repository source often has the latest details.</p>
</li>
</ul>
<h1>VII. Best Practices and Tips from the Community</h1>
<details>
<summary> ✔️ Click To Expand Best Practices and Tips from the community</summary>
<ul>
<li>
<p><strong>Rebasing over Merging:</strong> Never merge upstream changes into your local
branch. Always rebase your branch onto the upstream (e.g., <code>master</code> or
<code>nixos-unstable</code>) to avoid accidental large-scale pings in pull requests (Tip
from <code>soulsssx3</code> on Reddit).</p>
</li>
<li>
<p><strong>Tip from <code>ElvishJErrico</code>:</strong> Avoid using Nixpkgs directly as a flake for
local development due to slow copying to <code>/nix/store</code> and performance issues
with garbage collection on large numbers of small files. Use
<code>nix build -f . <package></code> instead of <code>nix build .#<package></code>.</p>
</li>
<li>
<p><strong>Edge Cases for Flake Syntax:</strong> Flake syntax might be necessary in specific
scenarios, such as NixOS installer tests where copying the Git history should
be avoided.</p>
</li>
<li>
<p><strong>Base Changes on <code>nixos-unstable</code>:</strong> For better binary cache hits, base your
changes on the <code>nixos-unstable</code> branch instead of <code>master</code>. Consider the
merge-base for staging branches as well.</p>
</li>
<li>
<p><strong>Consider <code>jujutsu</code>:</strong> Explore <a href="https://github.com/jj-vcs/jj">jj-vcs</a>, a
Git-compatible alternative that can offer a more intuitive workflow,
especially for large monorepos like Nixpkgs. While it has a learning curve, it
can significantly improve parallel work and branch management.</p>
</li>
<li>
<p><a href="https://saylesss88.github.io/vcs/jujutsu.html">Intro-To-Jujutsu</a></p>
</li>
</ul>
</details>
Fork, Clone, Contributehttps://saylesss88.github.io/nixpkgs/fork_clone_contribute.html2025-11-22T00:00:00+00:00saylesss87@proton.me (saylesss88)<h1>Fork, Clone, Contribute</h1>
<ul>
<li>
<p>In the <a href="https://github.com/NixOS/nixpkgs">Nixpkgs</a> Repository.</p>
</li>
<li>
<p>Click Fork, then Create a new Fork.</p>
</li>
<li>
<p>Uncheck the box “Only fork the <code>master</code> branch”, for development we will need
more branches.</p>
<ul>
<li>If you only fork master, you won’t have the <code>nixos-XX.YY</code> release branches
available on your fork when you later try to create a PR against them, or
when you want to create a feature branch from them on your fork.</li>
</ul>
</li>
<li>
<p>Click <code><> Code</code> and Clone the Repo. <code>sayls8</code> is the name of my GitHub, yours
will obviously be different.</p>
</li>
</ul>
<pre><code class="language-bash">git clone git@github.com:sayls8/nixpkgs.git
</code></pre>
<p>Figure out the branch that should be used for this change by going through
<a href="https://github.com/NixOS/nixpkgs/blob/master/CONTRIBUTING.md#branch-conventions">this section</a></p>
<p>When in doubt use <code>master</code>, that’s where most changes should go. This can be
changed later by
<a href="https://github.com/NixOS/nixpkgs/blob/master/CONTRIBUTING.md#rebasing-between-branches-ie-from-master-to-staging">rebasing</a></p>
<p>Add <a href="https://github.com/NixOS/nixpkgs">Nixpkgs</a> as your upstream:</p>
<pre><code class="language-bash">cd nixpkgs
git remote add upstream https://github.com/NixOS/nixpkgs.git
# Make sure you have the latest changes from upstream Nixpkgs
git fetch upstream
# Show currently configured remote repository
git remote -v
origin git@github.com:sayls8/nixpkgs.git (fetch)
origin git@github.com:sayls8/nixpkgs.git (push)
upstream https://github.com/NixOS/nixpkgs.git (fetch)
upstream https://github.com/NixOS/nixpkgs.git (push)
</code></pre>
<p><strong>Understanding Your Remotes</strong></p>
<p>This output confirms that:</p>
<ul>
<li>
<p><code>origin</code> is your personal fork on GitHub (<code>sayls8/nixpkgs.git</code>). When you
<code>git push origin ...</code>, your changes go here.</p>
</li>
<li>
<p><code>upstream</code> is the official Nixpkgs repository (<code>NixOS/nixpkgs.git</code>). When you
<code>git fetch upstream</code>, you’re getting the latest updates from the main project.</p>
</li>
</ul>
<p>This setup ensures you can easily pull updates from the original project and
push your contributions to your own fork.</p>
<pre><code class="language-bash"># Shows a ton of remote branches
git branch -r | grep upstream
# Narrow it down
git branch -r | grep upstream | grep nixos-
</code></pre>
<p>Next Steps for Contributing</p>
<ol>
<li>Ensure <code>master</code> is up to date with <code>upstream</code></li>
</ol>
<pre><code class="language-bash">git checkout master
git pull upstream master
git push origin master
</code></pre>
<ul>
<li>
<p><code>git pull upstream master</code> is equivalent to running <code>git fetch upstream</code>
followed by <code>git merge upstream/master</code> into your current branch (<code>master</code>).</p>
</li>
<li>
<p><code>git push origin master</code> updates your forks remote with the fetched changes.</p>
</li>
</ul>
<p>This keeps your fork in sync to avoid conflicts.</p>
<p>If targeting another branch, replace <code>master</code> with <code>nixos-24.11</code> for example.</p>
<ol start="2">
<li>Create a Feature Branch</li>
</ol>
<pre><code class="language-bash">git checkout master
git checkout -b my-feature-branch # name should represent the feature
</code></pre>
<ol start="3">
<li>Make and Test Changes</li>
</ol>
<p><a href="https://github.com/NixOS/nixpkgs/blob/master/pkgs/README.md#conventions">Packaging Conventions</a></p>
<p><strong>New package</strong>: Add to
<code>pkgs/by-name/<first-two-letters>/<package-name>/default.nix</code>.</p>
<p><strong>Example structure</strong>:</p>
<pre><code class="language-nix">{ lib, stdenv, fetchFromGitHub }: stdenv.mkDerivation {
pname = "xyz"; version = "1.2.3"; src = fetchFromGitHub { ... }; ... }
</code></pre>
<p><strong>Update package</strong>: Edit version and <code>sha256</code> in the package’s <code>default.nix</code>.
Use <code>nix-prefetch-url</code> to update hashes:</p>
<pre><code class="language-bash">nix-prefetch-url <source-url>
</code></pre>
<p><strong>Fix a bug</strong>: Modify files in <code>pkgs/</code>, <code>nixos/modules/</code>, or elsewhere.</p>
<p><strong>Test locally</strong>:</p>
<p>Build:</p>
<pre><code class="language-bash">nix-build -A <package-name>
</code></pre>
<p><strong>Test in a shell</strong>:</p>
<pre><code class="language-bash">nix-shell -p <package-name>
</code></pre>
<p>For NixOS modules:</p>
<pre><code class="language-bash">nixos-rebuild test
</code></pre>
<p>Follow the Nixpkgs Contributing Guide.</p>
<ol start="4">
<li><strong>Commit and Push</strong></li>
</ol>
<p>Commit with a clear message, make sure to follow
<a href="https://github.com/NixOS/nixpkgs/blob/master/CONTRIBUTING.md#commit-conventions">commit conventions</a>:</p>
<p><strong>Commit Conventions</strong></p>
<ul>
<li>
<p>Create a commit for each logical unit.</p>
</li>
<li>
<p>Check for unnecessary whitespace with <code>git diff --check</code> before committing.</p>
</li>
<li>
<p>If you have commits <code>pkg-name: oh, forgot to insert whitespace</code>: squash
commits in this case. Use <code>git rebase -i</code>. See
<a href="https://git-scm.com/book/en/v2/Git-Tools-Rewriting-History#_squashing">Squashing Commits</a>
for additional information.</p>
</li>
<li>
<p>For consistency, there should not be a period at the end of the commit
message’s summary line (the first line of the commit message).</p>
</li>
<li>
<p>When adding yourself as maintainer in the same pull request, make a separate
commit with the message maintainers: <code>add <handle></code>. Add the commit before
those making changes to the package or module. See
<a href="https://github.com/NixOS/nixpkgs/blob/master/maintainers/README.md">Nixpkgs Maintainers</a>
for details.</p>
</li>
</ul>
<p>Format the commit messages in the following way:</p>
<pre><code class="language-bash">(pkg-name): (from -> to | init at version | refactor | etc)
(Motivation for change. Link to release notes. Additional information.)
</code></pre>
<p>a) For example, for the <code>airshipper</code> package:</p>
<pre><code class="language-bash">git add pkgs/by-name/ai/airshipper/
git commit -m "airshipper: init at 0.1.0"
Adds the airshipper tool for managing game assets.
Upstream homepage: https://github.com/someuser/airshipper"
</code></pre>
<p>b) Updating <code>airshipper</code> to a new version</p>
<pre><code class="language-bash">git add pkgs/by-name/ai/airshipper/
git commit -m "airshipper: 0.1.0 -> 0.2.0
Updated airshipper to version 0.2.0. This release includes:
- Improved asset fetching logic
- Bug fixes for network errors
Release notes: https://github.com/someuser/airshipper/releases/tag/v0.2.0"
</code></pre>
<p>c) Fixing a bug in <code>airshipper</code>’s package definition</p>
<pre><code class="language-bash">git add pkgs/by-name/ai/airshipper/
git commit -m "airshipper: fix: build with latest glibc
Resolved build failures on unstable channel due to changes in glibc.
Patched source to use updated API calls.
"
</code></pre>
<p>Examples:</p>
<ul>
<li>
<p><code>nginx: init at 2.0.1</code></p>
</li>
<li>
<p><code>firefox: 122.0 -> 123.0</code></p>
</li>
<li>
<p><code>vim: fix build with gcc13</code></p>
</li>
</ul>
<p>Push:</p>
<pre><code class="language-bash">git push origin my-feature-branch
</code></pre>
<p>When you push your feature branch, it will output a link that you can follow to
complete the PR on GitHub.</p>
<p>If you have the <code>gh-cli</code> set up you can also do this from the command line:</p>
<pre><code class="language-bash">gh pr create --repo NixOS/nixpkgs --base master --head sayls8:feat/my-package
</code></pre>
<ol start="5">
<li>Create a Pull Request</li>
</ol>
<p>Go to <a href="https://github.com/sayls8/nixpkgs">https://github.com/sayls8/nixpkgs</a>. (your fork) Click the PR prompt for
my-feature-branch. Set the base branch to <code>NixOS/nixpkgs:master</code> (or
<code>nixos-24.11</code>). Write a PR description: Purpose of the change. Related issues
(e.g., Fixes #1234). Testing steps (e.g., <code>nix-build -A <package-name></code>). Submit
and respond to feedback.</p>
<ol start="6">
<li>Handle Updates</li>
</ol>
<p>For reviewer feedback or upstream changes:</p>
<p>Edit, commit, and push:</p>
<pre><code class="language-bash">git add . git commit -m "<package-name>: address feedback" git push origin my-feature-branch
</code></pre>
<p>Rebase if needed:</p>
<pre><code class="language-bash">git fetch upstream
git rebase upstream/master # or upstream/nixos-24.11
git push origin my-feature-branch --force
</code></pre>
<ol start="7">
<li>Cleanup</li>
</ol>
<p>After PR merge:</p>
<p>Delete branch:</p>
<pre><code class="language-bash">git push origin --delete my-feature-branch
</code></pre>
<p>Sync master:</p>
<pre><code class="language-bash">git checkout master
git pull upstream master
git push origin master
</code></pre>
<p>Addressing the Many Branches</p>
<ul>
<li>
<p>No need to manage all branches: The <code>nixos-branches</code> are just metadata from
upstream. You only check out the one you need (e.g., <code>master</code> or
<code>nixos-24.11</code>).</p>
</li>
<li>
<p>Focus on relevant branches: The filter (<code>grep nixos-</code>) shows the key release
branches. Ignore -small branches and older releases unless specifically
required. Confirm latest stable: If you’re targeting a stable branch,
<code>nixos-24.11</code> is likely the latest (or <code>nixos-25.05</code> if it’s active). Verify
via NixOS status.</p>
</li>
</ul>
Local Nixpkgshttps://saylesss88.github.io/nixpkgs/local_package.html2025-11-22T00:00:00+00:00saylesss87@proton.me (saylesss88)<details>
<summary> ✔️ Table of Contents</summary>
<!-- toc -->
</details>
<h1>Creating and Building a Local Package within a Nixpkgs Clone</h1>
<p>This chapter demonstrates the fundamental pattern for creating a package. Every
package recipe is a file that declares a function. This function takes the
packages dependencies as argument.</p>
<p>In this example we’ll make a simple package with <code>coreutils</code> and build it.
Demonstrating the process of building and testing a local package.</p>
<p>This chapter will assume you have already have a cloned fork of Nixpkgs. I
choose to clone mine to the <code>~/src/</code> directory.</p>
<p>You can check out the <code>nixpkgs/pkgs/README.md</code>
<a href="https://github.com/NixOS/nixpkgs/tree/master/pkgs">Here</a></p>
<p>The Nixpkgs Contributing Guide can be found
<a href="https://github.com/NixOS/nixpkgs/blob/master/CONTRIBUTING.md">Here</a></p>
<h2>Create your Package directory and a <code>default.nix</code></h2>
<p>For this example, we’ll create a package called <code>testPackage</code> and will place it
in the <code>nixpkgs/pkgs/misc</code> directory.</p>
<pre><code class="language-bash">cd ~/src/nixpkgs/pkgs/misc
mkdir testPackage && cd testPackage
hx default.nix
</code></pre>
<pre><code class="language-nix"># default.nix
{
runCommand,
coreutils,
}:
runCommand "testPackage" {
nativeBuildInputs = [
coreutils
];
} ''
echo 'This is a Test' > $out
''
</code></pre>
<p>Now we need to add our <code>testPackage</code> to <code>all-packages.nix</code></p>
<pre><code class="language-bash">cd pkgs/top-level
hx all-packages.nix
</code></pre>
<p><code>all-packages.nix</code> is a centralized module that defines all available package
expressions.</p>
<p>We’ll add our package in the list alphabetically:</p>
<pre><code class="language-nix"># all-packages.nix
# `/msc` # editor search inside file
# Scroll down to t's
# snip ...
termusic = callPackage ../applications/autio/termusic { };
# we add our package here
testPackage = callPackage ../misc/testPackage { };
tfk8s = callPackage ../applications/misc/tfk8s { };
# snip ...
</code></pre>
<blockquote>
<p><code>callPackage</code> is a core utility in Nixpkgs. It takes a Nix expression (like
our <code>default.nix</code> file, which defines a function) and automatically provides
the function with any arguments it declares, by looking them up within the
<code>pkgs</code> set (or the scope where <code>callPackage</code> is invoked). This means you only
need to list the dependencies your package needs in its <code>default.nix</code> function
signature, and <code>callPackage</code> will “inject” the correct versions of those
packages. This is what the <code>callPackage</code> Nix Pill demonstrates at a lower
level.</p>
</blockquote>
<h2>Understanding <code>pkgs/by-name/</code> and other locations</h2>
<p>Nixpkgs uses different conventions for package placement:</p>
<ul>
<li>
<p><strong>Older categories (e.g., <code>pkgs/misc/</code>, <code>pkgs/applications/</code>):</strong> Packages
within these directories typically use <code>default.nix</code> as their definition file
(e.g., <code>pkgs/misc/testPackage/default.nix</code>). <strong>These packages are NOT
automatically included</strong> in the top-level <code>pkgs</code> set; they <em>must</em> be This
chapter will assume you have already have a cloned fork of Nixpkgs. explicitly
added via a <code>callPackage</code> entry in <code>pkgs/top-level/all-packages.nix</code>. This is
the method demonstrated in this chapter for our <code>testPackage</code>.</p>
</li>
<li>
<p><strong>The new <code>pkgs/by-name/</code> convention:</strong> This is the <em>preferred location for
new packages</em>.</p>
<ul>
<li>
<p>Packages here are placed in a directory structure like
<code>pkgs/by-name/<first-two-letters>/<package-name>/</code>.</p>
</li>
<li>
<p>Crucially, their main definition file is named <code>package.nix</code> (e.g.,
<code>pkgs/by-name/te/testPackage/package.nix</code>).</p>
</li>
<li>
<p><strong>Packages placed within <code>pkgs/by-name/</code> are automatically discovered and
exposed</strong> by Nixpkgs’ top-level <code>pkgs</code> set. They <strong>do not</strong> require a manual
<code>callPackage</code> entry in <code>all-packages.nix</code>. This results in a more modular
and scalable approach, reducing manual maintenance.</p>
</li>
</ul>
</li>
</ul>
<blockquote>
<p>❗ : While this example uses <code>pkgs/misc/</code> to demonstrate explicit
<code>callPackage</code> usage, when contributing a <em>new</em> package to Nixpkgs, you should
nearly always place it within <code>pkgs/by-name/</code> and name its definition file
<code>package.nix</code>.</p>
</blockquote>
<ul>
<li>
<p><a href="https://github.com/NixOS/nixpkgs/blob/master/pkgs/by-name/README.md">pkgs/by-name/README</a></p>
</li>
<li>
<p>There are some
<a href="https://github.com/NixOS/nixpkgs/blob/master/pkgs/by-name/README.md#limitations">Limitations</a>
to this approach.</p>
</li>
<li>
<p><a href="https://github.com/NixOS/nixpkgs-vet">nixpkgs-vet</a></p>
</li>
</ul>
<p>Previously, packages were manually added to <code>all-packages.nix</code>. While this is no
longer needed in most cases, understanding the old method provides useful
context for troubleshooting legacy configurations or custom integrations.</p>
<h2>Try Building the Package</h2>
<p>Move to the root directory of Nixpkgs:</p>
<pre><code class="language-bash">cd ~/src/nixpkgs
</code></pre>
<p>Try building it:</p>
<pre><code class="language-bash">nix-build -A testPackage
this derivation will be built:
this derivation will be built:
/nix/store/yrbjsxmgzkl24n75sqjfxbpv5cs3b9hc-testPackage.drv
building '/nix/store/yrbjsxmgzkl24n75sqjfxbpv5cs3b9hc-testPackage.drv'...
/nix/store/3012zlv30vn6ifihr1jxbg5z3ysw0hl3-testPackage
</code></pre>
<p><code>runCommand</code> is a simple builder, it takes 3 arguments. The first is the package
name the second is the derivation attributes, and the third is the script to
run.</p>
<pre><code class="language-bash">cat ~/src/nixpkgs/result
───────┬──────────────────────────────
│ File: result
───────┼──────────────────────────────
1 │ This is a Test
───────┴──────────────────────────────
</code></pre>
<pre><code class="language-bash">nix-instantiate --eval -A testPackage.meta.position
"/home/jr/src/nixpkgs/pkgs/misc/testPackage/default.nix:6"
</code></pre>
<p>Tools like <code>nix search</code> and the Nixpkgs website use the <code>meta</code> information for
documentation and discoverability. It can also be useful for debugging and helps
to provide better error messages. The above command shows that the
<code>meta.position</code> attribute points to the file and line where the package
definition begins, which is very useful for debugging.</p>
<p>Typically a file will have a <code>meta</code> attribute that looks similar to the
following:</p>
<pre><code class="language-nix">meta = with lib; {
homepage = "https://www.openssl.org/";
description = "A cryptographic library that implements the SSL and TLS protocols";
license = licenses.openssl;
platforms = platforms.all;
} // extraMeta;
</code></pre>
<p>For example, the following shows how Nix is able to discover different parts of
your configuration:</p>
<p>Launch the <code>nix repl</code> and load your local flake:</p>
<pre><code class="language-bash">cd /src
nix repl
nix-repl> :lf nixpkgs
nix-repl> outputs.legacyPackages.x86_64-linux.openssl.meta.position
"/nix/store/syvnmj3hhckkbncm94kfkbl76qsdqqj3-source/pkgs/development/libraries/openssl/default.nix:303"
nix-repl> builtins.unsafeGetAttrPos "description" outputs.legacyPackages.x86_64-linux.openssl.meta
{
column = 9;
file = "/nix/store/syvnmj3hhckkbncm94kfkbl76qsdqqj3-source/pkgs/development/libraries/openssl/default.nix";
line = 303;
}
</code></pre>
<p>Lets create just the <code>meta.description</code> for demonstration purposes.</p>
<h2>Adding the meta attribute</h2>
<p>Since we don’t have a <code>meta</code> attribute this points to a default value that’s
incorrect.</p>
<p>Let’s add the <code>meta</code> attribute and try it again:</p>
<pre><code class="language-nix"># default.nix
{
runCommand,
coreutils,
}:
runCommand "testPackage" {
nativeBuildInputs = [
coreutils
];
meta = {
description = "test package";
};
} ''
echo 'This is a Test' > $out
''
</code></pre>
<pre><code class="language-nix">nix-instantiate --eval -A testPackage.meta.position
"/home/jr/src/nixpkgs/pkgs/misc/testPackage/default.nix:11"
</code></pre>
<p>Now it points us to the 11’th line, right where our <code>meta.description</code> is.</p>
<p>Let’s stage our package so nix recognises it:</p>
<pre><code class="language-bash">cd ~/nixpkgs
git add pkgs/misc/testPackage/
nix edit .#testPackage
</code></pre>
<p>I used <code>nix edit</code> here to ensure it was picked up properly.</p>
<p>The <code>default.nix</code> that we’ve been working on should open in your <code>$EDITOR</code></p>
Nixpkgs Overlayshttps://saylesss88.github.io/nixpkgs/overlay.html2025-11-22T00:00:00+00:00saylesss87@proton.me (saylesss88)<h1>Nixpkgs Overlays</h1>
<p>The following is done with a local clone of Nixpkgs located at <code>~/src/nixpkgs</code>.</p>
<p>In this example, we will create an overlay to override the version of
<code>btrfs-progs</code>. In the root directory of our local clone of Nixpkgs
(i.e.<code>~/src/nixpkgs</code>) we can run the following command to locate <code>btrfs-progs</code>
within Nixpkgs:</p>
<pre><code class="language-bash">fd 'btrfs-progs' .
./pkgs/by-name/bt/btrfs-progs/
</code></pre>
<p>Open the <code>package.nix</code> in the above directory and copy the <code>src</code> block within
the <code>stdenv.mkDerivation</code> block like so:</p>
<pre><code class="language-nix"># package.nix
version = "6.14";
src = fetchurl {
url = "mirror://kernel/linux/kernel/people/kdave/btrfs-progs/btrfs-progs-v${version}.tar.xz";
hash = "sha256-31q4BPyzbikcQq2DYfgBrR4QJBtDvTBP5Qzj355+PaE=";
};
</code></pre>
<p>When we use the above <code>src</code> block in our overlay we’ll need to add
<code>src = self.fetchurl</code> for our overlay to have access to <code>fetchurl</code>.</p>
<p>We will replace the version with our desired version number. To find another
version that actually exists we need to check their github repos
<a href="https://github.com/kdave/btrfs-progs/releases">btrfs-progs Releases</a>. I can see
that the previous version was <code>v6.13</code>, lets try that.</p>
<pre><code class="language-bash">cd ~/src/nixpkgs
hx overlay.nix
</code></pre>
<p>We will change the version to <code>6.13</code> for demonstration purposes. All that is
really required is changing the version and 1 character in the <code>hash</code> which
would cause a refetch and recalculation of the hash. We will use an empty string
to follow convention:</p>
<pre><code class="language-nix"># overlay.nix
self: super: {
btrfs-progs = super.btrfs-progs.overrideAttrs (old: rec {
version = "6.13";
# Notice the `self` added here
src = self.fetchurl {
url = "mirror://kernel/linux/kernel/people/kdave/btrfs-progs/btrfs-progs-v${version}.tar.xz";
hash = "";
};
};
});
}
</code></pre>
<p>To build this with the file right from the root of the local Nixpkgs (i.e.
<code>~/src/nixpkgs</code>) you could run the following. Running the command this way
avoids the impurity of looking it up in the <code>~/.config</code> directory:</p>
<pre><code class="language-bash">nix-build -A btrfs-progs --arg overlays '[ (import ./overlay.nix) ]'
</code></pre>
<p>The compiler will give you back the correct <code>hash</code>:</p>
<pre><code class="language-bash">specified: sha256-AAAAAAAAAAAAAAAAAAAAAAAAAAAAAAAAAAAAAAAAAAA=
got: sha256-ZbPyERellPgAE7QyYg7sxqfisMBeq5cTb/UGx01z7po=
</code></pre>
<p>Replace the empty <code>hash</code> with the new hash value we just got from the compiler
so the <code>overlay.nix</code> would look like this:</p>
<pre><code class="language-nix">self: super: {
btrfs-progs = super.btrfs-progs.overrideAttrs (old: rec {
version = "6.13";
src = self.fetchurl {
url = "mirror://kernel/linux/kernel/people/kdave/btrfs-progs/btrfs-progs-v${version}.tar.xz";
hash = "sha256-ZbPyERellPgAE7QyYg7sxqfisMBeq5cTb/UGx01z7po=";
};
});
}
</code></pre>
<p>Try building it again:</p>
<pre><code class="language-bash">nix-build -A btrfs-progs --arg overlays '[ (import ./overlay.nix) ]'
checking for references to /build/ in /nix/store/szd6lizahidjniz85a0g1wsrfknirhwb-btrfs-progs-6.13...
gzipping man pages under /nix/store/szd6lizahidjniz85a0g1wsrfknirhwb-btrfs-progs-6.13/share/man/
patching script interpreter paths in /nix/store/szd6lizahidjniz85a0g1wsrfknirhwb-btrfs-progs-6.13
/nix/store/szd6lizahidjniz85a0g1wsrfknirhwb-btrfs-progs-6.13/bin/fsck.btrfs: interpreter directive changed from "#!/bin/sh -f" to "/nix/store/xy4jjgw87sbgwylm5kn047d9gkbhsr9x-bash-5.2p37/bin/sh -f"
stripping (with command strip and flags -S -p) in /nix/store/szd6lizahidjniz85a0g1wsrfknirhwb-btrfs-progs-6.13/lib /nix/store/szd6lizahidjniz85a0g1wsrfknirhwb-btrfs-progs-6.13/bin
/nix/store/szd6lizahidjniz85a0g1wsrfknirhwb-btrfs-progs-6.13
</code></pre>
<p>We can inspect it with the repl:</p>
<pre><code class="language-bash">cd ~/src/nixpkgs
nix repl
nix-repl> :a import ./. { overlays = [ (import ./overlay.nix) ]; }
nix-repl> btrfs-progs
«derivation /nix/store/6yxhj84cwcsnrd87rcxbd6w08l9ikc6p-btrfs-progs-6.13.drv»
nix-repl> btrfs-progs.drvAttrs.buildInputs
[
«derivation /nix/store/yg4llzkcla5rppv8r1iikyamfxg3g4sg-acl-2.3.2.drv»
«derivation /nix/store/vqczbcwjnid6bs4cv3skl7kyd6kkzcfx-attr-2.5.2.drv»
«derivation /nix/store/xrvx0azszpdh2x0lnldakqx25vfxab19-e2fsprogs-1.47.2.drv»
«derivation /nix/store/iil4b8adk615zhp6wmzjx16z1v2f8f4j-util-linux-minimal-2.41.drv»
«derivation /nix/store/wwld8wp91m26wz69gp8vzh090sh5ygxd-lzo-2.10.drv»
«derivation /nix/store/w4ncw24gdfkbx9779xpgjli5sagi506m-systemd-minimal-libs-257.5.drv»
«derivation /nix/store/dmh4lvmq6n8hy56q93kplvnfnlwqzzv5-zlib-1.3.1.drv»
«derivation /nix/store/h8iwhnr636dwb72qqcyzp111ajjxgzr2-zstd-1.5.7.drv»
]
nix-repl> btrfs-progs.drvAttrs.version
"6.13"
nix-repl> btrfs-progs.drvAttrs.src
«derivation /nix/store/y5nkz1xczxha4xl93qq3adndyc46dcvf-btrfs-progs-v6.13.tar.xz.drv»
</code></pre>
<p>Using <code>:a</code> adds the attributes from the resulting set into scope and avoids
bringing the entire <code>nixpkgs</code> set into scope.</p>
<p>To see whats available, you can for example type <code>btrfs-progs.drvAttrs.</code> then
hit <code>TAB</code>.</p>
<p>Another way to do this is to move our overlay to the
<code>~/.config/nixpkgs/overlays</code> directory and rename the file like the following,
agian this adds an impurity because it relies on your <code>~/.config</code> directory
which is different from user to user:</p>
<pre><code class="language-bash">mv overlay.nix ~/.config/nixpkgs/overlays/btrfs-progs.nix
cd ~/src/nixpkgs
nix-build -A btrfs-progs
checking for references to /build/ in /nix/store/szd6lizahidjniz85a0g1wsrfknirhwb-btrfs-progs-6.13...
gzipping man pages under /nix/store/szd6lizahidjniz85a0g1wsrfknirhwb-btrfs-progs-6.13/share/man/
patching script interpreter paths in /nix/store/szd6lizahidjniz85a0g1wsrfknirhwb-btrfs-progs-6.13
/nix/store/szd6lizahidjniz85a0g1wsrfknirhwb-btrfs-progs-6.13/bin/fsck.btrfs: interpreter directive changed from "#!/bin/sh -f" to "/nix/store/xy4jjgw87sbgwylm5kn047d9gkbhsr9x-bash-5.2p37/bin/sh -f"
stripping (with command strip and flags -S -p) in /nix/store/szd6lizahidjniz85a0g1wsrfknirhwb-btrfs-progs-6.13/lib /nix/store/szd6lizahidjniz85a0g1wsrfknirhwb-btrfs-progs-6.13/bin
/nix/store/szd6lizahidjniz85a0g1wsrfknirhwb-btrfs-progs-6.13
</code></pre>
<h2>Overlays with Flakes</h2>
<p>In a flake, overlays are defined in the <code>outputs.overlays</code> attribute set of the
<code>flake.nix</code>.</p>
<p>They are then applied to <code>nixpkgs</code> inputs using
<code>inputs.nixpkgs.follows = "nixpkgs";</code> (or similar) and the overlays attribute on
the input.</p>
<p>Example of flake usage:</p>
<pre><code class="language-nix"># flake.nix
{
description = "My NixOS flake with custom overlays";
inputs = {
nixpkgs.url = "github:NixOS/nixpkgs/nixos-unstable";
};
outputs = { self, nixpkgs, ... }: {
overlays.myCustomOverlay = final: prev: {
btrfs-progs = prev.btrfs-progs.overrideAttrs (old: rec {
version = "6.13";
src = self.fetchurl {
url = "mirror://kernel/linux/kernel/people/kdave/btrfs-progs/btrfs-progs-v${version}.tar.xz";
hash = "sha256-ZbPyERellPgAE7QyYg7sxqfisMBeq5cTb/UGx01z7po=";
};
});
};
nixosConfigurations.my-system = nixpkgs.lib.nixosSystem {
system = "x86_64-linux";
modules = [
# Apply the overlay
{ nixpkgs.overlays = [ self.overlays.myCustomOverlay ]; }
./configuration.nix
];
};
};
}
</code></pre>
<pre><code class="language-bash">nix flake show
path:/home/jr/btrfs-progs?lastModified=1749655369&narHash=sha256-ln6dLiqo7TxStQSXgcIwfbdt7STGw4ZHftZRfWpY/JQ%3D
├───nixosConfigurations
│ └───my-system: NixOS configuration
└───overlays
└───myCustomOverlay: Nixpkgs overlay
</code></pre>
Debugging NixOS moduleshttps://saylesss88.github.io/Debugging_and_Tracing_NixOS_Modules_9.html2025-11-22T00:00:00+00:00saylesss87@proton.me (saylesss88)<h1>Chapter 11</h1>
<p>This chapter covers debugging NixOS modules, focusing on tracing module options
and evaluating merges.</p>
<details>
<summary> ✔️ Click to Expand Table of Contents</summary>
<!-- toc -->
</details>
<h2>Debugging and Tracing NixOS Modules</h2>
<p><img src="https://saylesss88.github.io/images/coding4.png" alt="404" /></p>
<!--  -->
<ul>
<li>Other related post if you haven’t read my previous post on modules, that may
be helpful before reading this one:
<ul>
<li>
<p><a href="https://saylesss88.github.io/posts/nix_modules_explained/">nix-modules-explained</a></p>
</li>
<li>
<p>This post is my notes following Nix Hour 40. If it seems a little chaotic,
try watching one. They are hard to follow if you’re not extremely familiar
with the concepts.</p>
</li>
<li>
<p><a href="https://www.youtube.com/watch?v=aLy8id4wr-M&t=2120s">Nix Hour 40</a></p>
</li>
</ul>
</li>
</ul>
<p>Nix Code is particularly hard to <strong>debug</strong> because of (e.g. lazy evaluation,
declarative nature, layered modules)</p>
<ul>
<li>The following simple Nix code snippet illustrates a basic NixOS module
definition and how options are declared and configured. We’ll use this example
to demonstrate fundamental debugging techniques using <code>nix-instantiate</code>.</li>
</ul>
<pre><code class="language-nix">let
lib = import <nixpkgs/lib>;
in
lib.evalModules {
modules = [
({ lib, ... }: {
options.foo = lib.mkOption {
# type = lib.types.raw;
type = lib.types.anything;
# default = pkgs;
};
config.foo = {
bar = 10;
list = [1 2 3 ];
baz = lib.mkDefault "baz";
};
})
{
foo.baz = "bar";
}
];
}
</code></pre>
<ul>
<li>
<p>In the above code, adding <code>lib</code> to the function arguments isn’t required but
if you were to move the module to another file it would fail without it
because <code>lib</code> comes from outside of it. So it’s good practice to refer to
<code>lib</code> in the modules themselves.</p>
</li>
<li>
<p>You should <strong>always</strong> assign a type to your options, if you don’t know which
type to use you could use <code>raw</code>. <code>raw</code> is a type that doesn’t do any
processing. So if you were to assign the entire packages set to the option
e.g. <code>default = pkgs;</code> it wouldn’t recurseinto all the packages and try to
evaluate them. There is also <code>anything</code>, that is useful if you do want to
recurse into the values.</p>
</li>
<li>
<p>The following is an example of how you would run this inside vim/neovim, the
rest of the examples will be from the command line:</p>
</li>
</ul>
<pre><code class="language-vim">:!nix-instantiate --eval -A config.foo --strict
</code></pre>
<p><strong>Output</strong>:</p>
<details>
<summary> Click to Expand the Output </summary>
<pre><code class="language-bash">{ bar = 10; baz = "bar"; list = [ 1 2 3 ]; }
</code></pre>
<p>To show the difference you could uncomment the <code>raw</code> type and comment the
<code>anything</code> type and run the above command again you’ll see that you get an
error:</p>
<pre><code class="language-bash">error: The option 'foo' is defined multiple times while it's expected to be
unique
</code></pre>
<p>To execute this command on the command line:</p>
<pre><code class="language-bash">nix-instantiate --eval --strict -A config.foo
</code></pre>
<p>It will show you the start of a trace. To get the full trace add:</p>
<pre><code class="language-bash">nix-instantiate --eval --strict -A config.foo --show-trace
</code></pre>
</details>
<h2>Example 2</h2>
<details>
<summary> Click to Expand Example 2 </summary>
<p>In the previous example, we looked at a simplified module. Now, let’s examine a
more realistic scenario involving a basic NixOS configuration file
(<code>configuration.nix</code>).</p>
<p>This example will demonstrate how to use <code>nix-instantiate</code> to evaluate an entire
system configuration and how <code>--show-trace</code> helps in diagnosing errors within
this context.</p>
<p>Consider the following <code>configuration.nix</code> file:</p>
<pre><code class="language-nix"># configuration.nix
{ lib, ... }: {
boot.loader.grub.device = "nodev";
fileSystems."/".device = "/devst";
system.stateVersion = "24.11";
}
</code></pre>
<ul>
<li>This configuration snippet sets the GRUB bootloader device, defines a root
filesystem, and specifies the expected NixOS state version. To evaluate this
entire system configuration, you can use <code>nix-instantiate</code> and point it to the
<code><nixpkgs/nixos></code> entrypoint, providing our <code>configuration.nix</code> file as an
argument. The <code>-A system</code> flag selects the top-level <code>system</code> attribute, which
represents the instantiated system configuration.</li>
</ul>
<p><strong>Run</strong> it in with:</p>
<pre><code class="language-bash">nix-instantiate '<nixpkgs/nixos>' --arg configuration ./configuration.nix -A system
</code></pre>
<p><strong>Output</strong>:</p>
<pre><code class="language-bash">/nix/store/kfcwvvpdbsb3xcks1s76id16i1mc3l5k-nixos-system-nixos-25.05pre-git.drv
</code></pre>
<p>Ok, we can see that this successfully <em>instantiates</em>. Let’s introduce an error
to trace:</p>
<pre><code class="language-nix">{ lib, ... }: {
boot.loader.grub.device = "nodev";
fileSystems."/".device = "/devst";
system.stateVersion = builtins.genList "24.11" null;
}
</code></pre>
<p><strong>Output</strong>:</p>
<pre><code class="language-bash">(stack trace truncated; use '--show-trace' to show the full, detailed trace)
error: expected an integer but found null: null
</code></pre>
<p>Rerun the command with <code>--show-trace</code> appended:</p>
<p>Or on the command line</p>
<pre><code class="language-bash">nix-instantiate '<nixpkgs/nixos>' --arg configuration ./configuration.nix -A system --show-trace
</code></pre>
<ul>
<li>This outputs a much longer trace than the first example. It shows you the file
the error occured in and you can see that in this case they are a lot of
internal functions. (e.g.
<code>at /nix/store/ccfwxygjrarahgfv5865x2f828sjr5h0- source/lib/attrsets.nix:1529:14:</code>)</li>
</ul>
<p>To show your own error message you could do something like this:</p>
<pre><code class="language-nix">{lib, ...}: {
boot.loader.grub.device = "nodev";
fileSystems."/".device = "/devst";
system.stateVersion = builtins.addErrorContext "AAAAAAAAAAAAAAAAA" (builtins.genList "24.11" null);
}
</code></pre>
<p>Run it:</p>
<pre><code class="language-bash">nix-instantiate '<nixpkgs/nixos>' --arg configuration ./configuration.nix -A system --show-trace`
</code></pre>
<p><strong>Output</strong>:</p>
<pre><code class="language-bash"> … while evaluating the attribute 'value'
at /nix/store/ccfwxygjrarahgfv5865x2f828sjr5h0-source/lib/modules.nix:770:21:
769| inherit (module) file;
770| inherit value;
| ^
771| }) module.config
… AAAAAAAAAAAAAAAAA
… while calling the 'genList' builtin
at /home/jr/tests/configuration.nix:4:71:
3| fileSystems."/".device = "/devst";
4| system.stateVersion = builtins.addErrorContext "AAAAAAAAAAAAAAAAA"
(builtins.genList "24.11" null);
| ^
5| }
… while evaluating the second argument passed to builtins.genList
error: expected an integer but found null: null
</code></pre>
<ul>
<li>In the latest nix they actually inverted the error messages so the most
relevant parts will be at the bottom.</li>
</ul>
</details>
<h2>Example 3</h2>
<details>
<summary> Click to Expand Example 3 </summary>
<p>Let’s consider another example, this time demonstrating the definition of
configuration options using <code>lib.mkOption</code> within a module structure.</p>
<pre><code class="language-nix"># default.nix
let
lib = import <nixpkgs/lib>;
in
lib.evalModules {
modules = [
({ lib, ... }: {
options.ints = lib.mkOption {
type = lib.types.attrsOf lib.types.int;
};
options.strings = lib.mkOption {
type = lib.types.string;
# type = lib.types.attrsOf lib.types.string;
default = "foo";
};
})
];
}
</code></pre>
<p><strong>Instantiate</strong> this with:</p>
<pre><code class="language-bash">nix-instantiate --eval --strict -A config.strings
</code></pre>
<p><strong>Output</strong>:</p>
<pre><code class="language-bash">evaluation warning: The type `types.string` is deprecated.
See https://github.com/NixOS/nixpkgs/pull/66346 for better alternative types.
"foo"
</code></pre>
<ul>
<li>Unfortunately you won’t get the same depreciation warning from <code>lib.attrsOf</code></li>
</ul>
<p>Below is an interesting way to provide nixpkgs run it on the command line:</p>
<pre><code class="language-bash">export NIX_PATH=nixpkgs=channel:nixpkgs-unstable
echo $NIX_PATH
</code></pre>
<p><strong>Output</strong>:</p>
<pre><code class="language-bash">nixpkgs=channel:nixpkgs-unstable
</code></pre>
<p>The next two commands are to check that after using the above way to provide
<code>nixpkgs-unstable</code> that they both point to the same store path, the following
command will fetch nixpkgs from the channel above:</p>
<pre><code class="language-bash">nix-instantiate --find-file nixpkgs
</code></pre>
<p><strong>Output</strong> 1️⃣</p>
<pre><code class="language-bash">/nix/store/ydrgwsibghsyx884qz97zbs1xs93yk11-source
</code></pre>
<pre><code class="language-bash">nix-instantiate --eval channel:nixpkgs-unstable -A path
</code></pre>
<p><strong>Output</strong>: 2️⃣</p>
<pre><code class="language-bash">/nix/store/ydrgwsibghsyx884qz97zbs1xs93yk11-source
</code></pre>
<ul>
<li>As you can see both commands produce the same store path</li>
</ul>
<h2>Example 4</h2>
<p>In our previous example, we encountered a deprecation warning for
<code>lib.types.string</code>. This next example delves deeper into why that type was
deprecated and demonstrates the consequences of its behavior, along with the
recommended fix.</p>
<pre><code class="language-nix"># default.nix
let
lib = import <nixpkgs/lib>;
in
lib.evalModules {
modules = [
({lib, ...}: {
options.ints = lib.mkOption {
type = lib.types.attrsOf lib.types.int;
};
options.strings = lib.mkOption {
# type = lib.types.string;
type = lib.types.attrsOf lib.types.string;
default = {
x = "foo";
};
};
config = {
strings = lib.mkOptionDefault {
x = "bar";
};
};
})
];
}
</code></pre>
<p>Evaluate it with:</p>
<pre><code class="language-bash">nix-instantiate --eval --strict -A config.strings
</code></pre>
<ul>
<li>
<p><code>types.string</code> depricated because it silently concatenates strings</p>
</li>
<li>
<p>The above command has two options with the same priority level and evaluates
to <code>{ x = "foobar"; }</code></p>
</li>
</ul>
<p><strong>Output:</strong></p>
<pre><code class="language-bash">evaluation warning: The type `types.string` is deprecated. See https://github.
com/NixOS/nixpkgs/pull/66346 for better alternative types.
{ x = "foobar"; }
</code></pre>
<ul>
<li><code>types.str</code> was the replacement for the depricated <code>types.string</code>:</li>
</ul>
<pre><code class="language-nix"># default.nix
let
lib = import <nixpkgs/lib>;
in
lib.evalModules {
modules = [
({lib, ...}: {
options.ints = lib.mkOption {
type = lib.types.attrsOf lib.types.int;
};
options.strings = lib.mkOption {
# type = lib.types.string;
type = lib.types.attrsOf lib.types.str;
# Sets the value with a lower priority: lib.mkOptionDefault
default = {
x = "foo";
};
};
config = {
strings = lib.mkOptionDefault {
x = "bar";
};
};
})
];
}
</code></pre>
<p><strong>Output:</strong></p>
<pre><code class="language-bash">error:
… while evaluating the attribute 'x'
… while evaluating the attribute 'value'
at /nix/store/ydrgwsibghsyx884qz97zbs1xs93yk11-source/lib/modules.nix:1148:41:
1147|
1148| optionalValue = if isDefined then { value = mergedValue; } else { };
| ^
1149| };
… while calling the 'foldl'' builtin
at /nix/store/ydrgwsibghsyx884qz97zbs1xs93yk11-source/lib/options.nix:508:8:
507| else
508| (foldl' (
| ^
509| first: def:
(stack trace truncated; use '--show-trace' to show the full, detailed trace)
error: The option `strings.x' has conflicting definition values:
- In `<unknown-file>': "foo"
- In `<unknown-file>': "bar"
Use `lib.mkForce value` or `lib.mkDefault value` to change the priority on any of these definitions.
shell returned 1
</code></pre>
</details>
<h2>Summary</h2>
<ul>
<li>
<p>So types in the module system aren’t just types in the conventional sense but
they also specify the emerging behavior of these values.</p>
</li>
<li>
<p>If we switch the type in the above example to <code>types.lines</code> you get this
returned, <code>{ x = "foo\nbar"; }</code></p>
</li>
<li>
<p><code>mkOptionDefault</code> isn’t typically something you should generally use, instead
options have a <code>default</code> setting</p>
</li>
<li>
<p>If you want to make sure that you set a default but if the user specifies it,
it shouldn’t get overridden. You should not set it in the following:</p>
</li>
</ul>
<pre><code class="language-nix">options.strings = lib.mkOption {
type = lib.types.attrsOf lib.types.lines;
default = {
x = "foo";
};
}
</code></pre>
<p>Because the above uses <code>mkOptionDefault</code> but instead in under the <code>config</code>
attribute like the following:</p>
<pre><code class="language-nix"># ...snip...
options.strings = lib.mkOption {
type = lib.types.attrsOf lib.types.lines;
# default = {
# x = "foo";
# };
};
config = {
strings = {
x = lib.mkDefault "foo";
};
};
# ...snip...
</code></pre>
<pre><code class="language-nix">let
lib = import <nixpkgs/lib>;
in
lib.evalModules {
modules = [
({lib, ...}: {
options.ints = lib.mkOption {
type = lib.types.attrsOf lib.types.int;
};
options.strings = lib.mkOption {
# type = lib.types.string;
type = lib.types.attrsOf lib.types.str;
# Sets the value with a lower priority: lib.mkOptionDefault
#default = {
# x = "foo";
#};
};
config.strings = {
x = "foo";
};
})
{
config.strings = {
y = "bar";
};
}
];
}
</code></pre>
<p><strong>Output</strong>:</p>
<ul>
<li>This works now because there’s no difference between <code>x</code> and <code>y</code></li>
</ul>
<pre><code class="language-bash">{ x = "foo"; y = "bar"; }
</code></pre>
<h2>More Functionality between modules</h2>
<pre><code class="language-nix">let
lib = import <nixpkgs/lib>;
in
lib.evalModules {
modules = [
({lib, ...}: {
options.ints = lib.mkOption {
type = lib.types.attrsOf lib.types.int;
};
options.strings = lib.mkOption {
# type = lib.types.string;
type = lib.types.attrsOf lib.types.str;
# Sets the value with a lower priority: lib.mkOptionDefault
#default = {
# x = "foo";
#};
};
config.strings = {
x = lib.mkDefault "foo";
};
})
{
config.strings = {
x = "x";
y = "bar";
};
}
];
}
</code></pre>
<ul>
<li>The above command would cause a conflict without the <code>x = lib.mkDefault foo</code>
And this is typically what you want to do for defaults and modules in things
like nested configuration.</li>
</ul>
<p><strong>Output:</strong></p>
<pre><code class="language-bash">{ x = "x"; y = "bar"; }
</code></pre>
<h3>Infinite recursion error</h3>
<ol>
<li>A common pitfall is to introduce a hard to debug error <code>infinite recursion</code>
when shadowing a name. The simplest example for this is:</li>
</ol>
<blockquote>
<pre><code class="language-nix">let a = 1; in rec { a = a; }
</code></pre>
</blockquote>
<blockquote>
<p>💡<strong>TIP</strong>: Avoid <code>rec</code>. Use <code>let ... in</code> Example:</p>
<pre><code class="language-nix">let
a = 1;
in {
a = a;
b = a + 2;
}
</code></pre>
</blockquote>
<details>
<summary> Click to Expand a more involved infinite recursion error </summary>
<p>We’ll separate the logic for this example, this will be the <code>default.nix</code> this
is where having <code>lib</code> defined in your inline modules is helpful because you can
just delete the section and paste it into your <code>modules.nix</code>:</p>
<pre><code class="language-nix"># default.nix
let
lib = import <nixpkgs/lib>;
in
lib.evalModules {
modules = [
./module.nix
];
}
</code></pre>
<p>And in the <code>module.nix</code>:</p>
<pre><code class="language-nix"># module.nix
{ lib, pkgs, ...}: {
options.etc = lib.mkOption {
type = lib.types.attrsOf lib.types.path;
default = { };
description = ''
Specifies which paths are is /etc/
'';
};
config._module.args.pkgs = import <nixpkgs> {
config = {};
overlays = [];
};
config.etc.foo = pkgs.writeText "foo" ''
foo configuration
'';
}
</code></pre>
<ul>
<li>If you evaluate this with the following you will get an infinite recursion
error.</li>
</ul>
<pre><code class="language-bash">nix-instantiate --eval --strict -A config.etc
</code></pre>
<ul>
<li>This happens because <code>--strict</code> evaluates the <code>etc</code>, then it goes into the
<code>attrsOf</code>, and the <code>path</code></li>
</ul>
<pre><code class="language-bash">nix repl
nix-repl> :l <nixpkgs>
nix-repl> hello.out.out.out
</code></pre>
<p>In this example:</p>
<ul>
<li>
<p><code>:l <nixpkgs></code> loads the Nixpkgs library into the repl environment, making its
definitions available.</p>
</li>
<li>
<p><code>hello</code> refers to the <code>hello</code> package definition within Nixpkgs. Packages in
Nixpkgs are defined as <em>derivations</em>.</p>
</li>
<li>
<p><code>.out</code> is a common attribute name for the <em>main output</em> of a derivation (e.g.,
the installed package). Some packages, especially those with complex build
processes or multiple outputs, might have nested output attributes. In the
case of <code>hello</code>, accessing <code>.out.out.out</code> ultimately leads us to the
<em>derivation</em> itself.</p>
</li>
</ul>
<p>The key takeaway here is that when you evaluate a package in the <code>nix repl</code>,
you’re often interacting with its derivation or one of its output paths in the
Nix store. The <code>«derivation ...»</code> indicates that <code>hello.out.out.out</code> evaluates
to a derivation – the blueprint for building the <code>hello</code> package. This is in
contrast to <code>--eval --strict</code>, which tries to fully evaluate values, potentially
leading to infinite recursion if it encounters a derivation that refers back to
itself indirectly during attribute evaluation.</p>
<p><strong>Output:</strong></p>
<pre><code class="language-bash">«derivation /nix/store/b1vcpm321dwbwx6wj4n13l35f4y2wrfv-hello-2.12.1.drv»
</code></pre>
<ul>
<li>So it recurses through the entire thing and tries to evaluate its string.</li>
</ul>
<p>So we want to change the command from <code>--eval --strict</code> which is only based on
evaluation to at least <code>nix-instantiate</code> which is based on derivations:</p>
<pre><code class="language-bash">nix-instantiate -A config.etc
</code></pre>
<p><strong>Output:</strong></p>
<pre><code class="language-bash">warning: you did not specify '--add-root'; the result might be removed by the garbage collector
/nix/store/abyfp1rxk73p0n5kfilv7pawxwvc7hsg-foo.drv
</code></pre>
<ul>
<li>We don’t really have a derivation yet for example:</li>
</ul>
<pre><code class="language-nix"># module.nix
{
lib,
pkgs,
...
}: {
options.etc = lib.mkOption {
type = lib.types.attrsOf (lib.types.attrsOf lib.types.path);
default = {};
description = ''
Specifies which paths are in /etc/
'';
};
config._module.args.pkgs = import <nixpkgs> {
config = {};
overlays = [];
};
config.etc.foo.bar = pkgs.writeText "foo" ''
foo configuration
'';
}
</code></pre>
<p>Try to evaluate the above command with <code>nix-instantiate -A config.etc</code> and Nix
doesn’t even try to build it. With nested <code>attrsOf</code></p>
<pre><code class="language-bash">nix repl -f default.nix
nix-repl> config.etc
{
foo = { ... };
}
nix-repl> config.etc.foo
{
bar = «derivation /nix/store/abyfp1rxk73p0n5kfilv7pawxwvc7hsg-foo.drv»;
}
</code></pre>
<ul>
<li>So <code>config.foo</code> is an attribute set and <code>config.etc.foo</code> is also an attribute
set but it’s not a derivation by itself. So <code>nix-instantiate</code> does this one
level of recursion here and it would have built <code>foo</code> value if it were a
derivation.</li>
</ul>
</details>
<h3>Example 5</h3>
<details>
<summary> Click to Expand Example 5 </summary>
<p>We’ll use the same <code>module.nix</code> and <code>default.nix</code> from the previous example.</p>
<p>Building More Complex Configurations with Modules In this next example, we’ll
focus on a common task in system configuration: managing files within the
<code>/etc/</code> directory. We’ll define a module that allows us to specify the content
of arbitrary files in <code>/etc/</code> and then use a special Nix function to combine
these individual file definitions into a single, manageable entity.</p>
<p>We’ll introduce a new option, <code>options.etc</code>, which will allow us to define the
content of files within <code>/etc/</code>. Then, we’ll use <code>pkgs.linkFarm</code> to create a
derivation that represents the entire <code>/etc/</code> directory as a collection of
symbolic links pointing to the individual file contents we’ve defined. This
demonstrates how modules can abstract away the details of creating complex
system configurations, providing a declarative and reproducible way to manage
even fundamental aspects of the operating system.</p>
<p>Let’s show how we can use Nix modules to declaratively manage the <code>/etc/</code>
directory</p>
<pre><code class="language-nix"># default.nix
let
lib = import <nixpkgs/lib>;
in
lib.evalModules {
modules = [
./module.nix
];
}
</code></pre>
<pre><code class="language-nix"># module.nix
{
lib,
pkgs,
config,
...
}: {
options.etc = lib.mkOption {
type = lib.types.attrsOf (lib.types.attrsOf lib.types.path);
default = {};
description = ''
Specifies which paths are in /etc/
'';
};
options.etcCombined = lib.mkOption {
type = lib.types.package;
default =
pkgs.linkFarm "etc"
(lib.mapAttrsToList (name: value: {
name = name;
path = value;
}) config.etc);
};
config._module.args.pkgs = import <nixpkgs> {
config = {};
overlays = [];
};
config.etc.foo = pkgs.writeText "foo" ''
foo configuration
'';
config.etc.bar = pkgs.writeText "bar" ''
bar configuration
'';
}
</code></pre>
<p>Run it with:</p>
<pre><code class="language-bash">nix-instantiate -A config.etcCombined
</code></pre>
<p><strong>Output</strong>:</p>
<pre><code class="language-bash">/nix/store/3da61nmfk546qn2zpxsm57mq6vz6fjx8-etc.drv
</code></pre>
<ul>
<li>So we can see that it will instantiate, lets see if it will build:</li>
</ul>
<pre><code class="language-bash">nix-build -A config.etcCombined
</code></pre>
<p><strong>Output</strong>:</p>
<pre><code class="language-bash">these 3 derivations will be built:
/nix/store/41yfxq4af1vrs0rrgfk5gc36kmjc7270-bar.drv
/nix/store/abyfp1rxk73p0n5kfilv7pawxwvc7hsg-foo.drv
/nix/store/3da61nmfk546qn2zpxsm57mq6vz6fjx8-etc.drv
building '/nix/store/41yfxq4af1vrs0rrgfk5gc36kmjc7270-bar.drv'...
building '/nix/store/abyfp1rxk73p0n5kfilv7pawxwvc7hsg-foo.drv'...
building '/nix/store/3da61nmfk546qn2zpxsm57mq6vz6fjx8-etc.drv'...
/nix/store/ca3wyk5m3qhy8n1nbn0181m29qvp1klp-etc
</code></pre>
<pre><code class="language-bash">nix-build -A config.etcCombined && ls result/ -laa
</code></pre>
<p><strong>Output</strong>:</p>
<pre><code class="language-bash">/nix/store/ca3wyk5m3qhy8n1nbn0181m29qvp1klp-etc
dr-xr-xr-x - root 31 Dec 1969 .
drwxrwxr-t - root 16 May 15:13 ..
lrwxrwxrwx - root 31 Dec 1969 bar -> /nix/store/1fsjyc2hmilab1qw6jfkf6cb767kz858-bar
lrwxrwxrwx - root 31 Dec 1969 foo -> /nix/store/wai5dycp0zx1lxg0rhpdxnydhiadpk05-foo
</code></pre>
<ul>
<li>
<p>We can see that <code>foo</code> and <code>bar</code> link to different derivations</p>
</li>
<li>
<p>When trying to figure out which <code>default</code> to use for <code>etcCombined</code> infinisil
went to the Nixpkgs Reference Manual. Make sure to go to the correct version.</p>
<ul>
<li>
<p><a href="https://nixos.org/manual/nixpkgs/stable/">24.11pre-git</a></p>
</li>
<li>
<p><a href="https://nixos.org/manual/nixpkgs/unstable/">25.05pre-git</a> (i.e. unstable)</p>
</li>
<li>
<p>Once at the website press <code>Ctrl+f</code> and type <code>symlinkjoin</code> and hit enter.</p>
</li>
</ul>
</li>
</ul>
<p>Or in your local copy of Nixpkgs you could go to
<code>nixpkgs/pkgs/build-support/ trivial-builders/default.nix</code>. Then use your
editors search feature, with nvim and helix you press <code>/symlinkjoin</code> or
<code>/linkFarm</code> hit enter then press <code>n</code> to cycle to the next match. It will bring
you to comments and up to date information.</p>
<pre><code class="language-bash"># linkFarm "myexample" [ { name = "hello-test"; path = pkgs.hello; }
# { name = "foobar"; path = pkgs.stack; } ]
</code></pre>
</details>
<h3>Tests</h3>
<details>
<summary> Click to Expand Test Example </summary>
<ul>
<li>How to create a Derivation with <code>passthru.tests</code> outside of Nixpkgs and then
run tests available to your package set?</li>
</ul>
<pre><code class="language-bash">mkdir passthru-tests && cd passthru-tests
</code></pre>
<p>Create a <code>default.nix</code> with the following:</p>
<pre><code class="language-nix"># default.nix
let
pkgs = import <nixpkgs> {};
package = pkgs.runCommand "foo" {
passthru.tests.simple = pkgs.runCommand "foo-test" {} ''
if [[ "$(cat ${package})" != "foo" ]]; then
echo "Result is not foo"
exit 1
fi
touch $out
'';
} ''
echo foo > $out
'';
in
package
</code></pre>
<p>See if it will build:</p>
<pre><code class="language-bash">nix-build
</code></pre>
<p>Try running the test:</p>
<pre><code class="language-bash">nix-build -A passthru.tests
</code></pre>
<pre><code class="language-bash">this derivation will be built:
/nix/store/pqpqq9x1wnsabzbsb52z4g4y4zy6p7yx-foo-test.drv
building '/nix/store/pqpqq9x1wnsabzbsb52z4g4y4zy6p7yx-foo-test.drv'...
/nix/store/7bbw2ban0mgkh4d59yz3cnai4aavwvb6-foo-test
</code></pre>
<h3>Test 2</h3>
<ul>
<li><code>passthru.tests</code> is the convention for defining tests associated with a
derivation. The attributes in <code>passthru</code> are preserved and accessible after
the derivation is built.</li>
</ul>
<pre><code class="language-nix">let
pkgs = import <nixpkgs> {};
package =
pkgs.runCommand "foo" {
passthru.tests.simple = pkgs.runCommand "foo-test" {} ''
if [[ "$(cat ${package})" != "foo" ]]; then
echo "Result is not foo"
exit 1
fi
touch $out
'';
passthru.tests.version = pkgs.testers.testVersion {
package = package;
version = "1.2";
};
# pkgs.writeShellApplication
script = ''
#!${pkgs.runtimeShell}
echo "1.2"
'';
passAsFiles = [ "script" ];
} ''
cp "$scriptPath" "$out"
'';
in
package
</code></pre>
<p>Try to build it:</p>
<pre><code class="language-bash">nix-build -A passthru.tests
</code></pre>
<ul>
<li>
<p><code>testers.testVersion</code> checks if an executable outputs a specific version
string.</p>
</li>
<li>
<p><code>nix-build -A passthru.tests</code> specifically targets the derivations defined
within the tests attribute of the main derivation.</p>
</li>
</ul>
<pre><code class="language-bash">these 3 derivations will be built:
/nix/store/lyz86bd78p7f3yjy1qky6annmggymcwd-foo.drv
/nix/store/s4iawjy5zpv89dbkc3zz7z3ngz4jq2cv-foo-test.drv
/nix/store/z3gi4pb8jn2h9rvk4dhba85fiphp5g4z-foo-test-version.drv
building '/nix/store/lyz86bd78p7f3yjy1qky6annmggymcwd-foo.drv'...
cp: cannot stat '': No such file or directory
error: builder for '/nix/store/lyz86bd78p7f3yjy1qky6annmggymcwd-foo.drv'
failed with exit code 1;
last 1 log lines:
> cp: cannot stat '': No such file or directory
For full logs, run:
nix log /nix/store/lyz86bd78p7f3yjy1qky6annmggymcwd-foo.drv
error: 1 dependencies of derivation '/nix/store/z3gi4pb8jn2h9rvk4dhba85fiphp5g4z
-foo-test-version.drv' failed to build
error: build of '/nix/store/s4iawjy5zpv89dbkc3zz7z3ngz4jq2cv-foo-test.drv',
'/nix/store/z3gi4pb8jn2h9rvk4dhba85fiphp5g4z-foo-test-version.drv' failed
</code></pre>
<p>Run <code>nix-build</code> with no arguments:</p>
<pre><code class="language-bash">nix-build
</code></pre>
<pre><code class="language-bash">nix derivation show /nix/store/lyz86bd78p7f3yjy1qky6annmggymcwd-foo.drv | jq '.[].env'
</code></pre>
<p><strong>Output</strong>:</p>
<pre><code class="language-json">{
"__structuredAttrs": "",
"buildCommand": "cp \"$scriptPath\" \"$out\"\n",
"buildInputs": "",
"builder": "/nix/store/xg75pc4yyfd5n2fimhb98ps910q5lm5n-bash-5.2p37/bin/bash",
"cmakeFlags": "",
"configureFlags": "",
"depsBuildBuild": "",
"depsBuildBuildPropagated": "",
"depsBuildTarget": "",
"depsBuildTargetPropagated": "",
"depsHostHost": "",
"depsHostHostPropagated": "",
"depsTargetTarget": "",
"depsTargetTargetPropagated": "",
"doCheck": "",
"doInstallCheck": "",
"enableParallelBuilding": "1",
"enableParallelChecking": "1",
"enableParallelInstalling": "1",
"mesonFlags": "",
"name": "foo",
"nativeBuildInputs": "",
"out": "/nix/store/9mcrnddb6lf1md14v4lj6s089i99l5k7-foo",
"outputs": "out",
"passAsFile": "buildCommand",
"passAsFiles": "script",
"patches": "",
"propagatedBuildInputs": "",
"propagatedNativeBuildInputs": "",
"script": "#!/nix/store/xg75pc4yyfd5n2fimhb98ps910q5lm5n-bash-5.2p37/bin/bash\necho \"1.2\"\n",
"stdenv": "/nix/store/lgydi1gl5wqcw6k4gyjbaxx7b40zxrsp-stdenv-linux",
"strictDeps": "",
"system": "x86_64-linux"
}
</code></pre>
<pre><code class="language-bash">nix derivation show /nix/store/lyz86bd78p7f3yjy1qky6annmggymcwd-foo.drv | jq
'.[].env.buildCommand'
</code></pre>
<p><strong>Output:</strong></p>
<pre><code class="language-bash">"cp \"$scriptPath\" \"$out\"\n"
</code></pre>
<ul>
<li>raw mode below</li>
</ul>
<pre><code class="language-bash">nix derivation show /nix/store/lyz86bd78p7f3yjy1qky6annmggymcwd-foo.drv | jq
'.[].env.buildCommand' -r
</code></pre>
<p><strong>Output</strong>:</p>
<pre><code class="language-bash">cp "$scriptPath" "$out"
</code></pre>
<ul>
<li>It turns out the correct command was <code>passAsFile</code> not <code>passAsFiles</code> but that
change wasn’t enough to fix it. <code>passAsFiles</code> expects a list of files, not a
single file path. Running <code>nix-build -A passthru.tests</code> failed saying
<code>> foo --version returned a non-zero exit code.</code></li>
</ul>
<pre><code class="language-nix">let
pkgs = import <nixpkgs> {};
package =
pkgs.runCommand "foo" {
#passthru.tests.simple = pkgs.runCommand "foo-test" {} ''
# if [[ "$(cat ${package})" != "foo" ]]; then
# echo "Result is not foo"
# exit 1
# fi
# touch $out
#'';
passthru.tests.version = pkgs.testers.testVersion {
package = package;
version = "1.2";
};
# pkgs.writeShellApplication
script = ''
#!${pkgs.runtimeShell}
echo "1.2"
'';
passAsFile = ["script"];
} ''
mkdir -p "$out/bin"
cp "$scriptPath" "$out/bin/foo"
chmod +x "$out/bin/foo"
'';
in
package
</code></pre>
<p>Build it:</p>
<pre><code class="language-bash">nix-build -A passthru.tests
</code></pre>
<p><strong>Output:</strong></p>
<pre><code class="language-bash">these 2 derivations will be built:
/nix/store/lqrlcd64dmpzkggcfzlnsnwjd339czd3-foo.drv
/nix/store/c3kw4xbdlrig08jrdm5wis1dmv2gnqsd-foo-test-version.drv
building '/nix/store/lqrlcd64dmpzkggcfzlnsnwjd339czd3-foo.drv'...
building '/nix/store/c3kw4xbdlrig08jrdm5wis1dmv2gnqsd-foo-test-version.drv'...
1.2
/nix/store/zsbk5zawak68ailvkwi2gad2bqbqmdz9-foo-test-version
</code></pre>
</details>
<h3>Key Takeaways for Debugging NixOS Modules</h3>
<ul>
<li>
<p><strong><code>nix-instantiate</code> is Your Friend:</strong> Use <code>nix-instantiate</code> to evaluate your
NixOS modules and pinpoint errors.</p>
</li>
<li>
<p><strong>Unlock Details with <code>--show-trace</code>:</strong> When errors occur, always append
<code>--show-trace</code> to get a comprehensive stack trace, revealing the origin of the
problem. Remember that in newer Nix versions, the most relevant parts of the
trace are often at the bottom.</p>
</li>
<li>
<p><strong>Understand Option Types:</strong> Nix option types (<code>raw</code>, <code>anything</code>,
<code>string</code>/<code>str</code>, <code>lines</code>, <code>attrsOf</code>) are not just about data types; they also
dictate how values are merged and processed within the module system.</p>
</li>
<li>
<p><strong>Be Mindful of <code>mkOptionDefault</code>:</strong> While useful in specific scenarios,
<code>mkOptionDefault</code> sets a lower priority default. For standard defaults that
can be overridden by user configuration, define them directly within the
<code>config</code> attribute using <code>lib.mkDefault</code>.</p>
</li>
<li>
<p><strong>Use <code>builtins.addErrorContext</code>:</strong> Enhance your custom error messages by
providing specific context relevant to your module’s logic using
<code>builtins.addErrorContext</code>.</p>
</li>
<li>
<p><strong>Derivations vs. Evaluation:</strong> Be aware of the difference between evaluating
expressions (<code>--eval --strict</code>) and instantiating derivations
(<code>nix-instantiate</code>). Strict evaluation can trigger infinite recursion if it
encounters unevaluated derivations with cyclic dependencies during attribute
access.</p>
</li>
<li>
<p><strong>Explore with <code>nix repl</code>:</strong> The <code>nix repl</code> allows you to interactively
explore Nix expressions and the outputs of derivations, providing insights
into the structure and values within Nixpkgs.</p>
</li>
</ul>
<h4>Conclusion</h4>
<p>This chapter has equipped you with essential techniques for debugging and
tracing NixOS modules. We’ve explored how to use <code>nix-instantiate</code> and
<code>--show-trace</code> to pinpoint errors, how to interpret Nix’s often-verbose error
messages, and how to leverage the <code>nix repl</code> for interactive exploration.
Understanding option types and the nuances of <code>mkOptionDefault</code> is crucial for
writing robust and predictable modules. We’ve also touched upon the distinction
between evaluation and instantiation, and how that impacts debugging.</p>
<p>While these tools and techniques are invaluable for understanding and
troubleshooting your own Nix configurations, they also become essential when you
want to contribute to or modify the vast collection of packages and modules
within <strong>Nixpkgs</strong> itself. Nixpkgs is where the majority of Nix packages and
NixOS modules reside, and learning how to navigate and contribute to it opens up
a whole new level of control and customization within the Nix ecosystem.</p>
<p>In the next chapter,
<a href="https://saylesss88.github.io/Working_with_Nixpkgs_Locally_10.html">Working with Nixpkgs Locally</a>,
we’ll shift our focus to exploring and modifying Nixpkgs. We’ll cover how to
clone Nixpkgs, how to make changes to package definitions, and how to test those
changes locally before contributing them back upstream. This chapter will
empower you to not just use existing Nix packages, but also to customize and
extend them to fit your specific needs.</p>
Nix Module System Explainedhttps://saylesss88.github.io/NixOS_Modules_Explained_3.html2025-11-21T00:00:00+00:00saylesss87@proton.me (saylesss88)<h1>Chapter 3</h1>
<details>
<summary> ✔️ Click to Expand Table of Contents</summary>
<!-- toc -->
</details>
<h2>Nix Module System Explained</h2>
<!--  -->
<p><img src="https://saylesss88.github.io/images/buildings1.png" alt="buildings" /></p>
<p><strong>TL;DR</strong>: In this chapter, we will break down the Nix module system used by
both NixOS and Home-Manager. We will discuss using home-manager as a module and
the flexibility that modules give us. We will touch on options and break down
the <code>vim</code> module from the Nixpkgs collection. Finally we will display how to
test modules with the repl.</p>
<p>Your <code>configuration.nix</code> is a module. For the Nixpkgs collection most modules
are in <code>nixos/modules</code>.</p>
<p>The suggested way of using <code>home-manager</code> according to their manual is as a
<a href="https://nix-community.github.io/home-manager/index.xhtml#sec-install-nixos-module">NixOS module</a>.
Both home-manager and NixOS use the same module system.</p>
<h2>Module Structure</h2>
<pre><code class="language-nix">{
imports = [
# Paths to other modules.
# Compose this module out of smaller ones.
];
options = {
# Option declarations.
# Declare what settings a user of this module can set.
# Usually this includes a global "enable" option which defaults to false.
};
config = {
# Option definitions.
# Define what other settings, services and resources should be active.
# Usually these depend on whether a user of this module chose to "enable" it
# using the "option" above.
# Options for modules imported in "imports" can be set here.
};
}
</code></pre>
<p><code>imports</code>, <code>options</code>, and <code>config</code> are the top-level attributes of a Nix module.
They are the primary, reserved keys that the Nix module system recognizes and
processes to combine different configurations into a single, cohesive system or
user environment. <code>config</code> is the same <code>config</code> you receive as a module argument
(e.g. <code>{ pkgs, config, ... }:</code> at the top of your module function)</p>
<p>Understanding <code>config</code>:</p>
<p><code>config</code> is the big constantly updated blueprint of your entire system.</p>
<p>Every time you bring in a new module, it adds its own settings and options to
this blueprint. So, when a module receives the <code>config</code> argument, it’s getting
the complete picture of everything you’ve asked NixOS to set up so far.</p>
<p>This allows the module to:</p>
<ul>
<li>
<p>See what other parts of your system are doing.</p>
</li>
<li>
<p>Make smart decisions based on those settings.</p>
</li>
<li>
<p>Add its own pieces to the overall plan, building on what’s already there.</p>
</li>
<li>
<p>Most modules are functions that take an attribute set and return an attribute
set.</p>
</li>
</ul>
<p>To turn the above module into a function accepting an attribute set just add the
function arguments to the top, click the eye to see the whole module:</p>
<pre><code class="language-nix">{ config, pkgs, ... }:
~ {
~ imports = [
~ # Paths to other modules.
~ # Compose this module out of smaller ones.
~ ];
~
~ options = {
~ # Option declarations.
~ # Declare what settings a user of this module can set.
~ # Usually this includes a global "enable" option which defaults to false.
~ };
~
~ config = {
~ # Option definitions.
~ # Define what other settings, services and resources should be active.
~ # Usually these depend on whether a user of this module chose to "enable" it
~ # using the "option" above.
~ # Options for modules imported in "imports" can be set here.
~ };
~ }
</code></pre>
<p>It may require the attribute set to contain:</p>
<ul>
<li>
<p><code>config</code>: The configuration of the entire system.</p>
</li>
<li>
<p><code>options</code>: All option declarations refined with all definition and declaration
references.</p>
</li>
<li>
<p><code>pkgs</code>: The attribute set extracted from the Nix package collection and
enhanced with the <code>nixpkgs.config</code> option.</p>
</li>
<li>
<p><code>modulesPath</code>: The location of the module directory of NixOS.</p>
</li>
</ul>
<h2>Modularize your configuration.nix</h2>
<p>Many people start of using a single <code>configuration.nix</code> and eventually their
single file configuration gets too large to search through and maintain
conveniently.</p>
<p>This is where <strong>modules</strong> come in allowing you to break up your configuration
into logical parts. Your <code>boot.nix</code> will contain settings and options related to
the actual boot process. You’re <code>services.nix</code> will only have services and so
on…</p>
<ul>
<li>These modules are placed in a logical path relative to either your
<code>configuration.nix</code> or equivalent or if you’re using flakes relative to your
<code>flake.nix</code> or equivalent.
<ul>
<li>The <code>imports</code> mechanism takes paths to other modules as its argument and
combines them to be included in the evaluation of the system configuration.</li>
</ul>
</li>
</ul>
<blockquote>
<pre><code class="language-nix">{ ... }:
{
imports = [
# Paths to other modules
# They can be relative paths
./otherModule.nix
# Or absolute
/path/to/otherModule.nix
# Or to a directory
../modules/home/shells/nushell
];
}
</code></pre>
</blockquote>
<blockquote>
<p>❗: The <strong>imports</strong> mechanism includes and evaluates the Nix expression found
at the given path <em>as a module</em>. If that path is a directory, it will
automatically look for and evaluate a <code>default.nix</code> file within that directory
<em>as a module</em>. It is common to have that <code>default.nix</code> be a function that only
imports and combines all the modules in said directory. Like the above
example, in the nushell directory would be a <code>default.nix</code> that is
automatically imported and evaluated.</p>
</blockquote>
<p><strong>Crucial Distinction: <code>imports</code> vs. <code>import</code></strong>:</p>
<p>Beginners often confuse the modules attribute <code>imports = [./module.nix]</code> here
with the Nix builtins function <code>import module.nix</code>. The first expects a path to
a file containing a NixOS module (having the same specific structure we’re
describing here), while the second loads whatever Nix expression is in that file
(no expected structure). –NixOS Wiki.</p>
<p>Considering <code>configuration.nix</code> is a module, it can be imported like any other
module and this is exactly what you do when getting started with flakes.</p>
<pre><code class="language-nix"># flake.nix
{
description = "NixOS configuration";
inputs = {
nixpkgs.url = "github:nixos/nixpkgs/nixos-unstable";
home-manager.url = "github:nix-community/home-manager";
home-manager.inputs.nixpkgs.follows = "nixpkgs";
};
outputs = inputs@{ nixpkgs, home-manager, ... }: {
nixosConfigurations = {
hostname = nixpkgs.lib.nixosSystem {
system = "x86_64-linux";
modules = [
./configuration.nix
home-manager.nixosModules.home-manager
{
home-manager.useGlobalPkgs = true;
home-manager.useUserPackages = true;
home-manager.users.jdoe = ./home.nix;
# Optionally, use home-manager.extraSpecialArgs to pass
# arguments to home.nix
}
];
};
};
};
}
</code></pre>
<p><code>modules = [...]</code> in <code>flake.nix</code>: This is effectively the initial <code>imports</code> list
for your entire NixOS system or Home Manager user configuration. It tells the
Nix module system: “Start by collecting and merging the configurations defined
in these specific modules.”</p>
<p>The above example is what you get from running:
<code>nix flake new /etc/nixos -t github:nix-community/home-manager#nixos</code></p>
<p>If you notice the <code>home-manager.nixosModules.home-manager</code>, that is what imports
home-manager as a module.</p>
<p>You could also make the actual home-manager module and import it like this:</p>
<pre><code class="language-nix"># home-manager.nix
{ inputs, outputs, ... }: {
imports = [
# Import home-manager's NixOS module
inputs.home-manager.nixosModules.home-manager
];
home-manager = {
extraSpecialArgs = { inherit inputs outputs; };
users = {
# Import your home-manager configuration
your-username = import ../home-manager/home.nix;
};
};
}
</code></pre>
<p>This “module” isn’t much different from the one included in the <code>flake.nix</code>
above, it is just shown here to show the flexibility of modules. They can be as
big and complex or as small and simple as you want. You can break up every
single program or component of your configuration into individual modules or
have modules that bundle similar programs the choice is yours.</p>
<p>Then in your <code>configuration.nix</code> or equivalent you would add <code>home-manager.nix</code>
to your imports list and you would have home-manager as a NixOS module.</p>
<details>
<summary>
✔️ Refresher (Click to Expand):
</summary>
<p>An <strong>attribute set</strong> is a collection of name-value pairs called <em>attributes</em>:</p>
<p>Attribute sets are written enclosed in curly braces <code>{}</code>. Attribute names and
attribute values are separated by an equal sign <code>=</code>. Each value can be an
arbitrary expression, terminated by a semicolon <code>;</code>.</p>
<blockquote>
<p><strong>Example</strong>:<a href="https://nix.dev/manual/nix/2.24/language/syntax#attrs-literal">nix.dev reference</a>
This defines an attribute set with attributes named:</p>
<ul>
<li><code>x</code> with the value <code>123</code>, an integer</li>
<li><code>text</code> with the value <code>"Hello"</code>, a string</li>
<li><code>y</code> where the value is the result of applying the function <code>f</code> to the
attribute set <code>{bla = 456; }</code></li>
</ul>
<pre><code class="language-nix">{
x = 123;
text = "Hello";
y = f { bla = 456; };
}
</code></pre>
<pre><code class="language-nix">{ a = "Foo"; b = "Bar"}.a
~ "Foo"
</code></pre>
</blockquote>
<p>Attributes can appear in any order. An attribute name may only occur once in
each attribute set.</p>
<blockquote>
<p>❗ Remember <code>{}</code> is a valid attribute set in Nix.</p>
</blockquote>
<p>The following is a <strong>function</strong> with an attribute set argument, remember that
anytime you see a <code>:</code> in Nix code it means this is a function. To the left is
the <strong>function arguments</strong> and to the right is the <strong>function body</strong>:</p>
<pre><code class="language-nix">{ a, b }: a + b
</code></pre>
<p>The simplest possible <strong>NixOS Module</strong>:</p>
<pre><code class="language-nix">{ ... }:
{
}
</code></pre>
</details>
<p>NixOS produces a full system configuration by combining smaller, more isolated
and reusable components: <strong>Modules</strong>. If you want to understand Nix and NixOS
make sure you grasp modules!</p>
<p>A NixOS module defines configuration options and behaviors for system
components, allowing users to extend, customize, and compose configurations
declaratively.</p>
<p>A <strong>module</strong> is a file containing a Nix expression with a specific structure. It
<em>declares</em> options for other modules to define (give a value). Modules were
introduced to allow extending NixOS without modifying its source code.</p>
<p>To define any values, the module system first has to know which ones are
allowed. This is done by declaring options that specify which attributes can be
set and used elsewhere.</p>
<p>If you want to write your own modules, I recommend setting up
<a href="https://github.com/nix-community/nixd?tab=readme-ov-file">nixd</a> or
<a href="https://github.com/oxalica/nil">nil</a> with your editor of choice. This will
allow your editor to warn you about missing arguments and dependencies as well
as syntax errors.</p>
<h3>Declaring Options</h3>
<p>Options are declared under the top-level <code>options</code> attribute with
<code>lib.mkOption</code>.</p>
<p><a href="https://nixos.org/manual/nixpkgs/stable/#function-library-lib.options.mkOption">mkOption</a>
Creates an Option attribute set. It accepts an attribute set with certain keys
such as, <code>default</code>, <code>package</code>, and <code>example</code>.</p>
<pre><code class="language-nix"># options.nix
{ lib, ... }:
{
options = {
name = lib.mkOption { type = lib.types.str; };
};
}
</code></pre>
<blockquote>
<p><code>lib</code> provides helper functions from <code>nixpkgs.lib</code> and the ellipsis (<code>...</code>) is
for arbitrary arguments which means that this function is prepared to accept
<strong>any additional arguments</strong> that the caller might provide, even if those
arguments are not explicitly named or used within the module’s body. They make
the modules more flexible, without the <code>...</code> each module would have to
explicitly list every possible argument it might receive, which would be
cumbersome and error-prone. So <code>{lib, ... }:</code> means that “I need the <code>lib</code>
argument” <strong>and</strong> I acknowledge that the module system might pass other
arguments automatically (like <code>config</code>, <code>pkgs</code>, etc.) and I’m fine with them
being there, even if I don’t use them directly in this specific module file.</p>
</blockquote>
<h3>Defining Values</h3>
<p>Options are <strong>set</strong> or <strong>defined</strong> under the top-level <code>config</code> attribute:</p>
<pre><code class="language-nix"># config.nix
{ ... }:
{
config = {
name = "Slick Jones";
};
}
</code></pre>
<p>In this <strong>option declaration</strong>, we created an option <code>name</code> of type <em>string</em> and
set that same option to a string.</p>
<p><strong>Option Definitions</strong> can be in a separate file than <strong>Option Declarations</strong></p>
<h3>Evaluating Modules</h3>
<p>Modules are <strong>evaluated</strong> with
<a href="https://nixos.org/manual/nixpkgs/stable/#module-system-lib-evalModules">lib.evalModules</a>
<code>lib.evalModules</code> evaluates a set of modules, typically once per application
(e.g. once for NixOS and once for Home-Manager).</p>
<h2>Checking out the Vim module provided by Nixpkgs</h2>
<p>The following is <code>nixpkgs/nixos/modules/programs/vim.nix</code>, a module that is
included in the Nixpkgs collection:</p>
<pre><code class="language-nix">{
config,
lib,
pkgs,
...
}:
let
cfg = config.programs.vim;
in
{
options.programs.vim = {
enable = lib.mkEnableOption "Vi IMproved, an advanced text";
defaultEditor = lib.mkEnableOption "vim as the default editor";
package = lib.mkPackageOption pkgs "vim" { example = "vim-full"; };
};
# TODO: convert it into assert after 24.11 release
config = lib.mkIf (cfg.enable || cfg.defaultEditor) {
warnings = lib.mkIf (cfg.defaultEditor && !cfg.enable) [
"programs.vim.defaultEditor will only work if programs.vim.enable is
enabled, which will be enforced after the 24.11 release"
];
environment = {
systemPackages = [ cfg.package ];
variables.EDITOR = lib.mkIf cfg.defaultEditor (lib.mkOverride 900 "vim");
pathsToLink = [ "/share/vim-plugins" ];
};
};
}
</code></pre>
<p>It provides options to enable Vim, set it as the default editor, and specify the
Vim package to use.</p>
<details>
<summary> ✔️ Breakdown of the vim module.(Click to Expand)</summary>
1. Module Inputs and Structure:
<pre><code class="language-nix">{
config,
lib,
pkgs,
...
}
</code></pre>
<p><strong>Inputs</strong>: The module takes the above inputs and <code>...</code> (catch-all for other
args)</p>
<ul>
<li>
<p><code>config</code>: Allows the module to read option values (e.g.
<code>config.programs.vim.enable</code>). It provides access to the evaluated
configuration.</p>
</li>
<li>
<p><code>lib</code>: The Nixpkgs library, giving us helper functions like <code>mkEnableOption</code> ,
<code>mkIf</code>, and <code>mkOverride</code>.</p>
</li>
<li>
<p><code>pkgs</code>: The Nixpkgs package set, used to access packages like <code>pkgs.vim</code></p>
</li>
<li>
<p><code>...</code>: Allows the module to accept additional arguments, making it flexible
for extension in the future.</p>
</li>
</ul>
<blockquote>
<p>Key Takeaways: A NixOS module is typically a function that can include
<code>config</code>, <code>lib</code>, and <code>pkgs</code>, but it doesn’t require them. The <code>...</code> argument
ensures flexibility, allowing a module to accept extra inputs without breaking
future compatibility. Using <code>lib</code> simplifies handling options (mkEnableOption,
mkIf, mkOverride) and helps follow best practices. Modules define options,
which users can set in their configuration, and <code>config</code>, which applies
changes based on those options.</p>
</blockquote>
<ol start="2">
<li>Local Configuration Reference:</li>
</ol>
<pre><code class="language-nix">let
cfg = config.programs.vim;
in
</code></pre>
<p>This is a local alias. Instead of typing <code>config.programs.vim</code> over and over,
the module uses <code>cfg</code>.</p>
<ol start="3">
<li>Option Declaration</li>
</ol>
<pre><code class="language-nix">options.programs.vim = {
enable = lib.mkEnableOption "Vi IMproved, an advanced text";
defaultEditor = lib.mkEnableOption "vim as the default editor";
package = lib.mkPackageOption pkgs "vim" { example = "vim-full"; };
};
</code></pre>
<p>This defines three user-configurable options:</p>
<ul>
<li>
<p><code>enable</code>: Turns on Vim support system-wide.</p>
</li>
<li>
<p><code>defaultEditor</code>: Sets Vim as the system’s default <code>$EDITOR</code>.</p>
</li>
<li>
<p><code>package</code>: lets the user override which Vim package is used.</p>
</li>
</ul>
<blockquote>
<p><code>mkPackageOption</code> is a helper that defines a package-typed option with a
default (<code>pkgs.vim</code>) and provides docs + example. Using <code>lib.mkEnableOption</code>
makes it clear exactly where this function is coming from. Same with
<code>lib.mkIf</code> and as you can see they can be further down the configuration,
further from where you defined <code>with lib;</code> making it less clear where they
come from. Explicitness is your friend when it comes to reproducability and
clarity.</p>
</blockquote>
<ol start="4">
<li>Conditional Configuration</li>
</ol>
<pre><code class="language-nix">config = lib.mkIf (cfg.enable || cfg.defaultEditor) {
</code></pre>
<ul>
<li>This block is only activated if <em>either</em> <code>programs.vim.enable</code> or
<code>defaultEditor</code> is set.</li>
</ul>
<ol start="5">
<li>Warnings</li>
</ol>
<pre><code class="language-nix">warnings = lib.mkIf (cfg.defaultEditor && !cfg.enable) [
"programs.vim.defaultEditor will only work if programs.vim.enable is enabled,
which will be enforced after the 24.11 release"
];
</code></pre>
<p>Gives you a soft warning if you try to set <code>defaultEditor = true</code> without also
enabling Vim.</p>
<ol start="6">
<li>Actual System Config Changes</li>
</ol>
<pre><code class="language-nix">environment = {
systemPackages = [ cfg.package ];
variables.EDITOR = lib.mkIf cfg.defaultEditor (lib.mkOverride 900 "vim");
pathsToLink = [ "/share/vim-plugins" ];
};
</code></pre>
<p>It adds Vim to your <code>systemPackages</code>, sets <code>$EDITOR</code> if <code>defaultEditor</code> is true,
and makes <code>/share/vim-plugins</code> available in the environment.</p>
</details>
<p>The following is a bat home-manager module that I wrote:</p>
<pre><code class="language-nix"># bat.nix
{
pkgs,
config,
lib,
...
}: let
cfg = config.custom.batModule;
in {
options.custom.batModule.enable = lib.mkOption {
type = lib.types.bool;
default = false;
description = "Enable bat module";
};
config = lib.mkIf cfg.enable {
programs.bat = {
enable = true;
themes = {
dracula = {
src = pkgs.fetchFromGitHub {
owner = "dracula";
repo = "sublime"; # Bat uses sublime syntax for its themes
rev = "26c57ec282abcaa76e57e055f38432bd827ac34e";
sha256 = "019hfl4zbn4vm4154hh3bwk6hm7bdxbr1hdww83nabxwjn99ndhv";
};
file = "Dracula.tmTheme";
};
};
extraPackages = with pkgs.bat-extras; [
batdiff
batman
prettybat
batgrep
];
};
};
}
</code></pre>
<p>Now I could add this to my <code>home.nix</code> to enable it:</p>
<pre><code class="language-nix"># home.nix
custom = {
batModule.enable = true;
}
</code></pre>
<p>If I set this option to true the bat configuration is dropped in place. If it’s
not set to true, it won’t put the bat configuration in the system. Same as with
options defined in modules within the Nixpkgs repository.</p>
<p>If I had set the default to <code>true</code>, it would automatically enable the module
without requiring an explicit <code>custom.batModule.enable = true;</code> call in my
<code>home.nix</code>.</p>
<h3>Module Composition</h3>
<p>NixOS achieves its full system configuration by combining the configurations
defined in various modules. This composition is primarily handled through the
<code>imports</code> mechanism.</p>
<p><code>imports</code>: This is a standard option within a NixOS or Home Manager
configuration (often found in your configuration.nix or home.nix). It takes a
list of paths to other Nix modules. When you include a module in the imports
list, the options and configurations defined in that module become part of your
overall system configuration.</p>
<p>You declaratively state the desired state of your system by setting options
across various modules. The NixOS build system then evaluates and merges these
option settings. The culmination of this process, which includes building the
entire system closure, is represented by the derivation built by
<code>config.system.build.toplevel</code>.</p>
<h3>NixOS Modules and Dependency Locking with npins</h3>
<details>
<summary> ✔️ npins example (Click to Expand)</summary>
As our NixOS configurations grow in complexity, so too does the challenge of
managing the dependencies they rely on. Ensuring consistency and reproducibility
not only applies to individual packages but also to the versions of Nixpkgs and
other external resources our configurations depend upon.
<p>Traditionally, NixOS configurations often implicitly rely on the version of
Nixpkgs available when <code>nixos-rebuild</code> is run. However, for more robust and
reproducible setups, especially in collaborative environments or when rolling
back to specific configurations, explicitly locking these dependencies to
specific versions becomes crucial.</p>
<p>In the following example, we’ll explore how to use a tool called <code>npins</code> to
manage and lock the dependencies of a NixOS configuration, ensuring a more
predictable and reproducible system. This will involve setting up a project
structure and using npins to pin the specific version of Nixpkgs our
configuration relies on.</p>
<p>This is the file structure:</p>
<pre><code class="language-bash">❯ tree
.
├── configuration.nix
├── default.nix
├── desktop.nix
└── npins
├── default.nix
└── sources.json
</code></pre>
<p>This uses <code>npins</code> for dependency locking. Install it and run this in the project</p>
<p>directory:</p>
<pre><code class="language-bash">npins init
</code></pre>
<p>Create a <code>default.nix</code> with the following:</p>
<pre><code class="language-nix"># default.nix
{ system ? builtins.currentSystem, sources ? import ./npins, }:
let
pkgs = import sources.nixpkgs {
config = { };
overlays = [ ];
};
inherit (pkgs) lib;
in lib.makeScope pkgs.newScope (self: {
shell = pkgs.mkShell { packages = [ pkgs.npins self.myPackage ]; };
# inherit lib;
nixosSystem = import (sources.nixpkgs + "/nixos") {
configuration = ./configuration.nix;
};
moduleEvale = lib.evalModules {
modules = [
# ...
];
};
})
</code></pre>
<p>A <code>configuration.nix</code> with the following:</p>
<pre><code class="language-nix"># configuration.nix
{
boot.loader.grub.device = "nodev";
fileSystems."/".device = "/devst";
system.stateVersion = "25.05";
# declaring options means to declare a new option
# defining options means to define a value of an option
imports = [
# ./main.nix
./desktop.nix # Files
# ./minimal.nix
];
# mine.desktop.enable = true;
}
</code></pre>
<p>And a <code>desktop.nix</code> with the following:</p>
<pre><code class="language-nix"># desktop.nix
{ pkgs, lib, config, ... }:
{
imports = [];
# Define an option to enable or disable desktop configuration
options.mine.desktop.enable = lib.mkEnableOption "desktop settings";
# Configuration that applies when the option is enabled
config = lib.mkIf config.mine.desktop.enable {
environment.systemPackages = [ pkgs.git ];
};
}
</code></pre>
<p><code>mkEnableOption</code> defaults to false. Now in your <code>configuration.nix</code> you can
uncomment <code>mine.desktop.enable = true;</code> to enable the desktop config and
vice-versa.</p>
<p>You can test that this works by running:</p>
<pre><code class="language-bash">nix-instantiate -A nixosSystem.system
</code></pre>
<p><code>nix-instantiate</code> performs only the evaluation phase of Nix expressions. During
this phase, Nix interprets the Nix code, resolves all dependencies, and
constructs derivations but does not execute any build actions. Useful for
testing.</p>
<p>To check if this worked and <code>git</code> is installed in systemPackages you can load it
into <code>nix repl</code> but first you’ll want <code>lib</code> to be available so uncomment this in
your <code>default.nix</code>:</p>
<pre><code class="language-nix"># default.nix
inherit lib;
</code></pre>
<p>Rerun <code>nix-instantiate -A nixosSystem.system</code></p>
<p>Then load the repl and check that <code>git</code> is in <code>systemPackages</code>:</p>
<pre><code class="language-bash">nix repl -f .
nix-repl> builtins.filter (pkg: lib.hasPrefix "git" pkg.name) nixosSystem.config.environment.systemPackages
</code></pre>
<p>This shows the path to the derivation</p>
<p>Check that mine.desktop.enable is true</p>
<pre><code class="language-nix">nix-repl> nixosSystem.config.mine.desktop.enable
true
</code></pre>
<p>As demonstrated with npins, explicitly managing the dependencies of your NixOS
modules is a powerful technique for ensuring the long-term stability and
reproducibility of your system configurations. By pinning specific versions of
Nixpkgs and other resources, you gain greater control over your environment and
reduce the risk of unexpected changes due to upstream updates.</p>
</details>
<h3>Best Practices</h3>
<p>You’ll see the following all throughout Nix code and is convenient although it
doesn’t follow best practices. One reason is static analysis can’t reason about
the code (e.g. Because it implicitly brings all attributes into scope, tools
can’t verify which ones are actually being used), because it would have to
actually evaluate the files to see which names are in scope:</p>
<pre><code class="language-nix"># utils.nix
{ pkgs, ... }: {
environment.systemPackages = with pkgs; [
rustup
evcxr
nix-prefetch-git
];
}
</code></pre>
<p>Another reason the above expression is considered an “anti-pattern” is when more
then one <code>with</code> is used, it’s no longer clear where the names are coming from.</p>
<p>Scoping rules for <code>with</code> are not intuitive, see
<a href="https://github.com/NixOS/nix/issues/490">issue</a> –nix.dev This can make
debugging harder, as searching for variable origins becomes ambiguous (i.e. open
to more than one interpretation).</p>
<p>The following follows best practices:</p>
<pre><code class="language-nix">{pkgs, ... }: {
environment.systemPackages = builtins.attrValues {
inherit (pkgs)
rustup
evcxr
nix-prefetch-git;
};
}
</code></pre>
<ul>
<li><a href="https://noogle.dev/f/builtins/attrValues">Noogle builtins.attrValues</a></li>
</ul>
<details>
<summary> ✔️ Above Command Summary (Click to Expand) </summary>
<pre><code class="language-nix">{
inherit (pkgs) rustup evcxr nix-prefetch-git;
}
</code></pre>
<p>is equivalent to:</p>
<pre><code class="language-nix">{
rustup = pkgs.rustup;
evcxr = pkgs.evcxr;
nix-prefetch-git = pkgs.nix-prefetch-git;
}
</code></pre>
<p>Applying <code>builtins.attrValues</code> produces:</p>
<pre><code class="language-nix">[ pkgs.evcxr pkgs.nix-prefetch-git pkgs.rustup ]
</code></pre>
<p>As you can see only the values are included in the list, not the keys. This is
more explicit and declarative but can be more complicated, especially for a
beginner.</p>
<p><code>builtins.attrValues</code> returns the values of all attributes in the given set,
sorted by attribute name. The above expression turns into something like the
following avoiding bringing every attribute name from <code>nixpkgs</code> into scope.</p>
<p>A more straightforward example:</p>
<pre><code class="language-nix">attrValues {c = 3; a = 1; b = 2;}
=> [1 2 3]
</code></pre>
</details>
<p>This approach avoids unintended name clashes or confusion when debugging.</p>
<p>Upon looking into this a bit further, most people use the following format to
avoid the “anti-pattern” from using <code>with pkgs;</code>:</p>
<pre><code class="language-nix"># utils.nix
{ pkgs, ... }: {
environment.systemPackages = [
pkgs.rustup
pkgs.evcxr
pkgs.nix-prefetch-git
];
}
</code></pre>
<p>While the performance differences might be negligible on modern computers,
adopting this best practice from the start is highly recommended. The above
approach is more explicit, it’s clear exactly where each package is coming from.</p>
<p>If maintaining strict scope control matters, use <code>builtins.attrValues</code>.</p>
<p>If readability and simplicity are more your priority, explicitly referencing
<code>pkgs.<packageName></code> might be better. Now you can choose for yourself.</p>
<h4>Conclusion</h4>
<p>As we have seen throughout this chapter, modules are the building blocks of your
NixOS system and are themselves often functions. There are a few different ways
to use these modules to build your system. In the next chapter,
<a href="https://saylesss88.github.io/Nix_Flakes_Explained_4.html">Nix Flakes Explained</a>
we will learn about Nix Flakes as a more modern and comprehensive entrypoint for
managing your entire system and its dependencies.</p>
<p>To further deepen your understanding of NixOS Modules and the broader ecosystem
of tools and best practices surrounding them, the following resources offer
valuable insights and information.</p>
<h4>Resources on Modules</h4>
<details>
<summary> ✔️ Resources (Click to Expand) </summary>
<ul>
<li>
<p><a href="https://nixos.org/manual/nixos/stable/#sec-writing-modules">WritingNixOsModules</a></p>
</li>
<li>
<p><a href="https://nixos.wiki/wiki/NixOS_modules">NixWikiNixOSModules</a></p>
</li>
<li>
<p><a href="https://nix.dev/tutorials/module-system/a-basic-module/index.html">nix.dev A basic module</a></p>
</li>
<li>
<p><a href="https://nix.dev/tutorials/module-system/deep-dive#module-system-deep-dive">ModuleSystemDeepDive</a></p>
</li>
<li>
<p><a href="https://xeiaso.net/talks/asg-2023-nixos/">xeiaso Nixos Modules for fun & profit</a></p>
</li>
<li>
<p><a href="https://nixos-and-flakes.thiscute.world/other-usage-of-flakes/module-system">NixOS Flakes Book Module System</a></p>
</li>
</ul>
<h1>Videos</h1>
<p><a href="https://www.youtube.com/watch?v=N7hFP_40DJo&t=17s">NixHour Writing NixOS modules</a>
– This example is from this video
<a href="https://infinisil.com/modules.mp4">infinisilModules</a></p>
<p><a href="https://www.youtube.com/watch?v=cZjOzOHb2ow">tweagModuleSystemRecursion</a></p>
</details>
Nix Flakes Explainedhttps://saylesss88.github.io/Nix_Flakes_Explained_4.html2025-11-21T00:00:00+00:00saylesss87@proton.me (saylesss88)<h1>Chapter 4</h1>
<details>
<summary> ✔️ Click to Expand Table of Contents</summary>
<!-- toc -->
</details>
<p><img src="https://saylesss88.github.io/images/trees3.cleaned.png" alt="trees3" /></p>
<!-- <img src="https://saylesss88.github.io/images/gruv15.png" width="800" height="600"> -->
<h2>Nix Flakes Explained</h2>
<p>If you’re completely new, take a look at
<a href="https://nixos.wiki/wiki/flakes#Installing_flakes">this</a> to get flakes on your
system.</p>
<p>For the Nix Flake man page type <code>man nix3 flake</code> and for a specific feature,
type something like <code>man nix3 flake-lock</code>.</p>
<p>Flakes replace stateful channels (which cause much confusion among novices) and
introduce a more intuitive and consistent CLI, making them a perfect opportunity
to start using Nix. – Alexander Bantyev
<a href="https://serokell.io/blog/practical-nix-flakes">Practical Nix Flakes</a></p>
<p>The “state” being remembered and updated by channels is the specific revision of
the Nixpkgs repository that your local Nix installation considers “current” for
a given channel. When this state changes on your machine, your builds diverge
from others whose machines have a different, independently updated channel
state.</p>
<p>Channels are also constantly updated on the remote servers. So, “nixos-unstable”
today refers to a different set of packages and versions than “nixos-unstable”
did yesterday or will tomorrow.</p>
<p>Flakes solve this by making the exact revision of <code>nixpkgs</code> (and other
dependencies) an explicit input within your <code>flake.nix</code> file, pinned in the
<code>flake.lock</code>. This means the state is explicitly defined in the configuration
itself, not implicitly managed by a global system setting.</p>
<p>Evaluation time is notoriously slow on NixOS, the problem was that in the past
Nix evaluation wasn’t hermetic preventing effective evaluation caching. A <code>.nix</code>
file can import other Nix files or by looking them up in the Nix search path
(<code>$NIX_PATH</code>). This causes a cached result to be inconsistent unless every file
is perfectly kept track of. Flakes solve this problem by ensuring fully hermetic
evaluation.</p>
<p>“Hermetic” means that the output of an evaluation (the derivation itself)
depends <em>only</em> on the explicit inputs provided, not on anything external like
environment variables or pulling in files only on your system. This is the
problem that Nix solves and the problem that flakes are built around.</p>
<h2>What is a Nix Flake?</h2>
<p><strong>Nix flakes</strong> are independent components in the Nix ecosystem. They define
their own <strong>dependencies</strong> (inputs) and what they produce (outputs), which can
include <strong>packages</strong>, <strong>deployment configurations</strong>, or <strong>Nix functions</strong> for
other flakes to use.</p>
<p>Flakes provide a standardized framework for building and managing software,
making all project inputs explicit for greater reproducibility and
self-containment.</p>
<p>At its core, a flake is a source tree (like a Git repository) that contains a
<code>flake.nix</code> file in its root directory. This file provides a standardized way to
access Nix artifacts such as packages and modules.</p>
<p>Flakes provide a standard way to write Nix expressions (and therefore packages)
whose dependencies are version-pinned in a lock file, improving reproducibility
of Nix installations. – NixOS Wiki</p>
<p>Think of <code>flake.nix</code> as the central entry point of a flake. It not only defines
what the flake produces but also declares its dependencies.</p>
<h3>Key Concepts</h3>
<p><code>flake.nix</code>: <strong>The Heart of a Flake</strong></p>
<p>The <code>flake.nix</code> file is mandatory for any flake. It must contain an attribute
set with at least one required attribute: <code>outputs</code>. It can also optionally
include <code>description</code> and <code>inputs</code>.</p>
<p><strong>Basic Structure:</strong></p>
<pre><code class="language-nix">{
description = "Package description";
inputs = { /* Dependencies go here */ };
outputs = { /* What the flake produces */ };
nixConfig = { /* Advanced configuration options */ };
}
</code></pre>
<p>I typically see <code>nixConfig</code> used for extra-substituters for cachix. This is a
general-purpose way to define Nix configuration options that apply when this
flake is evaluated or built. It ties into your <code>/etc/nix/nix.conf</code> or
<code>~/.config/nix/nix.conf</code>.</p>
<p>For example, create a directory and add a <code>flake.nix</code> with the following
contents, yes this is a complete <code>flake.nix</code> demonstrating <em>outputs</em> being the
only required attribute:</p>
<pre><code class="language-nix"># flake.nix
{
outputs = _: { multiply = 2 * 2; };
}
</code></pre>
<p>Now evaluate it with:</p>
<pre><code class="language-bash">nix eval .#multiply
4
</code></pre>
<p>In the <code>outputs = _: { ... };</code> line, the <code>_</code> (underscore) is a placeholder
argument. It represents the inputs that the outputs function could receive (like
<code>inputs</code>, <code>self</code>, <code>pkgs</code>, etc.), but in this specific case, we’re not using any
of them to define the multiply attribute. It’s a common convention in Nix to use
<code>_</code> when an argument is required by a function but intentionally ignored.</p>
<p>In the command <code>nix eval .#multiply</code>:</p>
<ul>
<li>
<p>the <code>.</code> signifies the current directory, indicating that Nix should look for a
<code>flake.nix</code> file in the directory where you’re running the command.</p>
</li>
<li>
<p>The <code>#</code> is used to select a specific attribute from the <code>outputs</code> of the
flake. In this case, it’s telling Nix to evaluate the <code>multiply</code> attribute.</p>
</li>
</ul>
<p>In the next example we will create a <code>devShells</code> output as well as a <code>packages</code>
output.</p>
<p><strong><code>flake.lock</code> auto-generated lock file</strong></p>
<p>All flake inputs are pinned to specific revisions in a lockfile called
<code>flake.lock</code> This file stores the revision info as JSON.</p>
<p>The <code>flake.lock</code> file ensures that Nix flakes have purely deterministic outputs.
A <code>flake.nix</code> file without an accompanying <code>flake.lock</code> should be considered
incomplete and a kind of proto-flake. Any Nix CLI command that is run against
the flake—like <code>nix build</code>, <code>nix develop</code>, or even <code>nix flake show</code>—generates a
<code>flake.lock</code> for you.</p>
<p>Here’s an example section of a <code>flake.lock</code> file that pins Nixpkgs to a specific
revision:</p>
<pre><code class="language-bash">$ cat flake.lock
{
"nodes": {
"nixpkgs": {
"info": {
"lastModified": 1587398327,
"narHash": "sha256-mEKkeLgUrzAsdEaJ/1wdvYn0YZBAKEG3AN21koD2AgU="
},
"locked": {
"owner": "NixOS",
"repo": "nixpkgs",
"rev": "5272327b81ed355bbed5659b8d303cf2979b6953",
"type": "github"
},
"original": {
"owner": "NixOS",
"ref": "nixos-20.03",
"repo": "nixpkgs",
"type": "github"
}
},
"root": {
"inputs": {
"nixpkgs": "nixpkgs"
}
}
},
"root": "root",
"version": 5
}
</code></pre>
<p>Any future build of this flake will use the version of <code>nixpkgs</code> recorded in the
lock file. If you add new inputs, they will be automatically added when you run
a nix flake command like <code>nix flake show</code>. But it won’t replace existing locks.</p>
<p>If you need to update a locked input to the latest version:</p>
<pre><code class="language-bash">nix flake lock --update-input nixpkgs
nix build
</code></pre>
<p>The above command allows you to update individual inputs, and <code>nix flake update</code>
will update the whole lock file.</p>
<h3>Helper functions that are good to know for working with Flakes</h3>
<p><code>lib.genAttrs</code>: A function, given the name of the attribute, returns the
attribute’s value</p>
<p>Example:</p>
<pre><code class="language-nix">nix repl
nix-repl> :l <nixpkgs>
nix-repl> lib.genAttrs [ "boom" "bash" ] (name: "sonic" + name)
</code></pre>
<p><strong>Output</strong>:</p>
<pre><code class="language-nix">{
bash = "sonicbash";
boom = "sonicboom";
}
</code></pre>
<p>You will often see the following:</p>
<p>A common use for this with flakes is to have a list of different systems:</p>
<pre><code class="language-nix"> systems = [
"x86_64-linux"
"aarch64-linux"
"x86_64-darwin"
"aarch64-darwin"
];
</code></pre>
<p>And use it to generate an attribute set for each listed system:</p>
<pre><code class="language-nix">eachSystem = lib.genAttrs systems;
</code></pre>
<p>The above command creates an attribute set by mapping over a list of system
strings. If you notice, you provide it a list (i.e. [ 1 2 3 ]) and the function
returns a set (i.e. <code>{ ... }</code>)</p>
<p>Why <code>genAttrs</code> is useful:</p>
<ul>
<li>
<p>It lets you define attributes (like <code>packages</code>, <code>checks</code>, <code>devShells</code>) per
supported system in a DRY(don’t repeat yourself), structured way.</p>
</li>
<li>
<p><code>lib.mapAttrs</code>: A function, given an attribute’s name and value, returns a new
<code>nameValuePair</code>.</p>
</li>
</ul>
<p>Example:</p>
<pre><code class="language-nix">nix-repl> builtins.mapAttrs (name: value: name + "-" + value) { x = "foo"; y = "bar"; }
</code></pre>
<p><strong>Output</strong>:</p>
<pre><code class="language-nix">{
x = "x-foo";
y = "y-bar";
}
</code></pre>
<p><code>pkgs.mkShell</code>: is a specialized <code>stdenv.mkDerivation</code> that removes some
repetition when using it with <code>nix-shell</code> (or <code>nix develop</code>)</p>
<p>Example:</p>
<pre><code class="language-nix">{ pkgs ? import <nixpkgs> {} }:
pkgs.mkShell {
packages = [ pkgs.gnumake ];
inputsFrom = [ pkgs.hello pkgs.gnutar ];
shellHook = ''
export DEBUG=1
'';
}
</code></pre>
<h4>A Simple flake that outputs a devshell and a package</h4>
<p>In a new directory create a <code>flake.nix</code></p>
<pre><code class="language-nix"># flake.nix
{
outputs = {
self,
nixpkgs,
}: let
pkgs = nixpkgs.legacyPackages.x86_64-linux;
in {
packages.x86_64-linux.default = pkgs.kakoune; # You could define a meta-package here
devShells.x86_64-linux.default = pkgs.mkShell {
packages = [
pkgs.kakoune
pkgs.git
pkgs.ripgrep
pkgs.fzf
];
};
};
}
</code></pre>
<p><code>mkShell</code> is a wrapper around <code>mkDerivation</code></p>
<p>This flake offers two main outputs for <code>x86_64-linux</code> systems:</p>
<ol>
<li>
<p>A <strong>standard package</strong> (<code>packages.x86_64-linux.default</code>): This simple example
just re-exports <code>kakoune</code> from <code>nixpkgs</code>. You could build your own apps here.</p>
</li>
<li>
<p>A <strong>development shell</strong> (<code>devShells.x86_64-linux.default</code>): This provides a
convenient environment where you have specific tools available without
installing them globally on your system.</p>
</li>
</ol>
<p>To use this flake you have a few options:</p>
<ul>
<li>
<p><code>nix run</code> will launch kakoune</p>
</li>
<li>
<p><code>nix develop</code> will activate the development environment providing all of the
pkgs listed under <code>mkShell</code>.</p>
</li>
<li>
<p>Or more explicitly <code>nix develop .#devShells.x86_64-linux.default</code>, does the
same thing as the command above.</p>
</li>
</ul>
<h4>Flake References</h4>
<details>
<summary> ✔️ Flake References (Click to Expand) </summary>
<p><strong>Flake references</strong> (flakerefs) are a way to specify the location of a flake.
They have two different formats:</p>
<blockquote>
<p><strong>Attribute set representation</strong>:</p>
<pre><code class="language-nix">{
type = "github";
owner = "NixOS";
repo = "nixpkgs";
}
</code></pre>
<p>or <strong>URL-like syntax</strong>:</p>
<pre><code class="language-nix">github:NixOS/nixpkgs
</code></pre>
<p>These are used on the command line as a more convenient alternative to the
attribute set representation. For instance, in the command</p>
<pre><code class="language-nix">nix build github:NixOS/nixpkgs#hello
</code></pre>
<p><code>github:NixOS/nixpkgs</code> is a flake reference (while <code>hello</code> is an output
attribute). They are also allowed in the <code>inputs</code> attribute of a flake, e.g.</p>
<pre><code class="language-nix">inputs.nixpkgs.url = "github:NixOS/nixpkgs";
</code></pre>
<p>is equivalent to</p>
<pre><code class="language-nix">inputs.nixpkgs = {
type = "github";
owner = "NixOS";
repo = "nixpkgs";
};
</code></pre>
<p>–
<a href="https://nix.dev/manual/nix/2.24/command-ref/new-cli/nix3-flake#flake-references">nix.dev flake-references</a></p>
</blockquote>
</details>
<h4>Nix Flake Commands</h4>
<details>
<summary> ✔️ Flake Commands (Click to Expand) </summary>
<blockquote>
<p><code>nix flake</code> provides subcommands for creating, modifying and querying <em>Nix
Flakes</em>. Flakes are the unit for packaging Nix code in a reproducible and
discoverable way. They can have dependencies on other flakes, making it
possible to have multi-repository Nix projects.</p>
</blockquote>
<p>— From
<a href="https://nix.dev/manual/nix/2.28/command-ref/new-cli/nix3-flake">nix.dev Reference Manual</a></p>
<ul>
<li>
<p>The main thing to note here is that <code>nix flake</code> is used to manage Nix flakes
and that Flake commands are whitespace separated rather than hyphen <code>-</code>
separated.</p>
</li>
<li>
<p>Flakes do provide some advantages when it comes to discoverability of outputs.</p>
</li>
<li>
<p>For Example, two helpful commands to inspect a flake are:</p>
<ul>
<li>
<p><a href="https://nix.dev/manual/nix/2.28/command-ref/new-cli/nix3-flake-show">nix flake show</a>
command: Show the outputs provided by a flake.</p>
</li>
<li>
<p><a href="https://nix.dev/manual/nix/2.28/command-ref/new-cli/nix3-flake-check">nix flake check</a>
command: check whether the flake evaluates and run its tests.</p>
</li>
<li>
<p>Any Nix CLI command that is run against a flake – like <code>nix build</code>,
<code>nix develop</code>, <code>nix flake show</code> – generate a <code>flake.lock</code> file for you.</p>
<ul>
<li>The <code>flake.lock</code> file ensures that all flake inputs are pinned to specific
revisions and that Flakes have purely deterministic outputs.</li>
</ul>
</li>
</ul>
<p>Example:</p>
</li>
</ul>
<pre><code class="language-bash">nix shell nixpkgs#ponysay --command ponysay "Flakes Rock!"
</code></pre>
<p>This works because of the [flake registry] that maps symbolic identifiers like
<code>nixpkgs</code> to actual locations such as <code>https://github.com/NixOS/nixpkgs</code>. So the
following are equivalent:</p>
<pre><code class="language-bash">nix shell nixpkgs#ponysay --command ponysay Flakes Rock!
nix shell github:NixOS/nixpkgs#ponysay --command ponysay Flakes Rock!
</code></pre>
<p>To override the <code>nixpkgs</code> registry with your own local copy you could:</p>
<pre><code class="language-bash">nix registry add nixpkgs ~/src/local-nixpkgs
</code></pre>
</details>
<h3>Attribute Sets: The Building Blocks</h3>
<details>
<summary> ✔️ Attribute set Refresher (Click to Expand) </summary>
<p><strong>Attribute sets</strong> are fundamental in Nix. They are simply collections of
name-value pairs wrapped in curly braces <code>{}</code>.</p>
<ul>
<li>Example, (click to see Output):</li>
</ul>
<pre><code class="language-nix">let
my_attrset = { foo = "bar"; };
in
my_attrset.foo
~ "bar"
</code></pre>
<p><strong>Top-Level Attributes of a Flake</strong>:</p>
<p>Flakes have specific <strong>top-level attributes</strong> that can be accessed directly
(without dot notation). The most common ones are <code>inputs</code>, <code>outputs</code>, and
<code>nixConfig</code>.</p>
</details>
<h3>Deeper Dive into the Structure of <code>flake.nix</code></h3>
<!--  -->
<p><code>inputs</code>: <strong>Declaring Dependencies</strong></p>
<p>The <code>inputs</code> attribute set specifies the other flakes that your current flake
depends on.</p>
<p>Each key in the <code>inputs</code> set is a name you choose for the dependency, and the
value is a reference to that flake (usually a URL or a Git Repo).</p>
<p>To access something from a dependency, you generally go through the <code>inputs</code>
attribute (e.g., <code>inputs.helix.packages</code>).</p>
<p>See
<a href="https://saylesss88.github.io/flakes/flake_inputs_4.1.html">Nix Flake inputs</a>
for a flake inputs deep dive.</p>
<p><strong>Example:</strong> This declares dependencies on the <code>nixpkgs</code> and <code>import-cargo</code>
flakes:</p>
<pre><code class="language-nix">inputs = {
import-cargo.url = "github:edolstra/import-cargo";
nixpkgs.url = "nixpkgs";
};
</code></pre>
<p>When Nix evaluates your flake, it fetches and evaluates each input. These
evaluated inputs are then passed as an attribute set to the outputs function,
with the keys matching the names you gave them in the inputs set.</p>
<p>The special input <code>self</code> is a reference to the <code>outputs</code> and the source tree of
the current flake itself.</p>
<p><strong><code>outputs</code>: Defining What Your Flake Provides</strong></p>
<p>The <strong><code>outputs</code></strong> attribute defines what your flake makes available. This can
include packages, NixOS modules, development environments (<code>devShells</code>) and
other Nix derivations.</p>
<p>Flakes can output arbitrary Nix values. However, certain outputs have specific
meanings for Nix commands and must adhere to particular types (often
derivations, as described in the
<a href="https://nixos.wiki/wiki/Flakes">output schema</a>).</p>
<p>You can inspect the outputs of a flake using the command:</p>
<pre><code class="language-nix">nix flake show
</code></pre>
<blockquote>
<p>This command takes a flake URI and displays its outputs in a tree structure,
showing the attribute paths and their corresponding types.</p>
</blockquote>
<p><strong>Understanding the <code>outputs</code> Function</strong></p>
<p>Beginners often mistakenly think that self and nixpkgs within
<code>outputs = { self, nixpkgs, ... }: { ... }</code> are the outputs themselves. Instead,
they are the <em>input arguments</em> (often called <em>output arguments</em>) to the outputs
function.</p>
<p>The outputs function in <code>flake.nix</code> always takes a single argument, which is an
attribute set. The syntax <code>{ self, nixpkgs, ... }</code> is Nix’s way of destructuring
this single input attribute set to extract the values associated with the keys
<code>self</code> and <code>nixpkgs</code>.</p>
<p>Flakes output your whole system configuration, packages, as well as Nix
functions for use elsewhere.</p>
<ul>
<li>
<p>For example, the <code>nixpkgs</code> repository has its own <code>flake.nix</code> file that
outputs many helper functions via the <code>lib</code> attribute.</p>
</li>
<li>
<p>For a deep dive into flake outputs, see
<a href="https://saylesss88.github.io/flakes/flake_outputs_4.2.html">Nix Flake Outputs</a></p>
</li>
</ul>
<blockquote>
<p>The <code>lib</code> convention The convention of using <code>lib</code> to output functions is
observed not just by Nixpkgs but by many other Nix projects. You’re free,
however, to output functions via whichever attribute you prefer. –
<a href="https://zero-to-nix.com/concepts/flakes/#inputs">Zero to Nix Flakes</a></p>
</blockquote>
<p>Some flake outputs are required to be system specific (i.e. “x86_64-linux” for
(64-bit AMD/Intel Linux) including packages, development environments, and NixOS
configurations)</p>
<p><strong>Variadic Attributes (…) and @-patterns</strong></p>
<p>The <code>...</code> syntax in the input arguments of the outputs function indicates
variadic attributes, meaning the input attribute set can contain more attributes
than just those explicitly listed (like <code>lib</code> and <code>nixpkgs</code>).</p>
<p><strong>Example:</strong></p>
<pre><code class="language-nix">mul = { a, b, ... }: a * b;
mul { a = 3; b = 4; c = 2; } # 'c' is an extra attribute
</code></pre>
<p>However, you cannot directly access these extra attributes within the function
body unless you use the @-pattern:</p>
<ul>
<li>(Click for Output)</li>
</ul>
<pre><code class="language-nix">mul = s@{ a, b, ... }: a b s.c; # 's' now refers to the entire input set
mul { a = 3; b = 4; c = 2; } # Output: 24
~ 24
</code></pre>
<p>When used in the outputs function argument list (e.g.,
<code>outputs = { pkgs, ... } @ inputs)</code>, the @-pattern binds the entire input
attribute set to a name (in this case, <code>inputs</code>) while also allowing you to
destructure specific attributes like pkgs.</p>
<p><strong>What <code>outputs = { pkgs, ... } @ inputs: { ... };</code> does:</strong></p>
<ol>
<li>
<p><strong>Destructuring:</strong> It tries to extract the value associated with the key
<code>pkgs</code> from the input attribute set and binds it to the variable <code>pkgs</code>. The
<code>...</code> allows for other keys in the input attribute set to be ignored during
this direct destructuring.</p>
</li>
<li>
<p><strong>Binding the Entire Set:</strong> It binds the entire input attribute set to the
variable inputs.</p>
<ul>
<li>Example <code>flake.nix</code>:</li>
</ul>
</li>
</ol>
<pre><code class="language-nix">{
inputs.nixpkgs.url = "github:NixOS/nixpkgs/nixos-unstable";
inputs.home-manager.url = "github:nix-community/home-manager";
outputs = { self, nixpkgs, ... } @ attrs: { # A `packages` output for the x86_64-linux platform
packages.x86_64-linux.hello = nixpkgs.legacyPackages.x86_64-linux.hello;
# A `nixosConfigurations` output (for a NixOS system named "fnord")
nixosConfigurations.fnord = nixpkgs.lib.nixosSystem {
system = "x86_64-linux";
specialArgs = attrs;
modules = [ ./configuration.nix ];
};
};
}
</code></pre>
<p><strong>Platform Specificity in Outputs</strong></p>
<p>Flakes ensure that their outputs are consistent across different evaluation
environments. Therefore, any package-related output must explicitly specify the
target platform (a combination of architecture and OS, <code>x86_64-linux</code>).</p>
<p><strong>legacyPackages Explained</strong></p>
<p><code>legacyPackages</code> is a way for flakes to interact with the traditional, less
structured package organization of nixpkgs. Instead of packages being directly
at the top level (e.g., <code>pkgs.hello</code>), <code>legacyPackages</code> provides a
platform-aware way to access them within the flake’s structured output format
(e.g., <code>nixpkgs.legacyPackages.x86_64-linux.hello</code>). It acts as a bridge between
the flake’s expected output structure and nixpkgs’s historical organization.</p>
<p><strong>The Sole Argument of outputs</strong></p>
<p>It’s crucial to remember that the outputs function accepts only one argument,
which is an attribute set. The <code>{ self, nixpkgs, ... }</code> syntax is simply
destructuring that single input attribute set.</p>
<p><strong>Outputs of the Flake (Return Value)</strong></p>
<p>The outputs of the flake refer to the attribute set that is returned by the
<code>outputs</code> function. This attribute set can contain various named outputs like
<code>packages</code>, <code>nixosConfigurations</code>, <code>devShells</code>, etc.</p>
<p><strong>Imports: Including Other Nix Expressions</strong></p>
<p>The <code>import</code> function in Nix is used to evaluate the Nix expression found at a
specified path (usually a file or directory) and return its value.</p>
<p>Basic Usage: import <code>./path/to/file.nix</code></p>
<p><strong>Passing Arguments During Import</strong></p>
<p><code>import <nixpkgs> {}</code> is calling two functions, not one.</p>
<ol>
<li><code>import <nixpkgs></code>: The first function call</li>
</ol>
<ul>
<li>
<p><code>import</code> is a built-in Nix function. Its job is to load and evaluate a Nix
expression from a specified path.</p>
</li>
<li>
<p><code><nixpkgs></code> is a flake reference. When you use <code>import <nixpkgs></code>, Nix
evaluates the <code>default.nix</code> file (or sometimes <code>lib/default.nix</code>) found at
that location.</p>
</li>
<li>
<p>The <code>default.nix</code> in <code>nixpkgs</code> evaluates to a function. This function is
designed to be configurable, allowing you to pass arguments like <code>system</code>,
<code>config</code>, etc. to customize how <code>nixpkgs</code> behaves and what packages it
provides.</p>
</li>
<li>
<p>So, <code>import <nixpkgs></code> doesn’t give you the <code>nixpkgs</code> package set directly; it
gives you the function that generates the <code>nixpkgs</code> package set derivation.</p>
</li>
</ul>
<ol start="2">
<li><code>{}</code>: The second function call (and its argument)</li>
</ol>
<ul>
<li>
<p><code>{}</code> denotes an empty attribute set</p>
</li>
<li>
<p>When an attribute set immediately follows a function, it means you are calling
that function and passing the attribute set as its single argument.</p>
</li>
</ul>
<p>So, the <code>{}</code> after <code>import <nixpkgs></code> is not part of the <code>import</code> function
iteself. It’s the argument being passed to the function that <code>import <nixpkgs></code>
just returned.</p>
<p>You can also pass an attribute set as an argument to the Nix expression being
imported:</p>
<pre><code class="language-nix">let
myHelpers = import ./lib/my-helpers.nix { pkgs = nixpkgs; };
in
# ... use myHelpers
</code></pre>
<p>In this case, the Nix expression in <code>./lib/my-helpers.nix</code> is likely a function
that expects an argument (often named <code>pkgs</code> by convention):</p>
<pre><code class="language-nix"># ./lib/my-helpers.nix
{ pkgs }:
let
myPackage = pkgs.stdenv.mkDerivation {
name = "my-package"; # ...
};
in
myPackage
</code></pre>
<p>By passing <code>{ pkgs = nixpkgs; }</code> during the import, you are providing the
nixpkgs value from your current <code>flake.nix</code> scope to the pkgs parameter expected
by the code in <code>./lib/my-helpers.nix</code>.</p>
<p><strong>Importing Directories (<code>default.nix</code>)</strong></p>
<p>When you use import with a path that points to a directory, Nix automatically
looks for a file named <code>default.nix</code> within that directory. If found, Nix
evaluates the expressions within <code>default.nix</code> as if you had specified its path
directly in the import statement.</p>
<ul>
<li>For more advanced examples see
<a href="https://saylesss88.github.io/flakes/flake_examples_4.3.html">Nix Flake Examples</a></li>
</ul>
<h5>Conclusion: Unifying Your Nix Experience with Flakes</h5>
<p>For some examples of more advanced outputs like <code>devShells</code> and <code>checks</code>, check
out this blog post that I wrote:
<a href="https://tsawyer87.github.io/posts/nix_flakes_tips/">Nix Flakes Tips and Tricks</a></p>
<p>In this chapter, we’ve explored Nix Flakes as a powerful and modern approach to
managing Nix projects, from development environments to entire system
configurations. We’ve seen how they provide structure, dependency management,
and reproducibility through well-defined inputs and outputs. Flakes offer a
cohesive way to organize your Nix code and share it with others.</p>
<p>As we’ve worked with the flake.nix file, you’ve likely noticed its structure – a
top-level attribute set defining various outputs like devShells, packages,
nixosConfigurations, and more. These top-level attributes are not arbitrary;
they follow certain conventions and play specific roles within the Flake
ecosystem.</p>
<p>In the next chapter,
<a href="https://saylesss88.github.io/Understanding_Top-Level_Attributes_5.html">Understanding Top-Level Attributes</a>
we will delve deeper into the meaning and purpose of these common top-level
attributes. We’ll explore how they are structured, what kind of expressions they
typically contain, and how they contribute to the overall functionality and
organization of your Nix Flakes. Understanding these attributes is key to
effectively leveraging the full potential of Nix Flakes.</p>
<h5>Further Resources</h5>
<details>
<summary> ✔️ Resources (Click to Expand)</summary>
<ul>
<li>
<p><a href="https://serokell.io/blog/practical-nix-flakes">practical-nix-flakes</a></p>
</li>
<li>
<p><a href="https://xeiaso.net/blog/nix-flakes-1-2022-02-21/">Nix Flakes an Introduction</a></p>
</li>
<li>
<p><a href="https://www.tweag.io/blog/2020-07-31-nixos-flakes/">tweag nix-flakes</a></p>
</li>
<li>
<p><a href="https://nixos.wiki/wiki/Flakes">NixOS-wiki Flakes</a></p>
</li>
<li>
<p><a href="https://nix.dev/concepts/flakes.html">nix.dev flakes</a></p>
</li>
<li>
<p><a href="https://vtimofeenko.com/posts/practical-nix-flake-anatomy-a-guided-tour-of-flake.nix/">anatomy-of-a-flake</a></p>
</li>
<li>
<p><a href="https://jade.fyi/blog/flakes-arent-real/">flakes-arent-real</a></p>
</li>
<li>
<p><a href="https://mhwombat.codeberg.page/nix-book/#_attribute_set_operations">wombats-book-of-nix</a></p>
</li>
<li>
<p><a href="https://zero-to-nix.com/concepts/flakes/">zero-to-nix flakes</a></p>
</li>
<li>
<p><a href="https://nixos-and-flakes.thiscute.world/">nixos-and-flakes-book</a></p>
</li>
<li>
<p><a href="https://flakehub.com/">FlakeHub</a></p>
</li>
</ul>
<p><img src="https://saylesss88.github.io/images/nixosnix.png" alt="FlakeHub" /></p>
</details>
Package Definitions Explainedhttps://saylesss88.github.io/Package_Definitions_Explained_6.html2025-11-21T00:00:00+00:00saylesss87@proton.me (saylesss88)<h1>Chapter 8</h1>
<details>
<summary> ✔️ Click to Expand Table of Contents</summary>
<!-- toc -->
</details>
<p><img src="https://saylesss88.github.io/images/coding2.png" alt="coding2" /></p>
<!--  -->
<h2>Package Definitions Explained</h2>
<p>In Nix, the concept of a <strong>package</strong> can refer to two things:</p>
<ul>
<li>
<p>A collection of files and data that constitute a piece of software or an
artifact.</p>
</li>
<li>
<p>A Nix <strong>expression</strong> that describes how to create such a collection. This
expression acts as a blueprint before the package exists in a tangible form.</p>
</li>
</ul>
<p>The process begins with writing a <strong>package definition</strong> using the Nix language.
This definition contains the necessary instructions and metadata about the
software you intend to “package.”</p>
<h2>The Journey from Definition to Package</h2>
<details>
<summary> ✔️ Click to Expand</summary>
<ol>
<li>
<p><strong>Package Definition:</strong></p>
<ul>
<li>
<p>This is essentially a function written in the Nix language.</p>
</li>
<li>
<p>Nix language shares similarities with JSON but includes the crucial
addition of functions.</p>
</li>
<li>
<p>It acts as the blueprint for creating a package.</p>
</li>
</ul>
</li>
<li>
<p><strong>Derivation:</strong></p>
<ul>
<li>
<p>When the package definition is evaluated by Nix, it results in a
<strong>derivation</strong>.</p>
</li>
<li>
<p>A derivation is a concrete and detailed build plan.</p>
</li>
<li>
<p>It outlines the exact steps Nix needs to take: fetching source code,
building dependencies, compiling code, and ultimately producing the
desired output (the package).</p>
</li>
</ul>
</li>
<li>
<p><strong>Realization (Building the Package):</strong></p>
<ul>
<li>
<p>You don’t get a pre-built “package” directly from the definition or the
derivation.</p>
</li>
<li>
<p>The package comes into being when Nix <strong>executes</strong> the derivation. This
process is often referred to as “realizing” the derivation.</p>
</li>
</ul>
</li>
</ol>
<p><strong>Analogy:</strong> Think of a package definition as an architectural blueprint, the
derivation as the detailed construction plan, and the realized package as the
finished building.</p>
</details>
## Skeleton of a Derivation
<p>The most basic derivation structure in Nix looks like this:</p>
<pre><code class="language-nix">{ stdenv }:
stdenv.mkDerivation { }
</code></pre>
<ul>
<li>
<p>This is a function that expects an attribute set containing <code>stdenv</code> as its
argument.</p>
</li>
<li>
<p>It then calls <code>stdenv.mkDerivation</code> (a function provided by <code>stdenv</code>) to
produce a derivation.</p>
</li>
<li>
<p>Currently, this derivation doesn’t specify any build steps or outputs.</p>
</li>
<li>
<p>Further Reading:</p>
</li>
<li>
<p><a href="https://ryantm.github.io/nixpkgs/stdenv/stdenv/">The Standard Environment</a></p>
</li>
<li>
<p><a href="https://nixos.org/guides/nix-pills/19-fundamentals-of-stdenv.html">Fundamentals of Stdenv</a></p>
</li>
</ul>
<h2>Example: A Simple “Hello” Package Definition</h2>
<p>Here’s a package definition for the classic “hello” program:</p>
<pre><code class="language-nix"># hello.nix
{
stdenv,
fetchzip,
}:
stdenv.mkDerivation {
pname = "hello";
version = "2.12.1";
src = fetchzip {
url = "[https://ftp.gnu.org/gnu/hello/hello-2.12.1.tar.gz](https://ftp.gnu.org/gnu/hello/hello-2.12.1.tar.gz)";
sha256 = "";
};
}
</code></pre>
<ul>
<li>
<p>This is a Nix function that takes stdenv and fetchzip as arguments.</p>
</li>
<li>
<p>It uses <code>stdenv.mkDerivation</code> to define the build process for the “hello”
package.</p>
<ul>
<li>
<p><code>pname</code>: The package name.</p>
</li>
<li>
<p><code>version</code>: The package version.</p>
</li>
<li>
<p><code>src</code>: Specifies how to fetch the source code using <code>fetchzip</code>.</p>
</li>
</ul>
</li>
</ul>
<p><strong>Handling Dependencies: Importing Nixpkgs</strong></p>
<ul>
<li>
<p>If you try to build <code>hello.nix</code> directly with <code>nix-build hello.nix</code>, it will
fail because <code>stdenv</code> and <code>fetchzip</code> are part of Nixpkgs, which isn’t included
in this isolated file.</p>
</li>
<li>
<p>To make this package definition work, you need to pass the correct arguments
(<code>stdenv</code>, <code>fetchzip</code>) to the function.</p>
</li>
</ul>
<p>The recommended approach is to create a <code>default.nix</code> file in the same
directory:</p>
<pre><code class="language-nix"># default.nix
let
nixpkgs = fetchTarball "[https://github.com/NixOS/nixpkgs/tarball/nixos-24.05](https://github.com/NixOS/nixpkgs/tarball/nixos-24.05)";
pkgs = import nixpkgs { config = {}; overlays = []; };
in
{
hello = pkgs.callPackage ./hello.nix { };
}
</code></pre>
<ul>
<li>
<p>This <code>default.nix</code> imports Nixpkgs.</p>
</li>
<li>
<p>It then uses <code>pkgs.callPackage</code> to call the function in <code>hello.nix</code>, passing
the necessary dependencies from Nixpkgs.</p>
</li>
<li>
<p>You can now build the “hello” package using: <code>nix-build -A hello</code>. The <code>-A</code>
flag tells Nix to build the attribute named hello from the top-level
expression in default.nix.</p>
</li>
</ul>
<p><strong>Realizing the Derivation and Handling sha256</strong></p>
<ul>
<li>
<p><strong>Evaluation vs. Realization</strong>: While “evaluate” refers to Nix processing an
expression, “realize” often specifically means building a derivation and
producing its output in the Nix store.</p>
</li>
<li>
<p>When you first run <code>nix-build -A hello</code>, it will likely fail due to a missing
sha256 hash for the source file. Nix needs this hash for security and
reproducibility. The error message will provide the correct sha256 value.</p>
</li>
<li>
<p><strong>Example Error</strong>:</p>
</li>
</ul>
<pre><code class="language-bash"> nix-build -A hello
error: hash mismatch in fixed-output derivation '/nix/store/pd2kiyfa0c06giparlhd1k31bvllypbb-source.drv':
specified: sha256-AAAAAAAAAAAAAAAAAAAAAAAAAAAAAAAAAAAAAAAAAAA=
got: sha256-1kJjhtlsAkpNB7f6tZEs+dbKd8z7KoNHyDHEJ0tmhnc=
error: 1 dependencies of derivation '/nix/store/b4mjwlv73nmiqgkdabsdjc4zq9gnma1l-hello-2.12.1.drv' failed to build
</code></pre>
<ul>
<li>Replace the empty <code>sha256 = "";</code> in <code>hello.nix</code> with the provided correct
value: <code>sha256 = "1kJjhtlsAkpNB7f6tZEs+dbKd8z7KoNHyDHEJ0tmhnc=";</code>.</li>
</ul>
<p><strong>Building and Running the Result</strong></p>
<p>After updating the <code>sha256</code>, you can successfully build the package:</p>
<pre><code class="language-bash">nix-build -A hello
</code></pre>
<p>The output will be a result symlink pointing to the built package in the Nix
store. You can then run the “hello” program:</p>
<pre><code class="language-bash">./result/bin/hello
Hello, world!
</code></pre>
<h3>Swaytools Package Definition</h3>
<p><strong>Example: The swaytools Package Definition</strong></p>
<p>Let’s examine a more complex, real-world package definition from Nixpkgs:
<code>nixpkgs/pkgs/tools/wayland/swaytools/default.nix</code>.</p>
<pre><code class="language-nix"># default.nix
{
lib,
setuptools,
buildPythonApplication,
fetchFromGitHub,
slurp,
}:
buildPythonApplication rec {
pname = "swaytools";
version = "0.1.2";
format = "pyproject";
src = fetchFromGitHub {
owner = "tmccombs";
repo = "swaytools";
rev = version;
sha256 = "sha256-UoWK53B1DNmKwNLFwJW1ZEm9dwMOvQeO03+RoMl6M0Q=";
};
nativeBuildInputs = [ setuptools ];
propagatedBuildInputs = [ slurp ];
meta = with lib; {
homepage = "https://github.com/tmccombs/swaytools";
description = "Collection of simple tools for sway (and i3)";
license = licenses.gpl3Only;
maintainers = with maintainers; [ atila ];
platforms = platforms.linux;
};
}
</code></pre>
<h3>Breakdown of the Above default.nix</h3>
<details>
<summary>Click to Expand</summary>
<p>1 <strong>Function Structure</strong>:</p>
<ul>
<li>
<dl>
<dt>The file starts with a function taking an attribute set of dependencies from
Nixpkgs: <code>{ lib, setuptools, buildPythonApplication, fetchFromGitHub, slurp }</code></dt>
<dd>.</dd>
</dl>
</li>
</ul>
<ol start="2">
<li><strong>Derivation Creation</strong>:</li>
</ol>
<ul>
<li>It calls <code>buildPythonApplication</code>, a specialized helper for Python packages
(similar to <code>stdenv.mkDerivation</code> but pre-configured for Python). The <code>rec</code>
keyword allows attributes within the derivation to refer to each other.</li>
</ul>
<ol start="3">
<li><strong>Package Metadata</strong>:</li>
</ol>
<ul>
<li>
<p><code>pname</code> and <code>version</code> define the package’s name and version.</p>
</li>
<li>
<p>The <code>meta</code> attribute provides standard package information like the homepage,
description, license, maintainers, and supported platforms.</p>
</li>
</ul>
<ol start="4">
<li><strong>Source Specification</strong>:</li>
</ol>
<ul>
<li>The <code>src</code> attribute uses <code>fetchFromGitHub</code> to download the source code from
the specified repository and revision, along with its <code>sha256</code> hash for
verification.</li>
</ul>
<ol start="5">
<li><strong>Build and Runtime Dependencies</strong>:</li>
</ol>
<ul>
<li>
<p><code>nativeBuildInputs</code>: Lists tools required during the build process (e.g.,
<code>setuptools</code> for Python).</p>
</li>
<li>
<p><code>propagatedBuildInputs</code>: Lists dependencies needed at runtime (e.g., <code>slurp</code>).</p>
</li>
</ul>
<ol start="6">
<li><strong>Build Format</strong>:</li>
</ol>
<ul>
<li><code>format = "pyproject";</code> indicates that the package uses a <code>pyproject.toml</code>
file for its Python build configuration.</li>
</ul>
<p><strong>Integration within Nixpkgs</strong></p>
<ul>
<li>
<p><strong>Location</strong>: The swaytools definition resides in
<code>pkgs/tools/wayland/swaytools/default.nix</code>.</p>
</li>
<li>
<p><strong>Top-Level Inclusion</strong>: It’s made available as a top-level package in
<code>pkgs/top-level/all-packages.nix</code> like this:</p>
</li>
</ul>
<pre><code class="language-nix"># all-packages.nix
swaytools = python3Packages.callPackage ../tools/wayland/swaytools { };
</code></pre>
<ul>
<li><code>python3Packages.callPackage</code> is used here because <code>swaytools</code> is a Python
package, and it ensures the necessary Python-related dependencies are correctly
passed to the <code>swaytools</code> definition.</li>
</ul>
</details>
<h2>Conclusion</h2>
<p>In this chapter, we’ve journeyed through the fundamental concept of package
definitions in Nix. We’ve seen how these Nix expressions act as blueprints,
leading to the creation of derivations – the detailed plans for building
software. Finally, we touched upon the realization process where Nix executes
these derivations to produce tangible packages in the Nix store. Examining the
simple “hello” package and the more complex “swaytools” definition provided
practical insights into the structure and key attributes involved in defining
software within the Nix ecosystem.</p>
<p>The crucial step in this process, the transformation from a package definition
to a concrete build plan, is embodied by the <strong>derivation</strong>. This detailed
specification outlines every step Nix needs to take to fetch sources, build
dependencies, compile code, and produce the final package output. Understanding
the anatomy and lifecycle of a derivation is key to unlocking the full power and
flexibility of Nix.</p>
<p>In the <strong>next chapter</strong>,
<a href="https://saylesss88.github.io/Intro_to_Nix_Derivations_7.html">Introduction to Nix Derivations</a>,
we will delve deeper into the structure and components of these derivations. We
will explore the attributes that define a build process, how dependencies are
managed within a derivation, and how Nix ensures the reproducibility and
isolation of your software builds through this fundamental concept.</p>
<h2>Resources</h2>
<ul>
<li><a href="https://nix.dev/tutorials/packaging-existing-software.html">Packaging Existing Software</a></li>
</ul>
Introductionhttps://saylesss88.github.io/README.html2000-01-01T00:00:00+00:00<p>📚 Welcome to nix-book!</p>
<p><a href="https://github.com/saylesss88/nix-book/actions/workflows/deploy-book.yml"><img src="https://github.com/saylesss88/nix-book/actions/workflows/deploy-book.yml/badge.svg?branch=main" alt="Deploy mdBook to User GitHub Pages" /></a></p>
<p><a href="https://www.buymeacoffee.com/saylesss88"><img src="https://img.shields.io/badge/Buy%20Me%20a%20Coffee-%23FFDD00?style=for-the-badge&logo=buy-me-a-coffee&logoColor=black" alt="Buy Me A Coffee" /></a></p>
<p>🚀 If you find this guide helpful, please consider leaving a star ⭐ or
supporting the project by buying me a coffee ☕. Your support helps keep this
content updated and freely available.</p>
<p>Follow nix-book with your preferred feed format for automatic notifications of
new content:</p>
<ul>
<li>
<p><a href="https://saylesss88.github.io/rss.xml">nix-book RSS</a></p>
</li>
<li>
<p><a href="https://saylesss88.github.io/atom.xml">nix-book Atom</a></p>
</li>
<li>
<p><a href="https://saylesss88.github.io/feed.json">nix-book JSON Feed</a></p>
</li>
</ul>
<p>Welcome to my personal journey and guide through the Nix ecosystem! This “book”
aims to be a practical and understandable resource for anyone looking to dive
into Nix, NixOS, and Home Manager. Whether you’re just getting started or
looking to deepen your understanding, I hope you find this resource helpful!</p>
<p>I am a technologist with a wide range of interests that I’m passionate about,
NixOS being one of them. I am also a privacy advocate trying to spread the word.</p>
<p>✨ What You’ll Find Here</p>
<p>This book covers a range of topics to help you harness the power of Nix:</p>
<ul>
<li>
<p>Getting Started with the Nix Ecosystem: Covers the Nix Language, Package
Manager, and a minimal Btrfs-Subvol install with Disko and Flakes, including
Btrfs Impermanence.</p>
</li>
<li>
<p>Hardening NixOS: A deep dive into security and hardening practices with NixOS</p>
</li>
<li>
<p>Hardening Networking: Configure dnscrypt-proxy, firewalls, and more.</p>
</li>
<li>
<p>Gnupg and gpg-agent on NixOS</p>
</li>
<li>
<p>Whonix KVM on NixOS</p>
</li>
<li>
<p>NixOS as a Guest VM with Secureblue as the Host</p>
</li>
<li>
<p>Version Control with Git</p>
</li>
<li>
<p>Version Control with JJ</p>
</li>
<li>
<p>Understanding Nix Functions: Explores practical Nix functions and their role
with NixOS Modules.</p>
</li>
<li>
<p>NixOS Modules Explained: A dedicated deep dive into NixOS’s modular
configuration system.</p>
</li>
<li>
<p>Nix Flakes Explained: Comprehensive coverage of Flake Inputs, Outputs,
Examples, and extending Flakes with Custom Packages using Overlays.</p>
</li>
<li>
<p>Understanding Top-Level Attributes</p>
</li>
<li>
<p>Package Definitions Explained</p>
</li>
<li>
<p>Intro to Nix Derivations: Including how builders and Autotools work.</p>
</li>
<li>
<p>Comparing Flakes and Traditional Nix</p>
</li>
<li>
<p>Debugging and Tracing NixOS Modules</p>
</li>
<li>
<p>Working with Nixpkgs Locally</p>
</li>
<li>
<p>Fork, Clone, Contribute to Nixpkgs</p>
</li>
<li>
<p>Nix Pull Requests</p>
</li>
<li>
<p>Intro to Nushell on NixOS</p>
</li>
</ul>
<p>My goal is to share my learnings and provide clear examples to make your Nix
experience smoother and more enjoyable.</p>
<p>📖 How to Read the Book</p>
<p>You can read the book directly here on GitHub by navigating through the folders,
or for a more comfortable reading experience, check out the dedicated website. I
tried to write it in a way where you could jump to the chapter you’re interested
in and still be able to follow along:</p>
<ul>
<li>
<p><a href="https://saylesss88.github.io/">Start Here</a></p>
</li>
<li>
<p>Browse the book chapters here on
<a href="https://github.com/saylesss88/nix-book/tree/main/src">GitHub</a>.</p>
</li>
</ul>
<p>🙏 Contributions & Feedback</p>
<p>This book is a living document, and I welcome your input! If you find any
errors, have suggestions for improvements, or want to contribute a new section,
please feel free to:</p>
<ul>
<li>
<p>Reach out to me on Reddit <code>u/saylesss88</code></p>
</li>
<li>
<p>Open an Issue: For bug reports, typos, or content suggestions.</p>
</li>
<li>
<p>Submit a Pull Request: If you have code changes or want to add content
directly.</p>
</li>
</ul>
<p>Your feedback is invaluable and helps make this resource better for everyone!</p>
<p>⚖️ License</p>
<p>This “Nix Book” is open-source and licensed under the Apache License 2.0.</p>
<p>This means you are free to use, modify, and distribute this work, provided you
adhere to the terms of the license. You can find the full text of the license in
the LICENSE file within this repository:</p>
<p>To see a WIP book on privacy, checkout
<a href="https://saylesss88.github.io/privacy-book/">privacy-book</a></p>
<p>View the
<a href="https://github.com/saylesss88/nix-book/tree/main?tab=Apache-2.0-1-ov-file">Apache License 2.0</a></p>
Chapter1https://saylesss88.github.io/Getting_Started_with_Nix_1.html2000-01-01T00:00:00+00:00<h1>Chapter1</h1>
<details>
<summary> ✔️ Click to Expand Table of Contents</summary>
<!-- toc -->
</details>
<!--  -->
<p><img src="https://saylesss88.github.io/images/trees1.cleaned.png" alt="trees" /></p>
<h2>Intro</h2>
<p>Welcome to <em>nix-book</em>, an introductory book about Nix. This book leans more
towards using Flakes but will contrast traditional Nix where beneficial.
Originally, this content started as a blog. I’m refining its flow to make it
more cohesive.</p>
<hr />
<p>In this chapter, I will touch on the different parts of the Nix ecosystem, give
a quick example of each and explain how they fit together.</p>
<ul>
<li>Click <a href="https://saylesss88.github.io/rss.xml">Here</a>, or the logo on the top
right, next to print for the RSS feed.</li>
</ul>
<hr />
<details>
<summary>
- ✔️: Will indicate an expandable section, click the little triangle to expand.
</summary>
<ul>
<li>These sections are expandable!</li>
</ul>
</details>
<p>The code blocks have an option to hide code, where I find it reasonable I will
hide the outputs of the expressions. Click the eye in the right corner of the
code block next to the copy clipboard.</p>
<p>Example hover over top-right corner of code block and click the eye to see
hidden text:</p>
<pre><code class="language-nix">{
attrset = { a = 2; b = 4; };
~ hidden_set = { a = hidden; b = set; };
}
</code></pre>
<blockquote>
<p>❗ If you’re new to Nix, think of it as a recipe book for software: you
describe what you want (declarative), and Nix ensures it’s built the same way
every time (reproducible).</p>
</blockquote>
<h3>Why Learn Nix?</h3>
<p>The main reason to learn Nix is that it allows you to write declarative scripts
for reproducible software builds. Rather than mutate the global state and
install packages to a global location such as <code>/usr/bin</code> Nix stores packages in
the Nix store, usually the directory <code>/nix/store</code>, where each package has its
own unique subdirectory. This paradigm gives you some powerful features, such
as:</p>
<ul>
<li>
<p>Allowing multiple versions or variants of the same package at the same time.
This prevents “DLL hell” from different applications having dependencies on
different versions of the same package.</p>
</li>
<li>
<p>Atomic upgrades: Upgrading or uninstalling an application cannot break other
applications and either succeed completely or fail completely preventing
partial upgrades breaking your system. The nix store is immutable preventing
package management operations from overwriting other packages. They wouldn’t
overwrite each other anyways because the hashing scheme ensures that new
versions or repeat packages end up at different paths.</p>
</li>
<li>
<p>Nix is designed to provide hermetic builds that aren’t affected by the
environment, this helps you make sure that when packaging software that the
dependencies are complete because they must be explicitly declared as inputs.
With other package managers it is more difficult to be sure that an
environment variable or something in your <code>$PATH</code> isn’t affecting your build.</p>
</li>
</ul>
<p>Let’s dive into the key characteristics of Nix:</p>
<table><thead><tr><th>Concept</th><th>Description</th></tr></thead><tbody>
<tr><td><strong>Pure</strong></td><td>Functions don’t cause side effects.</td></tr>
<tr><td><strong>Functional</strong></td><td>Functions can be passed as arguments and returned as results.</td></tr>
<tr><td><strong>Lazy</strong></td><td>Not evaluated until needed to complete a computation.</td></tr>
<tr><td><strong>Declarative</strong></td><td>Describing a system outcome.</td></tr>
<tr><td><strong>Reproducible</strong></td><td>Operations that are performed twice return same results</td></tr>
</tbody></table>
<blockquote>
<p>❗ Important: In Nix, everything is an expression, there are no statements.</p>
<p>❗ Important: Values in Nix are immutable.</p>
</blockquote>
<h3>The Nix Ecosystem</h3>
<p>The <strong>Nix Language</strong> is the foundation of the ecosystem and is used to write
<strong>Nix Expressions</strong>.</p>
<p>Example:</p>
<pre><code class="language-nix">{ hello = "world"; }
</code></pre>
<h1>or</h1>
<pre><code class="language-nix">"foo" + "bar"
</code></pre>
<p>While the Nix language provides the foundation for writing expressions, it is
only part of the ecosystem. These expressions become powerful when used within
the Nix Package Manager, which evaluates and realizes them into tangible
software builds and system configurations. This is where Nixpkgs and NixOS come
into play.</p>
<h3>The Nix Package Manager, Nixpkgs, and NixOS</h3>
<p>At the heart of the Nix ecosystem is <strong>Nix Package Manager</strong>. This powerful
engine is responsible for orchestrating the entire process: taking <strong>Nix
expressions</strong> (like <em>package definitions</em> and <em>configuration modules</em>),
evaluating them into precise <em>derivations</em>, executing their build steps (the
<em>realization phase</em>), and meticulously managing the immutable Nix store.</p>
<p>A cornerstone of the Nix ecosystem is <strong>Nixpkgs</strong>. This vast collection
comprises tens of thousands of Nix expressions that describe how to build a wide
array of software packages from source. Nixpkgs is more than just a package
repository—it also contains <strong>NixOS Modules</strong>, declarative configurations that
define system behavior, ensuring a structured and reproducible environment.
These modules enable users to declaratively describe a Linux system, with each
module contributing to the desired state of the overall system by leveraging
<em>package definitions</em> and <em>derivations</em>. This is how NixOS emerges: it is quite
simply the natural consequence of applying the Nix philosophy to building an
entire Linux operating system.</p>
<p>We will further expand our understanding of modules in
<a href="https://saylesss88.github.io/NixOS_Modules_Explained_3.html">Chapter 3</a></p>
<p>The following is an example of a NixOS module that is part of the <code>nixpkgs</code>
collection:</p>
<pre><code class="language-nix"># nixpkgs/nixos/modules/programs/zmap.nix
{
pkgs,
config,
lib,
...
}:
let
cfg = config.programs.zmap;
in
{
options.programs.zmap = {
enable = lib.mkEnableOption "ZMap, a network scanner designed for Internet-wide network surveys";
};
config = lib.mkIf cfg.enable {
environment.systemPackages = [ pkgs.zmap ];
environment.etc."zmap/blacklist.conf".source = "${pkgs.zmap}/etc/zmap/blacklist.conf";
environment.etc."zmap/zmap.conf".source = "${pkgs.zmap}/etc/zmap.conf";
};
}
</code></pre>
<ul>
<li>This module, <code>programs.zmap.nix</code>, demonstrates how NixOS configurations work.
It defines an enable option for the ZMap network scanner. If enabled by the
user in their system configuration, the module ensures the <code>zmap</code> package is
installed and its default configuration files are placed in <code>/etc</code>, allowing
ZMap to be managed declaratively as part of the operating system.
<ul>
<li>
<p>When <code>nixpkgs</code> is imported (e.g., in a NixOS configuration), the
configuration options and settings defined by its modules (like
<code>programs.zmap.nix</code>) become available for use, typically accessed via dot
notation (e.g., <code>config.programs.zmap.enable</code>). This ability to make such a
huge set of modules and packages readily available without a significant
performance penalty is due to Nix’s <strong>lazy evaluation</strong>; only the
expressions required for a particular build or configuration are actually
evaluated.</p>
</li>
<li>
<p>Most of the time you’ll simply <a href="https://search.nixos.org/packages">search</a>
to see if the package is already included in <code>nixpkgs</code> and follow the
instructions there to get it on your system. It is good practice to first
search for the <a href="https://search.nixos.org/options?">options</a> to see what
configurable settings are available, and then proceed to search for the
package itself if you know it exists or if you need its specific package
definition. When you look up the options for Zmap, <code>programs.zmap.enable</code> is
all that is listed in this example.</p>
</li>
<li>
<p>Home Manager uses the same underlying Nix module system as NixOS, and when
you do something like home.packages = with pkgs; you are referring to the
same package derivations from nixpkgs as you would with
<code>environment.systemPackages</code>. However, Home Manager’s own configuration
modules (e.g., for <code>programs.zsh</code> or <code>git</code>) are distinct and reside in the
Home Manager repository, designed for user-specific configurations.</p>
</li>
</ul>
</li>
</ul>
<p>One of the main differentiating aspects of Nix, as opposed to traditional
package managers, is this concept that package builds are treated as pure
functions. This functional paradigm ensures consistency and reproducibility,
which are core tenets of the Nix philosophy.</p>
<p><img src="https://saylesss88.github.io/images/nix_isnot_nixos.png" alt="Nix is not" /></p>
<p><strong>Fig. X:</strong> Conceptual diagram illustrating the distinction between Nix and
NixOS. Source: xeiaso, from the blog post “Making NixOS modules for fun and
(hopefully) profit”, <a href="https://xeiaso.net/talks/asg-2023-nixos/">https://xeiaso.net/talks/asg-2023-nixos/</a>.</p>
<p>Nix expressions permeate the ecosystem—everything in Nix is an expression,
including the next key components: package definitions and derivations.</p>
<h3>Package Definitions & Derivations</h3>
<p><strong>Package Definitions</strong> are specialized expressions that tell Nix how to build
software.</p>
<p>Example package definition:</p>
<pre><code class="language-nix"># hello.nix
{pkgs ? import <nixpkgs> {}}:
pkgs.stdenv.mkDerivation {
pname = "hello";
version = "2.12.1";
src = pkgs.fetchurl {
url = "https://ftp.gnu.org/gnu/hello/hello-2.12.1.tar.gz";
sha256 = "086vqwk2wl8zfs47sq2xpjc9k066ilmb8z6dn0q6ymwjzlm196cd";
};
nativeBuildInputs = [pkgs.autoconf pkgs.automake pkgs.gcc];
configurePhase = ''
./configure --prefix=$out
'';
buildPhase = ''
make
'';
installPhase = ''
make install
'';
}
</code></pre>
<ol>
<li><strong>Evaluation Phase</strong>:</li>
</ol>
<p>Now when you run something like:</p>
<pre><code class="language-bash">nix-instantiate hello.nix
warning: you did not specify '--add-root'; the result might be removed by the garbage collector
/nix/store/p2hbg16a9kpqgx2nzcsq39wmnyxyq4jy-hello-2.12.1.drv
</code></pre>
<ul>
<li>Nix evaluates the expression and produces a <code>.drv</code> file (the <strong>derivation</strong>),
a precise JSON-like blueprint describing how the package will be built. It
does not contain the built software itself.</li>
</ul>
<ol start="2">
<li><strong>Realization Phase</strong>:</li>
</ol>
<p>When you run:</p>
<pre><code class="language-bash">nix-build hello.nix
#...snip...
shrinking RPATHs of ELF executables and libraries in /nix/store/53hqyw72dijq3wb5kc0ln04g681gk6cp-hello-2.12.1
shrinking /nix/store/53hqyw72dijq3wb5kc0ln04g681gk6cp-hello-2.12.1/bin/hello
checking for references to /build/ in /nix/store/53hqyw72dijq3wb5kc0ln04g681gk6cp-hello-2.12.1...
gzipping man pages under /nix/store/53hqyw72dijq3wb5kc0ln04g681gk6cp-hello-2.12.1/share/man/
patching script interpreter paths in /nix/store/53hqyw72dijq3wb5kc0ln04g681gk6cp-hello-2.12.1
stripping (with command strip and flags -S -p) in /nix/store/53hqyw72dijq3wb5kc0ln04g681gk6cp-hello-2.12.1/bin
/nix/store/53hqyw72dijq3wb5kc0ln04g681gk6cp-hello-2.12.1
</code></pre>
<ul>
<li>
<p>Nix realizes the derivation by actually executing the build steps, fetching
sources, compiling (if needed), and producing the final result (typically
stored in e.g. <code>/nix/store/53hqyw72dijq3wb5kc0ln04g681gk6cp-hello-2.12.1</code>)</p>
</li>
<li>
<p><code>nix-build</code> also creates a symlink named <code>result</code> in your current directory,
pointing to the final build output in the Nix store.</p>
</li>
</ul>
<ol start="3">
<li>Execute the program:</li>
</ol>
<pre><code class="language-bash">./result/bin/hello
Hello, world!
</code></pre>
<p><code>result/bin/hello</code> points to the executable inside the output of the
derivation.The derivation describes how the package is built, but does not
include the final binaries.</p>
<p>To say that another way, the derivation is not the executable. The executable is
one of the derivations <code>outputs</code>. When Nix “realizes” a derivation, it executes
those build instructions, and the result is the actual built software, which
gets placed into its own unique path in the Nix store.</p>
<p>A single derivation can produce multiple outputs. The executable is typically
part of the <code>out</code> output, specifically in its <code>bin</code> directory.</p>
<p>Here is a small snippet of what a <code>.drv</code> file could look like, I got this from
building the hello derivation and running the following on the store path:</p>
<pre><code class="language-bash">nix show-derivation /nix/store/9na8mwp5zaprikqaqw78v6cdn1rxac7i-hello-2.12.1
</code></pre>
<pre><code class="language-nix">{
"/nix/store/871398c9cbskmzy6bvfnynr8yrlh7nk0-hello-2.12.1.drv": {
"args": [
"-e",
"/nix/store/v6x3cs394jgqfbi0a42pam708flxaphh-default-builder.sh"
],
"builder": "/nix/store/1jzhbwq5rjjaqa75z88ws2b424vh7m53-bash-5.2p32/bin/bash",
"env": {
"__structuredAttrs": "",
"buildInputs": "",
"builder": "/nix/store/1jzhbwq5rjjaqa75z88ws2b424vh7m53-bash-5.2p32/bin/bash",
"cmakeFlags": "",
"configureFlags": "",
"depsBuildBuild": "",
"depsBuildBuildPropagated": "",
"depsBuildTarget": "",
"depsBuildTargetPropagated": "",
"depsHostHost": "",
"depsHostHostPropagated": "",
"depsTargetTarget": "",
"depsTargetTargetPropagated": "",
"doCheck": "",
"doInstallCheck": "",
"mesonFlags": "",
"name": "hello-2.12.1",
"nativeBuildInputs": "",
"out": "/nix/store/9na8mwp5zaprikqaqw78v6cdn1rxac7i-hello-2.12.1",
"outputs": "out",
"patches": "",
"pname": "hello",
"propagatedBuildInputs": "",
"propagatedNativeBuildInputs": "",
"src": "/nix/store/pa10z4ngm0g83kx9mssrqzz30s84vq7k-hello-2.12.1.tar.gz",
"stdenv": "/nix/store/80wijs24wjp619zmrasrh805bax02xjm-stdenv-linux",
"strictDeps": "",
"system": "x86_64-linux",
"version": "2.12.1"
},
# ... snip ...
</code></pre>
<h4>Conclusion</h4>
<p>In this introductory chapter, we’ve laid the groundwork for understanding the
powerful Nix ecosystem. We explored how the Nix Language forms the declarative
bedrock, enabling us to define desired system states and software builds as
expressions. You saw how the Nix Package Manager orchestrates this process,
transforming those expressions into precise derivations during the evaluation
phase, and then faithfully “realizing” them into reproducible, isolated
artifacts within the immutable <code>/nix/store</code>.</p>
<p>We also introduced the vast Nixpkgs collection, which provides tens of thousands
of package definitions and forms the foundation for NixOS — a fully declarative
operating system built on these principles—and even user-level configurations
like those managed by Home Manager. This unique functional approach, with its
emphasis on immutability and lazy evaluation, is what enables Nix’s promises of
consistency, atomic upgrades, and truly hermetic builds, fundamentally changing
how we think about software and system management.</p>
<h5>Related Sub-Chapters</h5>
<ul>
<li>
<p>The <a href="https://saylesss88.github.io/nix/nix_language.html">Nix Language</a></p>
</li>
<li>
<p><a href="https://saylesss88.github.io/nix/nix_package_manager.html">Nix Package Manager</a></p>
</li>
</ul>
<p>Now that you have a foundational understanding of the Nix ecosystem and its core
operational cycle, we are ready to delve deeper into the building blocks of Nix
expressions. In the next chapter,
<a href="https://saylesss88.github.io/Understanding_Nix_Functions_2.html">Understanding Nix Functions</a>,
we will peel back the layers and explore the intricacies of function arguments,
advanced patterns, scope, and how functions play a crucial role in building more
sophisticated Nix expressions and derivations.</p>
<p>Here are some resources that are helpful for getting started:</p>
<h4>Resources</h4>
<details>
<summary> ✔️ Resources (Click to Expand)</summary>
<ul>
<li>
<p><a href="https://search.nixos.org/packages">NixOS Search</a></p>
</li>
<li>
<p><a href="https://search.nixos.org/options?">NixOS Options</a></p>
</li>
<li>
<p><a href="https://home-manager-options.extranix.com/?query=&release=master">Extranix Home-Manager Option Search</a></p>
</li>
<li>
<p><a href="https://github.com/nix-community/awesome-nix">awesome-nix</a></p>
</li>
<li>
<p><a href="https://wiki.nixos.org/wiki/Nix_ecosystem">Nix Core Ecosystem</a>, Nix, NixOS,
Nix Lang, Nixpkgs are all distinctly different; related things which can be
confusing for beginners this article explains them.</p>
</li>
<li>
<p><a href="https://github.com/nixos/nixpkgs">nixpkgs</a>: Vast package repository</p>
</li>
<li>
<p><a href="https://nixos.org/guides/how-nix-works/">How Nix Works</a></p>
</li>
<li>
<p><a href="https://nix.dev/manual/nix/2.26/language/types#type-attrs">Nix Reference Manual Data Types</a>
The main Data Types you’ll come across in the Nix ecosystem</p>
</li>
<li>
<p><a href="https://wiki.nixos.org/wiki/NixOS_Wiki">NixOS Wiki</a></p>
</li>
<li>
<p><a href="https://nix.dev/">nix.dev</a>: Has become the top respected source of
information in my opinion. There is a lot of great stuff in here, and they
actively update the information.</p>
</li>
</ul>
</details>
<pre><code>`````nix repl
(let a = "2"; in # Let expressions are a way to create variables
a + a + builtins.toString "4")
`````
</code></pre>